HTML/JS
-

New Perspectives on HTML and XHTML Tutorial 5 Case Problem 3
$12.00New Perspectives on HTML and XHTML Tutorial 5 Case Problem 3
Data Files needed for this Case Problem: blank.gif, bottom.jpg, bottomleft.jpg, bottomright.jpg, dhometxt.htm, dlogo.jpg, domepaper.css, dometxt.css, dtabletxt.css, left.jpg, leftbox.jpg, right.jpg, rightbox.jpg, tableback.jpg, top.jpg, topleft.jpg, and topright.jpg
dHome, Inc. Olivia Moore is the director of advertising for dHome, one of the nation’s newest manufacturers of geodesic dome houses. She’s hired you to work on the company’s Web site. Olivia has provided you with all of the text you need for the Web page, and your job is to design the page’s layout. You’ll start by designing a draft of the company’s home page. Olivia wants the page to include information about dHome’s pricing structure for various dome models. The page should also contain links to other pages on the Web site. A preview of the design you’ll create for Olivia is shown in Figure 5-78.
Complete the following:
1. Use your text editor to open dhometxt.htm, dometxt.css, and dtabletxt.css from the tutorial.05\case3 folder included with your Data Files. Enter your name and the date in the comment section of each file. Save the files as dhome.htm, dome.css, and dtable.css, respectively, in the same folder.
2. Go to the dhome.htm file in your text editor. Create links to the dome.css and dtable.css style sheets.
3. Scroll down to the pageContent div element, and above the paragraphs within that element, insert a table with the class name domeSpecs. Add the table summary, “A table describing six dome models sold by dHome, Inc.” and add the caption, “Building Models”.
4. Create a column group containing three col elements with class names of firstColumn, middleColumns, and lastColumn. The middleColumns element should span
two columns in the table.This tutorial includes complete steps from 1-22.
Learn More -
CIS 363B Week 2 iLab 2 Site Navigation and Styles
$15.00CIS 363B Week 2 iLab 2 Site Navigation and Styles
Scenario and Summary
Complete Tutorial 3, Case Problem 1.
Complete Tutorial 4, Case Problem 1.Deliverables
Following the directions below on how to upload to the Web Lab Server, you will create a subfolder within your root folder for each assignment and then upload your files to the appropriate folder.STEP 1
Complete Tutorial 3, Case Problem 1. Click on Tutorial 3 Files to download the support files for the case project. Follow all the directions to complete this task in your book.Create a subfolder called Week2Lab1 and upload your files to this folder.
STEP 2
Complete Tutorial 4, Case Problem 1. Click on Tutorial 4 Files to download the support files for the case project. Follow all the directions to complete this task in your book.Create a subfolder called Week2Lab2 and upload your files to this folder.
Learn More -
Website with JavaScript and Mobile Device Stylesheet
$12.00Website with JavaScript and Mobile Device Stylesheet
1. Review the articles at http://www.hand-interactive.com/resources/detect-mobile-javascript.htm and/or http://www.abeautifulsite.net/blog/2011/11/detecting-mobile-devices-with-javascript/. Also review the articles at http://www.thesitewizard.com/javascripts/change-style-sheets.shtml and/or http://www.w3schools.com/dhtml/default.asp.
Learn More
2. Create a page that uses JavaScript to determine if the user is viewing the site with a mobile device and changes the stylesheet to display the page appropriately. Your page should meet the following technical requirements:
• The page should ask the user for some kind of input. This can be text input to a textbox, a choice from a pulldown or a radio button.
• The page should use this input to modify the display in some way. For example, the user may choose a background color from a pulldown menu, or the page may refer to the user by name once the name is entered into a text box.
• The page should have some kind of interactive graphic capability, such as a picture that changes on click or mouseover.
• The page should report some information obtained from the user without human input, such as the type of browser or the time set on the user’s computer. -

Principles of Web Design Sklar Chapter 6 Hands-On Projects 3 4 CIT-150
$15.00Principles of Web Design Sklar Chapter 6 Hands-On Projects 3 4 CIT-150
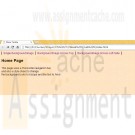
3. In this project, you will create a floating text box.
a. Copy the floatactivity.html file from the Chapter06 folder provided with your Data Files to the Chapter06 folder in your work folder. (Create the Chapter06
folder, if necessary.)
b. Open the file floatactivity.html in your HTML editor, and save it in your work folder as floatactivity1.html.
c. In your browser, open the file floatactivity1.html. When you open the file, it looks like Figure 6-30.
Figure 6-30 Original HTML file for Project 3
d. Examine the page code. Notice that an existing style rule sets a background-color for a floatbox class, as shown in the following code fragment:
.floatbox {background-color: #ccddee;}
e. This class is applied to the first <p> element in the document, as shown in Figure 6-30. Your goal is to use a variety of box properties to create a finished page that looks like Figure 6-31.
Figure 6-31 Completed HTML file for Project 3
f. Use the following properties to create the finished floating text box:
• width
• height
• float
• padding
• margin-right
• border
• text-align
Experiment with the different properties until you achieve results that look as close to the finished page as possible.4. In this project, you will have a chance to test the border properties. Save and view the file in your browser after completing each step.
Learn More
a. Using your HTML editor, create a simple HTML file (or open an existing file) that contains heading and paragraph elements. Save the file in your Chapter06
folder as borders.html.
b. Add a <style> element to the <head> section as shown in the following code:
<head>
<title>CSS Test Document</title>
<style type="text/css">
</style>
</head>
c. Experiment with the different border styles. Start by applying any of the following style rules to your document’s elements:
h1 {border: solid 1px black;}
h2 {border-top: solid 1px; border-bottom: solid 3px;}
p {border-left: double red; border-right: solid 1px;}
d. Experiment with adding padding properties to your style rules to off set the borders from the text. The following style rules have sample padding properties
to try:
h1 {border: solid 1px black; padding: 20px;}
h2 {border-top: solid 1px; border-bottom: solid 3px;
padding-top: 15px; padding-bottom: 30px;}
p {border-left: double red; border-right: solid 1px;
padding-left: 30px; padding-right: 20px;}
e. Continue to experiment with the border and padding properties. Try adding color and margin properties to see how the elements are displayed. -

Principles of Web Design Sklar Chapter 5 Hands-On Projects CIT-150
$15.00Principles of Web Design Sklar Chapter 5 Hands-On Projects CIT-150
1. In the following set of steps, you will learn how to style listitem elements with the list-style properties. As you work through the exercise, refer to Figure 5-27 to see the results you will achieve. Save your file and test your work in the browser as you complete each step.
To apply the list-style properties:
a. Open the file lists.html in your HTML editor, and save it in your work folder as lists1.html.
b. Copy the image file diamond.gif into your work folder.
c. In your browser, open the file lists1.html. When you open the file, it looks like Figure 5-26. Notice that the file contains three lists. You will apply a different liststyle to each list.
d. The first list on the page is a bulleted list that currently displays the default disc (bullet) style. Write a style rule that uses a class selector circle to uniquely select the list. Set the list-style-type property to change the bullet style to circle.
ul.circle {list-style-type: circle;}
e. Now apply the style to the first list by adding the class attribute to the <ul> element.
<!-- Bulleted List -->
<ul class="circle">
<li>Bread</li>
<li>Milk</li>
<li>Cheese</li>
<li>Eggs</li>
</ul>
f. The second list on the page is an ordered list that currently displays the default decimal style. Write a style rule that uses a class selector alpha to uniquely select the list. Set the list-style-type property to change the style to upper-alpha.
ol.alpha {list-style-type: upper-alpha;}
g. Now apply the style to the first list by adding the class attribute to the <ol> element.
<!-- Alphabetical List -->
<ol class="alpha">
<li>Spring</li>
<li>Summer</li>
<li>Fall</li>
<li>Winter</li>
</ol>
h. The third list on the page is an unordered list that currently displays the default bullet style. Write a style rule that uses a class selector image to uniquely select the list. Set the list-style-image property to a URL value, using the image file diamond.gif.
ul.image {list-style-image: url(diamond.gif);}
i. Now apply the style to the first list by adding the class attribute to the <ol> element. Figure 5-27 shows the finished document.
<!-- List Image -->
<ul class="image">
<li>Spruce</li>
<li>Pine</li>
<li>Elm</li>
<li>Birch</li>
</ul>2. Modify an existing HTML document to use Cascading Style Sheets.
Learn More
a. Build styles using the existing standard HTML elements in the file.
b. Test the work in multiple browsers to verify that all styles are portable.
c. Remove the files and place them in an external style sheet.
d. Link the HTML file to the style sheet. Test to make sure the file is displayed properly. -
NEW PERSPECTIVE for HTML, XHTML and XML Additional Case 1 Creating a Music School Web Site
$20.00NEW PERSPECTIVE for HTML, XHTML and XML Additional Case 1 Creating a Music School Web Site
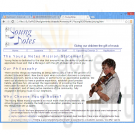
Case Young Notes
Complete the following:
1. Use your text editor to open the applicationtxt.htm, eventstxt.htm, fstylestxt.css, lessonstxt.htm, stafftxt.htm, tstylestxt.css, youngtxt.htm, and ystylestxt.css files from the addcases/case1 folder included with your Data Files. Enter your name and the date in the comment section of each file. Save the files as application.htm, events.htm, fstyles.css, lessons.htm, staff.htm, tstyles.css, young.htm, and ystyles.css, respectively, in the same folder.
2. Go to the young.htm file in your text editor. This file contains the Young Notes home page. Brenda wants you to add a graphic of a student to the page with an irregular line wrap around the image. Figure AC1-1 shows a preview of the completed page.from step 1 -33
32. Save your changes to the file, and then go to the Application page in the Young Notes Web site. Verify that the layout and content of the application form resemble that shown in Figure AC1-5.
Learn More
33. Submit your completed files to your instructor. -
CIS 273 Lab Assignment 8 Adding Sound
$10.00CIS 273 Lab Assignment 8 Adding Sound
Deliverable: One (1) Web page including supporting files (.jpg and .mp3)
Follow the directions below to complete Lab Assignment 8:
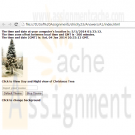
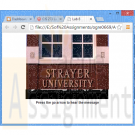
Note: The audio and image file required for this assignment can be found in the online course shell.Re-create the Web page shown below in which you:
Learn More
1. Insert the image .jpg file with the dimensions of 300px wide and 200px high.
2. Insert the audio .mp3 file with controls 300 wide and 35 high.
3. Insert and format the “Press the go arrow to hear the message” caption with the text font type set to Arial.
4. Validate that the sound does not start automatically. -
IT237 Week 7 Assignment Forms
$15.00IT237 Week 7 Assignment Forms
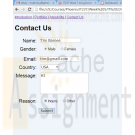
Enhance your website by doing the following:
Add a simple web form such as an order form, subscription to a newsletter, or request for contact.
E-mail the form data to yourself by coding the form tag as follows: where youremail@mailserver.edu is your e-mail address.
Include the following form controls:
Text boxes
Radio buttons
Check boxes
A list or drop-down box
A Submit button
A Reset button
Include ID attributes with short, meaningful names—without spaces—for every control. Each input control must include a label tag to make it easier for the audience to identify.
Test for functionality and usability.Check all of your HTML code using the HTML Validator located on the W3C website.
Save your revisions in your IT237-Name folder on your computer, and compress (zip) the folder (Maximum file size is 10MB).
Learn More -
CIS 273 Lab Assignment 5 Navigation Bars and Repeated Images
$12.00CIS 273 Lab Assignment 5 Navigation Bars and Repeated Images
Deliverable: Four (4) Web pages (the home page and three image pages) and four (4) Cascading Style Sheets (.css) (one for each page).
Follow the directions below to complete Lab Assignment 5:
Learn More
1. Create a home page with navigation bar to the three (3) pages with images listed below and a Cascading Style Sheet (.css) for bisque color and Arial text.
2. Create a "single image" page with a Cascading Style Sheet (.css) for background image, bisque color, and Arial text.
3. Create a "top line image" page with Cascading Style Sheet (.css) for background image, bisque color, and Arial text.
4. Create a "left side image" page with a Cascading Style Sheet (.css) for background image, bisque color, and centered Arial text. -
CIS 273 Lab Assignment 4 Nested Lists and Cascading Style Sheets
$12.00CIS 273 Lab Assignment 4 Nested Lists and Cascading Style Sheets
Deliverable: Three (3) Web pages and two (2) Cascading Style Sheets (.css)
Learn More
Follow the directions below to complete Lab Assignment 4:
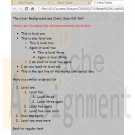
1. Re-create the sample Web pages listed below with nested ordered lists and nested unordered lists. (This Web page will be reused for each part below). (As shown in Figure 1.)
2. Create the Web page from number 1 with silver background color set by a Cascading Style Sheet (.css). (As shown in Figure 2.)
3. Create the Web page from number 1 with silver background color and Comic Sans MS font set by a Cascading Style Sheet (.css). (As shown in Figure 3.)
4. Re-create the Web page set from number 1 with Silver background color and Comic Sans MS font set by a Cascading Style Sheet (.css). Then, using in-page tags to override the CSS, set only the font of the sentence "Here is an Unordered list with several levels of sub-lists" to red, Arial font (different than the rest of the page). (As shown in Figure 4.)
Shopping Options
- Category
- Price
-
- $0.00 - $9.99 (1)
- $10.00 - $19.99 (63)
- $20.00 - $29.99 (8)
- $30.00 and above (3)

You have no items in your shopping cart.

