HTML/JS
3 Item(s)
Grid List
-
CTI 110 Web Programming and Database Foundations HTML and CSS Website Project
Regular Price: $40.00
Special Price $30.00
CTI 110 Web Programming and Database Foundations HTML and CSS Website Project
Project Guidelines
The following are the minimum guidelines for the HTML and CSS Website Project. As such, simply meeting the guidelines does not guarantee you a grade of 100 on the project.You may choose your own topic for your website. Pick a topic that you are already familiar with or that you wish to learn about. You may create a fictional topic, but this actually tends to increase the amount of work necessary to complete the project. Remember, this project is designed to be a website project, not a research project - keep it simple.Your site must contain a minimum of four(4)HTML pages and one(1)cascading style sheet.
All pages in your site should be based off of a template. All styling, formatting, and placement of elements should be controlled by CSS. Complete the template first then make copies and fill in the blanks. Refer to your textbooks and the assignments that you have already completed for ideas. It is ok to reuse your code, just not someone else's.
Follow the design tips found in your textbook and in any supplemental materials in Moodle.
The homepage of your site should explain the concept of your site and/or provide some type of introduction.
All pages in your site must be linked together through a common navigational structure. Your navigation elements must have some type of hover effect similar to those used in your textbook.
Your site must include atleast one image. Your image should be optimized to reduce file size.
Your site must include relevant data displayed in a table.
Your site must include atleast one link to an external site as well as a mailto link. The external link should open in a new window/tab.
To facilitate uploading your files to Moodle, all files in your site should be saved in a single .zip file.
Be creative. This is one of the few opportunities in the class where you can "do your own thing."
Keep a backup copy of your files.
If you have questions, ask!
When you are finished with your project, upload the .zip file containing all of the files in your project using the appropriate link in Moodle. You should have a single file to upload, and the file cannot be larger than 20 MB.
Learn More -
IST 222 Final Project Fictitious Rock Band Website
$30.00IST 222 Final Project
Create a website for a fictitious Rock Band.
All information for the band can be made up. I encourage you to be creative and have fun with the assignment.
Place all files in a folder in your account entitled 'Final'.Required:
The main page should be index.html. When I load that page, it should tell me the site has been redesigned and redirect me to the new page.The new page should be named new.html. This page should have links to the following support pages: schedule, Bios, Feedback. In addition to these links, the page should contain a welcome message and general info about the band. The link on the page should feature a mouse over effect, and when I point to each link, I should see a brief description of where that link takes me in a popup text area.
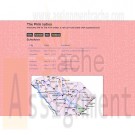
The schedule page (sched.html) should have a nicely formatted table showing me at least 6 upcoming concerts. It should show me the city date and location for each concert. The table should be centered on the page. All locations should be in South Carolina. At the bottom of the page, place a simple map of the South Carolina with a star over each concert location. When I click on that star (or general area), I should go to support page telling me about that location. (name these pages loca1, loc2, loc3, etc - these pages need not contain much info, just enough text to show me the page is there.)
The bio page (bio.html) should have a picture of each member of the band (at least 4) and a brief bio of each member. The pictures should all be the same size and should float to the left or right side of the page alternatively.
The feedback page (feed.html) should include a form asking for the fan's name, email address, gender, age, and state. It should include a text box for the fan to provide feedback and the necessary form buttons.
Learn More -
Penn foster Graded Project 40206200 HTML Coding
$30.00Penn foster Graded Project 40206200 HTML Coding
OVERVIEW
After completing the exercises and the examination for your HTML Coding study guide, you're now ready to complete the graded project. For the graded project, you'll use HTML and JavaScript to create a new Web page by using many of the new Web designing skills you've learned. You'll then upload the project to the student Web hosting site.INSTRUCTIONS
For the graded project, you'll create a Web page from scratch using many of the HTML commands you've learned. Follow each step and add each of the presentation elements as instructed.
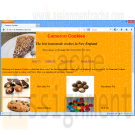
Laura Cameron, owner of Cameron Cookies in Portland, Maine, asks you to create a Web page for her. She wants her customers to be able to view her contact information, a listing of some types of cookies she sells, and an e-mail link to contact her at the store. She also wants you to link this page to a Web form where customers can order cookies. Follow the instructions below to create these Web pages for Laura.
1. Open a text editor, such as Windows Notepad.
2. Type the following lines of code into your document as shown below (Figure 1):
<HTML>
<HEAD>
<TITLE> Cameron Cookies </TITLE>
</HEAD>
<BODY>
</BODY>
</HTML>
3. Add a welcome message to your Web page by typing Heading 1 tags under the <BODY> tag as follows:
<H1> Cameron Cookies </H1>
4. Save the file as "index.htm."
5. Open a Web browser to view how your Web page looks. From the File menu, click Open and locate where you saved the file index.htm before clicking OK. Your Web page should look like Figure 2.
6. Change the color and positioning of your heading by
- Aligning the heading in the center
- Changing the font color to red
- Changing the font face to Arial. If Arial isn't available, then use Helvetica. If Helvetica isn't available, then use Sans Serif.
7. Save your changes and return to your Web browser. Press F5 to refresh the page to view your changes on your Web page (Figure 3).
8. Underneath the heading, add the following text: "The best homemade cookies in New England." Be sure to format this text as
- Heading 2
- Italicized (if Heading 2 isn’t already italicized)
- Centered
9. Save your changes and return to your Web browser. Press F5 to refresh the page to view your changes in your Web page (Figure 4).
10. Underneath this heading, add the following address information as paragraph text: 99 Sycamore St. Portland, ME 04101 (207) 555-1212 Be sure to center the text.
11. Add the following text underneath the address. Welcome to Cameron Cookies, which has been voted "the best homemade cookies in New England" in a recent poll. At Cameron Cookies, you're sure to find a cookie you’ll love. Here's a sampling of our many varieties:
Chocolate Nut
Macadamia Nut
Oatmeal Raisin
M & M's
White Chocolate
Chocolate Pecan
Chocolate Hazelnut
Cookies are a great gift idea that everybody loves. Just give us a call or send us an e-mail 24 hours in advance and we'll create a lovely gift bag or basket filled with an assortment of fresh, homemade cookies. Thanks for visiting our Web site and be sure to come visit us in person here in Portland, Maine. To place an order, click here.
12. Take your own photos or search through the Web to find photos of cookies to illustrate your Web pages. Create a table to display photos of each type of cookie to the left of the cookie name as in Figure 6. (Make sure your images don't have copyright restrictions. One source of free clip art is http://dgl.microsoft.com/.) Right-click the image and save it to the same folder where your Web page is located. Insert the photos in your HTML document to the left of each cookie name. Note: You may have to create a table for your images to appear correctly.
13. Find an image to use as your background of your Web page. Change your background to include this background image.
14. Save your changes in your text file and refresh your Web page in your browser.
15. Go back to the text you just entered in your HTML document and find the words "click here." Create a link from the words "click here" to a new Web page that
you haven't created yet called "orderform.htm," which you’ll save to the same folder as Cameron Cookies.
16. Save your changes in your text file and refresh your Web page in your browser. The words "click here" should now appear as a hyperlink, similar to Figure 5. (Don't click on the hyperlink; it's not yet fully functional.)
17. Save your file and check your e-mail link. Your Web page should look similar to Figure 6.Adding Links
Now you’re going to add more links to your home page for Cameron Cookies.
1. If you closed your HTML document for index.htm, reopen it now.
2. Under the address line for Cameron Cookies, insert a table with the following elements:
- Table width = 500
- One row
- Four columns
- No border
- Table row data is centered
3. Within each table cell, type the following text:
- About Us
- Contact Us
- Place an Order
- Sample Recipe
4. You're going to add a link for the text you just added.
Follow the directions below for the destination of each link:
- Link "About Us" to the page "about.htm." You haven't created this page yet, so the link won't be active until you create the About Us page. However, create the link to this page now.
- Link "Contact Us" to the e-mail address cookiemaster@cameroncookies.com.
- Link "Place an Order" to the page "orderform.htm."
You haven't created this page yet, so it won't be active until you create the Order Form page.
- Link "Sample Recipe" to the page "recipe.htm." You haven't created this page yet so it won’t be active until you create the recipe page.
5. Save your changes and check your Web file in a browser.
Your Web page should look similar to Figure 7. You're now finished with the index.htm page.Creating Your Other Pages
1. Copy your index.htm page and save it as "about.htm." You’re going to use some elements of the main page in all your other pages, so you don’t have to retype them.
2. Scroll down your HTML code to find the text "Welcome to Cameron Cookies." Now delete all the text from "Welcome" to the end of the page.
3. Make a copy of your about.htm file and save it as "recipe.htm."
4. Make another copy and save it as "orderform.htm."
5. Open the Web page for each new page created in your browser. Your Web pages should have your image, headers, address, and links; however, the remaining text should be gone.Modifying the About Us Page
1. Type the following text and format it to look like the text in Figure 8.
Cameron Cookies was created by Bill and Laura Cameron in 1995. The Camerons began selling homemade cookies around their neighborhood using a family recipe passed down by Bill’s grandmother, Stella Cameron. Their cookies were so popular that Bill and Laura had to expand their business, and in 1996 they moved to their current location in Portland, Maine. Cameron Cookies continues to sell off the shelves. Visitors to Maine drive out of their way to sample these wonderful, rich cookies that they’ve heard so much about. We hope to see you soon! Bill and Laura
2. Change your link "About Us" to "Home."
3. Change the destination of the link "Home" to index.htm.
4. Save your changes to your file and open the Web page for about.htm in your browser. Your page should look similar to Figure 8.
5. Test that the link for “Home” functions correctly. You'll be creating the recipe page next.Modifying the Recipe Page
1. Type Chocolate Chip Cookies in a Heading 2 format.
2. Type Ingredients in a Heading 3 format.
3. Type the following list of ingredients in an unordered list:
1/2 cup butter, softened
1 cup light brown sugar
3 tablespoons sugar
1 large egg
2 teaspoons vanilla extract
1-3/4 cups flour
12 HTML Coding
1/2 teaspoon baking powder
1/2 teaspoon baking soda
1/2 teaspoon salt
1-1/2 cups chocolate chips
4. Type Directions in a Heading 3 format.
5. Type the following in an ordered list format:
1. Preheat oven to 300 degrees. Cream butter with sugars.
2. Beat in egg and vanilla extract.
3. Mix dry ingredients in bowl. Add slowly to butter mixture. Stir in chocolate chips.
4. Drop cookie dough using a spoon onto a greased cookie sheet. Bake for 20 minutes or until browned.
Type the following:
Yield: 2 dozen cookies
7. Save your Web page and view it in a browser. It should appear similar to Figure 9.Modifying the Web Order Form
1. Add the form tags to your HTML document.
After your links, create a table for your order form with the following elements:
- Width = 65%
- Border = 0
- Cellpadding = 2
2. Within this table, you're going to create nested tables for your order form. The first table will contain personal information, the second will contain order information, and the third will contain payment information.
3. Create your first nested table and add form content and data to your table as shown in Figure 10.
4. Create your second nested table and add form content and data to your table as shown in Figure 11A and Figure 11B.
5. Add the words, "$5.95 for 1–5 boxes, $10 for five or more boxes to the second column.
6. Create your third nested table and add form content and data to your table as shown in Figure 12.
7. Save your file and refresh the Web page in your browser.
8. Check that all links on all pages are functional.Working with Dynamic Content and JavaScript
Learn More
This third part of your graded project involves working with dynamic content. You’re going to create transient status bar messages and a pop-up window. Turn to page 741 of your textbook and follow the directions for Case Problem 1.
3 Item(s)
Grid List

You have no items in your shopping cart.

