MS Access
Need Help in MS Access Assignment?
We can help you if you are having difficulty with your MS Access Assignment. Just email your MS Access Assignment at admin@assignmentcache.com.
We provide help for students all over the world in MS Access Assignment
-

Access VBA Tutorial 11 Challenge Case Problem 2 Parkhurst Health Center
$20.00Case Problem 2
Data File needed for this case problem: exercise.accdb (cont. from Tutorial 10)Parkhurst Health & Fitness Center Martha Parkhurst asks you to continue your work on the Exercise database by creating a new form and enhancing its accuracy and appearance. To help Martha with her request, complete the following steps:
1. Open the Exercise database located in theAccess3\Case2 folder provided with your Data Files.
2. Use the Form tool to create a form named frmMemberinfo using the tblMember table as the source table. Create a procedure for the frmMemberInfo form to convert City field values to proper case—capitalize the first letter of each word, and convert all other letters to lowercase. Test the procedure.
3. Create a procedure to verify Phone field valuesin the frmMemberInfo form by doing the following:
a. For a State field value of VA, the first three digits of the Phone field value must equal 703 or 804. If the Phone field value isinvalid, display an appropriate message, cancel the event, undo the change, and move the focus to the Phone field.
b. No special action is required for other Phone field values.
c. Test the procedure, and then save your form changes.4. Create a procedure for the frmMemberInfo form to do the following:
a. Display the word current to the right of the MemberID text box in bold, magenta text only when the MembershipStatus field value is Active. Otherwise, display the
word review in bold, blue text. (Hint: Remove all controlsfrom the control layout before resizing the MemberID text box and adding the label for the message. Use the Caption property in your VBA code, and make sure you enclose Caption property settings in quotation marks.)
b. Test the modified form, and then save your form changes.5. Make a backup copy of the database, compact and repair the Exercise database, and then close the database.
Learn More -

MIS582 iLab 4 Forms and Reports
$15.00MIS582 iLab 4 Forms and Reports
Learn More
i L A B O V E R V I E W
Scenario and Summary
In this assignment, you will learn to create and save forms and reports in a provided Access database. To complete this assignment, you will need to be able to run Access 2010.
Deliverables
Name your Access database file using Lab4_, your first initial, and your last name (e.g., Lab4_JSmith.accdb). Create and save your Access database file. When you are done, submit your database to the Course Project Dropbox.
i L A B S T E P S
STEP 1
• Download the Lab4_FormsReports.accdb database from Doc Sharing.
• Rename the Lab4_FormsReports.accdb database with a name containing Lab4_, your first initial, and your last name as the file name (e.g., Lab4_JSmith.accdb).
STEP 2:
• Run Access 2010, either via Citrix or from Visio 2010 installed on your workstation.
• Open the database you renamed in Step 1.
STEP 3:
Reports
Create a report for each of the following requirements. Reports may be created using the wizard or an SQL query. Reports should follow the formatting guidelines given in the next step. Reports should be named as indicated below (e.g., Report1, Report2, etc.).
1. Report1: Show Instructor information (Instructor_ID, First_Name, Last_Name) grouped by Approved Course_No.
2. Report2: Show student information (Student_ID, First_Name, Last_Name, Status, Zip) grouped by Major.
3. Report3: Show student information (Student_ID, First_Name, Last_Name, Major) grouped by Zip code. Zip codes should be in increasing order.
4. Report4: Show student information (First_Name, Last_Name) grouped by Course Number and Course Name. Course Number should be in in increasing order.
5. Report5: Show student information (Student_ID, First_Name, Last_Name, Address, Zip) grouped by Status. Students should be in alphabetical order by Last_Name and;then First_Name.
STEP 4:
Report Format
• Reports should display two or more child rows for each parent row. For example, Report1 should display each Course_No with instructors who are approved to teach the course grouped under it. In this case, the parent row would be the Approved Course_No with Instructor listed as child rows underneath each parent row
• There should be at least two child rows of data for each parent row. Add data to the tables in order to have reports show at least two child rows per parent.
STEP 5:
Form1: Create a form based on an SQL query.
• Create and run an SQL query that displays Student Information (Student_ID, First_Name, Last_Name, Address, Zip).
• Save the query in the database named Form1Query.
• Create a form based on Form1Query. While Form1Query is selected, go to the Create menu and select Form to build the basic form.
• Select the form and switch between the views (Forms, Layout, and Design) to change the properties or the form’s appearance as desired.
• Save the form in the database named Form1Query.
STEP 6:
Form2: Create a form using the Form Wizard.
• Invoke the Form Wizard as shown in the tutorials above.
• Using the Form Wizard, create a form showing instructor information (Instructor_ID, First_Name, Last_Name, Office_No).
• Switch between the views (Forms, Layout, and Design) to change the properties or the form’s appearance as desired.
• Save the form in the database named Form2Wizard.
STEP 7:
Form3: Create a form using a master detail relationship. A master detail relationship is simply a 1:N relationship between two tables. Use subforms to format the form in a split data entry form as shown in Figure 1-9. You may use SQL queries or the wizard or both to create your form and subform.
• Create a master form showing student information (Student_ID, First_Name, Last_Name, Address, Zip, Major, Status).
• Create a detail Subform showing Student_ID, Class_ID, and Student_Grade.
• For each student displayed, the student’s classes and grades should be displayed in the detail form.
• Switch between the views (Forms, Layout, and Design) to change the properties or the form’s appearance.
• Save the form in the database named Form3MaterDetail.
STEP 8:
When you are done, save the file on your local hard drive and upload it to the Course Project Dropbox. Your file should have the following filename format: Lab4_FirstInitialLastName.accdb. -

MIS582 iLab 3 Database Construction Using Access
$15.00MIS582 iLab 3: Database Construction Using Access
iLAB OVERVIEW
Scenario and Summary
In this assignment, you will learn to create an Access database from a given ERD. To complete this assignment, you will need to be able to run Access 2010, either through Citrix or installed on your workstation or laptop.
Deliverables
Name your Access database file using Lab3_, your first initial, and your last name (e.g., Lab3_JSmith.accdb). Create and save your Access database file. When you are done, submit your database to the Course Project Dropbox.
iLAB STEPS
STEP 1:
Review the ERD below to understand the entities, attributes, primary keys, and relationships that you will create in your Access database.STEP 2:
• Run Access 2010, either via Citrix or from Visio 2010 installed on your workstation.
• Select the blank database icon in the main window.
• Save the file with a name containing Lab3_, your first initial, and your last name (e.g., Lab3_JSmith.accdb). In Citrix, you will need to click the computer icon in the Save As window to see the different drives. Be sure to save the file to a local drive so it will be on your workstation.
See the tutorials above for instructions on how to perform the following steps in Access 2010.STEP 3:
Learn More
Add tables to the Access database.
• Add a table for each entity listed in the provided ERD diagram.
• Add a column for each attribute listed in the provided ERD diagram.
• Select a primary key for each table as indicated in the provided ERD diagram.
STEP 4:
For every column in every table, update the data type as needed to enforce the domain constraints of the data.
• Dates should have a date data type.
• Surrogate keys should be autonumbered.
• Numeric data should have a numeric data type.
• Character data should have a character data type.
STEP 5:
Draw relationships between your entities.
• Selection Relationships under Database Tools. Move all your tables into the Relationship window by dragging them in or by using the Show Tables pop-up window.
• Second item
o Add the relationship between the tables in your database.
o Enable referential integrity on the relationship.
o Enable cascade updates on the relationship.
STEP 6:
Add at least two rows of data to each table in your database. Use any values you like for each of the columns. Remember that you must add data to parent tables before adding data to child tables, because referential integrity is enabled.
STEP 7:
Set the following column constraints in your database.
• Student first and last name cannot be a null value.
• Course credit hours must be between one and four.
• Course name must be unique and cannot be a null value.
• Instructor first and last name cannot be a null value.
• Grade must be one of these values: A, B, C, D, F, I, W, or E. W signifies withdrawn and E signifies enrolled.
STEP 8:
When you are done, save the file on your local hard drive and upload it to the Course Project Dropbox. Your file should have the following filename format: Lab3_FirstInitialLastName.accdb.
For instructions on how to copy files between the Citrix server and your local machine, watch the iLab tutorial, Copying Files from Citrix, located in the iLab menu tab under Course Home.
Note!
Submit your assignment to the Dropbox located on the silver tab at the top of this page. -

DBM 380 Week 4 Normalization of ERD
$15.00Individual Normalization of the ERD The following assignment is based on the database environment chosen and created in the Week Three Individual Assignment. Your database project must meet the following assessment requirements: Design and develop a database using professional principles and standards. · Provide a logical and physical design of the database. · Use relational database software application to develop database. · Provide an entity relationship diagram. · Normalize the database. · Generate and provide test data. Use a Microsoft® Visio® diagram to normalize the ERD to third normal form (3NF). Use the Microsoft® Access® database created in Week Three to create a minimum of 10 rows of test data in each table. Also, create at least one query that joins two tables and returns values from both tables. Note. Only the Microsoft® Visio® diagram must be normalized to the 3NF. The 3NF is not required for a Microsoft® Access®database. Submit the ERD and final database to the appropriate Assignment link. Learn More -

Database Management Midterm RRGroup database
$20.00Database Management Midterm RRGroup database
1. You are creating a database for donations that are made to different non-for-profit agencies by different individuals. The database is made of three tables: Contributors (the list of donors with information about them), Donations (the list of generous gifts) and Agencies (the list of non-for profit organizations that receive gifts).
Learn More
2. Download all the files from the Midterm folder. Remember: it is best to first save them on your local computer before you open them and start working on them.
3. Open the database named RRGroup. It comes with the Contributors table. This is the one you are going to do all work.
4. Populate the Agency table with data from Agency text file.
5. Examine the Gifts Excel file and based on that file design the third table (headings, primary key, data type). Save it as Donations. Populate it with data from the Gifts file. Remember about the Primary Key.
6. Establish relationships between all three tables. Do all that is necessary to have them established. All of them must be “One-To-Many”.
7. Create a form for the Contributors table. Be sure it displays only one record at a time. Save it.
8. Create a query with the following data:
a. Name of the Agency
b. Number of donors.
c. Average amount of donation.
i. Name this query “Average Gift”
9. Create another query with the following data:
a. Donor’s last name
b. Agency name
c. Agency’s city. Provide ability to enter the city you want to view in the query
d. Amount of donation. You want to see donations over $50.
e. You want to see those donations that need to be picked up.
i. Attention: all the criteria must be “AND” – this query should display only those donors that gave gifts to agencies from an entered city and in the amount over $50 and gave gifts that need to be picked up.
ii. Name this query “Gifts in a City”
10. One more query. This time no criteria, only 3 fields: Donor’s last name, Agency Name and amount of donation. Save it as “Query for report”.
11. Create a report for the “Query for report”. Make sure that records are listed by Contributors. All other settings can be left as the default ones. Name the report: List of Contributions. -
DBM/380 Week 3 ERD Smith Consulting in Access
$15.00DBM/380 Week 3 ERD Smith Consulting in Access
Individual Database Creation Project
Learn More
The following assignment is based on the database environment chosen and discussed in the Week Two Individual Assignment.
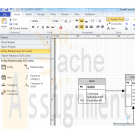
Create a Microsoft® Visio® diagram to create a detailed Entity Relationship Diagram(ERD) using the data specifications noted in the Week Two Individual Assignment. Make any necessary changes provided in your faculty’s feedback.
Create a Microsoft® Access® database to create the preliminary database tables, columns with data types, primary keys, and relationships. -
DBM/380 Week 4 Normalization of the Smith Consulting ERD
$15.00DBM/380 Week 4 Normalization of the Smith Consulting ERD
Learn More
The following assignment is based on the database environment chosen and created in the Week Three Individual Assignment.
Your database project must meet the following assessment requirements:
Design and develop a database using professional principles and standards.
Provide a logical and physical design of the database.
Use relational database software application to develop database.
Provide an entity relationship diagram.
Normalize the database.
Generate and provide test data.
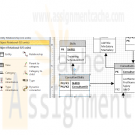
Use a Microsoft® Visio® diagram to normalize the ERD to third normal form (3NF).
Use the Microsoft® Access® database created in Week Three to create a minimum of 10 rows of test data in each table. Also, create at least one query that joins two tables and returns values from both tables.
Note. Only the Microsoft® Visio® diagram must be normalized to the 3NF. The 3NF is not required for a Microsoft® Access® database.
Submit the ERD and final database to the appropriate Assignment link. -
MS Access Advanced: VBA code Week 6 assignment
$20.00MS Access Advanced: VBA code Week 6 assignment
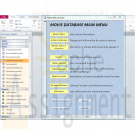
You will be modifying the frmMainMenu to call the caption of each button from the table MainMenu and form or the report.
1) Create a table MainMenu with at least 3 fields: ID, caption, and form or report to run.2) Your code (for the button) will dynamically read the caption from the table and assign it to the button.
HINT: Variables (table name) in other areas of the code should not be "hard-coded". If for example a Table name changes in the database it should be reflected in the menu. I do not need to go into the code and look for all entries for the hard-coded name of the table. Dynamic caption means should the name of any table change – the caption on the button for that table must change as well. Test it out …3) Your code (for the button) will dynamically read the form/report name and will run when you press the button.
Learn More
HINT: Like the hint for #2 above do the same for the reports. No names should be hard-coded. This prevents errors in the long run which often break a program, and maintenance does not become a nightmare!! This approach is a widely utilized practice amongst professional developers in support of friendly user experience enhancements! Our users want to be able to press buttons that are logical, practical, and smart
**My professor said that this assignment has to use the "DLookup" element in VBA.** -

Microsoft Access 2010 CHAPTER 5 Multitable Forms Camashaly Design AC 274 - AC 326
$20.00Microsoft Access 2010 CHAPTER 5 Multitable Forms Camashaly Design AC 274 - AC 326
Learn More
Project — Multitable Forms
Camashaly Design uses its database to keep records about clients and business analysts. After using the database for several months, however, Camashaly has found that it needs to maintain additional data on its business analysts. The company wants to identify those business analysts who have a professional certifi cate in business analysis, store the start date of each business analyst in the database, and include notes about each business analyst as well as the business analyst’s picture. Additionally, business analysts now maintain files about potential contacts. These files are separate from the database; some are maintained in Word and others in Excel. Camashaly would like a way to attach these files to the corresponding business analyst’s record in the database. Finally, Camashaly wants to add the Phone Number field to the Business Analyst Table. Users should type only the digits in the telephone number and then have Access format the number appropriately. If the user enters 7195558364, for example, Access will format the number as (719) 555-8364.
After the proposed fields have been added to the database, Camashaly wants users to be able to use a form that incorporates the Client and Business Analyst tables and that includes the newly added fields as well as some of the existing fields. The form also should include the client number, name, amount paid, and current due amount for the clients of each business analyst. Camashaly would like to see multiple clients on the screen at the same time (Figure 5 – 1). The database should allow users to scroll through all the clients of a business analyst and to open any of the attachments concerning the business analyst’s Client Notes. Finally, Camashaly requires queries that use the Certification, Start Date, and Comment fields. -
Microsoft Access 2010 CHAPTER 4 Creating Reports and Forms Camashaly Design AC 209 - AC 265
$20.00Microsoft Access 2010 CHAPTER 4 Creating Reports and Forms AC 209 - AC 265
Learn More
Project — Reports and Forms
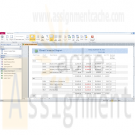
Camashaly Design has realized several benefits from using the database of clients and analysts. Camashaly hopes to realize additional benefits using two custom reports that meet their specific needs. Figure 4 – 1 shows the first report, which is a modified version of an existing report. The report features grouping. The report shown in Figure 4 – 1 groups records by client types. There are three separate groups, one each for the three possible client types: NON, RET, and SER. The appropriate type appears before each group. The totals of the Amount Paid, Current Due, Total Amount, and Hrs YTD fields for the clients in the group (called a subtotal) appear after the group. At the end of the report are grand totals of the same fields.
Figure 4 – 2 shows the first page of the second report. This report encompasses data from both the Business Analyst Table and the Client table. Like the report in Figure 4 – 1, the data is grouped, although this time it is grouped by analyst number. Not only does the analyst number appear before each group, but the first name and last name of the analyst appear as well. Like the first report, this report contains subtotals.
Camashaly also wants to improve the data entry process by using a custom form, as shown in Figure 4 – 3. The form has a title and a date. It does not contain all the fields in the Client table, and the fields are in a different order than in the table. For this form,
Camashaly likes the appearance of including the fields in a grid.


