ERD
Need Help in Entity Relationship Diagram ERD Assignment?
We can help you if you are having difficulty with your Entity Relationship Diagram (ERD) Assignment. Just email your ERD Assignments at admin@assignmentcache.com.
We provide help for students all over the world in Entity Relationship Diagram Assignment.
-
IM300 Week 4 Integrity and Constraints Hotel Database Part 3
$25.00IM300 Week 4 Integrity and Constraints Hotel Database Part 3
Resources: SR-bi-003 – Hotel Database, the results from SR-bi-003 – Hotel Database Parts 1 & 2, Oracle® Database Express® and Microsoft® Visio® Virtual Desktop.
Complete Service Request SR-bi-003 - Hotel Database–Part 3.
Normalize the entities and attributes to at least the third normal form.
Use Microsoft® Visio® diagramming tools to create an entity-relationship diagram (ERD) that demonstrates the logical design of your normalized database.
Create and alter tables in the city’s Oracle® Database Express® database to implement the ERD design.
Generate a new DDL script.
Create a fax cover sheet addressed to the project manager for the ERD and a newly generated DDL script to show your progress on the project.
Learn More -
CMIS 320 Lab 1 Homework Data modeling diagram
$15.00CMIS 320 Lab 1 Homework Data modeling diagram
Homework Submission Requirements:
Homeworks should be submited as an attached file in your assignment folder. text for coding and result of execution and MS Word format for documenting are preferred. Data modeling diagram could be copied and pasted into a Word doc.
You must name your file to include your first initial of your first name and last name.
Part I is 4 points and Part II is 1 points. Total is 5. Quiz is not required for grading.Part I: Data Modeling
Consider a student club or organization in which you are a member. What are the data entities of this enterprise? List and define each entity. Then, develop an enterprise data model showing these entities and important relationships between them. (See figure 1-3a on page 11 for an example enterprise data model)Part II: Lab 1
Learn More
In this class, we need a functional database system to complete the tasks, such as project 2 and Learning SQL. The school provides you with an Oracle database instance on NOVA unix server for this purpose. You all should have your accounts set up. What you need to do is to activate it for this class. -
CMIS 320 Lab 2 Homework 2 Data modeling and Sample database
$15.00CMIS 320 Lab 2 Homework 2 Data modeling and Sample database
Homework Submission Requirements:
Homework should be submitted as an attached file in your assignment folder. text for coding and result of execution and MS Word format for documenting are preferred. Data modeling diagram could be copied and pasted into a Word doc.
You must name your file to include your first initial of your first name and last name.
Part I is 4 points and Part II is 1 points. Total is 5. Quiz is not required for grading.Part I Data Modeling
For each of the following descriptions:
a. A piano manufacturer wants to track all pianos it makes. Each piano has a unique serial number and a manufacturing completion date. Each instrument represents exactly one piano model, all of which have an identification number and model. The company produces thousands of pianos of a certain model, and the design is specified before any single piano exists.
b. A vendor builds multiple types of tablet computers. Each has a type identification number and a name. The key specifications for each type include amount of storage and display type. The company uses multiple processor types, exactly one of which is used for a specific tablet type. The same processor can be used in multiple types of tablets. Each processor has a manufacturer and a manufacturer's unique code that identifies it.
perform the following tasks:
1. Identify the degree and cardinalities of the relationship.
2. Express the relationships graphically with an E-R diagram.
Document your work into a single, well-organized, well-written word document and submit no later than due date.Part II Lab 2
In lab 2, you will learn how to run a SQL script to create a sample database in your schema in NOVA Oracle database. You also start to learn simple SQL commands, such as select and insertClick here to open Lab 2 instruction page
This part of lab is to learn to run a SQL script on NOVA Oracle database server, and spool screen output to a text file. These techniques will be used when you work on your project 1 and 2. Download script file. This is sql script file containing completed sql commands to create tables and constraints and populate data to each table. The database you create is called JustLee Book Store. The code should be bug free.
Learn More
Download lab2.sql script
Start spool command and run the script:
Log on NOVA, make a dir named scripts using command mkdir scripts
Then cd to newly created script directory
Upload your script to scripts directory using FTP
(I downloaded a free FTP client CORE FTP LE) and use it to upload and download file)
Now you have a newly create dir and your script is uploaded. You are ready to run your script.
Using SQL*Plus, log on NOVA Oracle database with your account
At SQL prompt,Type the following command to turn on spool function: SQL>spool spool01.lst
spool01.lst is the spool file name
Then use this command to run the script: SQL>@lab2.sql
The command will execute all the SQL commands inside the script and output will be spooled to spool01.lst
In the script, there are drop table statement as well. When first run, these commands will fail because the tables are not created yet.
You can run the script multiple times without any problems.
When you finish the execution, issue command SQL>spool off
This command will end spool function and save output to the file you defined
When you have done all of these. Use FTP get spool01.lst to your local computer and submit it as part of homework 2
You should know how to perform the following tasks using sqlplus on NOVA Oracle database after you complete this lab:
Using FTP to upload or download a file (scripts...)
Using sqlplus to log on to NOVA Oracle database
Using sqlplus command, spool to output screen output to a text file and transfer the file back to your local PC.
Understand the steps taken place when you perform FTP file transfer and Spooling your output.
Test the database you create and learn SQL queries.
You need to spool the execution results of the following commands.
Do a database query: select table_name from user_tables; USER_TABLES is a database system view that allow users to see the tables they created in their own schema.
You should be able to list the tables you just created
use this query: select * from "table_name from the above query"; you can retrieve the data in these tables one a time
use this query: select count(*) from "table_name from the above query"; you can retrieve the record counts in these tables one a time
Use SQL*Plus command "desc books" to check columns and their datatypes. And insert one record into the table. Use SQL command "commit" to save the record into your database.
When you have done all of these. Use FTP get spooled file to your local computer and submit it as part of homework 2 -
Data Warehouse for Huffman Trucking Maintenance
Regular Price: $12.00
Special Price $10.00
Data Warehouse for Huffman Trucking Maintenance
Learn More
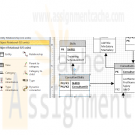
An organization has several operational systems: Customer Relationship Management (CRM) for marketing and sales, Enterprise Resource Planning (ERP), and Supply Chain Management (SCM). They also have external customer data. A wide variety of departments utilize this data: sales, marketing, procurement, human resources, R&D, and senior management.
Design a high-level conceptual view of a data warehouse (DW) for Huffman Trucking Maintenance using Microsoft® Visio® that shows the following:
Integration layers
The data warehouse (DW), with a Star Schema showing a Fact table and various dimension tables with all their needed fields and relationships
Recommended data marts
Include arrows to show ETL (extract, transform, and load) locations and direction, and paste a screen shot of the above Visio DW Star schema along with the DW description in a Word document. -
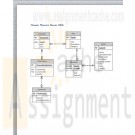
Muscat Theatre House ERD
Regular Price: $12.00
Special Price $10.00
Muscat Theatre House ERD
Muscat Theatre House is a place where opera performances are being scheduled. A play is an opera performance acted by different actors/actresses having different roles. A play has id, title, description and category. In every play there will be one or more actors/actresses performing and an actor may perform in any number of plays or may not perform in a given play. Information about actor/actress includes id, name, contact number, nationality, birthdate, and address, which is composed of street number, city, state and country. The role and payment for each actor/actress is also being stored for every play they will perform since these vary from play to play. A schedule is being prepared for each play which details the date and time a play will be performed. A play will be scheduled at least once. Once the schedule is published, customers start reserving seats for a particular schedule or may reserve seat to more than one schedule. A schedule may or may not be reserved by any customer. Information about customer includes id, name and contact number. Whenever a customer reserves for a schedule of a play, it will be identified by a reservation number along with the seat number/s being reserved.
Learn More -

MIS582 iLab 2 Week 3 Data Modeling Using Microsoft Visio
Regular Price: $15.00
Special Price $12.00
MIS582 iLab 2 Week 3 Data Modeling Using Microsoft Visio
iLab Overview
Scenario/Summary
In this assignment, you will learn to create a physical database model in Visio from a liste set of business requirements.NOTE: Please ensure you can run Visio 2010 either via Citrix or by an installation on your computer. Note that Citrix only supports Visio 2010. Visio is downloadable through the Student Software Store under Course Home in our Shell. If you have Visio 2013, you can use that at well too. There are two tutorials to consult with dependent on which version of Visio you will be using, either DBP-e13-Appendix-F.pdf or kroenke_dbp12e_appendix_f.pdf. Both are housed in the in the folder titled Visio Instructions Documents in Doc-Sharing. Access Visio 2010 at https://lab.devry.edu. If you cannot connect to Citrix, please consult with the Help Desk as specified within the iLab page under Course Home. Note, that the Steps listed below are specific to Visio 2010.
Deliverables
Submit your assignment to the Dropbox, located at the top of this page. For instructions on how to use the Dropbox, read these step-by-step instructions.
(See the Syllabus section "Due Dates for Assignments & Exams" for due dates.)
Name your Visio file using Lab2_, your first initial, and your last name (e.g., Lab2_JSmith.vsd). Create and save your database model in your Visio file. When you are done, submit your database to the Week 3: iLab Course Dropbox.Create and save your database model in your Visio file. Submit your file to the Week 3: iLab Course Dropbox.
Required Software
Visio 2010
(Visio 2010 is required for this project. Please ensure that you can run Visio 2010 via Citrix or by having it installed on your computer.)
Access the software at https://lab.devry.edu.Lab Steps
STEP 1: Business Case
Read the following business requirements closely to determine the entities and relationships needed to fulfill the requirements. The nouns in the paragraph will tell you the entities that will be needed. The verbs in the paragraph will help you determine the relationships between the entities.Muscles Health Club Database Requirements
The Muscles Health Club needs a database to keep track of its members, their personal trainers, and the fitness classes that they are taking.
Employees can act as personal trainers for members. However, only certified employees can act as personal trainers. A member can work with only one personal trainer at a time.
Members can take multiple fitness classes. Fitness classes are taught by employees who can teach multiple classes. Fitness classes are taught in one of the classrooms at one of Muscles Health Club's several locations.
Each fitness classroom is designed for a different type of class (e.g., spinning, aerobics, water aerobics, weight training, etc.). It is necessary to track what fitness classes are being held in each of the Muscles Health Club locations.STEP 2: Using Visio
Run Visio 2010 either via Citrix or on your workstation.
Click on the Software and Database Template group in the main window.
Double-click on the Database Model Diagram Template to open a new file.
Save the file with a name containing Lab2_, your first initial, and your last name as the file name (e.g., Lab2_JSmith.vsd). You will need to click the Computer icon in the Save As window to see the different drives. Be sure to save the file to a local drive so it will be on your workstation.STEP 3: Determine Database Entities
Add an entity for each entity that you identified in the requirements.
Drag the Entity icon onto the drawing area in Visio.
In the Database Properties window, add a physical name to identify it.STEP 4: Entity Attributes
For each entity, create a list of attributes that you think would be useful to describe the entity.
Select an entity in the drawing area of Visio.
In the Database Properties window, select the Columns category.
Use the table to add your attributes to the selected entities.
Select one of the attributes to be the primary key (PK).STEP 5: Crow’s Feet Notation
Set the diagram to use crow's feet notation.
On the Database tab, in the Manage group, click Display Options.
In the Database Document Option dialog, select the Relationship tab.
Select the Crow's Feet check box, and then click OK.STEP 6: Entity Relationships
Draw relationships between your entities.
Drag the Relationship icon onto a blank part of the drawing area.
Connect the two ends to each of the two entities in the relationship. The parent entity must have a PK defined. The entity will be outlined in bold red lines when it connects to one end of the relationship.STEP 7: Relationship Cardinality
Set the cardinality of your relationships.
Select a relationship line in the drawing area that is connecting two entities.
In the Database Properties window, select the Miscellaneous category.
Select the cardinality for the selected relationship.STEP 8: Save and Upload to Dropbox
When you are done, save the file on your local hard drive and upload it to the Week 3 Course Dropbox. Your file should have the following filename format: Lab2_FirstInitialLastName.vsd.Rubric
Learn More
Points will be awarded according to the following rubrics.
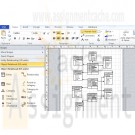
10 Points: Visio drawing: E-R model is provided as a Visio diagram.
10 Points: Entities: A minimum of four entities is present.
10 Points: Attributes: There are more than two attributes per entity; in most cases, there should be several.
10 Points: Relationships: A minimum of three relationships is present.
10 Points: Cardinality is specified on each relationship with crow's foot notation. -
DBM/380 Week 4 Normalization of the Smith Consulting ERD
$15.00DBM/380 Week 4 Normalization of the Smith Consulting ERD
Learn More
The following assignment is based on the database environment chosen and created in the Week Three Individual Assignment.
Your database project must meet the following assessment requirements:
Design and develop a database using professional principles and standards.
Provide a logical and physical design of the database.
Use relational database software application to develop database.
Provide an entity relationship diagram.
Normalize the database.
Generate and provide test data.
Use a Microsoft® Visio® diagram to normalize the ERD to third normal form (3NF).
Use the Microsoft® Access® database created in Week Three to create a minimum of 10 rows of test data in each table. Also, create at least one query that joins two tables and returns values from both tables.
Note. Only the Microsoft® Visio® diagram must be normalized to the 3NF. The 3NF is not required for a Microsoft® Access® database.
Submit the ERD and final database to the appropriate Assignment link. -
DBM/380 Week 3 ERD Smith Consulting in Access
$15.00DBM/380 Week 3 ERD Smith Consulting in Access
Individual Database Creation Project
Learn More
The following assignment is based on the database environment chosen and discussed in the Week Two Individual Assignment.
Create a Microsoft® Visio® diagram to create a detailed Entity Relationship Diagram(ERD) using the data specifications noted in the Week Two Individual Assignment. Make any necessary changes provided in your faculty’s feedback.
Create a Microsoft® Access® database to create the preliminary database tables, columns with data types, primary keys, and relationships. -

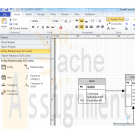
CS251 Fundamentals of Database Systems Week 4 IP The Microsoft Access Database
$20.00CS251 Fundamentals of Database Systems Week 4 IP The Microsoft Access Database
Learn More
Using Microsoft Access create the tables and relationships defined in your data model. Your Microsoft Access Database at this point should include the following:
The Tables as defined in your Entity Relationship Diagram.
The Relationships between the tables.
3 Defined Queries. One of the queried needs to be created to show the data from the Many-to-Many relationship (or include three tables) originally identified from the initial requirements.
Take a screenshot of the ERD and the Queries.
Add the Screenshots to the section in your template titled: The Microsoft Access Database. -

DBM 261 Week 2 Database Creation Riordan Manufacturing
$20.00Create a Microsoft Access database using Riordan Manufacturing’s 2005 sales figures. Normalize the tables to the third normal form. Create relationships among tables using the relationship tool. These relationships must include settings for referential integrity and cardinality. Create an extended ERD of your newly created database, using Microsoft Word, PowerPoint, or Visio. Include primary keys, foreign keys, fields, relationships, and cardinality in the ERD. Learn More

You have no items in your shopping cart.

