Search results for 'microsoft access Walburg'
-

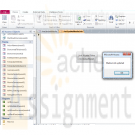
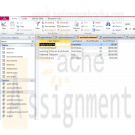
MS Access Advanced: VBA code Week 6 assignment
$20.00MS Access Advanced: VBA code Week 6 assignment
You will be modifying the frmMainMenu to call the caption of each button from the table MainMenu and form or the report.
1) Create a table MainMenu with at least 3 fields: ID, caption, and form or report to run.2) Your code (for the button) will dynamically read the caption from the table and assign it to the button.
HINT: Variables (table name) in other areas of the code should not be "hard-coded". If for example a Table name changes in the database it should be reflected in the menu. I do not need to go into the code and look for all entries for the hard-coded name of the table. Dynamic caption means should the name of any table change – the caption on the button for that table must change as well. Test it out …3) Your code (for the button) will dynamically read the form/report name and will run when you press the button.
Learn More
HINT: Like the hint for #2 above do the same for the reports. No names should be hard-coded. This prevents errors in the long run which often break a program, and maintenance does not become a nightmare!! This approach is a widely utilized practice amongst professional developers in support of friendly user experience enhancements! Our users want to be able to press buttons that are logical, practical, and smart
**My professor said that this assignment has to use the "DLookup" element in VBA.** -
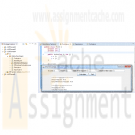
MS Access Advanced: VBA code Week 7 assignment
$20.00MS Access Advanced: VBA code Week 7 assignment
Create a simple excel spreadsheet with data to update the database. This can hold any type of data to be used in this database In MS Access
Learn More
1) Create a form (frmUpdateMediaLink) to link the spreadsheet to a table in the database (you can link the spreadsheet manually using the wizard but you will lose 4 points). Please Create a FORM to accomplish this step… A Wizard, built into MS Access can accomplish the same task and if you do this, please let me know.
2) Create a form (frmUpdateMedia), write a VBA code to extract the data and display it in a listbox, dropdownbox or any form of grid. This is another FORM… VBA CODE is needed to complete this step, I check this by Pressing Control-G and I see your VBA code. This step will take the information in this form and extract it and then populate a listbox, dropdownbox or a grid.
3) Integrate the spreadsheet data into the application.
HINT: the spreadsheet can contains any special list such new DVDs, or updated notes.
Write a code to update (your inventory table, can be CD list or DVD list) from the list.
HINT: for the update (the easy way) Same as above but an easier way to accomplish this
- delete the current records then insert the records from the spread sheet extra credit (advanced way)
- compare each record if it is new add it to the table, if it exists update the info from the spread sheet. If you are going to do this option please indicate in the student comments so I can look for it, make sure you upload the spread sheet with the database. -

DBM 405 Lab 6 Reading and Writing to External Files
$20.00DBM 405 Lab 6 Reading and Writing to External Files
Learn More
Scenario/Summary
This week, we are going to make a change to the processing in our schema by altering one of the procedures contained in the package previously created. At this point, we have dealt with procedures that required us to pass parameter values each time the procedure was executed. This type of processing greatly limits the ability to process large amounts of data efficiently. The lab this week will introduce you to a couple of the procedures contained in the UTL_FILE package that is part of Oracle's group of built-in packages. By using the GET_LINE and PUT_LINE procedures contained in UTL_FILE, you will be able to process multiple records from a file and create a results report on the events performed by your movie rental procedure with one call to execute the procedure.
For the lab, you will need to create a script file containing the PL/SQL code that will address the lab steps below. Run the script file in your SQL*Plus session using the SET ECHO ON session command at the beginning to capture both the PL/SQL block code and output from Oracle after the block of code has executed. You will only need to recompile both the package specifications and the package body since you will be making a change to the movie_rental_sp procedure in the specifications. You will be running tests to verify that the changes to your procedure are working as they should. Spool your output and name your files with your last name plus lab 6 and give the file a text (txt) extension. For example, if your last name was Johnson then the file would be named johnson_lab6.txt. Submit both the spooled output files AND the script file for grading of the lab.
IMPORTANT: Before beginning the lab, you will want to refresh the tables in your schema by running the movierental.sql script.
LAB STEP
Step 1: Setting Up Your Environment
Before you can effectively use the procedures in UTL_FILE to work with external files for this lab, you will need to set up your environment. The first step of this process will involve creating a directory folder under the R: drive which is the mapped drive for DBM405. The second part of the process will involve creating the Directory Object in Oracle to point to this folder. To accomplish this task, please follow the steps listed here.
1. Create the directory folder (You can refer to the SQL*Plus Tutorial in Week 1 for visuals of this process).
• First, log into the iLab and open up your Oracle folder. Next, open Windows Explorer and expand the R: drive tree.
• Under the R: drive, create your own folder by selecting File/New/Folder from the main menu bar. Name your folder using a unique name such as DBM405_lastname_lab6 or some other unique name. Make sure that there are no other folders under the R: drive with the same name as yours. You are the only person who has access to your folder, but the name must be unique.
2. Create the Directory Object.
• In Windows Explorer (the one in the Oracle folder in the iLab), you want to take note of the path name for the R: drive. It will be DBM405\ followed by the session you are in. For example, if you are in Spring A, the path would be DBM405\SPRINGA, or if Spring B, it would be DBM405\SPRINGB. This is important because this will be used to define the path for the Directory Object. Remember that the R: drive is really mapped to the Oracle server F: drive.
• Start up a session in SQL*Plus and log into your user schema.
• Use the following SQL command to create the Directory Object that you will use for this lab.
Create or Replace Directory DBM405_YOURNAME_DIR As 'F:\DBM405\session\YourFolderName';
IMPORTANT: Replace the word YOURNAME with your actual last name, the word session with the session name found in the path for the R: drive (see first bullet above), and the word YourFolderName with the name of the folder you created in Part 1 above. For example, if your last name were SMITH and you were taking this course is Spring session A and the folder you create was named DBM405_SMITH_lab6, the statement would be:
Create or Replace Directory DBM405_SMITH_DIR As 'F:\DBM405\SPRINGA\DBM405_SMITH_LAB6';
3. Set up the data file.
• Download the file "movierentaldata.txt" from Doc Sharing and place this file in the directory folder you created above in Part 1.
You have now set up Oracle to work with the procedures in UTL_FILE that we will use for this lab.
Step 2: Changing the Package Specifications
We are now ready to start updating the package that we modified in Lab 5 so that it will allow us to read a file and make changes to the database. To do this, we will need to make changes to the parameter list of the MOVIE_RENT_SP procedure to reflect a new process. Since we will be changing the parameter list, we will need to make changes to the Package Specifications as well as to the Package Body.
For the change to the Package Specifications, you will need to define a parameter for the Directory Object, one for the input file, and one for an output file that will be used for a verifications report. Each of these parameters can be defined as VARCHAR2 data types.
Step 3: The DECLARE (IS) Section of the Procedure
Now, we can move on to the Package Body and the MOVIE_RENT_SP procedure itself. The first thing you want to do is make sure that the parameter list in the procedure matches the parameter list that you just changed in the Specifications in Step 2. The two parameter lists must match exactly or you will get errors when trying to compile the Package Body.
When you read in the file, you will need several variables to handle both the record and the various pieces of data in the record. When the record is read in, you will need to substring each piece of data from the record into a variable which then can be used like you were using the parameters before. To keep from having to make numerous changes in the code, you might want to consider using the actual parameter names from your parameter list in the code from Lab 5. For example, if the parameter name for the movie ID was P_MOVIE_ID then you would create a variable named P_MOVIE_ID. Each of the variables for movie ID, member ID, and payment method can be cast to the data type in the MM_RENTAL table. For example:
p_movie_id mm_rental.movie_id%TYPE;
You will also need a variable to hold the record data that will be read in and a variable to hold record data that will be written out. Check the length of the data in the movierentaldata.txt file to determine the length for the input data variable. For the output data variable, you can use your own judgment, but using VARCHAR2(80) would probably be more than adequate.
The last thing you will need to add is a variable to act as the handle for the input record and one for the output record. Remember that the name for these is not important, but they must be based on the FILE_TYPE data type.
Step 4: Opening the Files
Now, we move to the body of the code and the BEGIN section. The first thing that needs to happen is to open both the files. Remember that we are going to set up our processing just like we would any IPO logic, i.e., we need to open the files, read a record, process the data, read the next record, and repeat this process until there is no more data.
To accomplish this first step of opening the files, you will need to initialize the two variables you declare to handle the files. For the input file, you will need to use the FOPEN program. Remember that you have to pass this program three variables: the name of the parameter for the directory object, the name of the parameter for the input file, and the mode the file is to be in. For the input file, the mode needs to be "r", and for the output file, the mode needs to be "w".
An example of what your code might look like can be found in the lecture material for this week.
Step 5: Setting Up the LOOP
Since our code in its current format is designed for only one set of input values (remember that in previous labs we were using an EXECUTE command and then passing data to the procedure) and we now want to process multiple records of data, we need to make a change to the overall structure of the code. We need to put all of the processing in the body of the procedure after the files are opened into a basic LOOP using the LOOP/END LOOP commands. Also, we will need a new BEGIN section inside this LOOP that all of the existing code will go into. The basic structure of body of your code should look like the following when you complete this step.
BEGIN
open files
LOOP
BEGIN
file processing
BEGIN
existing process to increment rental_id
EXCEPTION
END
EXCEPTION
END
END LOOP
END
Step 6: Setting Up the File Read and Process
Now, we need to get our data record so that we can process the data brought into the program. To do this, we need to read a record using the GET_LINE program in UTL_FILE. This involves using the UTL_FILE.GET_LINE process while passing the file handle variable and input record variable to the GET_LINE program.
Once the record is in the input variable, we then need to parse out the individual pieces of data (movie ID, customer ID, and payment method) from the record using the SUBSTR function. Remember that the parameters for the SUBSTR function are the record variable name, the value for the first byte of data we want to pull, and the length of the data. For example, to get the movie ID from our record, the code might look like the following.
p_movie_id := SUBSTR(v_rental_record, 1, 2);
This would pull two bytes of data from the data record and put them in the variable p_movie_id. Now we can use the variable in our code that follows to see if that movie ID exists in the mm_rental table. You will need to repeat the process above for the member ID and the payment method. Do all three together between the line of code that reads the file and the first SELECT statement.
Step 7: Setting Up the Output Process
If you have used the same names for your three data variables that you used for the original parameter names in the previous lab then you should not have to make any changes at all to any of the SELECT statements or the INSERT statement in the main body of code. Now, we need to set up the processing that will create the output data that will go into our output validation record. To do this, you will be using the PUT_LINE program within UTL_FILE.
There are going to be six different places you will want to write out a record. The first will be after the insert statement when a new rental record is added to the mm_rental table. To create this output line you can concatenate variables and character strings together to create the data record. For example, to create an output line that would read "Rental record 13 for member 10 has been added" after the new record has been inserted, you would use code similar to the following (keep in mind that your variable names might be different).
v_report_record := 'Rental record '||v_rental_id||' for member '||p_member_id||
' has been added';
UTL_FILE.PUT_LINE(v_report_filehandle, v_report_record);
This same type of process and format will need to be repeated for each exception handler that in the previous lab used the DBMS_OUTPUT.PUT_LINE package and procedure. In these cases, your output line is already formatted and set, you just need to replace the DBMS_OUTPUT.PUT_LINE with the initialization of your output record and then add the UTL_FILE.PUT_LINE code.
Step 8: Getting Out of the LOOP and Closing the Output File
There is one final step that has to be taken care of before you can start testing your code. Since we are reading a record file within a LOOP we need to be able to EXIT out of the loop after the last record has been processed. To do this you will need to add a NO_DATA_FOUND exception to your main exception handling section. This exception handle must be added before the WHEN OTHERS exception handle (remember, that on has to be last). This exception handle will have three pieces to process.
The first will be some form of message stating that all the records have been processed and this is the end of the report, i.e., ALL RECORDS PROCESSED - END OF REPORT. The second piece will be a line that will close the output file using UTL_FILE.FCLOSE. The only parameter you will need to pass is the name of the output file variable. This must be done or your output file will not have any data in it. The third thing will be the word EXIT which will tell the program to exit out of the loop.
You are now ready to compile your package specifications (must be done first) and then the package body. Debug any errors you might have and then run your test.
Step 9: Testing Your New Procedure
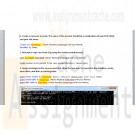
For this lab, you only need to test the MOVIE_RENT_SP procedure of the package. To do this, enter an EXECUTE command for the package.procedure and pass the name of your Directory Object, input file name, and output file name to the procedure. IMPORTANT: The Directory Object name MUST BE IN UPPERCASE! This is the way it is stored in the data dictionary in Oracle and if it is not in uppercase, an error will be generated. Your call to the new procedure should look similar to the following.
execute MM_RENTALS_PKG.movie_rent_sp('DBM405_SMITH_DIR','movierentaldata.txt','rentalreport.txt');
The output in your output file should look similar to the following (the wording may be different but the processes recorded should be the same).
There is no movie with id 13. Cannot proceed with rental.
There is no member with id 20. Cannot proceed with rental.
There is no payment method with id 7. Cannot proceed with rental.
Rental record 13 for member 10 has been added.
Movie id 5 is not available at this time. Cannot proceed with rental.
This concludes the Lab for Week 6. -

DBM 405 Lab 7 Study Case Front-End GUI
$20.00DBM 405 Lab 7 Study Case front-end GUI
Learn More
Scenario/Summary
The More Movies company has hired you to redesign a database system for them that can facilitate the process of renting out and returning movies.
They already have an Oracle database that stores information about movies, members who rent the movies, and the rentals. This is the database that you already have become familiar with and the one which includes tables: MM_MOVIE, MM_MOVIE_TYPE, MM_MEMBER, MM_RENTAL, and MM_PAY_TYPE. The machine on which this database is running has both the server and client Oracle9i software installed on it. Every night, a clerk updates data to account for the day's activities, and periodically the reports are run to summarize business, show renting trends, etc. Access to the database is accomplished using a SQL*Plus environment that is very similar to the iSQL*Plus that you know from the previous database course. This business process worked okay for as long as More Movies stayed a very small business.
However, the company has grown substantially, expanding its operations to more movie selection and more members, and consequently, it has moved to a larger location. It occupies a two-story shop now. It became very impractical to record rentals at the end of the day. They also do not want to rely on clerks knowing any SQL programming in order to record updates and run reports.
In short, there is a need for a more convenient database system. The machine on which the database is currently running is powerful enough to host the database server. The database should be accessible from four checkout stations that process renting out and returning movies. This system should have an easy-to-use graphical user interface access.
For the lab, you will be creating several documents to be submitted for the lab. Be sure that you save the documents with your last name and lab7 in the file name. Place all documents into a single ZIP file and submit for grading.
LAB STEP
Step 1:
Describe what software you propose to use to develop the front-end GUI application for the new system. Be sure to justify your choice. Keep in mind portability, ease of use, scalability, and ability to update. What other options have you considered?
Step 2:
In setting up the servers and environment, do you propose to use middleware? If so, what kind, and where would you deploy it?
Step 3:
Provide a system diagram of the proposed system. Be sure to include such things as servers (application and database), user clients, and any other special pieces to the puzzle that you might think of.
Step 4:
Provide a detailed design of the GUI screen that facilitates renting out and returning movies. For every button, or other component that provides reaction to user's events, give detailed pseudocode. Also, clearly indicate where you would use any of the PL/SQL code that you developed for the labs in this course. If the application platform you have selected does not support PL/SQL then describe how you would take the processing developed in the procedures and functions and incorporate it into the system.
This concludes the Lab for Week 7. -
Succeeding in Business with Access Chapter 3 Case Problem 1 and 3
$25.00Succeeding in Business with Access 2010
Learn More
Chapter 3 Analyzing Data for Effective Decision Making
Case Problem Level 1 - managing Customer Information for NHD Development Group Inc.
Antiques.accdb complete solution from Step 1 - Step 12.
Case Problem Level 2 - Retrieving Employee Information for MovinOn Inc.
MovinOn.accdb complete solution from Step 1 - Step 12. -

Small Business Jewelry Store Access Database with Form and Reports
$20.00Create a database using Microsoft Access.
Learn More
The database should contain three tables: Customers, Products, and Transactions; three queries: list of customers, transactions by customer, and transactions by product; and be something that a small business, such as a jewelry store or used car lot, can use for its daily needs.
The database must contain an input form for the transactions and one report that is based on any of the queries; the tables must each contain 10 records; and the records in the transactions table must be created by way of the input form.
In this assignment, use Microsoft Access to create the following: Forms Tables Queries Reports -

IT452 Unit 10 Final Project Misty Tutoring Business
$20.00IT452 Unit 10 Final Project
Learn More
In this project, you will create an end-to-end solution to meet a business need. This project is worth 200 points.
Scenario
Your good friend, Misty, has a tutoring business in Southern California. It is quite successful. A client will call with a tutoring need, and Misty will look on her Excel spread sheet of tutors for those qualified in the tutoring area the client needs, and who live near the client.
Misty now has approximately 20 freelance tutors registered with her. It has become quite difficult for her to tell what tutors are qualified and live near the client. You have told her you will develop a way for her to get such a list.
She has sent you the TutorList.xls file with the current list of tutors. (This file is available in Doc Sharing.) The Subject column has values of A (tutor is proficient in English and history), B (tutor is proficient in math and science), or C (tutor is proficient in all basic subjects). Hint: You need to create a database that consists of the data in these to files. The DateQualified column has the latest date the tutor was interviewed and checked out by Misty. In addition, she has provided the current term’s client list (Clients.xls). You will need to use BULK INSERT to load the data from the sheets into the tutoring database and write queries that find tutors in the same zip code as the client and provide the tutor in the same zip code in a report. Misty should be able to select the zip code as a parameter from the tutors in the report and the zip code as a parameter from the clients as a parameter to execute the reports.
Misty also requires that she should be able to interact with a Web page, because she does not want to know how to "run database software". This will require creating a web based report that she can access via a web link.
The first thing you should do is list the steps in your plan. What will be the major steps you need to take to accomplish your goal? The first step will be to install SQL Server 2008 Express with Advanced Services on Misty's computer. (She has agreed to that part of the plan.) The last step will be to create a report that asks for parameter values for a stored procedure or query at run time. This does not literally need to be done but should be a step in the plan if you advise her that it is needed on her machine.
For the purpose of this project, you will use your computer to work out the steps and create the report.
The first item to place in your final project document is your outline of major steps that need to be accomplished. Label this section:
1. Outline – 20 points
<Put your plan step list here.> (The outline will be worth 20 points.)
Then, for each step after the first (the installation step), make a section in your project, e.g.
2. <Whatever Step 2 is in your plan outline> - 80 points
In that section, state how you accomplished that step and/or give the code you used. Enough detail should be given so a knowledgeable person could completely recreate what you did. Show at least some of the results you obtained when you tested to see whether your step had been accomplished. (For
queries, 3 or 4 lines of output, and stating the number of lines returned is sufficient.) If a screen shot is the best way to demonstrate the results, include it in your project. Please use ALT+PrintScreen so that only the in-focus or active window, not the entire desktop, is copied.
[Note: You are starting with step 2, because step 1 of your plan is the installation, and it will be assumed that you know how to do that.]
[Hint: One of your steps should be the creation of a stored procedure that uses a variable for the zip code and determines which tutors live in the same zip code as the client. But, this step will be carried out in #3 below so you might want to letter your steps to avoid confusion.
3. Create the query or stored proc. that will produce the result set for the report - 40 points (Creation and Alter)
Create Procedure – 20 points
Alter Procedure – 20 points
The query / stored procedure that generates the result set for the report will be worth 20 points each. You then will also Alter the Stored Procedure one time and execute it. You should determine that it gives the desired results before configuring your report. Hint: The SELECT query portion of the stored procedure will be the query you use in your report datasource when you get to the portion of the design wizard (if you use the wizard instead of manually creating everything).
4. [The last step.] Configuring the Report and the Report Parameters – 60 points
Query for Report 20 points
Configuring Parameters – 20 points
Configuring/Designing 2 reports – 20 points
The final 60 points will be for the last step in your plan – configuring the report and the parameters for the report. The tutor subject choices should be A, B, or C. The date selection should be from the DateQualified values, with a default value of the earliest DateQualified. The customer zip code must be one of those in the TutorList. [Hint: The latter two parameter items require creation of additional data sets, one for the DateQualified values, and one for the zip code values. Hint: Each of the datasets should use a SELECT query as well to provide the data for the parameter. Look at what you did in Project 9 as an example. The DateQualified data set will have datetime data type. Each parameter will become a drop down on your report.
You should place four screen shots under this final step in your project document.
1. For the parameter that specifies Misty's choice of a tutor that resides in the same zip code as the client show one such client/tutor example.
2. For the parameter that specifies Misty's choice of minimum DateQualified, show how you have configured the Available Values for that parameter.
3. Show the Report Data pane of BIDS, showing all parameters and all data sets with their fields.
4. Deploy the report. Run the first report that does not contain parameters for zip code 91016. This one should show only the tutors available for that zip code. Run the second report with parameters for a customer zip code of 91803 for the report with parameters showing which client they qualify to work with, what their skill set is, and date equal to the earliest DateQualified value. Paste the screen shot of this report into your project document.
Because the entire project involves sequential steps, if you become hung somewhere in the middle and cannot proceed, you may send details to your instructor, and receive a hint in exchange for an appropriate point "cost" or deduction. If you cannot figure out what query you need to create the report, the instructor will send it to you, on request from you, for a "cost" of 20 points so you can move on.
Your screen shot of the report without parameters should look similar to this on the Report BIDS screen. It should be for ZipCode 91016 regardless to subject and qualified date:
Your screen shot of the report without parameters should look similar to this on the Report Manager screen:
Your screen shot of the report with parameters should look similar to this on the Report BIDS screen It should be for ZipCode 91803 regardless to subject and qualified date:
Your screen shot of the report with parameters should look similar to this on the Report Manager screen: -
IT358 Unit 8 Users and Roles
$20.00IT358 Unit 8 Users and Roles
Learn More
Outcomes addressed in this activity:
Create users
Create roles
Use the GRANT and REVOKE statements
Create and access database links
Project requirements:
In this project, you will work with privileges, roles, and passwords:
1. Answer Review questions 1–5 from Chapter 7.
2. Complete Hands on Assignments #1-10 from Chapter 7
Oracle 11G SQL Chapter 7 Hands-On assignment Solution
1. Create a new user account. The name of the account should be a combination of your first initial and your last name.
2. Attempt to log in to Oracle 10g using the newly created account.
3. Assign privileges to the new account that allow the new user to connect to the database, create new tables, and alter an existing table.
4. Using a properly privileged account, create a role named customerrep that allows new rows to be inserted into the ORDERS and ORDERITEMS tables and allows rows to be deleted from those tables.
5. Assign the account created in Assignment 1 the customerrep role.
6. Log in to Oracle 10g using the new account created in Assignment 1. Determine the privileges currently available to the account.
7. Revoke the privilege to delete rows in the ORDERS and ORDERITEMS tables from the customerrep role.
8. Revoke the customerrep role from the account created in Assignment 1.
9. Delete the customerrep role from the Oracle 10g database.
10. Delete the user account created in Assignment 1. -
CIS355A iLab 4 InheritanceTest DayGui and OfficeAreaCalculator Java Programs
$15.00CIS355A iLab 4 InheritanceTest DayGui and OfficeAreaCalculator Java Programs
In this lab, you will create one project that uses inheritance and two simple Graphical User Interfaces (GUI) programs.
Deliverables
Program files for each of the following three programs
1. InheritanceTest
2. DayGui
3. OfficeAreaCalculatoriLAB STEPS
STEP 1: InheritanceTest (20 points)
Write a program called InheritanceTest.java to support an inheritance hierarchy for class Point-Square-Cube. Use Point as the superclass of the hierarchy. Specify the instance variables and methods for each class. The private variable of Point should be the x-y coordinates. The private data of Square should be the sideLength. The private data of Cube should be depth. Each class must provide applicable accessor, mutator, and toString() methods for manipulating private variables of each corresponding class. In addition, the Square class must provide the area() and perimeter() methods. The Cube must provide the area() and volume() methods.
Write a program that instantiates objects of your classes, ask the user to enter the value for x, y, and sideLength, test all instance methods and outputs of each object’s perimeter, area, and volume when appropriate.STEP 2: DayGui (10 points)
Write a program called DayGui.java that creates a GUI having the following properties
Object Property Setting
JFrame Name Caption Layout mainFrame Messages FlowLayout
JButton Name Caption Mnemonic cmdGood Good G
JButton Name Caption Mnemonic cmdBad Bad B
Add individual event handlers to your program so that when a user clicks the Good button, the message "Today is a good day!" appears in a dialog box, and when the Bad button is clicked, the message "I'm having a bad day today!" is displayed. The following tutorial shows you much of the code solution. Feel free to use the tutorial, but make changes so that you are not simply copying the tutorial code for your entire solution. To make this different from the tutorial, change the colors of the buttons and panel. Also, add this application to a tabbed pane along with the program you will complete in the next step, Step 3. The following tutorials will likely be useful as you work to complete this step:
• JTabbedPane
• Tutorial to Write Your First GUISTEP 3: OfficeAreaCalculator (10 points)
Learn More
Write a program called OfficeAreaCalculator.java that displays the following prompts using two label components
• Enter the length of the office:
• Enter the width of the office:
Have your program accept the user input in two text fields. When a button is clicked, your program should calculate the area of the office and display the area in a text field with a label of Area. This display should be cleared whenever the input text fields receive the focus. A second button should be provided to terminate the application (Exit button).
The following tutorial shows you much of the code solution. Feel free to use the tutorial, but make changes so that you are not simply copying the tutorial code for your entire solution. To make this different from the tutorial, change the colors of the panel. Also, add this application to the same tabbed pane (see the JTabbedPane tutorial) as the application you built in Step 2, the DayGui application.
• Office Area Calculator Tutorial -
Microsoft Access 2010 Chapter 2 Lab 1: Querying the ECO Clothesline Database
$20.00Microsoft Access 2010 Chapter 2 Lab 1: Querying the ECO Clothesline Database
Learn More
Problem: The management of ECO Clothesline has determined a number of questions it wants the database management system to answer. You must obtain answers to the questions posed by management.
Instructions: Use the database modified in the In the Lab 1 of Chapter 1 on page AC 66 for this assignment, or see your instructor for information on accessing the files required for this book.
Perform the following tasks:
1. Open the ECO Clothesline database and create a new query for the Customer table that includes the Customer Number, Customer Name, Amount Paid, and Sales Rep Number fields in the design grid for all customers where the sales rep number is 49. Save the query as Lab 2-1 Step 1 Query.
2. Create a query that includes the Customer Number, Customer Name, and Amount Paid fields for all customers located in Virginia (VA) with a paid amount greater than $1,000.00. Save the query as Lab 2-1 Step 2 Query.
3. Create a query that includes the Customer Number, Customer Name, Street, and City fields for all customers whose names begin with T. Save the query as Lab 2-1 Step 3 Query.
4. Create a query that lists all cities in ascending order. Each city should appear only once. Save the query as Lab 2-1 Step 4 Query.
5. Create a query that allows the user to enter the city to search when the query is run. The query results should display the Customer Number, Customer Name, Balance, and Amount Paid fields. Test the query by searching for those records where the client is located in Ashton. Save the query
as Lab 2-1 Step 5 Query.
6. Include the Customer Number, Customer Name, and Balance fields in the design grid. Sort the records in descending order by the Balance field. Display only the top 25 percent of the records in the query result. Save the query as Lab 2-1 Step 6 Query.
7. Join the Sales Rep and the Customer table. Include the Sales Rep Number, First Name, and Last Name fields from the Sales Rep table. Include the Customer Number, Customer Name, and Balance from the Customer table. Sort the records in ascending order by sales rep’s last name and customer name. All sales reps should appear in the result even if they currently have no customers. Save the query as Lab 2-1 Step 7 Query.
8. Open the Lab 2-1 Step 7 Query in Design view and remove the Sales Rep table. Add the Amount Paid field to the design grid. Calculate the total of the balance and amount paid amounts. Assign the alias Total Amount to the calculated fi eld. Change the caption for the Balance field to Due. Save the query as Lab 2-1 Step 8 Query.
9. Create a query to display the average balance amount for all customers. Save the query as Lab 2-1 Step 9 Query.
10. Create a query to display the average balance amount for sales rep 51. Save the query as Lab 2-1 Step 10 Query.
11. Create a query to display the average balance amount for each sales rep. Save the query as Lab 2-1 Step 11 Query.
12. Create the crosstab shown in Figure 2 – 92. The crosstab groups the total of customers amount paid amounts by state and sales rep number. Save the crosstab as State-Sales Rep Crosstab.
13. Submit the revised database in the format specified by your instructor.

You have no items in your shopping cart.
