Search results for 'dbm 502 Mountain View Community Hospital'
-
I.C.U Blinds Database Design ERD
$20.00I.C.U Blinds Database Design
A customer goes to the store to buy blinds. This customer is served by one salesperson in a department. This salesperson can have many customers. An installer is scheduled to measure the customer's house for blinds. The installer can have many customers but each customer is served by only one installer. When a customer buys a blind, an invoice is created for the transaction. Installers and sales people report to a manager. A manager may manage many employees.
Based upon a visit to the store and interviews with several store employees, consider the following:
Customer data must be stored including name, address, email address, and phone number. Sales person and installer data must be stored including name, address, phone number, hire date, and manager ID. Manager information is similar but the database must store information about the employees they manage. Each employee may also have dependents eligible for the company-provided health coverage. Information to be stored about dependents includes name and date of birth. Each blind has a SKU, price, and description associated with it. Each invoice may have multiple blinds on it. Invoices include date purchased, item quantity, and calculated fields such as item subtotals (qty * price), and grand total.You have been asked to design a database for “I.C.U Blinds” based upon your expertise in databases.
CHOOSE ONE OF THE FOLLOWING (AND ONLY ONE)
Option #1 (Rock)
Draw the dependency diagrams which step through the normalization process (1NF, 2NF, and 3NF). Denormalize as needed and show your final dependency diagram. If you do denormalize, explain the reasoning behind each case. Please follow the formatting guidelines as per the normalization homework assignment we did. What you should turn in, is similar to the Chapter 5 assignment.Option #2 (Hard Place)
Break down the scenario into the component relationships. For each relationship, write the associated one liner, and the 4 sentences. Combine these relationships and in Visio, draw the ERD associated with your solution. Be sure to note all attributes, PKs, FKs, cardinality, optional and mandatory relationships, strong/weak relationships and entities. What you should turn in, is very similar to the Chapter 4 assignments.Tips and tricks
Learn More
Carefully consider each question and do not be afraid to add attributes – some will be needed (e.g. primary and foreign keys), some need to be inferred – (e.g. purchase date for the invoice), and some will be calculated (e.g. totals). As we have learned in class, remember in your answers that good solutions take into account the trade-offs between number of tables, the amount of data redundancy, and data to be entered for each transaction. -

DBM 405 Lab 4 PL/SQL Packages Advanced Database Oracle
$20.00DBM 405 Lab 4 PL/SQL Packages Advanced Database Oracle
Learn More
Step 1: Creating the Package Specifications
Before you begin, there are several things you will want to do to get ready for the lab.
1. Refresh your database tables by running the movierental.sql script. This will restore all of the data back to where it was in the beginning for the course.
2. Drop the two procedures and the function created in Lab 3. Be sure that you have your script file from Lab 3 so you can copy the procedure and function code from it.
Now you are ready to create your package specification. Your package name should be MM_RENTALS_PKG and it will contain the two procedures and the one function that were created in Lab 3.
Remember that for the specification, you only need to list the procedure and function header data (CREATE statement with parameters).
Test your package specification by running the script in SQL*Plus. If you have any errors, debug them and once you have a clean compile, move on to Step 2.
Step 2: Creating the Package Body
Creating the package body should be simple since you already have the code for the two procedures and the function, and you know it works.
Remember that the name for the package body must match the name of the specifications, and that the procedure and function header in the body must match that of the specification exactly.
Once you have created the body then run the script in your SQL*Plus session. Once you have a clean compile then move on to Step 3 to do your testing.
Step 3: Testing the Package
To test your package, you will need to run the same exact tests you did in Lab 3. The following outlines what you will test for:
Testing the first procedure -
1. No movie for the ID supplied (use 13, 10, and 2 for the parameters).
2. No member for the ID supplied (use 10, 20, and 2 for the parameters).
3. No payment method for the ID supplied (use 10, 10, and 7 for the parameters).
4. A successful rental (use 5, 10, and 2 for the parameters).
5. No movie available for the ID supplied (use 5, 11, and 2 for the parameters). Since there is only one movie available for ID 5, you will get this exception.
Testing the second procedure -
1. No rental for the ID supplied (use 20 for the parameter).
2. A successful rental return (use 1 for the parameter).
3. Try to return the same rental in Step 2.
Testing the function -
1. Test for a movie in stock using movie ID 11.
2. Test for a movie not in stock using movie ID 5 (from your tests of the second procedure above, the quantity should be 0).
3. Test for an invalid movie ID using movie ID 20.
IMPORTANT: Remember that all of your testing needs to be saved in a spool session so that it can be submitted to the Dropbox for grading.
Step 4: Determining Dependencies
Having created a package that contains program units to support the movie rental process is a major step in customizing the new database.
As application modifications are made in the future, however, we need to be able to identify all object dependencies to test changes.
For this step in the lab, you are to use either data dictionary views or the dependency tree utility found in Doc Sharing (utldtree.sql file) to compile a list of dependencies for all the More Movies database objects.
Remember that an object is anything that was created using the CREATE statement.
Present your finding in a separate Word document in a tabular format as in the following sample.
Each dependency type should be listed as either direct or indirect. -
DBM 405 Lab 5 User Defined Database Triggers
$20.00DBM 405 Lab 5 User Defined Database Triggers
Learn More
Scenario/Summary
This week, we are going to continue to expand the functionality of our database schema by adding a couple of triggers to that will help us automate some of the processing we already have in place. Triggers can be used to automate repetitive tasks within the database, such as adjusting inventory levels based on other actions taken in the database. Once you have created and tested your triggers, you will need to make some adjustments to the code in the package that was created in Lab 4.
For the lab, you will need to create a script file containing the PL/SQL code that will address the lab steps below. Run the script file in your SQL*Plus session using the SET ECHO ON session command at the beginning to capture both the PL/SQL block code and output from Oracle after the block of code has executed. You will be running tests to verify that your triggers are working once your package has been updated. Spool your output and name your files with your last name plus lab 5 and give the file a text (.txt) extension. For example, if your last name was Johnson then the file would be named johnson_lab5.txt. Submit both the spooled output files AND the script file for grading of the lab.
LAB STEP
Step 1: Creating the First Trigger
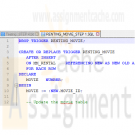
The first trigger you are going to create is to be named RENTING_MOVIE and is going to take care of the process of updating the mm_movie table to reflect a change downward in the quantity column for a movie when it is rented. Keep the following in mind:
1. The trigger needs to be an AFTER INSERT trigger on the mm_rental table. We want it to be an AFTER trigger so that, in case there are any exceptions raised, the trigger will not fire.
2. The trigger needs to be able to fire for each row that is inserted into the table.
3. The trigger process will only involve the update statement to lessen the quantity amount in the mm_movie table by one for the referenced movie ID.
Test your code by running the script in SQL*Plus. If you have any errors, debug them and once you have a clean compile, move on to Step 2.
Step 2: Creating the Second Trigger
The second trigger you are going to create is to be named RETURNING_MOVIE and is going to take care of the process of updating the mm_movie table to reflect a change upward in the quantity column for a movie when it is returned. Keep the following in mind:
1. The trigger needs to be an AFTER UPDATE trigger on the mm_rental table based on the updating of the check in date in the mm_rental table.
2. The trigger needs to be able to fire for each row that is updated.
3. The trigger process will only involve the update statement to increase the quantity amount in the mm_movie table by one for referenced movie ID.
Test your code by running the script in SQL*Plus. If you have any errors, debug them and once you have a clean compile, move on to step 2.
Step 3: Modifying the Package Code
Now, we have two triggers that will handle changes in our movie rental stock each time a movie is rented or returned. Since that same process currently exists in the procedures in our package then we need to make some changes.
To keep from having repetitive processes, and thus have a scenario for generating invalid inventory data, we need to take the processes out of the procedures in the package body by:
1. removing the update statement in the MOVIE_RENT_SP that decreases the quantity by one in the mm_movie table; and
2. removing the update statement in the MOVIE_RETURN_SP that increases the quantity by one in the mm_movie table.
Recompile the package body (you do not have to recompile the package specifications). If you have any errors, debug them and once you have a clean compile, move on to Step 4.
Step 4: Testing
To test your changes, you will only need to test a valid movie rental and a valid movie return. The following steps will help you with the process.
1. Query the mm_movie table to see all data for movie ID 1.
2. Execute the movie_rent_sp procedure in the package and use 1, 13, and 2 for the parameters.
3. Query the mm_movie table to verify the change in quantity for movie ID 1.
4. Query the mm_rental table to get the current rental ID for movie ID 1.
5. Execute the movie_return_sp procedure in the package using the rental ID from Step 4.
6. Query the mm_movie table to verify the change in quantity for movie ID 1.
This concludes the Lab for Week 5. -

DBM 405 Lab 6 Reading and Writing to External Files
$20.00DBM 405 Lab 6 Reading and Writing to External Files
Learn More
Scenario/Summary
This week, we are going to make a change to the processing in our schema by altering one of the procedures contained in the package previously created. At this point, we have dealt with procedures that required us to pass parameter values each time the procedure was executed. This type of processing greatly limits the ability to process large amounts of data efficiently. The lab this week will introduce you to a couple of the procedures contained in the UTL_FILE package that is part of Oracle's group of built-in packages. By using the GET_LINE and PUT_LINE procedures contained in UTL_FILE, you will be able to process multiple records from a file and create a results report on the events performed by your movie rental procedure with one call to execute the procedure.
For the lab, you will need to create a script file containing the PL/SQL code that will address the lab steps below. Run the script file in your SQL*Plus session using the SET ECHO ON session command at the beginning to capture both the PL/SQL block code and output from Oracle after the block of code has executed. You will only need to recompile both the package specifications and the package body since you will be making a change to the movie_rental_sp procedure in the specifications. You will be running tests to verify that the changes to your procedure are working as they should. Spool your output and name your files with your last name plus lab 6 and give the file a text (txt) extension. For example, if your last name was Johnson then the file would be named johnson_lab6.txt. Submit both the spooled output files AND the script file for grading of the lab.
IMPORTANT: Before beginning the lab, you will want to refresh the tables in your schema by running the movierental.sql script.
LAB STEP
Step 1: Setting Up Your Environment
Before you can effectively use the procedures in UTL_FILE to work with external files for this lab, you will need to set up your environment. The first step of this process will involve creating a directory folder under the R: drive which is the mapped drive for DBM405. The second part of the process will involve creating the Directory Object in Oracle to point to this folder. To accomplish this task, please follow the steps listed here.
1. Create the directory folder (You can refer to the SQL*Plus Tutorial in Week 1 for visuals of this process).
• First, log into the iLab and open up your Oracle folder. Next, open Windows Explorer and expand the R: drive tree.
• Under the R: drive, create your own folder by selecting File/New/Folder from the main menu bar. Name your folder using a unique name such as DBM405_lastname_lab6 or some other unique name. Make sure that there are no other folders under the R: drive with the same name as yours. You are the only person who has access to your folder, but the name must be unique.
2. Create the Directory Object.
• In Windows Explorer (the one in the Oracle folder in the iLab), you want to take note of the path name for the R: drive. It will be DBM405\ followed by the session you are in. For example, if you are in Spring A, the path would be DBM405\SPRINGA, or if Spring B, it would be DBM405\SPRINGB. This is important because this will be used to define the path for the Directory Object. Remember that the R: drive is really mapped to the Oracle server F: drive.
• Start up a session in SQL*Plus and log into your user schema.
• Use the following SQL command to create the Directory Object that you will use for this lab.
Create or Replace Directory DBM405_YOURNAME_DIR As 'F:\DBM405\session\YourFolderName';
IMPORTANT: Replace the word YOURNAME with your actual last name, the word session with the session name found in the path for the R: drive (see first bullet above), and the word YourFolderName with the name of the folder you created in Part 1 above. For example, if your last name were SMITH and you were taking this course is Spring session A and the folder you create was named DBM405_SMITH_lab6, the statement would be:
Create or Replace Directory DBM405_SMITH_DIR As 'F:\DBM405\SPRINGA\DBM405_SMITH_LAB6';
3. Set up the data file.
• Download the file "movierentaldata.txt" from Doc Sharing and place this file in the directory folder you created above in Part 1.
You have now set up Oracle to work with the procedures in UTL_FILE that we will use for this lab.
Step 2: Changing the Package Specifications
We are now ready to start updating the package that we modified in Lab 5 so that it will allow us to read a file and make changes to the database. To do this, we will need to make changes to the parameter list of the MOVIE_RENT_SP procedure to reflect a new process. Since we will be changing the parameter list, we will need to make changes to the Package Specifications as well as to the Package Body.
For the change to the Package Specifications, you will need to define a parameter for the Directory Object, one for the input file, and one for an output file that will be used for a verifications report. Each of these parameters can be defined as VARCHAR2 data types.
Step 3: The DECLARE (IS) Section of the Procedure
Now, we can move on to the Package Body and the MOVIE_RENT_SP procedure itself. The first thing you want to do is make sure that the parameter list in the procedure matches the parameter list that you just changed in the Specifications in Step 2. The two parameter lists must match exactly or you will get errors when trying to compile the Package Body.
When you read in the file, you will need several variables to handle both the record and the various pieces of data in the record. When the record is read in, you will need to substring each piece of data from the record into a variable which then can be used like you were using the parameters before. To keep from having to make numerous changes in the code, you might want to consider using the actual parameter names from your parameter list in the code from Lab 5. For example, if the parameter name for the movie ID was P_MOVIE_ID then you would create a variable named P_MOVIE_ID. Each of the variables for movie ID, member ID, and payment method can be cast to the data type in the MM_RENTAL table. For example:
p_movie_id mm_rental.movie_id%TYPE;
You will also need a variable to hold the record data that will be read in and a variable to hold record data that will be written out. Check the length of the data in the movierentaldata.txt file to determine the length for the input data variable. For the output data variable, you can use your own judgment, but using VARCHAR2(80) would probably be more than adequate.
The last thing you will need to add is a variable to act as the handle for the input record and one for the output record. Remember that the name for these is not important, but they must be based on the FILE_TYPE data type.
Step 4: Opening the Files
Now, we move to the body of the code and the BEGIN section. The first thing that needs to happen is to open both the files. Remember that we are going to set up our processing just like we would any IPO logic, i.e., we need to open the files, read a record, process the data, read the next record, and repeat this process until there is no more data.
To accomplish this first step of opening the files, you will need to initialize the two variables you declare to handle the files. For the input file, you will need to use the FOPEN program. Remember that you have to pass this program three variables: the name of the parameter for the directory object, the name of the parameter for the input file, and the mode the file is to be in. For the input file, the mode needs to be "r", and for the output file, the mode needs to be "w".
An example of what your code might look like can be found in the lecture material for this week.
Step 5: Setting Up the LOOP
Since our code in its current format is designed for only one set of input values (remember that in previous labs we were using an EXECUTE command and then passing data to the procedure) and we now want to process multiple records of data, we need to make a change to the overall structure of the code. We need to put all of the processing in the body of the procedure after the files are opened into a basic LOOP using the LOOP/END LOOP commands. Also, we will need a new BEGIN section inside this LOOP that all of the existing code will go into. The basic structure of body of your code should look like the following when you complete this step.
BEGIN
open files
LOOP
BEGIN
file processing
BEGIN
existing process to increment rental_id
EXCEPTION
END
EXCEPTION
END
END LOOP
END
Step 6: Setting Up the File Read and Process
Now, we need to get our data record so that we can process the data brought into the program. To do this, we need to read a record using the GET_LINE program in UTL_FILE. This involves using the UTL_FILE.GET_LINE process while passing the file handle variable and input record variable to the GET_LINE program.
Once the record is in the input variable, we then need to parse out the individual pieces of data (movie ID, customer ID, and payment method) from the record using the SUBSTR function. Remember that the parameters for the SUBSTR function are the record variable name, the value for the first byte of data we want to pull, and the length of the data. For example, to get the movie ID from our record, the code might look like the following.
p_movie_id := SUBSTR(v_rental_record, 1, 2);
This would pull two bytes of data from the data record and put them in the variable p_movie_id. Now we can use the variable in our code that follows to see if that movie ID exists in the mm_rental table. You will need to repeat the process above for the member ID and the payment method. Do all three together between the line of code that reads the file and the first SELECT statement.
Step 7: Setting Up the Output Process
If you have used the same names for your three data variables that you used for the original parameter names in the previous lab then you should not have to make any changes at all to any of the SELECT statements or the INSERT statement in the main body of code. Now, we need to set up the processing that will create the output data that will go into our output validation record. To do this, you will be using the PUT_LINE program within UTL_FILE.
There are going to be six different places you will want to write out a record. The first will be after the insert statement when a new rental record is added to the mm_rental table. To create this output line you can concatenate variables and character strings together to create the data record. For example, to create an output line that would read "Rental record 13 for member 10 has been added" after the new record has been inserted, you would use code similar to the following (keep in mind that your variable names might be different).
v_report_record := 'Rental record '||v_rental_id||' for member '||p_member_id||
' has been added';
UTL_FILE.PUT_LINE(v_report_filehandle, v_report_record);
This same type of process and format will need to be repeated for each exception handler that in the previous lab used the DBMS_OUTPUT.PUT_LINE package and procedure. In these cases, your output line is already formatted and set, you just need to replace the DBMS_OUTPUT.PUT_LINE with the initialization of your output record and then add the UTL_FILE.PUT_LINE code.
Step 8: Getting Out of the LOOP and Closing the Output File
There is one final step that has to be taken care of before you can start testing your code. Since we are reading a record file within a LOOP we need to be able to EXIT out of the loop after the last record has been processed. To do this you will need to add a NO_DATA_FOUND exception to your main exception handling section. This exception handle must be added before the WHEN OTHERS exception handle (remember, that on has to be last). This exception handle will have three pieces to process.
The first will be some form of message stating that all the records have been processed and this is the end of the report, i.e., ALL RECORDS PROCESSED - END OF REPORT. The second piece will be a line that will close the output file using UTL_FILE.FCLOSE. The only parameter you will need to pass is the name of the output file variable. This must be done or your output file will not have any data in it. The third thing will be the word EXIT which will tell the program to exit out of the loop.
You are now ready to compile your package specifications (must be done first) and then the package body. Debug any errors you might have and then run your test.
Step 9: Testing Your New Procedure
For this lab, you only need to test the MOVIE_RENT_SP procedure of the package. To do this, enter an EXECUTE command for the package.procedure and pass the name of your Directory Object, input file name, and output file name to the procedure. IMPORTANT: The Directory Object name MUST BE IN UPPERCASE! This is the way it is stored in the data dictionary in Oracle and if it is not in uppercase, an error will be generated. Your call to the new procedure should look similar to the following.
execute MM_RENTALS_PKG.movie_rent_sp('DBM405_SMITH_DIR','movierentaldata.txt','rentalreport.txt');
The output in your output file should look similar to the following (the wording may be different but the processes recorded should be the same).
There is no movie with id 13. Cannot proceed with rental.
There is no member with id 20. Cannot proceed with rental.
There is no payment method with id 7. Cannot proceed with rental.
Rental record 13 for member 10 has been added.
Movie id 5 is not available at this time. Cannot proceed with rental.
This concludes the Lab for Week 6. -
DBM 405 Lab 1 SQL Review Advanced Database Oracle
$20.00DBM 405 Lab 1 SQL Review Advanced Database Oracle
Learn More
Scenario/Summary
The purpose of the first week's lab is to review the SQL language, and familiarize you with the database example that we will use in labs through this course. If you have not done it yet, please download the MovieRentals.SQL file to your computer from Doc Sharing. This script file will need to be run once logged into your Oracle user account to create the tables and data that will be used for this lab and subsequent labs in the course.
Setting up your environment:
Before attempting Lab 1, you need to be sure you have read through the SQL*Plus tutorial which can be found in Doc Sharing as well as under the SQL*Plus Tutorial tab in Week 1. This tutorial describes the functionality of the editor and will step you through the process of setting up and using the SQL*Plus in the iLab environment so that it will best serve your needs for the remainder of the labs required for this course. Once you have logged into Oracle through iLab then execute the MovieRental.SQL script and create the tables and data for the lab.
For the lab, you will need to create a script file containing the eight queries that will address the lab steps below. Run the script file in your SQL*Plus session using the SET ECHO ON session command at the beginning to capture both the query and result set. Spool your output to a file named with your last name plus lab 1 and give the file a text (.txt) extension. For example, if your last name was Johnson then the file would be named johnson_lab1.txt. Submit both the spooled output AND the script file for grading of the lab.
LAB STEP
Step 1:
Within SQL*Plus, list names of the tables that you have created whose name starts with MM (Hint: use data dictionary view USER_TABLES).
Step 2:
Use DESCRIBE (in short: DESC) command in SQL*Plus for each of these tables to show columns and their datatypes.
Step 3:
Use SELECT * command to display all data from each of the tables in the MoreMovies schema. Make sure that the LINESIZE and PAGESIZE have large enough values, and that you format columns so that the report looks good. You should end up with five queries and result sets.
Step 4:
Using the mm_movie and mm_movie_type tables, write a query that will list all movie categories together with the count of movies in each category. Give the column with the count in it a meaningful name such as IN STOCK.
Step 5:
Using the mm_movie and mm_rental tables, write a query that will list titles and checkout dates for all movies that were signed out by Wild Coyote (MEMBER_ID=13).
Step 6:
Using the same two tables used in Step 5, write an SQL sub-query that will list all movies (movie ids and titles) of all movies that have never been rented.
Step 7:
Using the mm_member and mm_rental tables, write a query that will list all members (member ID, first name, and last name) and the number of movies they have rented, for all members who have rented at least one movie. Order the result set so that it shows the largest number of movies rented as the first row.
Step 8:
Write a query that will display the largest number of movies rented by one member and that member's name. Give the output column a meaningful name such as MAXIMUM NUMBER.
Step 9:
Using the mm_member and mm_rental tables, write a query that will display member ID, last name, first name, and the number of movies rented for each member. Give the column with the number of movies rented a meaningful name such as NUMBER RENTED.
Step 10:
Using the mm_member, mm_movie and mm_rental tables, write the query that will prepare a report that shows who rented which movie. Use member names (first and last) and movie title rather than the corresponding IDs. Order the report by member names, and for a single member by the movie titles.
This concludes the Lab for Week 1. -
DBM 405 Lab 2 Simple PL/SQL Applications Advanced Database Oracle
$20.00DBM 405 Lab 2 Simple PL/SQL Applications Advanced Database Oracle
Learn More
Scenario/Summary
The purpose of this week's lab is to work with basic PL/SQL syntax to create an anonymous block of code. In the lab, you will be using SQL*Plus to modify one of the tables in the MovieRental schema and then write a simple block of code to update the table with some new data and then execute the code in SQL*Plus. As an additional task in the lab, you will be asked to modify the existing PL/SQL block of code given to you to add exception handling and then execute it in SQL*Plus. Both of these concepts will help enforce the material covered in this second week.
For the lab, you will need to create a script file containing the PL/SQL code that will address the lab steps below. Run the script file in your SQL*Plus session using the SET ECHO ON session command at the beginning to capture both the PL/SQL block code and output from Oracle after the block of code has executed. To successfully test the code in Step 3, you will need to copy/paste your code into SQL*Plus for each movie ID as you change the value for the host variable. Spool your output to a file named with your last name plus lab 2 and give the file a text (.txt) extension. For example, if your last name was Johnson then the file would be named johnson_lab2.txt. Submit both the spooled output AND the script file for grading of the lab.
LAB STEP
Step 1:
As business is becoming strong and the movie stock is growing for More Movie Rentals, the manager wants to do more inventory evaluations. One item of interest concerns any movie for which the company is holding $75 or more in value. The manager wants to focus on these movies in regards to their revenue generation to ensure the stock level is warranted. To make these stock queries more efficient, the application team decides that a column should be added to the MM_MOVIE table named STK_FLAG that will hold a value '*' if stock is $75 or more. Otherwise, the value should be NULL. Add the new column to the MM_MOVIE table as a CHAR data type.
Execute a DESC MM_MOVIE on the table both before you add the new column and after the column is added.
Note: Since this is code will be in your script file, you will need to comment it out after the first time you have execute the ALTER TABLE statement successfully to avoid getting errors each additional time your script file is run.
Step 2:
Create an anonymous block of PL/SQL code that contains a CURSOR FOR loop to accomplish the task described above in Step 1. Your loop will need to interrogate the value (using an IF statement) found in the movie_qty field of the cursor loop variable to see if it is >= 75. If this is true then you will need to update the new column in the table with an '*' WHERE CURRENT OF the table. If the quantity is not >= 75 (the ELSE side of the IF statement) then update the new column with a NULL.
Execute a SELECT * from MM_MOVIE both before and after you execute the new PL/SQL block of code to show that the process works.
Step 3:
Here is a block that retrieves the movie title and rental count based on a movie ID provided via a host variable.
SET SERVEROUTPUT ON
VARIABLE g_movie_id NUMBER
BEGIN
:g_movie_id := 4;
END;
/
DECLARE
v_count NUMBER;
v_title mm_movie.movie_title%TYPE;
BEGIN
SELECT m.movie_title, COUNT(r.rental_id)
INTO v_title, v_count
FROM mm_movie m, mm_rental r
WHERE m.movie_id = r.movie_id
AND m.movie_id = :g_movie_id
GROUP BY m.movie_title;
DBMS_OUTPUT.PUT_LINE(v_title || ': ' || v_count);
END;
/
Modify the block of code to add exception handlers for errors that you can and cannot anticipate. You will need to execute the entire code listing shown above each time you wish to test it by changing the value of :g_movie_id for each test.
Once finished, test your exception handling by running the modified block for the following values of :g_movie_id. Be sure that you can capture the value in the :g_movie_id host variable.
• 12 - normal output will display title and number of rentals
• 13 - exception - there is no movie ID for 13
• 1 - exception - Movie with ID 1 has never been rented
This concludes the Lab for Week 2. -

DBM 405 Lab 7 Study Case Front-End GUI
$20.00DBM 405 Lab 7 Study Case front-end GUI
Learn More
Scenario/Summary
The More Movies company has hired you to redesign a database system for them that can facilitate the process of renting out and returning movies.
They already have an Oracle database that stores information about movies, members who rent the movies, and the rentals. This is the database that you already have become familiar with and the one which includes tables: MM_MOVIE, MM_MOVIE_TYPE, MM_MEMBER, MM_RENTAL, and MM_PAY_TYPE. The machine on which this database is running has both the server and client Oracle9i software installed on it. Every night, a clerk updates data to account for the day's activities, and periodically the reports are run to summarize business, show renting trends, etc. Access to the database is accomplished using a SQL*Plus environment that is very similar to the iSQL*Plus that you know from the previous database course. This business process worked okay for as long as More Movies stayed a very small business.
However, the company has grown substantially, expanding its operations to more movie selection and more members, and consequently, it has moved to a larger location. It occupies a two-story shop now. It became very impractical to record rentals at the end of the day. They also do not want to rely on clerks knowing any SQL programming in order to record updates and run reports.
In short, there is a need for a more convenient database system. The machine on which the database is currently running is powerful enough to host the database server. The database should be accessible from four checkout stations that process renting out and returning movies. This system should have an easy-to-use graphical user interface access.
For the lab, you will be creating several documents to be submitted for the lab. Be sure that you save the documents with your last name and lab7 in the file name. Place all documents into a single ZIP file and submit for grading.
LAB STEP
Step 1:
Describe what software you propose to use to develop the front-end GUI application for the new system. Be sure to justify your choice. Keep in mind portability, ease of use, scalability, and ability to update. What other options have you considered?
Step 2:
In setting up the servers and environment, do you propose to use middleware? If so, what kind, and where would you deploy it?
Step 3:
Provide a system diagram of the proposed system. Be sure to include such things as servers (application and database), user clients, and any other special pieces to the puzzle that you might think of.
Step 4:
Provide a detailed design of the GUI screen that facilitates renting out and returning movies. For every button, or other component that provides reaction to user's events, give detailed pseudocode. Also, clearly indicate where you would use any of the PL/SQL code that you developed for the labs in this course. If the application platform you have selected does not support PL/SQL then describe how you would take the processing developed in the procedures and functions and incorporate it into the system.
This concludes the Lab for Week 7. -
Ski Club Skiing Database Using SQL Management Studio
$15.00Ski Club Skiing Database Using SQL Management Studio
Learn More
Using SQL Management Studio, create the normalized tables, fields and relationships between the tables for the Skiing Database scenario below.
You have been contracted by the president of the Ski Club to design a Skiing Database:
The president has asked you to design a database to keep track of member and skiing resort information.
For each member of the club, she wants you to track name, address, phone number, age and skiing ability.
For the various ski mountains you need to track the name of the resort, its location, # of trails, # of lifts.
The president also wants a monthly report of skier activity including the skiers name, phone number, skiing ability, Ski Resort visited, the date of the visit and general comments on the skiing there.
Don't add any additional fields other than what is being requested. That does not mean you should not break down each field to it's smallest possible component.
Create the database using SQL Management Studio.
Detach the completed Database file and submit both the .mdf and .ldf files to the assignment in a zipped folder with your firstname followed by the initial of your lastname. -
CMIS 420 Homework Assignment 3 Advanced Relational Database Concepts and Applications
$20.00CMIS 420 Homework Assignment 3 Advanced Relational Database Concepts and Applications
Learn More
Homework Task 1:
Create a PL/SQL block to complete the followings.
Output the cheapest movie information. You can use the view you created in project 1 - task 1
In your block, referential type should be used to receive the cursor return.
Use DBMS_OUTPUT to output your result.
Possible Exception should be handled in exception handling section. You are not required to use user-defined exception. Use Oracle predefined exception. When exception occurs, you need to output error code and error message.
Spool the output to a text file. Don't forget to use "Set serveroutput on"
Submit your code as .sql file and spooled output
Homework Task 2:
Create a stored procedure based on task 1 with an input parameter movie_id. Modify your cursor to use movie_id to select desired movie information. And execute the procedure and spool the execution result.
Spool the output to a text file. Don't forget to use "set serveroutput on"
Submit your code as .sql file and spooled output
Homework Task 3:
Create a statement trigger on orders table. The trigger fires after updating the table. When the trigger fires one record insert into the following temp table using the insert statement shown below:
Note: you need to create temp_table and its sequence using the following code.
PROMPT creating table temp_table ...............
DROP TABLE temp_table;
CREATE TABLE temp_table
( num_col NUMBER(5) not null primary key,
char_col VARCHAR2(30),
date_col VARCHAR2(30));
PROMPT creating SEQUENCE trigger_seq ...............
DROP SEQUENCE trigger_seq;
CREATE SEQUENCE trigger_seq
START WITH 1
INCREMENT BY 1;
INSERT INTO temp_table (num_col, char_col, date_col)
VALUES (trigger_seq.NEXTVAL, 'After Statement trigger', TO_CHAR(sysdate, 'DD-MON-YYY HH24:MI:SS'));
Submit your code as .sql file
Homework Task 4:
Create a row trigger on order_items table to fire after inserting the data into order_items table. When the trigger fires it inserts a record into temp_table using the following insert statement:
INSERT INTO temp_table (num_col, char_col, date_col)VALUES (trigger_seq.NEXTVAL, 'After Row Trigger', TO_CHAR(sysdate, 'DD-MON-YYY HH24:MI:SS'));
Submit your code as .sql file
Homework Task 5:
Test your triggers.
Update orders table to set total payment to 300. fire statement trigger on orders table.
Insert one record into order_items. Fire row trigger on order_items table.
Query temp_table to get the inserted records for trigger firing.
Spool the output to a text file and submit it. -
IT452 Unit 5 Table Expressions
$20.00IT452 Unit 5 Table Expressions
Learn More
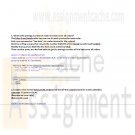
1. What is the average number of order line items over all orders? The Sales.OrderDetails table has one row for each product for each order. Each row represents a "line item" on a sales invoice for the orderid. Start by writing a query that returns the number (COUNT) of line items (rows) for each orderid. Modify that query to CAST the line item count as decimal (8,4). Then use that query as a derived table to get the average number of line items over all orders.
(Returns 9 rows)
2. Create a view named Sales.LOLJO_Orders that lists all the orderid values for orders placed by customer 'Customer LOLJO'. (Requires an Inner Join)
(Returns 10 rows)
3. Create a view named Sales.WhoSoldToLOLJO that lists the empid, lastname, and firstname of all employees who have sold to customer 'Customer LOLJO'. Execute a Select query to show the results of the view.
(6 rows)
4. Write a CTE to extract the employee with the most orders. Write the Outer query to display the EmployeeID and Highest Orders Sold Count for that Employee Result: (empid 4, 156 orders)
5. Create an inline table-valued function named Sales.fCustOrders that takes a customer name as an argument and returns the orderid and orderdate values for orders placed by that customer. The orderdate should have the date only, no time (Hint: CAST). Your project should have your CREATE FUNCTION statement. Query the function to see the results from the function for the argument (page 165) for companyname 'Customer MLTDN'.
(4 rows)
6. Create a VIEW called TopSales that shows the TOP 10 percent of sales. Verify the results of the view in a SELECT clause.
(216 rows)
7. Encrypt the TopSales View and bind the schema so that it cannot be dropped or altered created in #6. Test it by trying to remove the producID from the underlying Table and show the error
8. Change the TopSales view from # 7 so that it contains a filter that only has qty = 130 and does not allow modifications. Test it with an Update Statement by trying to change the quantity.

You have no items in your shopping cart.
