Search results for 'SELECT * FROM MM_MOVIE;'
-
CIS355A Week 2 Lab - Developing a GUI Application
Regular Price: $12.00
Special Price $10.00
CIS355A Week 2 Lab - Developing a GUI Application
OBJECTIVES
• Create a GUI that uses JTextField, JLabel, and JButton.
• Write event handlers to process user data.PROBLEM: Health Profile App
GymsRUs would like to replace their console program with an updated app using a graphical user interface. You will use the HealthProfile class that you created in the Week 1 Lab and build a GUI for it.FUNCTIONAL REQUIREMENTS
Make sure your HealthProfile class from the Week 1 Lab is in a named package, not default (i.e., package lab1).You must ADD the project that contains the HealthProfile class to this week’s project by
right click project, go to properties; and
click Libraries, Add Project, click OK.Then you will be able to reference your existing class as
import lab1.HealthProfile.Your project will have three classes:
• HealthProfile class from Week 1 Lab
• HealthProfileGUI class
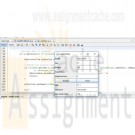
• Lab2Main classYour HealthProfildGUI class should have the following components (see sample GUI below).
• JTextField objects to enter: name, age, height in feet, height in inches, weight in pounds
• JButton objects to display results, clear the GUI
• JTextField objects to display the BMI, category, and max heart rate
• JLabels to describe all textboxes
You are free to layout and design your GUI as you like as long as it includes these components.Add default and parameterized constructors to your HealthProfile class. The parameterized constructor should have five arguments: the name, age, weight, height in feet, and height in inches. Note it should convert the height to inches to store in the private instance variable.
Code event handlers for each button:
• Display: Make sure all user input is present and valid Use the HealthProfile class to process the data Display the results on the GUI
• Clear Clear all text boxes on the GUIGRADING RUBRIC
HealthProfile class
• Add default and parameterized constructors 10
HealthProfileGUI class
• All components on GUI
• Display button event handler coded properly
• Clear button event handler coded properly
• Error messages for any invalid/missing user input using JOptionPane 25
Lab2Main class
• Displays the GUI properly 5
Code style 5
Lab Report 10
TOTAL 55CODE STYLE REQUIREMENTS
• Include meaningful comments throughout your code
• Use meaningful names for variables
• Code must be properly indented
• Include a comment header at beginning of each file, example below
/****************************************************
Program Name: ProgramName.java
Programmer's Name: Student Name
Program Description: Describe here what this program will do
***********************************************************/DELIVERABLES
Submit as a SINGLE zip folder
• All java files
• Lab reportFollow assignment specification regarding class/method names.
Learn More
Note that your java file name must match class name (DO NOT rename). -
CIS355A Week 1 Lab - Developing an OOP Console Application
Regular Price: $10.00
Special Price $8.00
CIS355A Week 1 Lab - Developing an OOP Console Application
OBJECTIVES
• Create a class in java with appropriate methods.
• Process user input with the class using the scanner for keyboard input and console output.PROBLEM: Health Profile Console Program
GymsRUs has a need to provide fitness/health information to their clients, including BMI and maximum heart rate. Your task is to write a console program to do this.Body mass index (BMI) is a measure of body fat based on a person’s height and weight. BMI can be used to indicate if you are overweight, obese, underweight, or normal. The formula to calculate BMI is
The following BMI categories are based on this calculation.
Category BMI Range
Underweight less than 18.5
Normal between 18.5 and 24.9
Overweight between 25 and 29.9
Obese 30 or moreMax heart rate is calculated as 220 minus a person's age.
FUNCTIONAL REQUIREMENTS
Design and code a class called HealthProfile to store information about clients and their fitness data. The attributes (name, age, weight, and height) are private instance variables. The class must include the following methods.method Description
setName Receives a value to assign to private instance variable
setAge Receives a value to assign to private instance variable
setWeight Receives a value to assign to private instance variable
setHeight Receives TWO inputs (height in feet, inches). Converts and stores the total INCHES in private instance variable
getName Returns private instance variable
getAge Returns private instance variable
getWeight Returns private instance variable
getHeight Returns private instance variable (inches)
getBMI Calculates and returns BMI
getCategory Returns category based on BMI
getMaxHR Calculates and returns maximum heart rateCreate a SEPARATE TEST CLASS, Lab1Main, to prompt for user input and display output using the HealthProfile class. Process multiple inputs using a loop. You can assume all user input is valid.
SAMPLE OUTPUT
Enter name or X to quit: John Smith
Your age: 35
Your weight: 200
Your height - feet: 6
Your height - inches: 0Health Profile for John Smith
BMI: 27.1
BMI Category: overweight
Max heart rate: 185Enter name or X to quit: Ann Jones
Your age: 50
Your weight: 120
Your height - feet: 5
Your height - inches: 2Health Profile for Ann Jones
BMI: 21.9
BMI Category: normal
Max heart rate: 170Enter name or X to quit: X
GRADING RUBRIC
HealthProfile class
• All methods created with proper functionality 25
Lab1Main class
• Receives user input using Scanner
• Process input using a HealthProfile object
• Correct output displayed in console
• BMI displayed with 1 decimal place
• Loop to process multiple clients 10
Code style 5
Lab Report 5
TOTAL 45CODE STYLE REQUIREMENTS
• Include meaningful comments throughout your code.
• Use meaningful names for variables.
• Code must be properly indented.
• Include a comment header at beginning of each file, example below.
/****************************************************
Program Name: ProgramName.java
Programmer's Name: Student Name
Program Description: Describe here what this program will do
***********************************************************/DELIVERABLES
Submit as a SINGLE zip folder
• All java files
• Lab reportFollow assignment specification regarding class/method names.
Learn More
Note that your java filename must match class name (DO NOT rename). -

WEB460 Lab 7 of 7: Model-View-Controller Application
Regular Price: $12.00
Special Price $10.00
WEB460 Lab 7 of 7: Model-View-Controller Application
Scenario/Summary
This lab will introduce you to the ASP.NET MVC application architecture. You will create a controller and views for the controller. In this lab, we will not explore models but with the foundation you gain here, you should be able to follow tutorials you discover online.TABLE OF CONTENTS
Lab Steps
STEP A: Create a Model-View-Controller Application
MVC applications are not created as Visual Studio Web Sites. Instead we create a Project, similar to what we do for a desktop application. Follow the directions in this week's lecture to create an ASP.NET MVC web application. The application should be named web460_wk7_ilab.
The name is very important because this project uses namespaces. If the namespace in your code files is not web460_wk7_ilab, you can either:
delete the project and recreate a new with the correct name (web460_wk7_iLab), or
adjust the code in the Lab to match the namespace of your application.
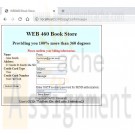
When you build and run the default web application, you should see a website similar to the image below that has a responsive web layout. As you adjust the window size, elements move to accommodate the narrower screen size, such as for a mobile device.Because URLs are very important in determining the classes and actions called in an MVC application, you should note the URL and port number IIS Express is using to run the application. localhost refers to your own computer, and the number following is the port. In the image below, the port is 51071.
In the examples shown in the lab steps below, replace the port number (51071) with the port number on your computer.STEP B: Adding a Controller
In this step, we will build a controller that returns HTML directly to the browser. This will help us begin with a simple example before adding more features. In the next step we will have the controller call a View( ) to create a full web page.
1. Right-click on the Controllers folder and select Add => Controller... from the menu.
2. Name the controller HelloEarthController and select the Empty MVC controller template.
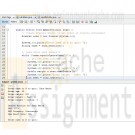
3. You should see HelloEarthController.cs in the Controllers folder in the Solution Explorer pane. Double-click the file to open it and examine the code. The index action method is
the default action method for each controller. Replace the HelloEarthController Index( ) action method with the following code:
Index Action Method in HelloEarthController.cs
// Add your comments here
public string Index()
{
return "This is the <strong>default action</strong> for this web site ...!";
}
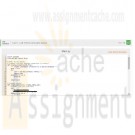
4. Run the application and append HelloEarth to the base URL:
http://localhost:51071/HelloEarth
You should see the following:
5. We just called the HelloEarth Controller. The URL routing logic in ASP.NET MVC applications is a format like this to determine what code to invoke:
/[Controller]/[ActionName]/[Parameters]
Add the following Welcome action method to the HelloEarth Controller:
Welcome Action Method in HelloEarthController.cs
// Add your comments here
public string Welcome()
{
return "<h2>Welcome to Earth visitor!</h2>";
}
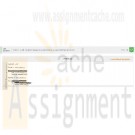
6. Run the application and append HelloEarth/Welcome to the base URL:
http://localhost:51071/HelloEarth/Welcome
You should see the following:
7. Now, let's pass information in arguments to the Welcome method. Change the Welcome method to the following:
Revised Welcome Action Method in HelloEarthController.cs
// Add your comments here
public string Welcome(string visitor, int numTimes = 1)
{
return HttpUtility.HtmlEncode("Hello " + visitor + "! Your number is " + numTimes);
}
8. Run the application and again append HelloEarth/Welcome to the base URL:
http://localhost:51071/HelloEarth/Welcome
You should see the default values for visitor and numTimes:
9. Run the application and again append query string parameters to the base URL:
http://localhost:51071/HelloEarth/Welcome?visitor=Jose&numTimes=5
MVC will bind the query string values to the action method parameters. You shouldSTEP C: Creating a View
In this step we'll create a View that displays default information when the site visitor goes to /HelloEarth.
1. Return to the HelloEarth Controller action method and return it to the original version (don't forget to change the return type back to ActionResult):
Original Index Action Method in EarthController.cs
// Add your comments here
public ActionResult Index()
{
return View();
}
2. To add a View for the Index method, right-click inside the Index method and select Add View...
3. In the Add View dialog, the view name should be Index and the view engine should be ASPX (C#). Also be sure the Use layout or master page is checked and Site.Master is selected as the master page.
4. You should now see a HelloEarth folder containing Index.aspx under the Views folder.
5. Double-click HelloEarth/Index.aspx to examine the code and you should see four content areas from the master page referenced. In the Content1 container, enter the following (this is the page title):
Hello Earth Index
6. In the Content2 container, enter the following (this is the main content heading):
<h2>Welcome to the Earth Index!</h2>
7. In the Content3 container, enter the following:
This web application is your introduction Earth culture.
8. Run the application and append HelloEarth to the base URL:
http://localhost:51071/HelloEarth
You should see the following:STEP D: Passing To the View From the Controller
MVC uses an object called the ViewBag to communicate between the controller and views. The ViewBag is a dynamic object that can have data fields added to it on the fly (as the program is running). We will use the ViewBag to send the Welcome View data to display on the web page.
1. Return to the HelloEarth Controller and change the Welcome action method to look like the code below (don't forget to change the return type back to ActionResult). We are setting the VisitorName and NumTimes data fields of the ViewBag object. Those data fields are not part of the ViewBag object but will be added when these statements are executed. In our example, we simply pass the parameters to the View, but we could also pass computed values or values retrieved from a Model.
Second Revision of Welcome Action Method in HelloEarthController.cs
// Add your comments here
public ActionResult Welcome(string visitor, int numTimes = 1)
{
ViewBag.VisitorName = visitor;
ViewBag.NumTimes = numTimes;
return View();
}
2. Right-click on the Welcome action method and select Add View... just as we did for the Index action method above. The %> name should be Welcome, use the ASPX (C#) view engine and the master page Site.Master. After clicking OK, you should see the file Welcome.aspx inside the HelloEarth folder under Views.
3. To access the ViewBag data fields in the View, we enclose it in <%: and %> as an ASPX directive. Open Welcome.aspx for editing. Inside the Content2 container, place the following:
<h2>Welcome to Earth <%: ViewBag.VisitorName %>!</h2>
4. Let's use ASPX Page directives along with the ViewBag data to repeatedly print our the visitor's name. Add the code below to the Content3 container:
Add to Content3 Content Container
<ul>
<% for (int i = 0; i < ViewBag.NumTimes; i++ )
{ %>
<li><%: ViewBag.VisitorName%></li>
<% } %>
</ul>
5. Run the application and again append query string parameters to the base URL:
http://localhost:51071/HelloEarth/Welcome?visitor=Jose&numTimes=5
MVC will bind the query string values to the action method parameters. The Controller will then pass those to the View. You should see:STEP E: Finalize the Lab
Learn More
1. Save your work!
2. Test it! Make changes as appropriate until it works.
3. Remember to add comments for each step being performed.
4. Please zip and submit the entire web project folder. -
DAT/210 Week 5 Python LAB 6.22: Python and sqlite basics
Regular Price: $10.00
Special Price $4.00
DAT/210 Week 5 Python LAB 6.22: Python and sqlite basics
Write a Python program that connects to a sqlite database.
Create a table called Horses with the following fields:
• id (integer): a primary key and not null
• name (text)
• breed (text)
• height (real)
• birthday (text)Next, insert the following data row into the Horses table:
Learn More
id: 1
name: 'Babe'
breed: 'Quarter Horse'
height: 15.3
birthday: '2015-02-10'
Output all records from the Horses table.
Ex: With the above row inserted, the output should be:
All Horses:
(1, 'Babe', 'Quarter Horse', 15.3, '2015-02-10') -
DAT/210 Week 5 Python LAB 6.20: Output values in a list below a user defined amount
Regular Price: $7.00
Special Price $4.00
DAT/210 Week 5 Python LAB 6.20: Output values in a list below a user defined amount
Write a program that first gets a list of integers from input. The input begins with an integer indicating the number of integers that follow. Then, get the last value from the input, which indicates a threshold. Output all integers less than or equal to that last threshold value.
Ex If the input is:
5
50
60
140
200
75
100
the output is:
50 60 75The 5 indicates that there are five integers in the list, namely 50, 60,140, 200, and 75. The 100 indicates that the program should output all integers less than or equal to 100, so the program outputs 50, 60, and 75.
Learn More
Such functionality is common on sites like Amazon, where a user can filter results. -
WEB460 Lab 6 of 7: Sending E-mail and Testing Your Application
Regular Price: $12.00
Special Price $10.00
WEB460 Lab 6 of 7: Sending E-mail and Testing Your Application
Lab Overview
This lab will not work if your Gmail, Yahoo, Outlook, or other email account is set up with two-factor authentication. You should use or create an account that does not have two-factor authentication to fully test this lab.
If you try to use your work or school email accounts, this lab has a better chance of working if you run it and try to send the email from your work computer or on campus. This is because some mail servers are set up to block sending emails from outside their domain.TABLE OF CONTENTS
Scenario/Summary
This week, we add the ability to send e-mails from our application. Then you will develop and implement a test plan for your application. Here is an outline of the lab:
STEP A: Set up a Web Application — this should be a copy of your Week 5 Lab as a starting point.
STEP B: Implement E-mail Functionally in the Business Layer
STEP C: Add E-mail Fields to pgConfirm.aspx
STEP D: Add Send E-mail Functionality to pgConfirm.aspx.cs
STEP E: Develop a Test Plan and Test your Application
STEP F: (Optional) Add Functionality to Autofill the Recipient's E-mail Address
STEP G: Finalize the LabSTEP A: Set up a Web Application
To begin this week's lab, create an empty Web Site and copy the files from the Week 5 Lab into your website folder.
Test your application. It should function the same as it did at the end of the Week 5 Lab.STEP B: Implement E-mail Send Functionality in the Business Layer
1. Because e-mail is a form of communication, we implement the SendEmail method in the business layer. First we create a MailMessage object that has the information for the e-mail, such as To, From, Subject, and the message Body. Then, to connect to a mail server and send the e-mail, we create an SmtpClient object. We need to tell the server about these two ASP.NET classes, so place the following at the start of clsBusinessLayer.cs:
Modules for clsBusinessLayer.cs
using System.Net;
using System.Net.Mail;2. Let's begin by stubbing out the SendMail method. The method accepts as parameters information needed to build and send the e-mail. We also return a message to the client that called the method indicating success or failure. We'll be optimistic and assume success. Stubbing a method is a useful development technique that lets your program compile and use the method, yet you don't have to have all the features implemented-only the correct return type.
SendMail method stub in clsBusinessLayer.cs
public string SendEmail(string emailFrom, string emailTo, string emailSubject, string emailBody, string acctPassword)
{
string mailSendMessage = "Email Status: The message was sent successfully to: " + emailTo;
//**** TODO: Create email message! *** //
//**** TODO: Add send mail functionality! *** //
return mailSendMessage;
}3. Next we create the MailMessage object and set its data fields using the values in the parameters. Replace the TODO comment for creating an e-mail message with the following code:
Creating a Message in SendMail method
// Add your comments here
MailMessage objMailMessage = new MailMessage();
objMailMessage.From = new MailAddress(emailFrom);
objMailMessage.To.Add(new MailAddress(emailTo));
objMailMessage.Subject = emailSubject;
objMailMessage.Body = emailBody;4. Now we create an SmptClient object to connect to your service provider and send thee-mail message.
Network Credentials
The two parameters for the NetworkCredential constructor should be the username (e-mail address) and account password for your web e-mail service. The values for these will be entered in the web form we build in a later step.
Do not hard code these values in your application—I don't want to know your e-mail password!Connecting to the Mail Service
Two very important fields in the SmptClient object are the Host and Port fields. These must be set to the values required by your personal e-mail service! Normally these would be set to an organization's SMTP server, but because there is no company for this lab, you must use your own web mail service. Host values for several common web mail providers is provided in the code comments. If your provider is not listed, you can check its support instructions to see how a local client e-mail application, such as Outlook or Mac OS X Mail can connect. These two fields, alongwith the NetworkCredentials object, make it possible to send the e-mail.Replace the TODO comment for adding send mail functionality with the following code:
Adding Send Functionality to SendEmail method
// Add your comments here
NetworkCredential objSMTPCredentials = new NetworkCredential(emailFrom,acctPassword);
// Add your comments here
SmtpClient mailObj = new SmtpClient();
// This needs to change based on your email Host
// to permit your application to send email
// for GMAIL
mailObj.Host = "smtp.gmail.com";
// for YAHOO, YMAIL, ROCKETMAIL, YAHOOMAIL
// mailObj.Host = "smtp.mail.yahoo.com";
// for HOTMAIL, MSN, OUTLOOK and LIVE.COM
// mailObj.Host = "smtp.live.com";
// for AOL
// mailObj.Host = "smtp.aol.com";
// Add your comments here
mailObj.Port = 587;
// if this does not work, try port 25
// Add your comments here
mailObj.UseDefaultCredentials = false;
mailObj.Credentials = objSMTPCredentials;
mailObj.EnableSsl = true;
mailObj.DeliveryMethod = SmtpDeliveryMethod.Network;
try
{
// Add your comments here
mailObj.Send(objMailMessage);
}
catch(Exception error)
{
mailSendMessage = " Email Status: An error has happened sending the email, " + emailTo;
}STEP C: Add E-mail Fields to pgConfirm.aspx
In this step, we modify pgConfirm.aspx so the user can send an e-mail. For this application to successfully send an e-mail, it will need your e-mail credentials. You may hard code your e-mail address, but please do not hard code your password! It should be entered in the SENDAuthorization field. This field should have the TextMode property set to Password so that the password is not displayed when typed.1. Begin by moving the Credit Card information and the Submit Order button into the left ContentArea of the Master Page. This leaves room for only our e-mail feature to be in the right ContentArea.
2. In this right ContentArea, add the controls as shown below. Structure the layout of your form to appear similar to an e-mail message.
ControlType Name or ID Text (if applicable)
Label lblFrom From:
TextBox txtFrom yourEmail@yourProvider.com
Label lblTo To:
TextBox txtTo
Label lblSubject Subject:
TextBox txtSubject
Label lblMessage Message:
TextBox txtMessage
Label lblPassword Enter SMTP account password for SEND authorization:
TextBox txtPassword
Button btnSendEmail Send Email3. Several of the controls require the following special property settings.
Textbox txtMessage - Set the TextMode property to MultiLine so that the user can type several lines of text for the e-mail message body. You can also adjust the size of this text box to show several lines of text.
Textbox txtFrom - Set the Text property to the e-mail address from the account you use to send e-mail.
Textbox txtPassword - Set the TextMode property to Password so that your e-mail account password is not displayed.4. When this step is complete, in Design Mode, pgConfirm.aspx should look similar to the image below:
STEP D: Sending an E-mail From pgConfirm.aspx
In pgConfirm.aspx.cs, create the method btnSendEmail_click() so that it calls SendEmail() and passes the data the user entered in the form.
1. Add a data field to represent the business layer object:
clsBusinessLayer myBusinessLayer;
2. Add the following line to the Page_Load method to instantiate the business layerobject:
myBusinessLayer = new clsBusinessLayer(Server.MapPath("~/App_Data/"));
3. Create the btnSendMail_Click method by entering the code below into pgConfirm.aspx.cs and enter your comments for each step being performed.
btnSendMail_Click method in pgConfirm.aspx.cs
protected void btnSendEmail_Click (object sender, EventArgs e)
{
Master.UserFeedBack.Text = myBusinessLayer.SendEmail(txtFrom.Text, txtTo.Text, txtSubject.Text, txtMessage.Text, txtPassword.Text);
}STEP E: Develop a Test Plan and Test Your Application!
1. Develop a test plan that has at least ten different features to test. You should test *the entire* application, not just the email functionality from this week. You can test more; being thorough is a good thing!
An Excel spreadsheet (Wk6_Test_Plan.xlsx (https://devryu.instructure.com/courses/60316/files/9167014/download?wrap=1)) that you can use as a test plan template can be found in the Files section of the Course Menu.2. Test your application! Make changes as appropriate until it works. Try sending several e-mails to yourself. If your application fails to send mail, try the following adjustments.
There are usually three possible values that cause issues: email username (usually your e-mail address), your password, and the host's STMP address.
Double-check that mailObj.Host matches the name of your e-mail or ISP's SMTPserver.
The From e-mail address and password should be what you use to log in to your e-mail account. If your username is different, change the emailFrom parameter in the call to the NetworkCredentials constructor to reflect your e-mail account username.
A fourth, less common problem is that some e-mail providers may use ports other than 587 for SSL e-mail. Try setting mailObj.Port to either 25 or 465.3. Execute the tests in your test plan and record the results in the spreadsheet . Upload the spreadsheet as part of this week's deliverables.
STEP F: (OPTIONAL) Auto-fill Recipient's E-mail Address (OPTIONAL)
OPTIONAL ACTIVITY:
Each user record in the database has an e-mail address associated with it. To have pgConfirm automatically fill the To field with this address, two small changes need to be made to the application:
1. Modify the FindCustomer method in clsBusinessLayer.cs so that it validates the e-mailaddress in addition to the other fields in the record.
2. In the Page_Load method of pgConfirm.aspx.cs, call the business layer FindCustomer method and use the result to fill the txtTo control.
Then test away!STEP G: Finalize the Lab
Learn More
1. Save your work!
2. Test it! Make changes as appropriate until it works.
3. Remember to add comments for each step being performed.
4. Please zip and submit the entire web project folder and your test plan. -
DAT/210 Week 3 Java LAB 4.16: Parsing dates
Regular Price: $7.00
Special Price $3.00
DAT/210 Week 3 Java LAB 4.16: Parsing dates
Complete main() to read dates from input, one date per line. Each date's format must be as follows: March 1, 1990. Any date not following that format is incorrect and should be ignored. Use the substring() method to parse the string and extract the date. The input ends with -1 on a line alone. Output each correct date as: 3/1/1990.
Ex: If the input is:
Learn More
March 1, 1990
April 2 1995
7/15/20
December 13, 2003
-1
then the output is:
3/1/1990
12/13/2003 -
DAT/210 Week 3 Java LAB 4.15: Word frequencies - methods
Regular Price: $7.00
Special Price $3.00
DAT/210 Week 3 Java LAB 4.15: Word frequencies - methods
Write a program that reads a list of words. Then, the program outputs those words and their frequencies. The input begins with an integer indicating the number of words that follow. Assume that the list will always contain less than 20 words.
Ex If the input is:
5 hey hi Mark hi mark
the output is:
hey 1
hi 2
Mark 1
hi 2
mark 1
Hint: Use two arrays, one for the strings, another for the frequencies.
Your program must define and call a method:
public static int getFrequencyOfWord(String[] wordsList, int listSize, String currWord)
Note: This is a lab from a previous chapter that now requires the use of a method.import java.util.Scanner;
public class LabProgram {
Learn More
/* Define your method here */
public static void main(String[] args) {
/* Type your code here. */
}
} -
DAT/210 Week 3 Java LAB 4.14: Elements in a range
Regular Price: $7.00
Special Price $3.00
DAT/210 Week 3 Java LAB 4.14: Elements in a range
Write a program that first gets a list of integers from input. The input begins with an integer indicating the number of integers that follow. Assume that the list will always contain fewer than 20 integers. That list is followed by two more integers representing lower and upper bounds of a range. Your program should output all integers from the list that are within that range (inclusive of the bounds). For coding simplicity, follow each output integer by a space, even the last one. The output ends with a newline.
Ex: If the input is:
5 25 51 0 200 33
0 50
then the output is:
25 0 33
(the bounds are 0-50, so 51 and 200 are out of range and thus not output).
To achieve the above, first read the list of integers into an array.
import java.util.Scanner;public class LabProgram {
Learn More
public static void main(String[] args) {
/* Type your code here. */
}
} -
DAT/210 Week 3 Java LAB 4.13: Varied amount of input data
Regular Price: $7.00
Special Price $3.00
DAT/210 Week 3 Java LAB 4.13: Varied amount of input data
Statistics are often calculated with varying amounts of input data. Write a program that takes any number of non-negative integers as input, and outputs the average and max. A negative integer ends the input and is not included in the statistics.
Ex When the input is:
15 20 0 5 -1
the output is:
10 20
You can assume that at least one non-negative integer is input.import java.util.Scanner;
public class LabProgram {
Learn More
public static void main(String[] args) {
/* Type your code here. */
}
}

You have no items in your shopping cart.
