Search results for 'My Guitar Shop'
-
MIS 562 Week 5 Homework Query Optimization
$20.00MIS 562 Week 5 Homework Query Optimization
Using the student schema from week 2, provide answers to the following questions.
Question
SQL statement or Answer
1. Generate statistics for the student, enrollment, grade, and zipcode tables (15 pts)2. Write a query that performs a join, a subquery, a correlated subquery using the student, enrollment, grade, and zipcode tables. Execute each query to show that it produces the same results. (15 pts)
3. Produce an autotrace output and explain plan for each query. (10 pts)
4. Analyze the results and state which performs best and why. Write an analysis of what operations are being performed for each query. Determine which query is the most efficient and explain why (10 pts)
Learn More -
CIS407 Lab 7 Week 7 Error Notification via E-Mail
$12.00This course has expired to download the latest version of CIS407A Labs click here
iLab 7 of 7: Error Notification via E-Mail
iLAB OVERVIEW
Scenario/Summary
In this lab, we will incorporate error handling into the login process so that a notice of each invalid login is automatically e-mailed to the technical support staff.Deliverables
When you try to log in, if your user name is not Mickey, Minnie, or another user you added (that is, if the user name is not found in tblUserLogin), then an e-mail should be sent to the addressrecipient@recipientdomain.com. If the user attempts to bypass the login page by typing a page name in the URL, your web application should redirect the user back to the login page. Once you have verified that it works, save your project, zip up all files, and submit in the Dropbox.
NOTE: E-mails may be blocked due to firewalls, antivirus software, or even Internet service providers that turned off SMTP because of some known security issues. If the code works (does not produce an error when submitting), you will get full credit for this project even if no e-mail message is actually transmitted. Consult with your instructor before submitting if an error occurs or if no e-mail is generated, to be sure.iLAB STEPS
STEP 1: Business Layer Functionality
1. Open Microsoft Visual Studio.NET 2008.
2. Click the ASP.NET website named PayrollSystem to open it.
3. Create a new class called clsBusiness Layer.
4. Add the following code in the clsBusinessLayer class:
// **** Add the following at the top of the class file,
// Add your comments here
using System.Net.Mail;
//**** Add the following code inside the body of public class clsBusinessLayer ****
public static bool SendEmail(string Sender, string Recipient, string bcc, string cc,
string Subject, string Body)
{
try {
// Add your comments here
MailMessage MyMailMessage = new MailMessage();
// Add your comments here
MyMailMessage.From = new MailAddress(Sender);
// Add your comments here
MyMailMessage.To.Add(new MailAddress(Recipient));
// Add your comments here
if (bcc != null && bcc != string.Empty) {
// Add your comments here
MyMailMessage.Bcc.Add(new MailAddress(bcc));
}
// Add your comments here
if (cc != null && cc != string.Empty) {
// Add your comments here
MyMailMessage.CC.Add(new MailAddress(cc));
}
// Add your comments here
MyMailMessage.Subject = Subject;
// Add your comments here
MyMailMessage.Body = Body;
// Add your comments here
MyMailMessage.IsBodyHtml = true;
// Add your comments here
MyMailMessage.Priority = MailPriority.Normal;
// Add your comments here
SmtpClient MySmtpClient = new SmtpClient();
// Add your comments here
MySmtpClient.Port = 25;
MySmtpClient.Host = "127.0.0.1";
// Add your comments here
MySmtpClient.Send(MyMailMessage);
// Add your comments here
return true;
} catch (Exception ex) {
// Add your comments here
return false;
}
}STEP 2: Integration
5. Open the frmLogin web form code behind file and add the following code to the body of the if (dsUserLogin.tblUserLogin.Count < 1) statement, just above the return statement:
// Add your comments here
// Add your comments here
if (clsBusinessLayer.SendEmail("youremail@yourdomain.com",
"receiver@receiverdomain.com", "", "", "Login Incorrect",
"The login failed for UserName: " + Login1.UserName +
" Password: " + Login1.Password))
{
Login1.FailureText = Login1.FailureText +
" Your incorrect login information was sent to receiver@receiverdomain.com";
}6. NOTE: Change the youremail@yourdomain.com and receiver@receiverdomain.com to your e-mail and someone else's e-mail for testing.
7. Optional: Perform this step only if you are doing this lab using Visual Studio 2008 installed on your own computer, your computer has Internet Information Services (IIS) installed, and you have administrative rights to IIS. If you are doing this lab using the iLab (Citrix) server, or if you do not have access to IIS, skip to step 8.
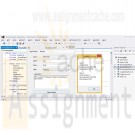
Open IIS (Start > Control Panel > Administrative Tools > Internet Information Services), navigate to the Default SMTP Virtual Server, right-click on it, and left-click on Properties.8. Click here for text description of this image.
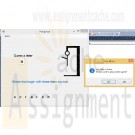
9. Click the Access tab, then the Relay button, then Add, and add the IP 127.0.0.1. Click OK, OK, and APPLY when finished.10. Click here for text description of this image.
11. We have a security hole in our web application. If you start the web application by going to the login page, you can bypass the login page by simply typing the name of a form in the URL (try it). There is some limited protection because of the check we are doing for user role, but it still allows a user to get to pages we don't want them to get to unless the role is set properly. Add a security check in the Page_Load of each sensitive page (Manage Users, Add New Employee, View User Activity, Edit Employees), check for the Session role item with a value of "A," and, if the user is accessing these pages without the proper permissions, redirect back to the frmLogin.aspx page.
12. This still leaves the possibility of a person bypassing the login page. We will fix that by using forms authentication. Add the following to the web.config file. (There should already be an authentication section – replace it with this.)
<authentication mode="Forms">
<forms loginUrl="frmLogin.aspx" />
</authentication>
<authorization >
<deny users="?" />
</authorization>
13. This will redirect users to the login page if they have not yet gone through it for login. This process will use a cookie – when the user successfully logs in in a cookie is set that allows the user to go to other pages. If that cookie is not set then the user is redirected to the login page if they try to go to any other page. Add the cookie code by adding this code in the frmLogin.aspx C# code after each place that you have e.Authenticated = true:
FormsAuthentication.RedirectFromLoginPage(Login1.UserName, false);
14. Hints: Make sure you reestablish your database connection if you copied the files from a previous lab. Also, make sure to update the web.config file with the database connection string.
Update any DataSource controls you added with the new payroll database location.
When you manually try to go to a second page by skipping the login page, a cookie is set specifying the name of the page you were attempting to go to. Once you login successfully, ASP.Net will automatically attempt to navigate back to that page. You can reset the cookie so that the next page is frmMain, as expected, by typing that page in the URL for the browser before logging in.Submit Final Lab (includes all previous lab assignments)
STEP 3: Test and Submit
12. Run your project. When you try to log in, enter a user name that is not Mickey or Minnie (i.e., a user name that is not found in tblUserLogin). An e-mail should be sent to therecipient@recipientdomain.com e-mail address.Test that frmMain reconfigures properly based on user role. Make sure the user cannot bypass the login page.
Once you have verified that everything works, save your website, zip up all files, and submit in the Dropbox.
NOTE: E-mails may be blocked due to firewalls, antivirus software, or even Internet service providers that turned SMTP off because of some known security issues. If the code works (does not produce an error when submitting), you will get full credit for this project even if no e-mail message is actually transmitted. Consult with your instructor before submitting if an error occurs or if no e-mail is generated. It is expected that no e-mail will be sent if you are using the DeVry iLab (Citrix) server for this lab or if you were not able to configure IIS in step 7.
NOTE: Make sure you include comments in the code provided where specified (where the " // Add your comments here" is mentioned), including code you wrote, or else a 5 point deduction per item (form, class, function) will be made.
Learn More -
Assignment 2 Frans Virtual Fruit Stand Part 2
$12.00Assignment 2 Fran’s Virtual Fruit Stand, Part 2
Use the concepts and scenario from Assignment 1 to help Fran’s Virtual Fruit Stand increase the functionality of its online shopping cart. When a customer checks out, the shopping cart must store the required data pertaining to each item the customer is buying. Your job is to design a program that will prompt the user for the required data and then store it. The required data includes the item name, the price per pound, and the number of pounds of that item being purchased. When complete, your program should include three (3) arrays, two (2) loops, one (1) and / or conditional statement, and one (1) variable.
Using Visual Logic, design a flowchart that is also a fully functional program to add functionality to the online shopping cart. According to your design, the program must:
Continually accept data regarding the purchase of fruit as specified below until the user enters a sentinel value, or until five (5) items are entered, whichever comes first.
Prompt the user for each item and accept the name of the fruit (e.g., “dried apples”), the price per pound, and the number of pounds sold in a month.
Store the required data in three (3) arrays (e.g., one (1) for the item name, one (1) for the price per pound, and one (1) for the number of pounds being purchased) with corresponding index values. Note: For example, index value 3, when applied to the “itemName” array, would give us the name of the third item that the customer is buying. That same index value of 3, when applied to the “pricePerPound” array, would give us the price per pound of that same third item that the customer is buying.
Store up to five (5) values in each of the three (3) arrays.
Provide functionality in which the user ends the program by typing a sentinel value, and the program tells the user what the sentinel value is. Note: An acceptable message may read “Type n to end the program.”, where “n” is the sentinel value. If the user does not end the program in this way, then the program ends when it has collected the data for five (5) items.
Print an itemized receipt with the following data after the last item in the purchase has been saved to the array.
Item name
Price per pound of each item
Number of pounds purchased of each item
Subtotal price for each item, calculated as price per pound multiplied by the number of pounds
Total weight of the entire order (in pounds)
The cost of shipping which is based on the total weight of the entire order, calculated as 50 cents per pound. Note: For example, if the entire order weighs seven (7) pounds, the cost of shipping would be $3.50.
Grand total price of all items and shipping.Note: Use the “console” option in the output command to accomplish this task. An example of an acceptable output has been provided below:
Learn More -

Clearly Visual Basic Chapter 17 Exercise 10 Doughnut Shoppe Solution
$15.00Clearly Visual Basic Chapter 17 Exercise 10 Doughnut Shoppe Solution
The Doughnut Shoppe sells four varieties of doughnuts: Glazed ($.65), Sugar ($.65), Chocolate ($.85), and Filled ($1.00). It also sells regular coffee ($1.80) and cappuccino ($2.50). The store manager wants an application that she can use to calculate and display a customer’s subtotal, 3% sales tax, and total due.
a. Create a Visual Basic Windows application. Use the following names for the solution and project, respectively: Doughnut Shoppe Solution and Doughnut Shoppe Project. Save the application in the ClearlyVB2010\Chap17 folder. Change the name of the form file on your disk to frmMain.vb. If necessary, change the form’s name to frmMain.
b. Create the interface shown in Figure 17-16.
c. Code the application. Use one function to calculate and return the cost of the doughnut. Use another function to calculate and return the cost of the coffee. Use a third function to calculate and return the 3% sales tax. Use a Sub procedure to clear the subtotal, sales tax, and total due amounts when a radio button is clicked.
d. Save the solution and then start and test the application. Close the Code Editor window and then close the solution.
Learn More -
CSC 275 Flower Pack Java Assignment 1
$12.00CSC 275 Flower Pack Java Assignment 1
As I was on a hike the other day I came across a small child in the woods. He told me his life story, with special mention of his disabled sister that loves flowers, and asked me for a favor.
He wanted a way to organize the flowers that he picks for her each day and perform a few basic tasks with them, along with a few restrictions. It is our goal to help him out!
• He can only carry 25 flowers as adding any more causes many of them to become crushed.
• He needs to be able to search for a specific type of flower in his pack incase his sister has a special request.
• He needs to be able to sort flowers by their names alphabetically in ascending order (A-Z)
• He needs to know how many of each flower he has in his pack.Now, I have started a simple program which will serve as guidance for you, please help me finish it. (Please don’t modify the code that I give you, just add your code where required)
Learn More
import java.util.Scanner;
public class Assignment01Driver {
public static void main(String[] args){
new Assignment01Driver ();
}
// This will act as our program switchboard
public Assignment01Driver (){
Scanner input = new Scanner(System.in);
String[] flowerPack = new String[25];
System.out.println("Welcome to my flower pack interface.");
System.out.println("Please select a number from the options below");
System.out.println("");
while(true){
// Give the user a list of their options
System.out.println("1: Add an item to the pack.");
System.out.println("2: Remove an item from the pack.");
System.out.println("3: Sort the contents of the pack.");
System.out.println("4: Search for a flower.");
System.out.println("5: Display the flowers in the pack.");
System.out.println("0: Exit the flower pack interfact.");
// Get the user input
int userChoice = input.nextInt();
switch(userChoice){
case 1:
addFlower(flowerPack);
break;
case 2:
removeFlower(flowerPack);
break;
case 3:
sortFlowers(flowerPack);
break;
case 4:
searchFlowers(flowerPack);
break;
case 5:
displayFlowers(flowerPack);
break;
case 0:
System.out.println("Thank you for using the flower pack interface. See you again soon!");
System.exit(0);
}
}
}
private void addFlower(String flowerPack[]) {
// TODO: Add a flower that is specified by the user
}
private void removeFlower(String flowerPack[]) {
// TODO: Remove a flower that is specified by the user
}
private void sortFlowers(String flowerPack[]) {
// TODO: Sort the flowers in the pack (No need to display them here) - Use Selection or Insertion sorts
// NOTE: Special care is needed when dealing with strings! research the compareTo() method with strings
}
private void searchFlowers(String flowerPack[]) {
// TODO: Search for a user specified flower
}
private void displayFlowers(String flowerPack[]) {
// TODO: Display only the unique flowers along with a count of any duplicates
/*
* For example it should say
* Roses - 7
* Daffodils - 3
* Violets - 5
*/
}
} -
MySql DBA Project 2
$20.00MySql DBA Project 2
Sometimes a search isn't thorough. For example, when looking for information on guitars, a user may search for the term "guitars" and potentially miss documents containing the word "Fender" (a type of guitar).
MySQL's solution to this problem is the WITH QUERY EXPANSION option. The syntax for this solution is as follows:
SELECT Title, AlbumDescription FROM Albums
WHERE MATCH (AlbumDescription)
AGAINST ('guitars' WITH QUERY EXPANSION);When you use WITH QUERY EXPANSION, MySQL actually searches your full text index twice. The first time it searches with the word guitars. It then takes the most relevant results from the first search, and searches again. Take a look:
mysql> SELECT Title, AlbumDescription FROM Albums
-> WHERE MATCH (AlbumDescription)
-> AGAINST ('guitars');
+---------------------+------------------------------------------+
| Title | AlbumDescription |
+---------------------+------------------------------------------+
| Blood on the Tracks | Recorded using Martin and Fender guitars |
+---------------------+------------------------------------------+
1 row in set (0.00 sec)mysql> SELECT Title, AlbumDescription FROM Albums
-> WHERE MATCH (AlbumDescription)
-> AGAINST ('guitars' WITH QUERY EXPANSION);
+----------------------+------------------------------------------+
| Title | AlbumDescription |
+----------------------+------------------------------------------+
| Blood on the Tracks | Recorded using Martin and Fender guitars |
| Highway 61 Revisited | First using the fender! |
+----------------------+------------------------------------------+
2 rows in set (0.00 sec)In the second query, the first row was matched by guitars, and the word fender was used to find the second row.
Demonstrate WITH QUERY EXPANSION by writing four new subqueries against your Albums table. In your first two queries, do not use WITH QUERY EXPANSION. In the remaining two queries DO use WITH QUERY EXPANSION.
Combine the results of the four subqueries with a UNION. Add a column to the result set called QueryExpansion that indicates which row used query expansion. Also, add a column called Query to the result to indicate which words were included in your search.
Save your query as dba1lesson11project2.sql and then hand in the project.
Learn More -
CS371 Database Design Executive Summary
$25.00CS371 Database Design Executive Summary
Write a proposal for the new database design to include:
An executive summary for the database projectDevelop main project details
Explain the issues that exist with maintaining the data in its current form.
Explain the process of migrating the data in its current form to a well formed data model by highlighting the following in detail:
Identify required attributes that need to be tracked
Identify functional dependencies
Show the redesign in 1NF, 2NF, and 3NF (similar to figures 7.29, 7.31, 7.33)Explain the project benefits of the data in its new form.
Create the E-R diagram of your relational tables using MySQL Workbench and include in proposal.
Propose some additional data items, which you believe may be beneficial to the University if tracked in your database (i.e. Descriptions, more info about the instructors and students, departments, etc). Describe the steps required to implement these additions.
Identify project risks
In addition to the proposal, in a separate file submit:
Learn More
Provide the SQL statement required to create at least one of your tables.
Provide the SQL statement required to delete at least one of your tables.
Provide the SQL statement required to create a view which includes Course #, Course Name, Time, and Days only.
Identify at least one index, which you believe would improve performance. Explain your choice.
If you add a course description attribute to your course table, there may be some performance impacts imposed by the addition of this "text" field. -
Penn Foster Graded Project 03784200 Graphical User Interface Design for Windows Forms
$20.00Penn Foster Graded Project 03784200 Graphical User Interface Design for Windows Forms
OVERVIEW
You now have the basic GUI skills to make the GroceryApp project a multiple-form application. This project will assess your understanding of using controls, menus, and handling multiple forms. Make sure that you follow all directions completely and verify your results before submitting the project. Remember to include all required components in your solution.YOUR PROJECT
In the graded project for Lesson 3, you added grocery classes to the GroceryApp project. In this project, you’ll add a form with controls and menus to allow users to add grocery items to the shopping basket. You’ll also set the startup form and manage the login form.
Note: You’ll use the output of this project in the graded project for Lesson 5.INSTRUCTIONS
1. In Visual Studio, load the GroceryApp project that you completed in Lesson 3. If this is not available, then you will need to ask your instructor for the finished Lesson 3 project.
2. Add a new form to the project named GroceryItemForm.
3. Add controls to GroceryItemForm to the layout shown
This form contains two menus, four Label controls, two TextBox controls, a NumericUpDown control, a ComboBox control, a GroupBox component, a RichTextBox control, and a Button control.
Note: See Assignment 10 in Lesson 4 for how to lay out controls.
1. Modify the design-time properties of the form and its controls using the information in Table 3.
2. Add the option E&xit to the Application menu.
3. Add the options A&dd and &View in the Basket menu.
4. Save your work on GroceryItemForm.vb.
5. Open the design view of LoginForm.vb.
6. Set the AcceptButton and CancelButton properties on LoginForm to the buttons btnLogin and btnCancel, respectively.
7. Set the PasswordChar property to * on txtPassword.
8. Set the TabIndex property for the two TextBox controls to 0 and 1, respectively.
9. In the Click event of btnCancel button, end the application.
10. Save these changes on LoginForm.vb.
11. Open GroceryItemForm.vb.
12. In the form’s Load event, display the login form modally and exit the application.
13. In the Click event of the btnAddToBasket button, perform the following steps:
a. Create a GroceryItem object using the values from the controls and add it to the basket variable.
Note: Remember the basket variable is the GroceryBasket collection.
b. Verify all controls except txtScanNumber contain a value.
c. Set the value of the txtScanNumber control using the following code:
t xt ScanNum ber. Text = _txtBrandName.Text.Substring(0,3) & "1019"
d. Instantiate the GroceryItem class, using the control values.
e. Use the following expression to set the Aisle property. The expression converts the text into an Aisle enumeration.
[Enum].Parse(Get Type(Aisle), cboAisle.Text )
f. Add the GroceryItem object to the basket variable.
14. In the Click event of the Exit menu item, end the application.
15. Have the btnAddToBasket_Click method handle the Click event of AddToolStripMenuItem as well.
16. In the Click event of the View menu item, display all of the items in the basket variable in an informational message box. You need only display the Aisle, ScanNumber and BrandName properties.
17. Set GroceryItemForm as the startup form.
18. Save and run the application. Verify that all controls and menus work correctly.
Note: You don’t need to login successfully to test the application. If you click the Close button in the top right corner of the login form, you can skip the login process. This is by design in this case, but in a real-world application, this would be considered a serious security breach.
19. Test your work.SUBMISSION GUIDELINES
To submit your project, you must provide the following files:
- LoginForm.Designer.vb
- GroceryItemForm.vb
- GroceryItemForm.Designer.vbPREPARE YOUR FILES
To find these files, go to directory where you saved the GroceryApp project. To open the project directory, right-click on GroceryApp in the Solution Explorer panel and choose the Open Folder in File Explorer option in the context menu Figure 45.
Copy the LoginForm.Designer.vb, GroceryItemForm.vb and GroceryItemForm.Designer.vb files to your desktop or any other temporary location.GRADING CRITERIA
Learn More
Your project will be graded using the following rubric:
The GroceryItemForm contains the required controls and layout 40 points
The GroceryItemForm contains the required application logic 20 points
The LoginForm has been modified correctly 10 points
All source code files are included 30 points
TOTAL 100 points -
Penn Foster Final Graded Project 03784400 Hangman Game
$25.00Penn Foster Final Graded Project 03784400 Hangman Game
OVERVIEW
Now that you've completed the lessons and required textbook reading, you're ready to put it all together for the final project. This project is a final assessment on the entire course and covers all the lessons. This is a new Windows application that's not based on the output of any previous graded projects. You may find it helpful to review the instructions of previous graded projects and the completed output from Lesson 5 graded project.
Make sure that you follow all directions completely and verify your results before submitting the project. Remember to include all required components in your solution.YOUR PROJECT
You've been tasked to create an educational game for a fifth grade reading class. The game must test student's spelling skills using a variation of the classic game Hangman. If you're unfamiliar with the rules and general game play, please consult the online reference at http://en.wikipedia.org/wiki/Hangman_(game) for more information.Database
The application will use the HangManDB.mdf file. The HangManDB database contains the tables in Figure 58. The UnitID column in the Words table is a foreign key to the ID column in the Units table. The Word column contains the actual word to guess, while the Description column contains the description of words for that unit.User Interface
The user interface will consist of a single Windows form. The user interface will resemble Figure 59.
When the application first loads, the textbox for the letter guess should be disabled (Figure 60). If the New option is chosen in the menu, then a new word and the unit description should be loaded from the database. If the Quit option is chosen in the menu, then the application should quit.After each guess, one of two things should happen. If it's a correct guess, then all occurrences of that letter should appear in the labels at the bottom. If it's an incorrect guess, then the next stage of the hangman should appear in the picture box. In either case, the textbox should highlight the letter, so that the user can make another guess. The textbox should not be cleared or the user may attempt to guess the same letter (Figure 61).
The game ends when either all letters of the word are guessed correctly or the hangman picture is completed. When the game is won (Figure 62) or lost (Figure 63), a message box should display, prompting to play again.
In either case, clicking the Yes button should have the same effect as clicking the New option in the menu, and clicking the No button should exit out of the application.
Application Files
This application will consist of the following files in the solution explorer:
1. GameForm.vb. The only form in the application.
2. HangmanDB.mdf. The database that contains the questions and unit descriptions.
3. Images folder. The images needed for the different visual states of the hangman.
4. QuestionDataSet.xsd. The DataSet for the HangmanDB database. Should contain both tables Words and Units.
HangmanDB.MDF and the Images folder will be provided to you.Provided Files
You'll be provided with the following files:
- The HangmanDB.mdf database
- The Images folder that contains the image files
Hangman-0.png, Hangman-1.png, Hangman-2.png, Hangman-3.png, Hangman-4.png, Hangman-5.png, and Hangman-6.png
- The HelperMethodsCode.txt file with suggested codeINSTRUCTIONS
1. In Visual Studio, create a new Windows Forms Application project named HangmanApp.
2. Create the Images folder in the project by using the Add > New Folder option in the Solution Explorer or the New Folder option in the Project menu
3. Add each hangman image to the Image folder. You can either click and drag them into the Solution Explorer or use the Add > Existing Item... option and select all images using the Shift key. If using the second method, make sure to change filter to All Files (*.*).
4. In the Properties panel, set the Copy To Output Directory property to Copy Always for each image file. You can use the Shift key to select all image files at once.
5. Add the HangmanDB.mdf database to the project. Use the Add > Existing Item... option. Make sure to change filter to All Files (*.*).
6. In the Data Source Configuration Wizard dialog, choose the DataSet option and then click the Next button.
7. Check the checkbox next to Tables and then click the Finish button. This will create a default dataset named HangmanDBDataSet with the Units and Words data tables.
8. Rename the Form1.vb file to GameForm.vb.
9. Click the Yes button in the dialog to rename the Form1 class as well.10. Create the user interface for GameForm.vb. See the User Interface section above for the layout. The form will consist of the following controls:
a. One MenuStrip control that contains the Game menu with the options New and Quit.
b. One Label control for instruction with the text Guess a letter; 14-point font recommended.
c. One Label control for the unit description.
d. One TextBox control for the user to type in letter choices.
e. A PictureBox control that will display the hangman images. You'll set the ImageLocation property to load the hangman images.
f. A Panel control that will contain the displayed letter labels.
g. Eleven Label controls, one for each letter of the word. These labels should be in the panel and will have an initial placeholder until the user guesses a letter.
You can choose to set the control properties to whatever you like, but below are some helpful suggestions. If you don’t name the controls with the recommended names, you will need to modify some provided code shown in Table 4.6. In the body of GameForm, you should define the following variables:
a. dsQuestions. A HangmanDBDataSet object
b. numWord. The index of which word is being guessed.
c. strWord. The actual word being guessed.
d. numRightGuesses. Number of right guesses in a game.
e. numWrongGuesses. Number of wrong guesses in a game.
f. blnGameStarted. Indicates whether the game has started or not.7. In the body of GameForm, you should define the following utility methods:
a. A method named CheckProgress that calculates the total number of tries (numRightGuesses + numWrongGuesses), displays the correct message box for winning or losing, and starts the next game or exits the application depending on the message box button
b. A method named WonGame that checks each letter in the word is matched by its label and returns True if this is the case
c. A method named LostGame that checks to see if the number of wrong guesses is greater than six and returns True if this is the case
d. A method named ResetAllLabels that sets each character label to blank text8. Open the HelperMethodsCode.txt file and copy and paste its contents into the GameForm class.
Note: These handy methods will reduce your development time. Think of it as help from a colleague, because you’ll rarely develop a business application alone and most often will work within a team.9. In the body of GameForm, you should have the following event procedures:
a. Form Load event handler. Disable the txtGuess textbox, initialize numWord to -1 to indicate no word has been chosen, and call the LoadData method.
b. Quit button Click event handler. Exit the application
c. In the New button Click event handler, perform the following tasks:
I. Initialize all variables, especially numRightGuesses, numWrongGuesses, blnGameStarted, and numWord. Make sure to increment numWord to the next index. Each game will increment this number by one.
II. Initialize controls. Clear the text of all controls, including the labels, textbox, and picture box. For the picture box, you can just set its ImageLocation to “”.
III. Enable and set the focus of the txtGuess textbox.
IV. Set controls using the DataSet. If you followed the same names, then you can use this code:
‘Get a word column row
strWord = CStr(dsQuestions.Words(numWord)(1))
‘Gets unitdescription
lblUnitDescription.Text = CStr(dsQuestions.Words(numWord).UnitsRow(1))
V. Set the Text property to the underscore character (_) for each label control based on the number of characters in the word.
D. In the txt Guess text box Text Changed event, perform the following tasks:
I. Check if the game is started using the blnGameStarted variable and that the txtGuess textbox contains a value. Clearing a textbox will trigger a TextChanged event, so you’ll need to
verify a letter was actually typed by the user.
II. Check to see if the word (strWord) contains the guess (txtGuess).
III. If it does, then call the SetRightLetterLabels method and increment the numRightGuesses variable.
IV. If it doesn't, set the image in the pboxHangman and increment the numWrongGuesses variable.
Your code should resemble the following:
pboxHangman.ImageLocation ="images\Hangman-" & numWrongGuesses & ".png"
numWrongGuesses + = 1
V. Check to see if the game has been won or lost yet. Use the CheckProgress method.
VI. Select the text in the txtGuess textbox.10. Save and run the application. Verify that all controls and menus work correctly. You’ll submit the compiled application for this project.
SUBMISSION GUIDELINES
You’ll submit the HangmanApp.exe file for your project.
To find this file, you should go to directory to where you saved the HangmanApp project and copy the HangmanApp.exe file from the bin\Debug folder. Make sure the HangmanApp.exe file executes before submission. The Images folder and HangmanDB.mdf must be in the same directory as the HangmanApp.exe to execute as expected.Use the following procedure to submit your project online:
Learn More
1. Log in to view your student homepage and go to the My Courses page.
2. Click the Take Exam link next to the lesson you’re working on.
3. Attach our files as follows:
a. Click the Browse button.
b. Locate the file you wish to attach.
c. Double-click on the file.
d. Click the Upload File button.
4. Enter your email address in the box provided.
(Note: Your email address is required for online submissions.)
5. If you wish to include comments about this project to your instructor, enter your comments in the Message textbox.
6. Click Submit Files. -
POS 409 Week 3 Sorting and Searching C# Program
$20.00POS 409 Week 3 Sorting and Searching C# Program
Create a text file with one record of text data. This text file will be read by the program and the data in the text file will serve as a search term.
Design, implement, test, and debug a C# program using the following guidelines.
In the form load event, read the text file you built. This row of data will be a word or phrase that may occur in the data entered on the form (referred to later as "search term"). Convert the text read to uppercase.
Create a form with textboxes for 10 input fields. Designate the fields in such a way that the user enters specific data (for example, movies, books, names, or sports). The data entered should be of type string.
Add a button, "Accept Input", to accept the input. In the click event for the button, validate the input and load the input into an array.
Validate the input by calling a value-returning method. Pass the 10 input fields to the method and return a value to indicate whether or not the data passed validation (for example, you can return a zero if the data passed validation and a 1 if it did not). Validation should consist of checking if data was entered in the field. Notify the user if the data is not valid and stop execution.
Add a void method that loads the input fields into an array and converts the data in them to uppercase.Add another button, "Sort Input", to sort the input data. In the click event for the button, add a void method to do the sorting. In the void method, use the selection sort algorithm presented in chapter 7 to sort the data. After sorting, in the button click event, create a loop to iterate through the array of sorted data and display the data in a listbox on the form.
Add a final button to the form, "Check Input". In the click event for the button, call a value-returning method. This method will compare the data in the array and the search term (data read in the form load event). Count the number of elements in the array in which the search term is found. Pass the number of times the word or phrase is found back as the value returned. Put the results in a label on the form. For example, if my search term is "the", the label might say "Search term - the - is found 3 times in the input data". The search should count as a match if the search term is only a portion of the array element. For example, if your search term is "the" and the array element is "The Old Man and The Sea", it should count as a match because "the" is contained within the array element. However, you do not need to count all occurrences of the search term in the array element. So, in "The Old Man and The Sea" example, count once, not twice.
Here is an example. My search term is "the". The array elements are: "The Old Man and The Sea", "Jane Eyre", "Moby Dick", "The Great Gatsby", "MacBeth", "The Iliad and the Odyssey", "Huckleberry Finn", "Catch-22", "To Kill a Mockingbird", and "The Bell Jar". With this data, the program should find 4 occurrences of the search term (those array elements that are underlined).
The type of application to be developed is a Windows Forms application.
Please note that the reason the selection sort algorithm is required for this assignment is two-fold. First, it will give you a chance to look at someone else's code and learn it well enough to figure out how to modify it. Second, it will give you additional practice with string handling when you learn how to compare strings. It is not acceptable to try to find another way to sort the data.
Include identifying information in the form of block comments at the top of each class in the project (programmer name, date, program description). Include adequate comments throughout the program, utilize meaningful names for controls, variables, fields, and forms. Include white space for readability purposes in the code. The focus of the project is on learning the C#.Net syntax. However, ensure the form is simple and easy to understand for the user. Refer to the Individual Assignment grading form to view grading criteria.
Zip the files of the project together and submit the zipped file. Include the text file used in your zip file also.
Learn More

You have no items in your shopping cart.
