Search results for 'GU 371'
-
Bigger Vision of Athens Lab 4 Create Table in Oracle
Regular Price: $12.00
Special Price $10.00
Bigger Vision of Athens Lab 4 Create Table in Oracle
For this lab we will be taking the final set of 3NF tables developed from our normalization process in Lab 3 and creating them into Oracle Database (through installing or using an online tool).
(Please review the tutorials posted in Week 9 to check your work from Lab 3 and get it into the correct form)
You will use SQL and the CREATE TABLE command to create each table with its various attributes (columns).
You will then use the INSERT INTO command to add 5 rows of sample data to populate each table.
After creating the tables and entering the data, use the SELECT * FROM {tablename} command to list all of the data in each table. You can do a screen capture to save the table data.Turn in the following:
*A text file containing all the SQL commands you used to create each tables, insert the data, and select it in order.
*Screenshots for each of your tables with all of the dataScenario:
Bigger Vision of Athens You have been asked to develop a database system for the Bigger Vision of Athens Emergency Shelter.
BVoA is a small, community shelter with approximately 142 beds.
The basic goal is to provide hot meals, showers, laundry services, and a place to stay at night for the surrounding community in North Georgia.
The various business functions that the non-profit currently has are:
1. Guest management software: Stores information about guests of the shelter
2. Volunteer management software: Records information about the shelter's volunteers
3. Scheduling software: Assigns guests and volunteers to specific days of the month
4. Financial management software: Tracks the shelter inventory, financial resources, and operations of the shelter, including donor information
5. Administrative services software: Provide general management and support services for board members not directly related to shelter operationsExamples of shelter software operations include: scheduling guests for the night, scheduling volunteers in advance for certain days, clocking guests and volunteers in and out, recording meals, showers, and laundry services, writing up guests for rule violations, reviewing inventory levels of needed supplies, putting in requests for new supplies, logging board meeting notes, and saving donor information.
Learn More
The staff at the shelter include 80 full-time personnel and 30 part-time personnel, such as: the executive director, board members, administrative staff, day workers, night workers, job counselors, social services staff, technical support staff, cooking staff, janitorial staff, and security staff. -
Bigger Vision of Athens Lab 3 Normalization
Regular Price: $12.00
Special Price $10.00
Bigger Vision of Athens Lab 3 Normalization
For this lab, we will be completing the Normalization step for several of your entities from your E/R diagram.
You will normalize the following entities to 3rd normal form:
GUEST
INVENTORY
VOLUNTEER
SCHEDULE
DONOR
(Show ALL steps, from 1st normal form to 2nd normal form to 3rd normal form)
After going through your steps of normalization, add in your Foreign keys based on your cardinalities from your E/R diagram. Be sure you include your attributes in your table from Lab 2.Scenario:
Bigger Vision of Athens You have been asked to develop a database system for the Bigger Vision of Athens Emergency Shelter.
BVoA is a small, community shelter with approximately 142 beds.
The basic goal is to provide hot meals, showers, laundry services, and a place to stay at night for the surrounding community in North Georgia.
The various business functions that the non-profit currently has are:
1. Guest management software: Stores information about guests of the shelter
2. Volunteer management software: Records information about the shelter's volunteers
3. Scheduling software: Assigns guests and volunteers to specific days of the month
4. Financial management software: Tracks the shelter inventory, financial resources, and operations of the shelter, including donor information
5. Administrative services software: Provide general management and support services for board members not directly related to shelter operationsExamples of shelter software operations include: scheduling guests for the night, scheduling volunteers in advance for certain days, clocking guests and volunteers in and out, recording meals, showers, and laundry services, writing up guests for rule violations, reviewing inventory levels of needed supplies, putting in requests for new supplies, logging board meeting notes, and saving donor information.
Learn More
The staff at the shelter include 80 full-time personnel and 30 part-time personnel, such as: the executive director, board members, administrative staff, day workers, night workers, job counselors, social services staff, technical support staff, cooking staff, janitorial staff, and security staff. -

New Perspectives on HTML, CSS, and Dynamic HTML 5th edition Tutorial 13 Case 3 The 221B Blog
Regular Price: $15.00
Special Price $12.00
New Perspectives on HTML, CSS, and Dynamic HTML 5th edition Tutorial 13 Case 3 The 221B Blog
The 221B Blog Kyle Harris is a fan of mystery stories. His favorites are the Sherlock Holmes stories by Sir Arthur Conan Doyle. Kyle decided to create a Web site for other fans of the fictional detective; the site is called The 221B Blog, named after the street number of Holmes’ fictional Baker Street address.
On his Web site, Kyle has added a discussion forum, links to other mystery Web sites, and a place for members to post artwork, essays, and fan fiction. Kyle also has created links to online text versions of all of the 56 short stories and four novels in the Sherlock Holmes canon. Kyle is concerned that having so many links on the home page will make it difficult for users to navigate the site. He’s seen sites in which lists of links are stored in popup or pull-down menus, remaining out of sight until needed by a user. Kyle wants to add a similar feature to his Web site and has asked you to help him write the code.
Each pull-down menu will have a heading that identifies the contents of the menu. Kyle envisions the HTML structure shown in Figure 13-41 in which the pull-down menus are nested within another list that acts as a menu bar. Each pull-down menu is identified with the class name submenu, and the h1 element containing each heading is identified with the class name submenuHead.Kyle already has created the style sheet for the menus and the HTML code for the Web page. Your job will be to write the JavaScript code to control the operation of the pull-down menus on the page.
Complete the following:
Learn More
1. Using your text editor, open the holmestxt.htm, pulltxt.css, and pulltxt.js files from the tutorial.13\case3 folder, enter your name and the date in the comment section of each file, and then save the files as holmes.htm, pullmenu.css, and pullmenu.js, respectively.
2. Take some time to view the contents of the holmes.htm file in your text editor, noting the structure of the two navigation lists and the submenus within each of those lists.
3. Open the holmes.htm file in your Web browser, and then study the placement of the six pull-down menus for the stories and novels of Sherlock Holmes. The page also contains four pull-down menus in the vertical navigation bar containing links to Web sites for User Submissions, Holmes on the Web, Arthur Conan Doyle, and Other Fictional Detectives, but these are obscured by the horizontal pull-down menus at the moment.
4. Go to the pullmenu.css file in your text editor. At the bottom of the file, insert the following two style rules: i) hide the ul elements nested within the li elements belonging to the submenu class by setting their display property to none; and ii) display a pointer cursor for h1 elements belonging to the submenuHead class.
5. Save your changes to the file and then return to the holmes.htm file in your text editor.
6. Add a script element linking the file to the pullmenu.js file and then close the file, saving your changes.
7. Go to the pullmenu.js file in your text editor. Insert a command to run the init() function when the page is loaded by the browser.
8. Create the init() function. The purpose of this function is to add a dynamic id attribute
to each pull-menu heading, and to create an onclick event handler for each submenu heading. Add the following commands to the function:
a. Create the submenuHeads variable containing the object collection for all elements in the document belonging to the submenuHead class.
b. Loop through the submenuHeads object collection, and for each item in the collection do the following: i) add the id attribute isubmenu_heading to the element, where i is the index number of the item in the object collection; and ii) run the showMenu() function when the item is clicked.
9. Create the hideAllMenuLists() function. The purpose of this function is to hide all pull-down menus on the page. Add the following commands to the function:
a. Create the allMenuLists variable referencing all of the ul elements in the document that are nested within the li elements belonging to the submenu class. (Hint: Use the querySelectorAll() method.)
b. Loop through the allMenuLists object collection. For each item in the collection, set the display style property value to none.
10. Create the showMenu() function. The purpose of this function is to display the pulldown menu corresponding to the menu heading that was clicked by the user. Add the following commands to the function:
a. Create the subIndex variable containing the index number found within the id property of the heading that was clicked by the user. (Hint: Use the parseInt() function to extract the index number.)
b. Create the allMenus variable containing the object collection of all elements belonging to the submenu class.
c. Create the currentMenu variable containing the element from the allMenus object collection with the index number indicated by the subIndex variable.
d. Create the currentMenuList containing the first ul element nested within the currentMenu object. This will be the pull-down menu that you will either hide or display on the page.
e. If the display property of currentMenuList is equal to block, change the display property to none to hide it; otherwise, because currentMenuList must be hidden, run the hideAllMenuLists() function to hide all other pull-down menus on the page and change the display style property of currentMenuList to block.
11. Document your code with informative comments throughout the JavaScript file.
12. Save your changes to the file, and then reload holmes.htm in your Web browser. Verify that when you click the pull-down menu headings located on the menu bar or on the vertical navigation list, the corresponding menu is displayed. Further verify that only one pull-down menu can be displayed at a time. Finally, verify that you can hide any pull-down menu by clicking the menu heading a second time.
13. Submit your completed files to your instructor, in either printed or electronic form, as requested. -

IT 401 Business Computer Languages Java programs
Regular Price: $15.00
Special Price $12.00
IT 401 Business Computer Languages Java programs
Q1.:
Write a complete Java program (code + screenshot of output) that performs the following:
Given the following marks of a student: 84, 72, 91, 61, 69, 77
• Create an array (marksArray) to include all of student marks.
• Create a method (smallest) to find the smallest mark and print its value.
• Create a method (average) to compute the average of a student marks and return its value to the caller.
• Create a new array (backup) to copy all marks of the current array (marksArray). (Hint: use Arrays.copyOf method)
Answer:Q2.:
Write a complete Java program (code + screenshot of output) that performs the following:
• Create an array list and add the following items: [Toyota, Nissan, Mercedes, Mazda].
• Print out the existing items of the array list on the screen.
• Replace the item "Mercedes" with "Kia", and remove the item "Mazda".
• Print out the current array list items in the opposite order.
Answer:Q3.:
Write a complete Java program (code + screenshot of output) that performs the following:
• Write a while loop that reads integer values entered by user.
• Stop when a user enters any non-integer value.
• Compute the sum of all entered values that are greater than Zero and print the result on the screen.
Answer:Q4.:
Each of the following Java code contains one or more errors. Find the error(s) and modify the code so that it will work properly.
# Original Code Correct Code
1. int[] values= values [10];
for (int i = 0; i <= 10; i++)
{
values [i] = i * i;
}2. int count= -10;
while (count<0)
{
System.out.println(count);
}3.
for (double i : values)
{
Sum = sum + values [i];
i++;
}
4. int fractions[] = [2.8, 5.5, 4.6];5. ArrayList<int> arr = new ArrayList();
arr.add(5);
System.out.println(arr.length);6. for (int i = 0; i < arrSize; i++)
Learn More
{
System.out.println(values);
} -

OOP2200 Lab 8 Structs and File I/O CPP
Regular Price: $15.00
Special Price $12.00
OOP2200 Lab 8 Structs and File I/O CPP
This lab assignment will be completed by pairs of students. Submissions by individual students will not be accepted under normal circumstances. The intent is that the two students work together. In this lab you will be creating a “Plain-Old-Data” structure to store basic pay record information. You will use that structure to store raw pay record data read from a data file and produce a formatted report as a text file.Raw Data
The data file "hours.txt" (provided), stores data for a number of employees. Each employee is recorded as follows: first name, last name, number of hours worked this week, and wage-per-hour. It currently contains the following data, but please note the file your instructor uses to test your program may contain a different number of records.
John Smith 25.0 15.00
Mary Jones 33.5 17.50
Pat Brown 40.0 21.00
Jen Simpson 37.5 18.00
Gary Phillips 15.0 11.25PayRecord struct
Create a data structure called PayRecord that has data-members for each of the four fields of information we are recording: first name, last name, number of hours worked this week, and wage-per-hour. When you read a line from the input file, you will be storing it in a PayRecord struct.Reading the Input File and Writing to the Output File
Read raw data from the "hours.txt" data file (using your PayRecord struct) and produce a report in a file called "pay.txt". The report must contain the following:
• Each employee name in the format first initial only, followed by ".", followed by last name. (e.g. Thom MacDonald becomes T. MacDonald)
• The pay for each employee (hours worked * wage) formatted as currency.
• The grand total paid to all employees for the week.
Use the following may as a guide. You should try to match the format of this report as closely as possible.
YOUR NAME
PAY FOR THIS WEEK
=========================
J. Smith $ 375.00
M. Jones $ 586.25
P. Brown $ 840.00
J. Simpson $ 675.00
G. Phillips $ 168.75
=========================
Total: $ 2645.00Notes:
Learn More
1. Ensure that both the input and output files open properly. You should not process any file that is not open. Ensure to close both files when complete.
2. Each employee occurs in the data file one time only. If any of the names appear in your report more than once, you have made a logic error.
3. You are not required to output the report to the screen.
4. One viable approach is to read one line from the input file and then write one line to the report in a loop until there are not more records. Another approach is to read all the records in the input file into a vector first, then produce the report from the vector. Either approach is fine. There is no explicit requirement to read and store all of the pay records before you begin writing the report.
General Requirements
• Include an opening comment with both partner's names, the name of the program, the date, and a short description.
• Follow the course coding standards! Use descriptive names and sensible data-types for variables, constants, functions, etc. that follow our naming conventions.
• Use good spacing and make sure braces ({}) are located where they are supposed to be, and indentation follows Allman style.
• Attach your unzipped source code file(s) (.cpp, .h) to the assignment folder. Nothing else please. -
New Perspectives HTML5 and CSS3 7th Edition Tutorial 10 Case 1 Trophy Case Sports
Regular Price: $20.00
Special Price $15.00
New Perspectives HTML5 and CSS3 7th Edition Tutorial 10 Case 1 Trophy Case Sports
Trophy Case Sports Sarah Nordheim manages the website for Trophy Case Sports, a sports memorabilia store located in Beavercreek, Ohio. She has asked you to work on creating a script for a shopping cart page. The script should take information on the items that the customer has purchased and present in it table form, calculating the total cost of the order. A preview of the page you will create is shown in Figure 10-35.
Sarah has already designed the page layout. Your job will be to use JavaScript to enter the order information (this task will later be handled by a script running on website) and to write a script that generates the HTML code for the shopping cart table.
Complete the following:
1. Use your editor to open the tc_cart_txt.html, tc_cart_txt.js and tc_order_txt.js files from the htm10 case 1 folder. Enter your name and the date in the comment section of each file, and save them as tc_cart.html, tc_cart.js and tc_order.js respectively.2. Go to the tc_cart.html file in your editor. Directly above the closing </head> tag, insert script elements to link the page to the tc_order.js and tc_cart.js files in that order. Defer the loading and running of both script files until after the page has loaded.
3. Scroll down the file and directly below the h1 heading titled "Shopping Cart" insert a div element with the ID cart.
4. Save your changes to the file and go to the tc_ordet.js file in your editor.
5. Within the tc_order.js file, you will create arrays containing information on a sample customer order. Create an array named item that will contain the ID numbers of the items purchased by the customer. Add the following four item numbers to the array: 10582, 23015, 41807, and 10041.
6. Create an array named itemDescription containing the following item descriptions:
• 1975 Green Bay Packers Football (signed), Item 10582
• Tom Land, 1955 Football Card (unsigned), Item 23015
• 1916 Army-Navy Game, Framed Photo (signed), Item 41807
• Protective Card Sheets, Rem 100417. Create an array named itemPrice containing the following item prices: 149.93, 89.98, 334.93, and 22.67.
8. Create an array named itemQty containing the following quantities that the customer ordered of each item: 1, 1, 1, and 4.
9. Save your changes to the file, and then open the tc_cart.js file in your editor.
10. In your script, you will calculate a running total of the cost of the order. Declare a variable named orderTotal and set its initial value to 0.
11. Declare a variable named cartHTML that will contain the HTML code for the contents of the shopping cart, which will be displayed as a table. Set its initial value to the text string:
<table>
<tr>
<th>Item</th><th>Description</th><th>Price</th><th>Qty</th><th>Total</th>
</tr>12. Create a for loop that loops through the entries in the item array. Each time through the loop, execute the commands described in Steps a through e.
a. Add the following HTML code to the value of the cartHTML variable
<tr> <td><img src='tc_item.png' alt='item' /> </td>
where item is the current value from the item array.
b. Add the following HTML code to the cartHTML variable to display the description, price, and quantity ordered of the item
<td> description</td> <td>price</td> <td>quantity</td>
where description is the current value from the itemDescription array, price is the current value from the itemPrice array preceded by a $ symbol, and quantity is from the itemQty array.
c. Declare a variable named itemCost equal to the price value multiplied by the quantity value for the current item.
d. Add the following HTML code to the cartHTML variable to display the cost for the item(s) ordered, completing the table row
<td>$cost</td></tr>
where cost is the value of the itemCost variable, preceded by a $ symbol.
e. Add the value of the itemCost variable to the order Total variable to keep a running total of the total cost of the customer order.13. After the tor loop has completed, add the following HTML code to the value of the cartHTML variable, completing the shopping cart table
<tr>
<td colspan= '4'>Subtotal</td>
<td>Total</td>
</tr>
</table>
where total is the value of the orderTotal variable, preceded by a $ symbol.14. Apply the cartHTML value to the inner HTML of the div element with the ID cart.
15. Document your script file with appropriate comments, and then save your work.
16. Open the tc_cart.html file in your browser and verify that the page now shows the shopping cart data for the sample customer order.
Learn More -

PRG 421 Week 3 Individual Coding Assignment
Regular Price: $10.00
Special Price $7.00
PRG 421 Week 3 Individual Coding Assignment
For this assignment, you will develop "starter" code. After you finish, your code should access an existing text file that you have created, create an input stream, read the contents of the text file, sort and store the contents of the text file into an ArrayList, then write the sorted contents via an output stream to a separate output text file.
Learn More
Copy and paste the following Java™ code into a JAVA source file in NetBeans:
import java.io.BufferedReader;
import java.io.BufferedWriter;
public class Datasort {
public static void main (String [] args) {
File fin = // input file
File fout = // create an out file
// Java FileInputStream class obtains input bytes from a file
FileInputStream fis = new FileInputStream(fin);
// buffering characters so as to provide for the efficient reading of characters, arrays, and lines
BufferedReader in = new BufferedReader(new InputStreamReader(fis));
// declare an array in-line, ready for the sort
String aLine;
ArrayList al = new ArrayList ();
int i = 0;
while ((aLine = in.readLine()) != null) {
// set the sort for values is greater than 0
Collections.sort(al); // sorted content to the output file
{
System.out.println(s);
}
// close the 2 files
}
}
Add code as indicated in the comments.
Note: Refer to this week's Individual assignment, "Week Three Analyze Assignment," and to Ch. 8, "IO," in OCP: Oracle® Certified Professional Java® SE 8 Programmer II Study Guide.
Run and debug your modified program in NetBeans until it satisfies the requirements described above.
Save your finalized JAVA file with a .txt extension.
Submit your TXT file to the Assignment Files tab. -

PRG 421 Week 1 Individual Analyze Assignment Analyzing a Java Program Containing Abstract and Derived Classes
Regular Price: $6.00
Special Price $4.00
PRG 421 Week 1 Individual Analyze Assignment Analyzing a Java Program Containing Abstract and Derived Classes
"Analyzing a Java™ Program Containing Abstract and Derived Classes"
The purpose of creating an abstract class is to model an abstract situation.
Example:
You work for a company that has different types of customers: domestic, international, business partners, individuals, and so on. It well may be useful for you to "abstract out" all the information that is common to all of your customers, such as name, customer number, order history, etc., but also keep track of the information that is specific to different classes of customer. For example, you may want to keep track of additional information for international customers so that you can handle exchange rates and customs-related activities, or you may want to keep track of additional tax-, company-, and department-related information for business customers.
Modeling all these customers as one abstract class ("Customer") from which many specialized customer classes derive or inherit ("International Customer," "Business Customer," etc.) will allow you to define all of that information your customers have in common and put it in the "Customer" class, and when you derive your specialized customer classes from the abstract Customer class you will be able to reuse all of those abstract data/methods.This approach reduces the coding you have to do which, in turn, reduces the probability of errors you will make. It also allows you, as a programmer, to reduce the cost of producing and maintaining the program.
In this assignment, you will analyze Java™ code that declares one abstract class and derives three concrete classes from that one abstract class. You will read through the code and predict the output of the program.
Read through the linked Java™ code carefully.
Predict the result of running the Java™ code. Write your prediction into a Microsoft® Word document, focusing specifically on what text you think will appear on the console after running the Java™ code.
In the same Word document, answer the following question:
Why would a programmer choose to define a method in an abstract class, such as the Animal constructor method or the getName() method in the linked code example, as opposed to defining a method as abstract, such as the makeSound() method in the linked example?Supporting Material: Week One Analyze Assignment Text File
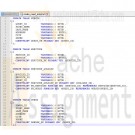
/**********************************************************************
* Program: PRG/421 Week 1 Analyze Assignment
* Purpose: Analyze the coding for an abstract class
* and two derived classes, including overriding methods
* Programmer: Iam A. Student
* Class: PRG/421r13, Java Programming II
* Instructor:
* Creation Date: December 13, 2017
*
* Comments:
* Notice that in the abstract Animal class shown here, one method is
* concrete (the one that returns an animal's name) because all animals can
* be presumed to have a name. But one method, makeSound(), is declared as
* abstract, because each concrete animal must define/override the makeSound() method
* for itself--there is no generic sound that all animals make.
**********************************************************************/package mytest;
// Animal is an abstract class because "animal" is conceptual
// for our purposes. We can't declare an instance of the Animal class,
// but we will be able to declare an instance of any concrete class
// that derives from the Animal class.
abstract class Animal {
// All animals have a name, so store that info here in the superclass.
// And make it private so that other programmers have to use the
// getter method to access the name of an animal.private final String animalName;
// One-argument constructor requires a name.
public Animal(String aName) {
animalName = aName;
}// Return the name of the animal when requested to do so via this
// getter method, getName().
public String getName() {
return animalName;
}// Declare the makeSound() method abstract, as we have no way of knowing
// what sound a generic animal would make (in other words, this
// method MUST be defined differently for each type of animal,
// so we will not define it here--we will just declare a placeholder
// method in the animal superclass so that every class that derives from
// this superclass will need to provide an override method
// for makeSound()).
public abstract String makeSound();
};// Create a concrete subclass named "Dog" that inherits from Animal.
// Because Dog is a concrete class, we can instantiate it.
class Dog extends Animal {
// This constructor passes the name of the dog to
// the Animal superclass to deal with.
public Dog(String nameOfDog) {
super(nameOfDog);
}// This method is Dog-specific.
@Override
public String makeSound() {
return ("Woof");
}
}// Create a concrete subclass named "Cat" that inherits from Animal.
// Because Cat is a concrete class, we can instantiate it.
class Cat extends Animal {
// This constructor passes the name of the cat on to the Animal
// superclass to deal with.
public Cat(String nameOfCat) {
super(nameOfCat);
}// This method is Cat-specific.
@Override
public String makeSound() {
return ("Meow");
}
}class Bird extends Animal {
// This constructor passes the name of the bird on to the Animal
// superclass to deal with.
public Bird (String nameOfBird) {
super(nameOfBird);
}// This method is Bird-specific.
@Override
public String makeSound() {
return ("Squawk");
}
}public class MyTest {
Learn More
public static void main(String[] args) {
// Create an instance of the Dog class, passing it the name "Spot."
// The variable aDog that we create is of type Animal.
Animal aDog = new Dog("Spot");
// Create an instance of the Cat class, passing it the name "Fluffy."
// The variable aCat that we create is of type Animal.
Animal aCat = new Cat("Fluffy");
// Create an instance of (instantiate) the Bird class.
Animal aBird = new Bird("Tweety");
//Exercise two different methods of the aDog instance:
// 1) getName() (which was defined in the abstract Animal class)
// 2) makeSound() (which was defined in the concrete Dog class)
System.out.println("The dog named " + aDog.getName() + " will make this sound: " + aDog.makeSound());
//Exercise two different methods of the aCat instance:
// 1) getName() (which was defined in the abstract Animal class)
// 2) makeSound() (which was defined in the concrete Cat class)
System.out.println("The cat named " + aCat.getName() + " will make this sound: " + aCat.makeSound());
System.out.println("The bird named " + aBird.getName() + " will make this sound: " + aBird.makeSound());
}
} -

New Perspectives on HTML, CSS, and Dynamic HTML 5th edition Tutorial 14 Case 1 New Accents Photography
Regular Price: $15.00
Special Price $12.00
New Perspectives on HTML, CSS, and Dynamic HTML 5th edition Tutorial 14 Case 1 New Accents Photography
After you have completed all of the tutorials in Chapter 14, turn to page 1001 in your textbook and do Case Problem 1, New Accents Photography. Make sure all files are uploaded to cPanel and submit your URL for the accents.htm file when you are finished.
Use JavaScript to create a dynamic style sheet switcher.
Data files needed for this Case Problem: accentstxt.htm, base.css, elegant.css, elegant.png, elegant_back.png, elegant_small.png, innovative.css, innovative.png, innovative_back.png, innovative_small.png, joyous.css, joyous.png, joyous_back.png, joyous_small.png, modernizr-1.5.js, nalogo.png, romantic.css, romantic.png, romantic_back.png, romantic_small.png, styletxt.js, zany.css, zany.png, zany_back.png, zany_small.png
New Accents Photography Christine Drake is the owner and chief photographer at New Accents Photography, a photography studio in Ashland, Oregon, that specializes in wedding photos. Wedding portraiture is a competitive business. and Christine wants to improve the design of her Web site's opening page to help interest couples in viewing her work. Christine is proud of the many and varied styles of portraiture that New Accents Photography offers, and she would like to create an interactive style sheet switcher that loads different style designs based on her photos.
Christine envisions making several style sheets, and she wants to limit the amount of work she'll have to do when updating the HTML code as she adds new sheets to her site. She would like your help with writing a JavaScript app that examines the list of style sheets in the site's home page and creates a figure box of clickable thumbnail images for each sheet design. A preview of the page you'll create for Christine is shown In figure 14-66.Christine already has written the style sheet code and most of the HTML code. Your job will be to write the JavaScript code to enable her customers to switch from one style design to another.
Complete the following:
1. Using your text editor, open accentstxt.htm and styletxt.js from the tutorial.14\case1 folder. Enter your name and the date in the comment section of each file, and then save the files asaccents.htm and stylebox.js, respectively.2. Go to the accents.htm file in your text editor. Currently, Christine has only one persistent style sheet linked to her document. Create a link to the preferred style sheet romantic.css and give it the title romantic.
3. Create links to the following alternate style sheets: elegant.css, joyous.css, innovative.css, and zany.css. Give the style sheets the titles elegant, joyous, innovative, and zany, respectively. Do not disable any of these style sheets at this time.
4. Create a link to the styleBox.js file. Take some time to study the rest of the HTML code and then close the file, saving your changes.
5. Go to the styleBox.js file in your text editor. Below the comments, declare a global variable named allSheets and set it equal to an empty array. The purpose of the allSheets variable will be to store references to each preferred and alternate style sheet in the document.
6. Add a command to run the loadStyles() function when the page is initially loaded.
7. Create the loadStyles() function. The purpose of this function is to load all of the preferred and alternate style sheets into the allSheets variable. Add the following commands to the function:
a. Declare the links variable referencing all link elements in the document.
b. Loop through the contents of the links object collection. For each item, determine whether it represents a preferred or alternate style sheet with a defined title.
c. Disable each alternate style sheet, but leave the preferred style sheet enabled.
d. Use the push() array method to add each preferred or alternate style sheet to the allSheets array.
e. After the completion of the for loop, call the displayThumbs() function.
8. Create the displayThumbs() function. The purpose of this function is to display thumbnail images of each style sheet design from the allSheets array. Add the following commands to the function:
a. Create an element node for the figure element and store it in the figBox variable.
b. Set the id of the figBox element node to the text string thumbnails.
c. Loop through each item in the allSheets array, and do the following for each item:
i) create an element node for the img element and store it in the sheetImg variable;
ii) set the source of the sheetImginline image to the file title_small.png, where title is the title value of the current style sheet in the loop; iii)set the title attribute of the inline image to match the title attribute of the current style sheet;
iv) add an onclick event handler to the inline image to run the showSheet() function when clicked; and
v) append sheetImg to the figBox node.
d. After the for loop has completed, append the figBox node to the document element with the id main.
9. Create the showSheet() function. The purpose of this function is to change the style sheet used in the document. Add the following commands to the function:
a. Declare the variable sTitle, setting it equal to the title attribute of the inline image that called the showSheet() function. (Hint: Use the this keyword to reference the inline image.)
b. Loop through all of the sheets in the allSheets array. Enable the style sheet whose title attribute equals sTitle and disable all of the others.
10. Document your work with descriptive comments throughout your code.11. Save your changes to the file, and then open accents.htm in your Web browser. Verify that five inline images have been added near the bottom of the Web page. Click each thumbnail image and verify that it loads a different style sheet. (Note: If you are using Safari for Windows or Macintosh Version 5.1.2, this style sheet switcher will not work.)
12. Submit your completed files to your instructor, in either printed or electronic form, as requested.
Learn More -
PRG420 Week 2 Individual Assignment Coding a Program Containing if-then and switch
Regular Price: $10.00
Special Price $7.00
PRG420 Week 2 Individual Assignment Coding a Program Containing if-then and switch
Individual: Coding a Program Containing if-then and switch
Includes Working Java Build and Program File and Explanation of Code
Resources: Week Two Coding Assignment Zip File (starter code for this assignment that includes placeholders), and Week Two Recommended Activity Zip File (examples of how to code a switch statement, an if-then-else statement, and how to construct a string to display text onscreen).
For this assignment, you will apply what you learned in analyzing Java™ code so far in this course by writing your own Java™ program.
The Java™ program you write should do the following:
• Accept user input that represents the number of sides in a polygon. Note: The code to do this is already written for you.
• If input value is not between 3 and 5, display an informative error message
• If input value is between 3 and 5, use a switch statement to display a message that identifies the correct polygon based on the number of sides matching the input number (e.g., triangle, rectangle, or polygon)
Complete this assignment by doing the following:
1. Download and unzip the linked Week Two Coding Assignment Zip File.
2. Read the file carefully, especially the explanatory comments of what the existing code does.
3. Add your name and the date in the multi-line comment header.
4. Refer to the following linked Week Two Recommended Activity Zip File to see examples of how to code all of the Java™ statements (i.e., switch, println(), and if-then-else) you will need to write to complete this assignment.
5. Replace the following lines with Java code as directed in the file:
• LINE 1
• LINE 2
6. Comment each line of code you add to explain what you intend the code to do.
7. Test and modify your Java™ program until it runs without errors and produces the results as described above.
Note: Refer to this week's analyzing code assignment if you need help.
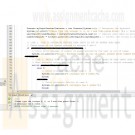
Submit your Java source (.java) code file using the Assignment Files tab./**********************************************************************
* Program: PRG/420 Week 2
* Purpose: Week 2 Coding Assignment
* Programmer: Iam A. Student
* Class: PRG/420 PRG420 PRG 420
* Creation Date: 10/18/17
*********************************************************************
*
**********************************************************************
* Program Summary: This program demonstrates these basic Java concepts:
* - defining variables of different types
* - if-then and if-then-else logic
* - constructing a string to display onscreen
* - switch logic
*
* To finish assignment, you will add code where indicated. The
* behavior of your completed assignment should be to accept an input
* value for the number of sides of a two-dimensional figure. Based on that value,
* your code should display the type of figure that corresponds to the number of polygon angles
* indicated (3=triangle, 4=rectangle, etc.)
*
* Here are the specific requirements:
*
* After the user types in a value from 3 to 5 inclusive (i.e., 3, 4, or 5):
*
* 1. Your code determines whether the input value is out of range (less than 3 or more than 5)
* and, if so, displays a meaningful error message on the screen and ends the program.
*
* 2. Because you will be comparing a single expression (the input value) to multiple constants (3, 4, and 5),
* your code should use a switch statement to display the following message onscreen:
*
* If user inputs 3, onscreen message should say "A triangle has 3 sides."
* If user inputs 4, onscreen message should say "A rectangle has 4 sides."
* If user inputs 5, onscreen message should see "A pentagon has 5 sides."
*
* 3. Be sure to test your program. This means running your program multiple
* times with test values 3, 4, 5, as well as at least two values that fall outside that range
* (one lower than the lowest and one higher than the highest) and making sure
* that the correct message displays for each value you input. Also be sure
* that running your program does not cause any compiler errors.
***********************************************************************/package week2codingassignment;
import java.util.Scanner;
public class PRG420Week2_CodingAssignment {
Learn More
public static void main(String[] args) {
String userInputStringOfAngles; // Declare a variable of type String to capture user input
int numberOfAngles; // Declare a variable of type int to hold the converted user input
Scanner myInputScannerInstance = new Scanner(System.in); // Recognize the keyboard
System.out.print("Please type the integer 3, 4, or 5 and then press Enter: "); // Prompt the user
userInputStringOfAngles= myInputScannerInstance.next(); // Capture user input as string
numberOfAngles = Integer.parseInt(userInputStringOfAngles); // Convert the string to a number in case this will be useful later
// LINE 1. CODE TO DETERMINE WHETHER USER INPUT IS OUT OF BOUNDS GOES HERE
// LINE 2. SWITCH CODE TO PRINT CORRECT "SHAPE" MESSAGE BASED ON USER INPUT GOES HERE
}
}

You have no items in your shopping cart.
