Search results for 'cit-150 chapter5 individual case'
-

PRG 421 Week 1 Individual Analyze Assignment Analyzing a Java Program Containing Abstract and Derived Classes
Regular Price: $6.00
Special Price $4.00
PRG 421 Week 1 Individual Analyze Assignment Analyzing a Java Program Containing Abstract and Derived Classes
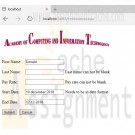
"Analyzing a Java™ Program Containing Abstract and Derived Classes"
The purpose of creating an abstract class is to model an abstract situation.
Example:
You work for a company that has different types of customers: domestic, international, business partners, individuals, and so on. It well may be useful for you to "abstract out" all the information that is common to all of your customers, such as name, customer number, order history, etc., but also keep track of the information that is specific to different classes of customer. For example, you may want to keep track of additional information for international customers so that you can handle exchange rates and customs-related activities, or you may want to keep track of additional tax-, company-, and department-related information for business customers.
Modeling all these customers as one abstract class ("Customer") from which many specialized customer classes derive or inherit ("International Customer," "Business Customer," etc.) will allow you to define all of that information your customers have in common and put it in the "Customer" class, and when you derive your specialized customer classes from the abstract Customer class you will be able to reuse all of those abstract data/methods.This approach reduces the coding you have to do which, in turn, reduces the probability of errors you will make. It also allows you, as a programmer, to reduce the cost of producing and maintaining the program.
In this assignment, you will analyze Java™ code that declares one abstract class and derives three concrete classes from that one abstract class. You will read through the code and predict the output of the program.
Read through the linked Java™ code carefully.
Predict the result of running the Java™ code. Write your prediction into a Microsoft® Word document, focusing specifically on what text you think will appear on the console after running the Java™ code.
In the same Word document, answer the following question:
Why would a programmer choose to define a method in an abstract class, such as the Animal constructor method or the getName() method in the linked code example, as opposed to defining a method as abstract, such as the makeSound() method in the linked example?Supporting Material: Week One Analyze Assignment Text File
/**********************************************************************
* Program: PRG/421 Week 1 Analyze Assignment
* Purpose: Analyze the coding for an abstract class
* and two derived classes, including overriding methods
* Programmer: Iam A. Student
* Class: PRG/421r13, Java Programming II
* Instructor:
* Creation Date: December 13, 2017
*
* Comments:
* Notice that in the abstract Animal class shown here, one method is
* concrete (the one that returns an animal's name) because all animals can
* be presumed to have a name. But one method, makeSound(), is declared as
* abstract, because each concrete animal must define/override the makeSound() method
* for itself--there is no generic sound that all animals make.
**********************************************************************/package mytest;
// Animal is an abstract class because "animal" is conceptual
// for our purposes. We can't declare an instance of the Animal class,
// but we will be able to declare an instance of any concrete class
// that derives from the Animal class.
abstract class Animal {
// All animals have a name, so store that info here in the superclass.
// And make it private so that other programmers have to use the
// getter method to access the name of an animal.private final String animalName;
// One-argument constructor requires a name.
public Animal(String aName) {
animalName = aName;
}// Return the name of the animal when requested to do so via this
// getter method, getName().
public String getName() {
return animalName;
}// Declare the makeSound() method abstract, as we have no way of knowing
// what sound a generic animal would make (in other words, this
// method MUST be defined differently for each type of animal,
// so we will not define it here--we will just declare a placeholder
// method in the animal superclass so that every class that derives from
// this superclass will need to provide an override method
// for makeSound()).
public abstract String makeSound();
};// Create a concrete subclass named "Dog" that inherits from Animal.
// Because Dog is a concrete class, we can instantiate it.
class Dog extends Animal {
// This constructor passes the name of the dog to
// the Animal superclass to deal with.
public Dog(String nameOfDog) {
super(nameOfDog);
}// This method is Dog-specific.
@Override
public String makeSound() {
return ("Woof");
}
}// Create a concrete subclass named "Cat" that inherits from Animal.
// Because Cat is a concrete class, we can instantiate it.
class Cat extends Animal {
// This constructor passes the name of the cat on to the Animal
// superclass to deal with.
public Cat(String nameOfCat) {
super(nameOfCat);
}// This method is Cat-specific.
@Override
public String makeSound() {
return ("Meow");
}
}class Bird extends Animal {
// This constructor passes the name of the bird on to the Animal
// superclass to deal with.
public Bird (String nameOfBird) {
super(nameOfBird);
}// This method is Bird-specific.
@Override
public String makeSound() {
return ("Squawk");
}
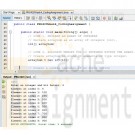
}public class MyTest {
Learn More
public static void main(String[] args) {
// Create an instance of the Dog class, passing it the name "Spot."
// The variable aDog that we create is of type Animal.
Animal aDog = new Dog("Spot");
// Create an instance of the Cat class, passing it the name "Fluffy."
// The variable aCat that we create is of type Animal.
Animal aCat = new Cat("Fluffy");
// Create an instance of (instantiate) the Bird class.
Animal aBird = new Bird("Tweety");
//Exercise two different methods of the aDog instance:
// 1) getName() (which was defined in the abstract Animal class)
// 2) makeSound() (which was defined in the concrete Dog class)
System.out.println("The dog named " + aDog.getName() + " will make this sound: " + aDog.makeSound());
//Exercise two different methods of the aCat instance:
// 1) getName() (which was defined in the abstract Animal class)
// 2) makeSound() (which was defined in the concrete Cat class)
System.out.println("The cat named " + aCat.getName() + " will make this sound: " + aCat.makeSound());
System.out.println("The bird named " + aBird.getName() + " will make this sound: " + aBird.makeSound());
}
} -

New Perspectives on HTML, CSS, and Dynamic HTML 5th edition Tutorial 14 Case 1 New Accents Photography
Regular Price: $15.00
Special Price $12.00
New Perspectives on HTML, CSS, and Dynamic HTML 5th edition Tutorial 14 Case 1 New Accents Photography
After you have completed all of the tutorials in Chapter 14, turn to page 1001 in your textbook and do Case Problem 1, New Accents Photography. Make sure all files are uploaded to cPanel and submit your URL for the accents.htm file when you are finished.
Use JavaScript to create a dynamic style sheet switcher.
Data files needed for this Case Problem: accentstxt.htm, base.css, elegant.css, elegant.png, elegant_back.png, elegant_small.png, innovative.css, innovative.png, innovative_back.png, innovative_small.png, joyous.css, joyous.png, joyous_back.png, joyous_small.png, modernizr-1.5.js, nalogo.png, romantic.css, romantic.png, romantic_back.png, romantic_small.png, styletxt.js, zany.css, zany.png, zany_back.png, zany_small.png
New Accents Photography Christine Drake is the owner and chief photographer at New Accents Photography, a photography studio in Ashland, Oregon, that specializes in wedding photos. Wedding portraiture is a competitive business. and Christine wants to improve the design of her Web site's opening page to help interest couples in viewing her work. Christine is proud of the many and varied styles of portraiture that New Accents Photography offers, and she would like to create an interactive style sheet switcher that loads different style designs based on her photos.
Christine envisions making several style sheets, and she wants to limit the amount of work she'll have to do when updating the HTML code as she adds new sheets to her site. She would like your help with writing a JavaScript app that examines the list of style sheets in the site's home page and creates a figure box of clickable thumbnail images for each sheet design. A preview of the page you'll create for Christine is shown In figure 14-66.Christine already has written the style sheet code and most of the HTML code. Your job will be to write the JavaScript code to enable her customers to switch from one style design to another.
Complete the following:
1. Using your text editor, open accentstxt.htm and styletxt.js from the tutorial.14\case1 folder. Enter your name and the date in the comment section of each file, and then save the files asaccents.htm and stylebox.js, respectively.2. Go to the accents.htm file in your text editor. Currently, Christine has only one persistent style sheet linked to her document. Create a link to the preferred style sheet romantic.css and give it the title romantic.
3. Create links to the following alternate style sheets: elegant.css, joyous.css, innovative.css, and zany.css. Give the style sheets the titles elegant, joyous, innovative, and zany, respectively. Do not disable any of these style sheets at this time.
4. Create a link to the styleBox.js file. Take some time to study the rest of the HTML code and then close the file, saving your changes.
5. Go to the styleBox.js file in your text editor. Below the comments, declare a global variable named allSheets and set it equal to an empty array. The purpose of the allSheets variable will be to store references to each preferred and alternate style sheet in the document.
6. Add a command to run the loadStyles() function when the page is initially loaded.
7. Create the loadStyles() function. The purpose of this function is to load all of the preferred and alternate style sheets into the allSheets variable. Add the following commands to the function:
a. Declare the links variable referencing all link elements in the document.
b. Loop through the contents of the links object collection. For each item, determine whether it represents a preferred or alternate style sheet with a defined title.
c. Disable each alternate style sheet, but leave the preferred style sheet enabled.
d. Use the push() array method to add each preferred or alternate style sheet to the allSheets array.
e. After the completion of the for loop, call the displayThumbs() function.
8. Create the displayThumbs() function. The purpose of this function is to display thumbnail images of each style sheet design from the allSheets array. Add the following commands to the function:
a. Create an element node for the figure element and store it in the figBox variable.
b. Set the id of the figBox element node to the text string thumbnails.
c. Loop through each item in the allSheets array, and do the following for each item:
i) create an element node for the img element and store it in the sheetImg variable;
ii) set the source of the sheetImginline image to the file title_small.png, where title is the title value of the current style sheet in the loop; iii)set the title attribute of the inline image to match the title attribute of the current style sheet;
iv) add an onclick event handler to the inline image to run the showSheet() function when clicked; and
v) append sheetImg to the figBox node.
d. After the for loop has completed, append the figBox node to the document element with the id main.
9. Create the showSheet() function. The purpose of this function is to change the style sheet used in the document. Add the following commands to the function:
a. Declare the variable sTitle, setting it equal to the title attribute of the inline image that called the showSheet() function. (Hint: Use the this keyword to reference the inline image.)
b. Loop through all of the sheets in the allSheets array. Enable the style sheet whose title attribute equals sTitle and disable all of the others.
10. Document your work with descriptive comments throughout your code.11. Save your changes to the file, and then open accents.htm in your Web browser. Verify that five inline images have been added near the bottom of the Web page. Click each thumbnail image and verify that it loads a different style sheet. (Note: If you are using Safari for Windows or Macintosh Version 5.1.2, this style sheet switcher will not work.)
12. Submit your completed files to your instructor, in either printed or electronic form, as requested.
Learn More -
PRG420 Week 5 Individual Assignment Coding a Program Containing Exception Handling
Regular Price: $10.00
Special Price $7.00
PRG420 Week 5 Individual Assignment Coding a Program Containing Exception Handling
Individual: Coding a Program Containing Exception Handling
Includes Working Java Build and Program File and Explanation of Code
Resource: Week Five Coding Assignment Zip File (starter code for this assignment that includes placeholders)
For this assignment, you will apply what you learned in analyzing a simple Java™ program by writing your own Java™ program. The Java™ program you write should do the following:
• Organize the code capable of throwing an exception of type ParseException as a try block.
• Include a catch block to handle a ParseException error thrown by the try block.
• Include a hard-coded error that results in a ParseException to prove that the code can catch and handle this type of exception.
Complete this assignment by doing the following:
1. Download and unzip the linked Week Five Coding Assignment Zip File.
2. Add comments to the code by typing your name and the date in the multi-line comment header.
3. Replace the following lines with Java™ code as directed in the file:
• LINE 1
• LINE 2
4. Replace the value assigned with one of the variables so that the program throws an exception.
5. Comment each line of code you add to explain what you intend the code to do. Be sure to include a comment for the replacement value you added in Step 4 that causes the program to throw an exception.
6. Test and modify your Java™ program until it runs without errors and produces the results described above.
Note: Refer to this week's analyzing code assignment if you need help.
Submit your Java application file using the Assignment Files tab./********************************************************************
Learn More
* Program: PRG420Week5_CodingAssignment
* Purpose: Week 5 Individual Assignment #2
* Programmer: Iam A. Student
* Class: PRG/420 PRG420 PRG 420
* Creation Date: TODAY'S DATE GOES HERE
*********************************************************************
*
*********************************************************************
* Program Summary:
* This program converts a given date to a string.
* The code includes exception handling for a ParseException.
************************************************************************************/
package prg420week5_codingassignment;
import java.util.*;
import java.text.*;
public class PRG420Week5_CodingAssignment {
public static void main(String[] args){
// The getInstance() method returns a Calendar object whose calendar fields have been initialized with the current date and time.
Calendar calendar = Calendar.getInstance(); {
LINE 1. BEGIN THE TRY BLOCK.
String str_date="01-Nov-17"; // Declare a string that we will use later to format a date like this: ##-XXX-##
DateFormat formatter; // Declare an object of type DateFormat so that we can call its parse() method later
Date myFormattedDate; // Declare a variable of type Date to hold the formatted date
formatter = new SimpleDateFormat("dd-MMM-yy"); // Assign a specific date format to the formatter variable
// The given date is taken as a string that is converted into a date type by using
// the parse() method
myFormattedDate = (Date)formatter.parse(str_date); // setting up the format
System.out.println("The formatted date is " + myFormattedDate);
System.out.println("Today is " +calendar.getTime() );
LINE 2. WRITE THE CATCH BLOCK TO CATCH EXCEPTIONS OF TYPE ParseException (TO HANDLE EXCEPTION, SIMPLY PRINT THE EXCEPTION)
}
}
} -
PRG420 Week 4 Individual Assignment Coding a Program Containing an Array
Regular Price: $10.00
Special Price $7.00
PRG420 Week 4 Individual Assignment Coding a Program Containing an Array
Individual: Coding a Program Containing an Array
Includes Working Java Build and Program File and Explanation of Code
Resource: Week Four Coding Assignment Zip File (starter code for this assignment that includes placeholders)
For this assignment, you will apply what you learned in analyzing a simple Java™ program by writing your own Java™ program that creates and accesses an array of integers. The Java™ program you write should do the following:
• Create an array to hold 10 integers
• Ask the user for an integer. Note: This code has already been written for you.
• Populate the array. Note: The first element should be the integer input by the user. The second through tenth elements should each be the previous element + 100. For example, if the user inputs 10, the first array value should be 10, the second 110, the third 210, and so on.
• Display the contents of the array on the screen in ascending index order.
Complete this assignment by doing the following:
1. Download and unzip the linked Week Four Coding Assignment Zip File.
2. Read each line of the file carefully, including the detailed instructions at the top.
3. Add comments to the code by typing your name and the date in the multi-line comment header.
4. Replace the following lines with Java™ code as directed in the file:
• LINE 1
• LINE 2
• LINE 3
• LINE 4
• LINE 5
5. Comment each line of code you add to explain what you intend the code to do.
6. Test and modify your Java™ program until it runs without errors and produces the results as described above.
Note: Refer to this week's analyzing code assignment if you need help.
Submit your Java source (.java) code file using the Assignment Files tab./********************************************************************
* Program: PRG420Week4_CodingAssignment
* Purpose: Week 4 Individual Assignment #2
* Programmer: Iam A. Student
* Class: PRG/420 PRG420 PRG 420
* Creation Date: TODAY'S DATE GOES HERE
*********************************************************************
*
*********************************************************************
* Program Summary: This program demonstrates these basic Java concepts:
* - Creating an array based on user input
* - Accessing and displaying elements of the array
*
* The program should declare an array to hold 10 integers.
* The program should then ask the user for an integer.
* The program should populate the array by assigning the user-input integer
* to the first element of the array, the value of the first element + 100 to
* the second element of the array, the value of the second element + 100 to
* the third element of the array, the value of third element + 100 to
* the fourth element of the array, and so on until all 10 elements of the
* array are populated.
*
* Then the program should display the values of each of the array
* elements onscreen. For example, if the user inputs 4, the output
* should look like this:
*
* Enter an integer and hit Return: 4
* Element at index 0: 4
* Element at index 1: 104
* Element at index 2: 204
* Element at index 3: 304
* Element at index 4: 404
* Element at index 5: 504
* Element at index 6: 604
* Element at index 7: 704
* Element at index 8: 804
* Element at index 9: 904
***********************************************************************/
package prg420week4_codingassignment;
import java.util.Scanner;
public class PRG420Week4_CodingAssignment {
public static void main(String[] args) {
// LINE 1. DECLARE AN ARRAY OF INTEGERS// LINE 2. ALLOCATE MEMORY FOR 10 INTEGERS WITHIN THE ARRAY.
// Create a usable instance of an input device
Scanner myInputScannerInstance = new Scanner(System.in);
// We will ask a user to type in an integer. Note that in this practice
// code WE ARE NOT VERIFYING WHETHER THE USER ACTUALLY
// TYPES AN INTEGER OR NOT. In a production program, we would
// need to verify this; for example, by including
// exception handling code. (As-is, a user can type in XYZ
// and that will cause an exception.)
System.out.print("Enter an integer and hit Return: ");
// Convert the user input (which comes in as a string even
// though we ask the user for an integer) to an integer
int myFirstArrayElement = Integer.parseInt(myInputScannerInstance.next());
// LINE 3. INITIALIZE THE FIRST ARRAY ELEMENT WITH THE CONVERTED INTEGER myFirstArrayElement
// LINE 4. INITIALIZE THE SECOND THROUGH THE TENTH ELEMENTS BY ADDING 100 TO THE EACH PRECEDING VALUE.
// EXAMPLE: THE VALUE OF THE SECOND ELEMENT IS THE VALUE OF THE FIRST PLUS 100;
// THE VALUE OF THE THIRD ELEMENT IS THE VALUE OF THE SECOND PLUS 100; AND SO ON.
Learn More
// LINE 5. DISPLAY THE VALUES OF EACH ELEMENT OF THE ARRAY IN ASCENDING ORDER BASED ON THE MODEL IN THE TOP-OF-CODE COMMENTS.
}
} -
PRG420 Week 3 Individual Assignment Coding a Program Containing Loops
Regular Price: $10.00
Special Price $7.00
PRG420 Week 3 Individual Assignment Coding a Program Containing Loops
Individual: Coding a Program Containing Loops
Includes Working Java Build and Program File and Explanation of Code
Resource: Week Three Coding Assignment Zip File (starter code for this assignment that includes placeholders)
For this assignment, you will apply what you learned in analyzing for, while, and do-while loops by writing these statements yourself. The Java™ program you write should do the following:
• Display a pyramid of asterisks onscreen (i.e., a nested for loop)
• Display the integers 10 to 1 in decreasing order, one number per line (i.e., a while/do-whlie loop)
• Add 7 until the sum becomes greater than 157, at which point the program should display both the sum and the number of 7s added Complete this assignment by doing the following:
1. Download and unzip the linked Week Three Coding Assignment Zip File.
2. Add comments to the code by typing your name and the date in the multi-line comment header.
3. Replace the following lines with Java™ code as directed in the file:
• LINE 1
• LINE 2
• LINE 3
4. Comment each line of code you add to explain what you intend the code to do and why you chose each type of loop.
5. Test and modify your Java™ program until it runs without errors and produces the results as described above.
Note: Refer to this week's analyzing code assignment if you need help.
Submit your Java source (.java) code file using the Assignment Files tab.
/**********************************************************************
* Program: PRG420Week3_CodingAssignment
* Purpose: Week 3 Individual Assignment #2
* Programmer: Iam A. Student
* Class: PRG/420 PRG420 PRG 420
* Creation Date: TODAY'S DATE GOES HERE
***********************************************************************
*
***********************************************************************
* Program summary: For, while, do-while loops; nested loops
*
* For this assignment, you will add code to create:
*
* a for loop nested inside another for loop
* a while loop
* a do-while loop
*************************************************************************/package prg420week3_codingassignment;
public class PRG420Week3_CodingAssignment {
public static void main(String[] args) {
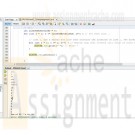
// The following code should print asterisks: 1 on line 1, 2 asterists on line 2,
Learn More
// 3 on line 3, 4 on line 4... for as many lines as the variable linesOfAsterisks.
// To do this, we can use 2 nested for loops. The first for loop is coded for you.
// You will need to add another for lop, NESTED INSIDE the first, that prints
// a certain # of asterisks based on the # of times the loop code has been executed.
// The result should look like this:
// *
// **
// ***
// ****
// *****
// etc.
int linesOfAsterisks = 5;
for (int i = 1; i <= linesOfAsterisks; i++) { // for each line...
// LINE 1. ADD A NESTED FOR LOOP THAT DISPLAYS ONE ASTERISK ON LINE 1, TWO ASTERISKS ON LINE 2, 3 ASTERISKS ON LINE 3, ETC.
System.out.println();
}
//////////////////////////////////////////////////////////////////////
// Add a while or do-while loop that displays the numbers from 10 to 1 in that order, like so:
// 10
// 9
// 8
// 7
// ...
// 1
//////////////////////////////////////////////////////////////////////
int num=10;
//LINE 2. ADD A LOOP THAT DISPLAYS NUMBERS 10 TO 1 IN DECREASING ORDER (HINT: DECREMENT OPERATOR)
///////////////////////////////////////////////////////////////////////
// Write a loop that adds 7s one at a time until the sum becomes > 157.
// Then print out both the sum and the number of 7s that were aded.
// Write a while or do-while loop, whichever you think is most appropriate.
//////////////////////////////////////////////////////////////////////////
int sum = 0;
int numberOfSevens = 0;
//LINE 3. ADD ANOTHER LOOP THAT ADDS 7s UNTIL SUM > 157. THEN DISPLAY SUM AND NUMBER OF SEVENS ADDED.
} -
PRG420 Week 2 Individual Assignment Coding a Program Containing if-then and switch
Regular Price: $10.00
Special Price $7.00
PRG420 Week 2 Individual Assignment Coding a Program Containing if-then and switch
Individual: Coding a Program Containing if-then and switch
Includes Working Java Build and Program File and Explanation of Code
Resources: Week Two Coding Assignment Zip File (starter code for this assignment that includes placeholders), and Week Two Recommended Activity Zip File (examples of how to code a switch statement, an if-then-else statement, and how to construct a string to display text onscreen).
For this assignment, you will apply what you learned in analyzing Java™ code so far in this course by writing your own Java™ program.
The Java™ program you write should do the following:
• Accept user input that represents the number of sides in a polygon. Note: The code to do this is already written for you.
• If input value is not between 3 and 5, display an informative error message
• If input value is between 3 and 5, use a switch statement to display a message that identifies the correct polygon based on the number of sides matching the input number (e.g., triangle, rectangle, or polygon)
Complete this assignment by doing the following:
1. Download and unzip the linked Week Two Coding Assignment Zip File.
2. Read the file carefully, especially the explanatory comments of what the existing code does.
3. Add your name and the date in the multi-line comment header.
4. Refer to the following linked Week Two Recommended Activity Zip File to see examples of how to code all of the Java™ statements (i.e., switch, println(), and if-then-else) you will need to write to complete this assignment.
5. Replace the following lines with Java code as directed in the file:
• LINE 1
• LINE 2
6. Comment each line of code you add to explain what you intend the code to do.
7. Test and modify your Java™ program until it runs without errors and produces the results as described above.
Note: Refer to this week's analyzing code assignment if you need help.
Submit your Java source (.java) code file using the Assignment Files tab./**********************************************************************
* Program: PRG/420 Week 2
* Purpose: Week 2 Coding Assignment
* Programmer: Iam A. Student
* Class: PRG/420 PRG420 PRG 420
* Creation Date: 10/18/17
*********************************************************************
*
**********************************************************************
* Program Summary: This program demonstrates these basic Java concepts:
* - defining variables of different types
* - if-then and if-then-else logic
* - constructing a string to display onscreen
* - switch logic
*
* To finish assignment, you will add code where indicated. The
* behavior of your completed assignment should be to accept an input
* value for the number of sides of a two-dimensional figure. Based on that value,
* your code should display the type of figure that corresponds to the number of polygon angles
* indicated (3=triangle, 4=rectangle, etc.)
*
* Here are the specific requirements:
*
* After the user types in a value from 3 to 5 inclusive (i.e., 3, 4, or 5):
*
* 1. Your code determines whether the input value is out of range (less than 3 or more than 5)
* and, if so, displays a meaningful error message on the screen and ends the program.
*
* 2. Because you will be comparing a single expression (the input value) to multiple constants (3, 4, and 5),
* your code should use a switch statement to display the following message onscreen:
*
* If user inputs 3, onscreen message should say "A triangle has 3 sides."
* If user inputs 4, onscreen message should say "A rectangle has 4 sides."
* If user inputs 5, onscreen message should see "A pentagon has 5 sides."
*
* 3. Be sure to test your program. This means running your program multiple
* times with test values 3, 4, 5, as well as at least two values that fall outside that range
* (one lower than the lowest and one higher than the highest) and making sure
* that the correct message displays for each value you input. Also be sure
* that running your program does not cause any compiler errors.
***********************************************************************/package week2codingassignment;
import java.util.Scanner;
public class PRG420Week2_CodingAssignment {
Learn More
public static void main(String[] args) {
String userInputStringOfAngles; // Declare a variable of type String to capture user input
int numberOfAngles; // Declare a variable of type int to hold the converted user input
Scanner myInputScannerInstance = new Scanner(System.in); // Recognize the keyboard
System.out.print("Please type the integer 3, 4, or 5 and then press Enter: "); // Prompt the user
userInputStringOfAngles= myInputScannerInstance.next(); // Capture user input as string
numberOfAngles = Integer.parseInt(userInputStringOfAngles); // Convert the string to a number in case this will be useful later
// LINE 1. CODE TO DETERMINE WHETHER USER INPUT IS OUT OF BOUNDS GOES HERE
// LINE 2. SWITCH CODE TO PRINT CORRECT "SHAPE" MESSAGE BASED ON USER INPUT GOES HERE
}
} -
PRG420 Week 1 Individual Assignment Coding a Simple "Hello, world!" Java Program
Regular Price: $7.00
Special Price $5.00
PRG420 Week 1 Individual Assignment Coding a Simple "Hello, world!" Java Program
Individual: Coding a Simple "Hello, world!" Java™ Program
Includes Working Java Build and Program File and Explanation of Code
Resource: Week One Coding Assignment Zip File (starter code for this assignment that includes placeholders)
For this assignment, you will apply what you learned in analyzing a simple Java™ program by writing your own Java™ program. The Java™ program you write should do the following:
• Display a prompt on the console asking the user to type in his or her first name
• Construct the greeting string "Hello, nameEntered!"
• Display the constructed greeting on the console
Complete this assignment by doing the following:
1. Download and unzip the linked zip file.
2. Add comments to the code by typing your name and the date in the multi-line comment header.
3. Replace the following lines with Java™ code as directed in the file:
• LINE 1
• LINE 2
• LINE 3
• LINE 4
4. Comment each line of code you add to explain what you intend the code to do.
5. Test and modify your Java™ program until it runs without errors and produces the results as described above.
Note: Refer to this week's analyzing code assignment if you need help.
Submit your Java source (.java) code file using the Assignment Files tab./**********************************************************************
* Program: PRG420Week1_CodingAssignment
* Purpose: Week 1 Individual Assignment #2
* Programmer: YOUR FULL NAME GOES HERE
* Class: PRG/420 PRG420 PRG 420
* Creation Date: TODAY'S DATE GOES HERE
*********************************************************************
*
**********************************************************************
* Program Summary: This program asks the user for a one-word name
* and then displays a constructed greeting
* that looks like this:
*
* Hello, NAME!
**********************************************************************/
package prg420week1_codingassignment;/**
*
* @author NETBEANS PLACES YOUR INITIALS HERE
*/import java.util.Scanner;
public class PRG420Week1_CodingAssignment {
public static void main(String[] args) {
// Create a usable instance of an input device
LINE 1. INSTANTIATE AN INSTANCE OF SCANNER AND ASSIGN IT TO A VARIABLE OF TYPE SCANNER.// Prompt user for input
LINE 2. USE THE PRINT() METHOD TO PROMPT THE USER FOR HIS OR HER FIRST NAME.// Capture first word and assign it to A VARIABLE
LINE 3. USE THE NEXT() METHOD OF YOUR SCANNER INSTANCE TO ASSIGN A VALUE TO A STRING VARIABLE.// Construct the greeting
LINE 4. USE THE PRINTLN() METHOD TO CONSTRUCT A CORRECTLY PUNCTUATED GREETING.}
Learn More
} -
CIS407 Lab 5 of 7: Transaction Processing PayrollSystem ASP.NET Application
Regular Price: $12.00
Special Price $10.00
CIS407 Lab 5 of 7: Transaction Processing PayrollSystem ASP.NET Application
Lab Overview
Scenario/Summary
This week, we will use the .NET OleDbTransaction functions to either commit a set of changes to the database, if all of them were done correctly, or to roll back all of the changes if there was an error in any one of them. We will first modify the code that we created last week so that it will save personnel data in the database in two steps; first by inserting a personnel record for a new employee, and then by updating that record to fill in the start and end dates.
This two-step approach is not really needed in this simple case, but we will use it to simulate a more complex database transaction that would have to be done in multiple steps, such as one involving more than one table or even more than one database. We will then see what happens when there is an error in the second operation (the update), allowing a record to be created containing incomplete information: not a good result! We will fix the problem by wrapping both operations (the insert and the update) into a single transaction that will be committed (made permanent) only if both operations succeed or will be rolled back (undone) if either operation fails. We will also add client-side validation using the ASP.Net validation controls, and we will allow the user an easy way to edit all employees.
Please watch the tutorial before beginning the Lab.Lab Steps
Deliverables
All files are located in the subdirectory of the project. The project should function as specified:
When you press the Submit button in frmPersonnel, a record should be saved in the tblPersonnel table containing the FirstName, LastName, PayRate, StartDate, and EndDate that you entered. Test that the transaction will roll back by entering invalid information in one or more items, such as Hello for a StartDate. Check that client-side validation works: The ability to edit employees in a grid is working. Once you have verified that it works, save your website, zip up all files, and submit them.STEP 1: Modify the clsDataLayer to Use a Two-Step Process
Learn More
1. Open Microsoft Visual Studio.NET.
2. Click the ASP.NET project called PayrollSystem to open it.
3. Open the clsDataLayer class.
4. Modify the SavePersonnel() function so that instead of just doing a single SQL INSERT operation with all of the personnel data, it does an INSERT with only the FirstName and LastName, followed by an UPDATE to save the PayRate, StartDate, and EndDate into the new record. (This two-step approach is not really necessary here because we are dealing with only one table, tblPersonnel, but we are doing it to simulate a case with more complex processing requirements, in which we would need to insert or update data in more than one table or maybe even more than one database.) Find the following existing code in the SavePersonnel() function:
// Add your comments here
strSQL = "Insert into tblPersonnel " +
"(FirstName, LastName, PayRate, StartDate, EndDate) values ('" +
FirstName + "', '" + LastName + "', " + PayRate + ", '" + StartDate +
"', '" + EndDate + "')";
// Add your comments here
command.CommandType = CommandType.Text;
command.CommandText = strSQL;
// Add your comments here
command.ExecuteNonQuery();
Modify it so that it reads as follows:
// Add your comments here
strSQL = "Insert into tblPersonnel " +
"(FirstName, LastName) values ('" +
FirstName + "', '" + LastName + "')";
// Add your comments here
command.CommandType = CommandType.Text;
command.CommandText = strSQL;
// Add your comments here
command.ExecuteNonQuery();
// Add your comments here
strSQL = "Update tblPersonnel " +
"Set PayRate=" + PayRate + ", " +
"StartDate='" + StartDate + "', " +
"EndDate='" + EndDate + "' " +
"Where ID=(Select Max(ID) From tblPersonnel)";
// Add your comments here
command.CommandType = CommandType.Text;
command.CommandText = strSQL;
// Add your comments here
command.ExecuteNonQuery();
5. Set frmMain as the startup form and run the PayrollSystem Web application to test the changes. When valid data values are entered for a new employee, things should work exactly as they did previously. To test it, enter valid data for a new employee in frmPersonnel and click Submit. The frmPersonnelVerified form should be displayed with the entered data values and a message that the record was saved successfully. Click the View Personnel button and check that the new personnel record was indeed saved to the database and that all entered data values, including the PayRate, StartDate, and EndDate, were stored correctly. Close the browser window.
Now run the PayrollSystem Web application again, but this time, enter some invalid data (a nonnumeric value) in the PayRate field to cause an error, like this:
6. Now, when you click Submit, the frmPersonnelVerified form should display a message indicating that the record was not saved:
However, when you click on the View Personnel button to display the personnel records, you should see that an incomplete personnel record was in fact created, with missing values for the PayRate, StartDate, and EndDate fields.
This occurred because the Insert statement succeeded but the following Update statement did not. We do not want to allow this to happen because we end up with incomplete or incorrect data in the database. If the Update statement fails, we want the Insert statement to be rolled back, or undone, so that we end up with no record at all. We will fix this by adding transaction code in the next step.
STEP 2: Add Transaction Code
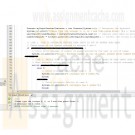
7. In the clsDataLayer.cls class file, add code to the SavePersonnel() function to create a transaction object. Begin the transaction, commit the transaction if all database operations are successful, and roll back the transaction if any database operation fails. The following listing shows the complete SavePersonnel() function; the lines you will need to add are marked with ** NEW ** in the preceding comment and are shown in bold and underlined.
// This function saves the personnel data
public static bool SavePersonnel(string Database, string FirstName, string LastName,
string PayRate, string StartDate, string EndDate)
{
bool recordSaved;
// ** NEW ** Add your comments here
OleDbTransaction myTransaction = null;
try
{
// Add your comments here
OleDbConnection conn = new OleDbConnection("PROVIDER=Microsoft.ACE.OLEDB.12.0;" +
"Data Source=" + Database);
conn.Open();
OleDbCommand command = conn.CreateCommand();
string strSQL;
// ** NEW ** Add your comments here
myTransaction = conn.BeginTransaction();
command.Transaction = myTransaction;
// Add your comments here
strSQL = "Insert into tblPersonnel " +
"(FirstName, LastName) values ('" +
FirstName + "', '" + LastName + "')";
// Add your comments here
command.CommandType = CommandType.Text;
command.CommandText = strSQL;
// Add your comments here
command.ExecuteNonQuery();
// Add your comments here
strSQL = "Update tblPersonnel " +
"Set PayRate=" + PayRate + ", " +
"StartDate='" + StartDate + "', " +
"EndDate='" + EndDate + "' " +
"Where ID=(Select Max(ID) From tblPersonnel)";
// Add your comments here
command.CommandType = CommandType.Text;
command.CommandText = strSQL;
// Add your comments here
command.ExecuteNonQuery();
// ** NEW ** Add your comments here
myTransaction.Commit();
// Add your comments here
conn.Close();
recordSaved = true;
}
catch (Exception ex)
{
// ** NEW ** Add your comments here
myTransaction.Rollback();
recordSaved = false;
}
return recordSaved;
}
8. Run your Web application. First, enter valid data in all fields of frmPersonnel. When you press the Submit button in frmPersonnel, a record should be saved in the tblPersonnel table containing the FirstName, LastName, PayRate, StartDate, and EndDate. With valid data entered in all items, the successfully saved message should appear, indicating that the transaction was committed.
Click the View Personnel button and verify that the new record was in fact added to the database table correctly.
9. Now, close the browser, run the Web application again, and this time, test that the transaction will roll back after entering incorrect information. On the frmPersonnel form, enter invalid data for PayRate and click Submit. The not saved message should appear, which indicates that the transaction was rolled back.
Click the View Personnel button and verify that this time, as desired, an incomplete record was not added to the database table.
10. You have seen how we used the try/catch block to catch an unexpected error. You may have noticed that if you enter bad data for the dates, an exception is thrown. Go back to the validation code that you added in the frmPersonnel code and add a try/catch with logic to prevent an invalid date from causing a server error.
11. In the Week 3 Lab, you learned how to validate code once the page was posted back to the server. There is some validation that must be done on the server because it requires server resources such as the database. Some validation can also be done on the client. If you can do validation on the client, it saves a round trip to the server, which will improve performance. In this approach, we will check values before the page is submitted to the server for processing. Normally, there is a combination of server and client validation used in a Web application. ASP.Net includes validation controls which will use JavaScript on the client to perform validation. You will find these controls in the Validation group in the toolbox.
12. Add validation controls to the frmPersonnel form as follows: For the first, last name, and pay rate, make sure each field has data in it. Use the RequiredFieldValidator for this task. Add the control to the right of the text box that you are validating. The location of the validator control is where the error message (if there is one) will appear for the control to which you link the validator. You will be adding one validator control for each text box that you want to validate. Remember to set the ControlToValidate and ErrorMessage properties on the validator control. Making this change eliminates the need for the server-side check you were doing previously. Use a regular expression validator to check that the start and end date are in the correct format.
In order to keep the validation controls from causing wrapping, you may want to increase the Panel width.
A regular expression for mm/dd/yyyy is this:
^(0[1-9]|1[012])[- /.](0[1-9]|[12][0-9]|3[01])[- /.](19|20)\d\d$
13. Remove the View Personnel and Cancel buttons from the frmPersonnel form, because they will cause a Postback and invoke the client-side editing that you just added. The user is able to get to the View Personnel from the main form and from the personnel verification screen, so there is no need for these buttons now.
14. Because you have entered data in this lab that is invalid and those partial records are in the database, you will need to add the ability to remove or update data. Open up frmMain and add a new main form option called Edit Employees. Add the link and image for it. This option will take the user to a new form called frmEditPersonnel.
15. Add the new form frmEditPersonnel. On frmEditPersonnel, add the ACIT logo at the top of the form. Add a label that says Edit Employees. Add a GridView control with an ID of grdEditPersonnel.
16. You will now add a SQLDataSource to the page. You will be using a databound grid for this form unlike the previous grids, in which you added as unbound (in the designer).
17. Add a new SQLDataSource control to the frmEditPersonnel in the Design View. This is not a visible control; that is, it will only appear in Design View, but the user will never see it. Note: If you change the folder name or location of your database, you will need to reconfigure the data source (right-click on the data source control and select the Configure Data Source option).
18. There is a small > indicator in the Design View of the SQL Data Source control that you added. If the configuration menu is collapsed (press it to open the menu), or there is a < with the menu displayed, from the data source menu, select Configure Data Source.
19. Press the New Connection button and browse for the database.
20. Press the Next button.
21. When asked if you want to save the connection in the application configuration file, check the Yes check box and press Next.
22. Select the tblPersonnel table.
23. Select all columns (you can use the * for this).
24. Press the Advanced button and check the Generate Insert, Update, and Delete option and press the OK button.
25. Press the Next button.
26. Press the Test Query button and make sure that you see all records in the database like the image below. If it does not, repeat the above steps to make sure that you did everything properly (and selected the correct database - if you are not sure, open the database in Windows Explorer to be sure that it is the one with data in tblPersonnel). Press the Finish button.
27. Click on the grid that you added in the Design View and expand the Properties menu (the little > in the upper right of the control). Choose the data source you just added. On the GridView tasks menu, select Edit columns. Add an Edit, Update, and Cancel Command field. Add a Delete Command field. Press OK. You can now test the grid, which is a fully functioning Update and Delete grid. Try it out!
STEP 3: Test and Submit
28. Once you have verified that everything works as it is supposed to work, save your project, zip up all files, and submit it.
NOTE: Make sure you include comments in the code provided where specified (where the " // Your comments here" is mentioned) and for any code you write, or else a 5-point deduction per item (form, class, function) will be made. -

CIS407 Lab 1 PayrollSystem ASP.NET Application
Regular Price: $8.00
Special Price $5.00
CIS407 Lab 1 PayrollSystem ASP.NET Application
In this Lab, you will create an Annual Salary Calculator ASP.NET Web application using Visual Studio.NET.
For the Labs, you will use the Microsoft Visual Studio software application. You have two options for using this application:
- You may use a copy of Visual Studio that is installed on your local PC. If you do not already have this software, there is a link in the Syllabus (in the Textbook and Required Materials section) that you can follow to obtain a copy at low or no cost through the DeVry Student Software Fulfillment Center.
or
- You may run Visual Studio over the Web from the DeVry Lab (Citrix) server. Instructions for using the Lab (Citrix) server are on the Lab page under the Introduction & Resources Module.
Throughout this course, you will be creating a Web application for a fictitious company called ACIT (Academy of Computing and Information Technology). To get familiar with the development environment, follow the Lab Steps to create a simple Annual Salary Calculator ASP.NET Web application. You will be adding to this application each week.Overview of Fictitious Company
The Academy of Computing and Information Technology is a mid-size indie (independent) film studio that is in need of a payroll system. We have outgrown our current system, a simple spreadsheet, to the extent that it takes three people over one week to pay everyone on a timely basis.Overview of Our Company
We have over 2,000 full-time and part-time employees. We produce comedy, fiction, and science fiction films with budgets of $250K–$20 million. We have produced over 50 films since we first began 20 years ago.
We are very profitable and have strong links to many of the industry's most powerful people.Current Payroll System
Our current system consists of mostly manual processing using an MS Excel spreadsheet to control who gets paid.
The system consists of the three payroll staff members reviewing each of the full-time staff members' wages, calculating how many hours they worked based on their hourly rate, and paying them by issuing a check.
The check needs to be entered in another worksheet for each of the people who were paid so that we can tell when it went out, how much it was for, and if it was cashed or not. If a [Date_Cashed] is entered, we deduct that amount from our working payroll capital account to track how much money we have for payroll.
This process is then repeated for all part-time staff and independent contractors.Our Needs
We need a more automated way to pay our staff. We need to use the same logical flow as a basis, yet improve on it by having a way to
1. easily calculate the projected annual salary based on rate and number of hours;
2. search, enter, update, and delete staff and independent employee information in one place;
3. search, enter, update, and delete payroll automation information for the employee to set up recurring payments or one-time payments;
4. produce reports to show the following: (a) summary of who got paid per week, (b) summary of all payments per week, (c) details of any employee to-date (allow entry of a specific employee ID);
5. allow transactions to be rolled back in case we pay someone too much;
6. make use of transaction processing in case the system unexpectedly shuts down;
7. ensure the system is secure (logins required);
8. allow only authorized payroll personnel to control all aspects of the system;
9. allow only authorized payroll personnel to view transactions and user activity;
10. allow only authorized payroll personnel to e-mail reports to users using the e-mail on file; and
11. incorporate error handling into all processes in the system and e-mail any errors to the technical support people.Required Software
Microsoft Visual Studio.Net
Access the software at https://lab.devry.edu (Links to an external site.)Links to an external site..
Steps: 1, 2, and 3
STEPs 1–3: Create Website and Home Page
Please watch this video for a similar example to the one we are doing. It introduces event handlers, getting data from textboxes, performing basic calculations, and formatting the output to be displayed:
In this Lab, we will learn how to create a simple ASP.NET Web application using Microsoft Visual Studio.NET. The application will display the text "Hello, World" on the home page.
1. Open Microsoft Visual Studio.
2. Create a new ASP.NET website called "PayrollSystem."
To do this, select File -> New -> Web Site
You will get the following screen which shows Visual Basic.
Select Visual C# template on the left of your screen if it is not already selected. Notice that your screen will now show Visual C# instead of Visual Basic.
Click Browse at the bottom of the screen to change Web Location, if necessary to get the screen below.
Notice that my Web Location is now different.
Select ASP.NET Empty project and click OK to get the screen below.
Right-click on the project name from Solution Explorer, then select Add->Add New Item to get the following screen.
Select Web Form, accept Default.aspx file, and click Add to get:
Click Design at the bottom left-hand of the window to show the following:
Edit the Default.aspx file (the home page for your site) to add the message "Greetings and Salutations. I will master ASP.NET in this course."
To do this, if necessary, click the Design button below the editing window to switch to Design view, then click in the editing window and type " Greetings and Salutations. I will master ASP.NET in this course." (without the quotes) to get the following screen.
Click the Save button on the toolbar to save the changes to Default.aspx.
STEPs 4–5: Start Debugging; NOTE: Citrix users have different steps!3. To ensure that everything is working properly, click the Start Debugging button on the toolbar, or press the F5 key on the keyboard, or pull down the Debug menu and select Start Debugging.
Save and run by Right-Click-> Run from Browser.
Press Yes.
Click the Start Debugging button on the toolbar, or press the F5 key on the keyboard, or pull down the Debug menu and select "Start Debugging."Notice that this time the project build and website validation started.
If the Debugging Not Enabled dialog box appears, select the option to add or modify the Web.config file to enable debugging and click OK. You should only have to do this the first time you debug the site.
You will get a clean run just as you did previously. Your output screen looks like the screen below.NOTE: To execute the application, you have these options:
• If you are using Citrix, press CTRL + F5 to Start Without Debugging. You will not be deducted points for this part.
• If you are using a standalone version, press F5 to Start with Debugging, or you can press CTRL + F5 to Start Without Debugging.
Create the Salary Calculator Form
1. Right click on the Project name. Choose Add, then Select Web Form to get the screen below.And you get the Add New Item screen, shown below.
2. Select the name of the form you will add frmSalaryCalculator.aspx. Make sure "Place code in separate file" is checked and "Select master page" is unchecked.
You will create a Web-based salary calculator on this new page.
Click the Design view.
Add the Tools Window using View-> Toolbox.3. You can choose to adjust the ToolBox to tab with Solution Explorer to look like the following screen.
You will create a Web-based salary calculator on this new page.
To do this, open the aspx page in Design view and, from the Toolbox, drag a label into the form, click after the label and add about 5 spaces, then drag a textbox control after the label.
Press Enter after the textbox to put the cursor on the next line.
Add another label and textbox below the first set and press Enter.
Then add a button control. Finally, on the last line, add another label. Your form should look like the screen displayed below.4. If necessary, add the Property Window as shown in the screen below, using View->Properties Window.
5. Now we will modify the page to add proper labels and give the textboxes names.
• Change the text displayed in each label so that the first label displays Annual Hours; the second label should display Rate; and the third label should display $.
• To change the text displayed, click on the label control. This causes the property window to show all properties of the label, then change the Text property of the control in the Properties window.
• Set the ID property of the top textbox to txtAnnualHours.
• Set the ID property of the second textbox to txtPayRate. Set the ID of the bottom label (the one we set the text property to "$") to lblAnnualSalary. (Note: We set these IDs as we will be accessing the control values from the C# code. You can set the button ID and the other two labels' ID properties as well, but we won't be accessing them from our code.)
• Change the button text to display Calculate Salary. (Hint: To change the text displayed as the button label, change the Text property of the button.) The ID of the button should be btnCalculateSalary.Your form should now look like the screen displayed below.This code will be called each time the user presses the button. It is important to remember that code in the code behind page executes on the server, not on the user's browser. This means that when the button is pressed, the page is submitted back to the Web server and is processed by the ASP.Net application server on the Web server. It is this code (between the { and } in this method) that will execute on the server. Once it is done executing, the page will be sent back to the browser. Any changes we make to the page or controls on the page will be shown to the user in the updated page.
Learn More
• In this method, add code that will get the text in the txtAnnualHours text box, convert it to a Double, and store it in a double variable.
• Add code that will get the text from the txtPayRate text box, convert it to a Double, and store it in another variable.
• Create a third variable of type Double and set its value to the annual hours variable value multiplied by the rate double variable value.
• Take this resulting value and convert it to a string (text), and update the lblAnnualSalary Text property with this new string.
Let's look at a similar example. After reviewing this example, write the code needed to calculate the annual salary.
CostOfRoom Calculator is the alternate example, which demonstrates the skills you need to complete this assignment. See video at the top of this lab document and screenshots below.
What follows is an example of code-behind the Calculate button for the CostOfRoom Calculator:
Code-behind the calculate button
A control's property can be accessed by simply using the control ID followed by a . followed by the name of the property. For example, the value stored in the Text property of the txtAnnualHours control can be accessed by using this: txtAnnualHours.Text. Text properties on controls are of type string.
The output of the CostOfRoom calculator is shown in the screen below with Length, Width, Cost Per Square Unit labels and input boxes, and the Calculations button.
Use small values for length and width.
Use large values for length and width and see the formatting of the output.
To convert a string to a Double you can use the Convert class. If we had a string variable called str1 and a double variable called myNumber, the C# code to convert this would be as follows:
When converting from one type to another, we are assuming that the value stored in the type being converted is compatible with the type with which we are converting. In the example above, if the value stored in str1 was not a type compatible with a Double (for example, tiger), an error would be raised.
All of the base types in C# (double, int etc) have a ToString() method that you can call. If you had a double variable that you wanted to convert to a string and set that string to my label's text, you would do the following:
This would take whatever value was stored in the myNumber Double and convert it to a string.
Set your new form as the start page by clicking once on the form name in the Solution Explorer and then right-clicking on the form name and selecting Set as Start Page. You can now test your application and make sure it works correctly as you did with the Hello World form above. You can switch back and forth between which form runs when you run your application by setting the different forms as the start page. The final result should look something like the screen below with the Annual Hours, Pay Rate, Calculate Salary button, and result.
Once you have verified that your project works, save your project, zip all files, and submit it.
NOTE: Please download and review the Files section files Web Lab and Citrix.zip, which contain information on how to FTP to the DeVry University website and how to use Citrix for the assignments. -

Lab 4 Introduction to Classes Box Class CPP
Regular Price: $20.00
Special Price $15.00
Out of stock
Lab 4 Introduction to Classes Box Class CPP
This lab assignment will be completed by pairs of students. Submissions by individual students will not be accepted under normal circumstances. The intent is that the two students work together. You will create a new class called Box, which represents a rectangular cubiod shape, and demonstrate its use.
Box Class Mandatory Requirements:
- Height, width, and depth dimension attributes. Each of these dimensions is stored as a positive real number with a minimum possible value of 0.01. 0 Include a set (mutator) and get (accessor) method for each dimension.
- If a dimension is set to a value lower than the minimum (0.01), then throw an invalid_argument exception with an appropriate message. Default and parameterized constructor(s). If arguments are not specified when a box is instantiated, then each of the dimensions of the box should be set to 1.0.
- A method to resize the box. This mutator should have three parameters; one for each of the dimensions.
- A method to get the volume of the box. This accessor should return height x width x depth.
- A method to convert the object to a string. This accessor should build a string that neatly displays the dimensions, formatted for output.Program Requirements:
The purpose of the main( ) function in this program is to demonstrate each of the features of the Box class. There is no set expectation for how you should do this but it should be sensible and easy to decipher from looking at the program output.Things to Explore:
You are welcome to explore beyond the mandatory requirements if you wish. Some suggestions you may be interested in include concepts that will be covered in later units:
- including static members in your class. Consider adding variables to store the minimum and maximum dimensions a box could have. These values would be shared by all Box objects.
- Creating a derived class. Think of a new class that builds on the Box class. Alternatively, you could create a Rectangle class and derive the Box class from it.
- Creating arrays/vectors of objects, or use a pointer to dynamically allocate objects. You could try this out in your demo program.General Requirements
Learn More
• Include an opening comment with both partners' names, the name of the program, the date, and a short description.
• Follow the course coding standards! Use descriptive names and sensible data-types for variables, constants, functions, etc. that follow our naming conventions. • Use good spacing and make sure braces ({}) are located where they are supposed to be and indentation follows Allman style.
• Attach an unzipped source code file (.cpp) to the assignment folder. Nothing else please.

You have no items in your shopping cart.
