Search results for 'My'
-
CIS407 Lab 3 Week 3 User activity monitoring ASP.NET Web Application
$12.00This course has expired to download the latest version of CIS407A Labs click here
CIS 407 iLab 3 of 7: User activity monitoring
iLAB OVERVIEW
Scenario/Summary
In this lab, we will demonstrate how to save user activity data in a database. We will be creating a new form to display the user activity data, a new dataset to contain the data, a data access class to structure the code, and a function within the data access class to save users' activity data when users visit the Personnel form page (frmPersonnel.aspx). We will also be adding server side validation to the frmPersonnel for you added in the previous lab and update or main menu for the new functionality. INCLUDE A SCREENSHOT OF THE ASSIGNMENT SUCCESSFULLY RUNNING TO RECEIVE CREDITDeliverables
All files are located in the subdirectory of the project. The project should function as specified: When you visit the Personnel form page (frmPersonnel.aspx), a record should be saved in the tblUserActivity table with the IP address, form name accessed (frmPersonnel), and the date accessed. When you click the "View Activity" button, you should see at least one record with this information. When the user goes to the frmPersonnel web form and enters data the following business rules are to be enforced:
• Fields may not be empty or filled with spaces. If any field is empty, turn that field background color to yellow and add to/create an error message to be shown in the error label.
• The end date must be greater than the start date. If the end date is less than the start date turn both date fields yellow and add to/create an error message to be shown in the error label.
If all fields validate properly, then the session state items should be set properly and the user should see the frmPersonnelVerified form with all the values displayed. You will also add a new item to frmMain that will take the user to the new frmUserActivity form you added. Add the proper link and a hyperlinked image to allow the user to select this new option. Once you have verified that everything works, save your website, zip up all files, and submit in the Dropbox.iLAB STEPS
STEP 1: Data Connection, Dataset and Data Access Class (10 points)
1. Open Microsoft Visual Studio.NET 2008.
2. Open the PayrollSystem website by clicking on it in the Recent Projects list, or by pulling down the File menu, selecting Open Website, navigating to the folder where you previously saved the PayrollSystem, and clicking Open.
3. Download the PayrollSystem_DB.MDB file from Doc Sharing and save it on your local computer. (Note: your operating system may lock or block the file. Once you have copied it locally, right click on the file and select Properties and then Unblock if available). Then add it to the PayrollSystem website as follows: In Visual Studio, in the Solution Explorer click Website, Add Existing Item, then navigate to the PayrollSystem_DB.MDB file you downloaded and click the Add button.
4. Now we need to create a new connection to the PayrollSystem_DB.MDB. To begin, click View Server Explorer.
5. When the Server Explorer toolbox appears, click the Connect to Database button.
6.When the Add Connection dialog appears, click the Change button. In the "Change Data Source" dialog, select MS Access Database File; Uncheck Always use this Selection; then click OK.
7. Click the Browse button to navigate to the PayrollSystem_DB.mdb file in your website folder, then click "Open". (NOTE: Be sure you select the PayrollSystem_DB.mdb file in your PayrollSystem website folder, not the one you originally downloaded from Doc Sharing!) Click Test Connection. You should receive a message that the test connection succeeded. Click OK to acknowledge the message, then click "OK" again to close the Add Connection dialog.
8. The PayrollSystem_DB.mdb should be added to the Server Explorer. Expand the database, then expand the Tables entry under the database until you see tblUserActivity. Leave the Server Explorer window open for now as you will be returning to it in a moment.
9. Create a new dataset by selecting Website Add New Item. Under Templates, select the Dataset item. Enter dsUserActivity.xsd for the name. Click Add.
10. Click here for text discription of this image.
11. If the following message appears, select Yes. You want to make this dataset available to your entire website.
12. If the TableAdapter Configuration Wizard dialog appears, click Cancel. (We will be configuring a Data Adapter for this dataset later in C# code, so we do not need to run this wizard.)
13. Drag-and-drop the tblUserActivity table from the Server Explorer window into the dsUserActivity dataset in the editor window.
NOTE: If you see a message that says your connection uses a local data file that is not in the current project, that indicates you did not select the correct PayrollSystem_DB.mdb file when you created your data connection. To fix this problem, click No, then right-click on PayrollSystem_DB.mdb in the Server Explorer window and choose Modify Connection. Click the Browse button, navigate to the PayrollSystem_DB.mdb file that is in your PayrollSystem website folder, and click Open. Test the connection, then click OK.
14. Click the Save icon on the toolbar to save the dsUserActivity.xsd dataset.
15. Click here for text discription of this image.
16. (You can now close the Server Explorer window if you wish.)
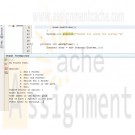
17. Create a new class to contain the C# code that will access this dataset. To do so, click Website, Add New Item. In the Add New Item dialog, select the Class template, and enter clsDataLayer for the name. Make sure the Language is set to Visual C#. Click "Add".
18. Click here for text discription of this image.
19. If the following message appears, select Yes. You want to make this class available to everything in your solution.
20. Add the following to the top of your class, below any other using statements created for you by Visual Studio:
// Add your comments here
using System.Data.OleDb;
using System.Net;
using System.Data;
21. Add the following three functions inside the squiggly braces for the "public class clsDataLayer" class, above the beginning of the "public clsDataLayer()" constructor:
// This function gets the user activity from the tblUserActivity
public static dsUserActivity GetUserActivity(string Database)
{
// Add your comments here
dsUserActivity DS;
OleDbConnection sqlConn;
OleDbDataAdapter sqlDA;
// Add your comments here
sqlConn = new OleDbConnection("PROVIDER=Microsoft.Jet.OLEDB.4.0;" +
"Data Source=" + Database);
// Add your comments here
sqlDA = new OleDbDataAdapter("select * from tblUserActivity", sqlConn);
// Add your comments here
DS = new dsUserActivity();
// Add your comments here
sqlDA.Fill(DS.tblUserActivity);
// Add your comments here
return DS;
}
// This function saves the user activity
public static void SaveUserActivity(string Database, string FormAccessed)
{
// Add your comments here
OleDbConnection conn = new OleDbConnection("PROVIDER=Microsoft.Jet.OLEDB.4.0;" +
"Data Source=" + Database);
conn.Open();
OleDbCommand command = conn.CreateCommand();
string strSQL;
strSQL = "Insert into tblUserActivity (UserIP, FormAccessed) values ('" +
GetIP4Address() + "', '" + FormAccessed + "')";
command.CommandType = CommandType.Text;
command.CommandText = strSQL;
command.ExecuteNonQuery();
conn.Close();
}
// This function gets the IP Address
public static string GetIP4Address()
{
string IP4Address = string.Empty ;
foreach (IPAddress IPA in
Dns.GetHostAddresses(HttpContext.Current.Request.UserHostAddress)) {
if (IPA.AddressFamily.ToString() == "InterNetwork") {
IP4Address = IPA.ToString();
break;
}
}
if (IP4Address != string.Empty) {
return IP4Address;
}
foreach (IPAddress IPA in Dns.GetHostAddresses(Dns.GetHostName())) {
if (IPA.AddressFamily.ToString() == "InterNetwork") {
IP4Address = IPA.ToString();
break;
}
}
return IP4Address;
}STEP 2: frmUserActivity, frmPersonnel, frmMain (10 points)
18. Create a new Web form called frmUserActivity. Switch to Design Mode and add a Label and GridView (found under the Toolbox, Data tab) having the following properties:
Property Value
Label - Text User Activity
GridView - (ID) grdUserActivity
19. Go to the Page_Load method and add the following code:
if (!Page.IsPostBack) {
// Declares the DataSet
dsUserActivity myDataSet = new dsUserActivity();
// Fill the dataset with what is returned from the function
myDataSet = clsDataLayer.GetUserActivity(Server.MapPath("PayrollSystem_DB.mdb"));
// Sets the DataGrid to the DataSource based on the table
grdUserActivity.DataSource = myDataSet.Tables["tblUserActivity"];
// Binds the DataGrid
grdUserActivity.DataBind();
}
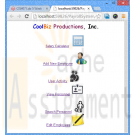
20. Open the frmMain form, add a new link button and image button to point to the new frmUserActivity. Find an image to use for the image button and add the new option as View User Activity.
21. Go to the frmMain Page_Load and add the following code:
// Add your comments here
clsDataLayer.SaveUserActivity(Server.MapPath("PayrollSystem_DB.mdb"), "frmPersonnel");
22. On the frmUserActivity form, add the CoolBiz logo hyperlinked logo at the top of the page so that when clicked the user is returned to frmMain.
23. In the Solution Explorer, right click on the frmMain.aspx form and select Set As Start Page. Run your project. When you open the project, a record should be saved in the tblUserActivity table with the IP address, form name accessed (frmPersonnel), and the date accessed. When you click the View Activity button, you should see at least one record with this information.
24. You will now add server side validation code to the frmPersonnel page. Currently, when the Submit button is pressed, the frmPersonnelVerified page is displayed. This is because the frmPersonnelVerified page is set as the Submit button's PostBackUrl property. Instead of having the page go directly to the frmPersonnelVerified page when the Submit button is pressed, we want to do some server side validation. If any of the validation rules fail, we will redisplay the frmPersonnel page with the fields in question highlighted in yellow with an error message displayed.
First, it is important to understand what is currently happening when the submit button is pressed. This is causing a postback of the form to the frmPersonnelVerified form. When this postback happens, all of the data in the fields on the frmPersonnel form are sent to the frmPersonnelVerified form as name value pairs. In the Page_Load code of frmPersonnelVerified these values are picked up from the Request object and displayed. Each name value pair will be in the Request object as the ID of the control containing the value and the value itself. We can pass data between pages by using Session state instead. In order to do validation on the values but still have the values visible on the frmPersonnelVerified page, we will need to change not only the PostBack URL of the frmPersonnel page but also how the frmPersonnelVerified form is getting the data – it will need to get it from Session state rather than from the Request object.
Make the following changes:
1. Clear the Submit button PostBackURLProperty on the frmPersonnel form.
2. In the btnSubmit_Click event handler get each value from the data entry fields and set Session state items for each.
3. Change the frmPersonnelVerified code behind to get the values from the Session state items you created in the previous step.
When you are done with these steps, you should be able to enter data on the frmPersonnel data entry form and then click the Submit button. The frmPersonnelVerified page should then be displayed with the values that were in the data entry fields on frmPersonnel.
Make sure this is all working before proceeding to the next steps.
25. Add a label to the frmPersonnel form with an ID of lblError. Do not place the label to the right or left of any of the controls on the form. Add it below the controls or above the controls. The text property of this label should be set to an empty string.
26. Add code to perform server side validation in response to the submit button being clicked. Here are the business rules we want to enforce (remember this will be server C# code in the frmPersonnel code behind): Fields may not be empty or filled with spaces. If any field is empty, turn that field background color to yellow and add to/create an error message to be shown in the error label. The end date must be greater than the start date. If the end date is less than the start date, turn both date fields yellow and add to/create an error message to be shown in the error label. If all fields validate properly then the session state items should be set properly and the user should see the frmPersonnelVerified form with all the values displayed.
27. Lab Hints: To set a value in session state do the following:
Session["txtFirstName"] = txtFirstName.Text;
28. "txtFirstName" is the key and txtFirstName.Text is the value.
29. To get this same value back from the session we use the key and the Session object as follows:
Session["txtLastName"].ToString()
30. There is a Trim method on the string object that will automatically remove spaces from the beginning and end of a string. Remember, you can turn an object like a Session item object into a string using the Convert class or just using it's ToString() method.
31. You may want to create variables to work with for validation rather than using the Request item objects directly.
32. To turn a string into a DateTime object you can use the DateTime method Parse. If you had a date value stored in a string called strDate, you could turn it into a DateTime object like this:
DateTime myDateTimeObject = DateTime.Parse(strDate);
33. You can compare two DateTime objects by using the DateTime.Compare method. If you had two DateTime objects called dt1 and dt2 you can check to see if dt1 is greater than dt2 by doing this:
if (DateTime.Compare(dt1,dt2) > 0)
34. DateTime.Compare will return a 0 if the two dates are equal, a 1 if dt1 is greater than dt2, and a -1 if dt1 is less than dt2.
35. If you put in an invalid date for either of the date fields, you will get an exception/server error when trying to parse the values. We will address this in a later lab – for now make sure you enter valid dates (valid meaning a date in the form of mm/dd/yyyy).
36. If I had a TextBox control that was called txtAge and you wanted to set it's background color you could do this:
txtAge.BackColor = System.Drawing.Color.Yellow;
37. Remember to clear the PostBackURL property of the submit button!STEP 3: Verify and submit (10 points)
28. View the video above on what functions your lab should have so far.
29. Run your project. When you open the project, and go to the main menu form a record should be saved in the tblUserActivity table with the IP address, form name accessed (frmPersonnel), and the date accessed. When you click the View Activity button you should see at least one record with this information. The validation and error display should work for entering data. All navigation and hyperlinks should work.
Once you have verified that it works, save your project, zip up all files, and submit in the Dropbox.NOTE: Make sure you include comments in the code provided where specified (where the " //Your comments here" is mentioned) and for any code you write, or else a five point deduction per item (form, class, function) will be made. You basically put two forward slashes, which start the comment; anything after the // on that line is disregarded by the compiler. Then type a brief statement describing what is happening in following code. Comments show professionalism and are a must in systems. As a professional developer, comments will set you apart from others and make your life much easier if maintenance and debugging are needed.
Learn More -
CIS407 Lab 4 Week 4 Web forms with database interaction ASP.NET Web Application
$12.00This course has expired to download the latest version of CIS407A Labs click here
CIS 407 iLab 4 of 7: Web forms with database interaction
iLAB OVERVIEW
Scenario/Summary
In this lab, we will start with the form we created in Week 2 (frmPersonnel) and add functionality to INSERT records into a database table and SELECT records for display to the user. We will create a typed dataset, a Data Layer class, several functions to access the data, and a connection to a database. We also will add a search form to allow the user to search records in the database and display the results of that search.
Instructions for Week 4 iLab: Web Forms with Database InteractionDeliverables
All files are located in the subdirectory of the project. The project should function as specified: When you press the Submit button in frmPersonnel, a record should be saved in the tblPersonnel table having the FirstName, LastName, PayRate, StartDate, and EndDate you entered on the form. Add a search feature to the project. Update your main navigation page with the new options. Once you have verified that it works, save your website, zip up all files, and submit it in the Dropbox.iLAB STEPS
STEP 1: Data Layer (10 points)
1. Open Microsoft Visual Studio.NET 2008.
2. Click the ASP.NET project called PayrollSystem to open it.
3. Open the clsDataLayer class and add the following function:
// This function saves the personnel data
public static bool SavePersonnel(string Database, string FirstName, string LastName,
string PayRate, string StartDate, string EndDate)
{
bool recordSaved;
try {
// Add your comments here
OleDbConnection conn = new OleDbConnection("PROVIDER=Microsoft.Jet.OLEDB.4.0;" +
"Data Source=" + Database);
conn.Open();
OleDbCommand command = conn.CreateCommand();
string strSQL;
// Add your comments here
strSQL = "Insert into tblPersonnel " +
"(FirstName, LastName, PayRate, StartDate, EndDate) values ('" +
FirstName + "', '" + LastName + "', " + PayRate + ", '" + StartDate +
"', '" + EndDate + "')";
// Add your comments here
command.CommandType = CommandType.Text;
command.CommandText = strSQL;
// Add your comments here
command.ExecuteNonQuery();
// Add your comments here
conn.Close();
recordSaved = true;
} catch (Exception ex) {
recordSaved = false;
}
return recordSaved; }
4. In the frmPersonnelVerified form, go to the Page_Load() event and add the following code after the existing code (but in the Page_Load event handler):
// Add your comments here
if (clsDataLayer.SavePersonnel(Server.MapPath("PayrollSystem_DB.mdb"),
Session["txtFirstName"].ToString(),
Session ["txtLastName"].ToString(),
Session ["txtPayRate"].ToString(),
Session ["txtStartDate"].ToString(),
Session ["txtEndDate"].ToString()))
{
txtVerifiedInfo.Text = txtVerifiedInfo.Text +
"\nThe information was successfully saved!";
}
else
{
txtVerifiedInfo.Text = txtVerifiedInfo.Text +
"\nThe information was NOT saved.";
5. Add comments for all code containing // Add your comments here.
6. Test your work to make sure no errors occur! (Make sure to put in valid date values for the date data entry fields).STEP 2: Data Display and Search (10 points)
7. Using the skills you learned in Week 3, create a new DataSet for the tblPersonnel table (called the DataSet dsPersonnel).
8. Using the skills you learned in Week 3, create a new function called GetPersonnel in the clsDataLayer class. This function should retrieve all data from the tblPersonnel table and return it in the form of a dsPersonnel DataSet. Use the GetUserActivity function as an example.
9. Create a new Web form called frmViewPersonnel.
10. Using the skills you learned in Week 3, add a GridView control (called grdViewPersonnel) to the form. This GridView control will be used to display data from the tblPersonnel table. Add the CoolBiz logo at the top of the page and make sure it links back to frmMain.
11. Add the following code to the Page_Load() function in frmViewPersonnel:
if (!Page.IsPostBack) {
// Declare the DataSet
dsPersonnel myDataSet = new dsPersonnel();
// Fill the dataset with what is returned from the function
myDataSet = clsDataLayer.GetPersonnel(Server.MapPath("PayrollSystem_DB.mdb"));
// Set the DataGrid to the DataSource based on the table
grdViewPersonnel.DataSource = myDataSet.Tables["tblPersonnel"];
// Bind the DataGrid
grdViewPersonnel.DataBind();
}
12. Return to the frmPersonnel Web form and add a button ((ID) = btnViewPersonnel, Text = View Personnel) which, when clicked, will display form frmViewPersonnel.
13. Using the skills you learned in Week 3, open the frmPersonnelVerified form and add a button ((ID) = btnViewPersonnel, Text = View Personnel) which, when clicked, will display form frmViewPersonnel. NOTE: This is the same button with the same functionality that you added to form frmPersonnel in the previous step. Also add a new link and linked image to frmMain called View Personnel that will go to the new frmViewPersonnel page you created.
14. You will now add a search feature to allow the user to find and display data. The user will enter a last name and the web application will display the grid of employees with all employees that match that last name.
15. Create a new web form called frmSearchPersonnel. Add the hyperlinked Cool Biz logo to this page. Also add a new item on frmMain (with a link button and image button) called Search Personnel.
16. On the frmSearchPersonnel form, add a label that displays "Search for employee by last name:". Next to the label, add a text box with an ID of txtSearchName. Add a button with an ID of btnSearch and set the text of the button to "Search".
17. When the frmSearchPersonnel Search button is pressed, the frmViewPersonnel is displayed. At this point, no searching is actually happening, but you have the forms you need and the navigation working. Now you can focus on the coding you will need to do to have the grid only display matching employees.
18. Before calling the GetPersonnel method you added previously in the lab, get the value that is in the Request["txtSearch"] item. When the form posts the search page results to the frmViewPersonnel, the name value pair for the search value is passed as part of the Request object. Assign this value to a string variable.
19. Modify the GetPersonnel method you added to include a new parameter called strSearch of type string. This parameter needs to be after the Database string parameter that is already in the method.
20. When calling the GetPersonnel method, pass the value you received to the strSearch parameter.
21. In the GetPersonnel method, you now need to use the passed in strSearch parameter value as part of the SQL string being used to retrieve data. You also need to add logic so that, if strSearch is empty or has no value, all employees are returned in the query.
22. Test the search so that when you enter a last name, employees with that last name are returned. Make sure that when you access frmViewPersonnel and you are not searching, all employees are returned.
23. Lab Hints:
Make sure you re-establish your database connection if you copied the files from a previous lab.
Before you pass the search value into the GetPersonnel method, make sure you check to see if the Request item is null. If it is, you need to pass an empty string into the method or check for null inside the method. If you don't do this, you will get a server error. To check to see if an object is null, you compare the object to the keyword null.
To create an SQL statement that will search for a given last name in the tblPersonnel table, you can do the following (assume that the search variable was called strSearch).
"select * from tblPersonnel where LastName = '" + strSearch + "'"
24. Add the new Search option and the View Employees option to your main navigation page.STEP 3: Test and submit (10 points)
Learn More
Run your project and test it as follows:
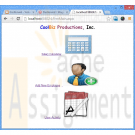
The frmMain form should be displayed first (set this form as your start page).
Homepage
Click on the Add New Employee hyperlink to go to the frmPersonnel data entry form. Click the View Personnel button on this form. The frmViewPersonnel form should be displayed in the browser, but at this point, there should not be any personnel listed (because you haven't entered any yet).
Use the Back button in your web browser to return to the frmPersonnel form and enter some personnel data, similar to the following:
Entering Personnel Data
Now click the Submit button. The frmPersonnelVerified form should be displayed, showing the data you entered, and you should get a message saying that the data was successfully saved, like this:
Verifying Personnel Data
Finally, click the View Personnel data button on this form. The frmViewPersonnel form should be displayed and should show the personnel record you just entered, retrieved from the database, like this:
Viewing Personnel Data
You also should be able to view the employee records by clicking the link on the home page.
Test the search feature and make sure that entering no search string returns all the data and that typing in a last name will return all employees with the same last name.
Search
Search Results
NOTE: Make sure you include comments in the code provided where specified (where the " // Your comments here" line appears) and for any code you write, or else a five point deduction per item (form, class, function) will be made. -
CIS407 Lab 5 Week 5 Transaction Processing ASP.NET Web Application
$12.00This course has expired to download the latest version of CIS407A Labs click here
CIS 407 iLab 5 of 7: Transaction Processing
iLAB OVERVIEW
Scenario/Summary
This week, we will use the .NET OleDbTransaction functions to either commit a set of changes to the database, if all of them were done correctly, or to roll back all of the changes if there was an error in any one of them. We will first modify the code we created last week so that it saves personnel data in the database in two steps; first by inserting a personnel record for a new employee, and then by updating that record to fill in the start and end dates. This two-step approach is not really needed in this simple case, but we will use it to simulate a more complex database transaction that would have to be done in multiple steps, such as one involving more than one table or even more than one database. We will then see what happens when there is an error in the second operation (the update), allowing a record to be created containing incomplete information--not a good result! We will fix the problem by wrapping both operations (the insert and the update) into a single transaction that will be committed (made permanent) only if both operations succeed or that will be rolled back (undone) if either operation fails. We will also add client-side validation using the ASP.Net validation controls, and we will allow the user an easy way to edit all employees.
Instructions for Week 5 iLab: "Transaction Processing"Deliverables
All files are located in the subdirectory of the project. The project should function as specified: When you press the Submit button in frmPersonnel, a record should be saved in the tblPersonnel table containing the FirstName, LastName, PayRate, StartDate, and EndDate you entered. Test that the transaction will rollback by entering invalid information in one or more items, such as Hello for a StartDate. Check tht client-side validation works: The ability to edit employees in a grid is working. Once you have verified that it works, save your website, zip up all files, and submit them to the Dropbox.iLAB STEPS
STEP 1: Modify the clsDataLayer to use a two-step process (10 points)
1. Open Microsoft Visual Studio.NET 2008.
2. Click the ASP.NET project called PayrollSystem to open it.
3. Open the clsDataLayer class.
4. Modify the SavePersonnel() function so that instead of just doing a single SQL INSERT operation with all the personnel data, it does an INSERT with only the FirstName and LastName, followed by an UPDATE to save the PayRate, StartDate, and EndDate into the new record. (This two-step approach is not really necessary here because we are dealing with only one table, tblPersonnel, but we are doing it to simulate a case with more complex processing requirements, where we would need to insert or update data in more than one table or maybe even more than one database.) Find the following existing code in the SavePersonnel() function:
// Add your comments here
strSQL = "Insert into tblPersonnel " +
"(FirstName, LastName, PayRate, StartDate, EndDate) values ('" +
FirstName + "', '" + LastName + "', " + PayRate + ", '" + StartDate +
"', '" + EndDate + "')";
// Add your comments here
command.CommandType = CommandType.Text;
command.CommandText = strSQL;
// Add your comments here
command.ExecuteNonQuery();
5. Modify it so that it reads as follows:
// Add your comments here
strSQL = "Insert into tblPersonnel " +
"(FirstName, LastName) values ('" +
FirstName + "', '" + LastName + "')";
// Add your comments here
command.CommandType = CommandType.Text;
command.CommandText = strSQL;
// Add your comments here
command.ExecuteNonQuery();
// Add your comments here
strSQL = "Update tblPersonnel " +
"Set PayRate=" + PayRate + ", " +
"StartDate='" + StartDate + "', " +
"EndDate='" + EndDate + "' " +
"Where ID=(Select Max(ID) From tblPersonnel)";
// Add your comments here
command.CommandType = CommandType.Text;
command.CommandText = strSQL;
// Add your comments here
command.ExecuteNonQuery();
6. Set frmMain as the startup form and run the PayrollSystem Web application to test the changes. When valid data values are entered for a new employee, things should work exactly as they did before. To test this, enter valid data for a new employee in frmPersonnel and click Submit. The frmPersonnelVerified form should be displayed with the entered data values and a message that the record was saved successfully. Click the View Personnel button and check that the new personnel record was indeed saved to the database and that all the entered data values, including the PayRate, StartDate, and EndDate, were stored correctly. Close the browser window.
7. Now run the PayrollSystem Web application again, but this time enter some invalid data (a nonnumeric value) in the PayRate field to cause an error, like this:
frmPersonnel With Bad Data
8. Click here for text description of this image.
9. Now when you click Submit, the frmPersonnelVerified form should display a message indicating the record was not saved:
frmPersonnel Verified With Error Message
10. Click here for text description of this image.
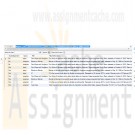
11. However, when you click on the View Personnel button to display the personnel records, you should see that an incomplete personnel record was in fact created, with missing values for the PayRate, StartDate and EndDate fields:
Incomplete Personnel Record
12. Click here for text description of this image.
13. This occurred because the Insert statement succeeded but the following Update statement did not. We do not want to allow this to happen because we end up with incomplete or incorrect data in the database. If the Update statement fails, we want the Insert statement to be rolled back, or undone, so that we end up with no record at all. We will fix this by adding transaction code in the next step.STEP 2: Add transaction code (10 points)
7. In the clsDataLayer.cls class file, add code to the SavePersonnel() function to create a transaction object. Begin the transaction, commit the transaction if all database operations are successful, and roll back the transaction if any database operation fails. The following listing shows the complete SavePersonnel() function; the lines you will need to add are marked with ** NEW ** in the preceding comment and are shown in bold.
// This function saves the personnel data
public static bool SavePersonnel(string Database, string FirstName, string LastName,
string PayRate, string StartDate, string EndDate)
{
bool recordSaved;
// ** NEW ** Add your comments here
OleDbTransaction myTransaction = null;
try
{
// Add your comments here
OleDbConnection conn = new OleDbConnection("PROVIDER=Microsoft.Jet.OLEDB.4.0;" +
"Data Source=" + Database);
conn.Open();
OleDbCommand command = conn.CreateCommand();
string strSQL;
// ** NEW ** Add your comments here
myTransaction = conn.BeginTransaction();
command.Transaction = myTransaction;
// Add your comments here
strSQL = "Insert into tblPersonnel " +
"(FirstName, LastName) values ('" +
FirstName + "', '" + LastName + "')";
// Add your comments here
command.CommandType = CommandType.Text;
command.CommandText = strSQL;
// Add your comments here
command.ExecuteNonQuery();
// Add your comments here
strSQL = "Update tblPersonnel " +
"Set PayRate=" + PayRate + ", " +
"StartDate='" + StartDate + "', " +
"EndDate='" + EndDate + "' " +
"Where ID=(Select Max(ID) From tblPersonnel)";
// Add your comments here
command.CommandType = CommandType.Text;
command.CommandText = strSQL;
// Add your comments here
command.ExecuteNonQuery();
// ** NEW ** Add your comments here
myTransaction.Commit();
// Add your comments here
conn.Close();
recordSaved = true;
}
catch (Exception ex)
{
// ** NEW ** Add your comments here
myTransaction.Rollback();
recordSaved = false;
}
return recordSaved;
}
8. Run your Web application. First, enter valid data in all the fields of frmPersonnel. When you press the Submit button in frmPersonnel, a record should be saved in the tblPersonnel table containing the FirstName, LastName, PayRate, StartDate, and EndDate. With valid data entered in all the items, the "successfully saved" message should appear indicating that the transaction was committed.
frmPersonnelVerified After Commit
9. Click here for text description of this image.
10. Click the View Personnel button and verify that the new record was in fact added to the database table correctly.
frmViewPersonnel After Commit
11. Click here for text description of this image.
12. Now close the browser, run the Web application again, and this time test that the transaction will roll back after entering incorrect information. On the frmPersonnel form, enter invalid data for PayRate and click Submit. The "not saved" message should appear, which indicates that the transaction was rolled back.
frmPersonnel Verified After Rollback
13. Click here for text description of this image.
14. Click the View Personnel button and verify that this time, as desired, an incomplete record was not added to the database table.
frmViewPersonnel After Rollback
15. Click here for text description of this image.
16. You have seen how we used the try/catch block to catch an unexpected error. You may have noticed that if you enter bad data for the dates, an exception is thrown. Go back to the validation code you added in the frmPersonnel code and add a try/catch with logic to prevent an invalid date from causing a server error.
17. In the Week 3 and Week 5 labs, you learned how to validate code once the page was posted back to the server. There is some validation that must be done on the server because it requires server resources such as the database. Some validation can also be done on the client. If you can do validation on the client it saves a round trip to the server, which will improve performance. In this approach, we will check values before the page is submitted to the server for processing. Normally, there is a combination of server and client validation used in a web application. ASP.Net includes validation controls which will use JavaScript on the client to perform validation. You will find these controls in the Validation group in the toolbox.
18. Add validation controls to the frmPersonnel form as follows: For the first and last name, make sure each field has data in it. Use the RequiredFieldValidator for this. Add the control to the right of the text box you are validating. The location of the validator control is where the error message (if there is one) will appear for the control you link the validator to. You will be adding one validator control for each text box you want to validate. Remember to set the ControlToValidate and ErrorMessage properties on the validator control. Making this change eliminates the need for the server-side check you were doing previously. Use a regular expression validator to check that the start and end date are in the correct format.
frmPersonnel Validation Controls
19. Click here for text description of this image.
20. Remove the View Personnel and Cancel buttons from the frmPersonnel form as they will cause a Postback and invoke the client-side editing you just added. The user is able to get to the View Personnel from the main form and from the personnel verification screen, so there is no need for these buttons now.
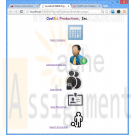
21. Because you have entered data in this lab that is invalid and those partial records are in the database, you will need to add the ability to remove or update data. Add a new main form option called Edit Employees. Add the link and image for this. This option will take the user to a new form called frmEditPersonnel.
frmMain with links added
22. Click here for text description of this image.
23. Add the new form frmEditPersonnel. On frmEditPersonnel, add the CoolBiz log at the top of the form. Add a label that says "Edit Employees." Add a GridView control with an ID of grdEditPersonnel.
24. You will now add a SQLDataSource to the page. You will be using a databound grid for this form unlike the previous grids, in which you added as unbound (in the designer).
25. Add a new SQLDataSource control to the frmEditPersonnel in the design view. This is not a visible control; that is, it will only appear in design view but the user will never see it. Note: If you change the folder name or location of your database, you will need to reconfigure the data source (right-click on the data source control and select the "Configure Data Source" option.
26. There is a small > indicator in the design view of the SQL Data Source control you added if the configuration menu is collapsed (press it to open the menu), or there is a < with the menu displayed. From the data source menu, select "Configure Data Source."
27. Press the New Connection button and select the database.
28. Press the Next button.
29. When asked if you want to save the connection in the application configuration file, check the Yes check box and press Next.
30. Select the tblPersonnel table.
31. Select all columns (you can use the * for this).
32. Press the Advanced button and check the Generate Insert, Update, and Delete option and press the OK button.
33. Press the Next button.
34. Press the Test Query button and make sure everything works as it is supposed to. If it does not repeat the above steps to make sure you did everything properly. Press the Finish button.
7. Click on the grid you added in the design view and expand the properties menu (the little > in the upper right of the control). Choose the data source you just added. On the GridView tasks menu, select Edit columns. Add an Edit, Update, and Cancel Command field. Add a Delete Command field. Press OK. You can now test the grid, which is a fully functioning Update and Delete grid. Try it out!
Edit Employees
8. Click here for text description of this image.
9. Hints: Make sure you re-establish your database connection if you copied the files from a previous lab.
In order to keep the validation controls from causing wrapping, you may want to increase the Panel width.
A regular expression for mm/dd/yyyy is this:
^(0[1-9]|1[012])[- /.](0[1-9]|[12][0-9]|3[01])[- /.](19|20)\d\d$
Experiment with the editable grid and command buttons for different display styles.STEP 3: Test and submit (10 points)
Learn More
29. Once you have verified that everything works as it is supposed to, save your project, zip up all files, and submit in the Dropbox.
NOTE: Make sure you include comments in the code provided where specified (where the " // Your comments here" is mentioned) and for any code you write, or else a five point deduction per item (form, class, function) will be made. -

Warehouse App Management System C Program
$50.00Warehouse App Management System C Program
Part A Introduction
Your friend owns a frozen food warehouse which keeps wholesale food items in a gigantic freezer at -24C. Orders arrive daily from supermarkets and restaurants by email and are “picked” and placed on pallets before being shipped to the customer.
Your friend explains that the company is using off the shelf software to successfully manage the delivery side of the business. He explains that he needs a way to monitor and communicate the pallet picking jobs to the employees.He is interested in having an app developed so that he can assign, manage and monitor the progress of the picking operations. His employees with smart phones will see what pallets (orders) are assigned to them and then update them when completed.
As a first step, he wishes to analyse data regarding pallet picking jobs and employee information to see how efficiently his company is performing. You are required to implement (using the C programming language) a prototype management system for the frozen food store. Make use of techniques covered in the course material: functions, file handling, dynamic memory allocation, data structures and sorting algorithms.
The Warehouse App Management System (WAMS) will have 2 important files: one file to record information about the employees and another file to record information about the pallets picked by the employees. The picker’s name and number are kept on file. Each pallet (job) will have an employee’s number, job number, customer name, date (and time) due and a date (and time) completed on file. You can use a dummy date and time for the date and time completed information. An employee can have many picking jobs assigned to him.
WAMS should provide functions to add employees and jobs, view employee information, sort employee information by name, view job information by date, sort job information by location, and view job information by employee.
Create a C program to implement the functions described below. Note that you may add your own utility-style functions in addition to each of the functions required. Note also that the program should be contained in one file only (i.e. no header files or multiple source files). Document your code by including comments throughout, for example, document functions with header comments. (Comments contained just before the function definition.) Your system should include a user manual containing instructions on how to run the WAMS as well as pseudo code or flowcharts for each function.
[70 marks]Function 1: display_menu
When the application is started, use this function to print a list of options to the user using a numbered list. When the user selects an option, the system performs the required action, and returns to the menu waiting for the user to select another option. Include an option to exit the system.Your main menu system might resemble the following:
1. Add an Employee
2. Add a job
3. View all employee information
4. Sort employee information by name
5. View job information by date and time due
6. Sort job information by customer
7. Sort job information by date and time due
8. Set job as completed
9. View job information by employee
10. ExitFunction 2: load_data
This function is automatically called when the program is started. It reads employee and job information from files. If the files do not exist, notify the user, create the files and display the main menu. Once a file is open, data is read into an array of structs by dynamically creating sufficient memory for each entry read from the file.Define a struct to represent the information for an employee, containing the following fields:
• Number (int)
• Employee (char[])Define a struct to represent the information for a job, containing the following fields:
• Employee number (int)
• Job Number (int)
• Customer (char([])
• Due date/time (appropriate object)
• Completed Time (appropriate object)Function 3: add_new_employee
When the user selects the “add new employee” menu item, prompt them for the data for the new employee. Append the new employee to the array of current employees and notify the user that the new record has been added successfully.Function 4: add_new_job
When the user selects the “add new job” menu item, prompt them for the new job information. Append the new job to the array of current jobs and notify the user that the new record has been added successfully.Function 5: view_employee
When the user selects the “view employees” option, this function prints a list of all employee information on record. Make sure that the employee information is in a report with headers, not simply a list of raw information.Function 6: sort_employee
Give the user the option to sort employees by name. Store the sorted information and notify the user of the name of the file. This function displays the employee, number, sorted by employee. Make a copy of the original array of employees to perform the sorting function. Make sure that the employee information is in a report with headers, not simply a list of raw information.Function 7: view_job_information_time_due
When the user selects the “View job information by date and time due” menu option, this function prompts the user for a job number. It then displays the date/time (in a human-readable format), the employee number, the customer and the time completed. Make sure that the information is in a report with headers, not simply a list of raw information.Function 8: sort_job_information_by_customer
When the user selects the “sort job information by customer” menu options, this function display all jobs sorted by customer. Store the sorted information and notify the user of the name of the file. Make a copy of the original array of jobs to perform the sorting function. Make sure that the job information is in a report with headers, not simply a list of raw information.Function 9: set_job_completed
When the user selects the “Set job as completed” menu options, prompt them for the job number. Then find the corresponding job and set the date and time completed variable to the current date and time. Store the updated information and notify the user of the name of the file.Function 10: view_job_information_by_employee
When the user selects the “view job information by employee” menu option, this function displays each employee and the job number of the jobs that they have in the database. Make sure that the information is in a report with headers, not simply a list of raw information.Function 11: save_data
This function is called when the user chooses to exit the system. Open all data files and write out the information contained in the respective arrays.Part B - Modification
Learn More
What other set of requirements could be implemented as part of WAMS to improve its functionality toward a real-time app? Choose one requirement (e.g. Print a list of recently completed jobs or print the most urgent unfinished job.), provide a definition, flowchart or pseudo code, and a suitable implementation to be included as part of the overall system. Amend the employee and/or job structures accordingly, to handle any extra information.
[30 marks] -

Penn foster Graded Project 402082 Unix-Based Environments and Apache HTTP Server
$15.00Penn foster Graded Project 402082 Unix-Based Environments and Apache HTTP Server
OVERVIEW
After installing Apache HTTP Server, you’re now ready to configure it for your website! Throughout this and future graded projects, you’ll be creating a fictional website, configuring it in various web server environments and then uploading it to the Penn Foster web server. There’s no better way to apply your knowledge than by completing a common real-world task!PROJECT SCENARIO
You’re now asked to test the fan club website on a local Apache HTTP Server. You should have completed the previous graded assignment and have the following files:
• index.html—Contains the band name, current lineup, and a brief history of the band.
• music.html—Contains their music catalog and upcoming tour dates.
• fanclub.html—Contains a form to sign-up for the band’s fanclub.
If not, go back to the previous graded project and create the required files and folders. In addition to these pages, you’ll add the following Perl script in this graded project:
• signup.pl—This script will accept the form data from fanclub.html and display that data on a welcome page.INSTRUCTIONS
In this graded project, you’ll need to have installed ActivePerl from the previous study unit and installed Apache HTTP Server as directed in the current study unit. In the first section, you’ll configure Apache for your website. In the second section, you’ll add a Perl script, modify the fanclub.html file and then test to see if the website works. To make configuration simpler, you may want to move the band_fan folder with all of its content to the C:\ drive to shorten its path. The location will now be C:\band_fan.CONFIGURATION
1. Determine the location of the band_fan folder. You can do this through the GUI by right-clicking the folder and choosing the Properties option from the context menu (Figure 7). The folder in which it’s located is the value for the Location field. You can either copy-and-paste the location or write it down. Click the OK button to dismiss the dialog.Open the Apache configuration file. This can be accessed from the Start menu. Start > All Programs > Apache HTTP Server 2.2 > Configure Apache Server > Edit the Apache httpd.conf Configuration (Figure 8).
2. A dialog may appear indicating that Windows can’t open the file. If so, select the Select a program from a list of installed programs radio button and click
the OK button. You can choose any text editor you prefer.
3. Find the DocumentRoot directive in the httpd.conf file. You can use the CTRL-F shortcut to search for the word without scrolling through the whole file.
# DocumentRoot: The directory out of which you’ll serve your
# documents. By default, all requests are taken from this directory, but
# symbolic links and aliases may be used to point to other locations.
#
DocumentRoot "C:/Apache/htdocs"
4. Modify the DocumentRoot directive for the band_fan folder. Warning: You’ll need to change every backslash (\) in the path to a forward-slash (/). C:\foster\band_fan should now be C:/foster/band_fan.
DocumentRoot "C:/band_fan"
5. Find the second Directory tag in the httpd.conf file. You can use the CTRL-F shortcut to search for the phrase <Directory "C:/Apache/htdocs"> without scrolling through the whole file.
# This should be changed to whatever you set DocumentRoot to.
#
<Directory "C:/Apache/htdocs">
6. Modify the Directory tag for the band_fan folder. Warning: You’ll need to change every backslash (\) in the path to a forward-slash (/).
<Directory "C:/band_fan">
7. Find the Options directive immediately below the Directory tag.
# The Options directive is both complicated and important. Please see
# http://httpd.apache.org/docs/2.2/mod/core.html#options
# for more information.
Options Indexes FollowSymLinks
8. Modify the Options directive to support CGI scripts by adding the option ExecCGI.
Options Indexes FollowSymLinks ExecCGI
9. Find the ScriptAlias directive in the httpd.conf file. You can use the CTRL-F shortcut to search for the word without scrolling through the whole file.
# ScriptAlias: This controls which directories contain server scripts.
# ScriptAliases are essentially the same as Aliases, except that
# documents in the target directory are treated as applications and
# run by the server when requested rather than as documents sent to the
# client. The same rules about trailing "/" apply to ScriptAlias
# directives as to Alias.
ScriptAlias /cgi-bin/ "C:/Apache/cgi-bin/"
10. Modify the ScriptAlias directive for the band_fan folder, including the cgi-bin directory.
ScriptAlias /cgi-bin/"C:/band_fan/cgi-bin/"
11. Find the next Directory tag in the httpd.conf file. You can use the CTRL-F shortcut to search for the phrase <Directory "C:/Apache/cgi-bin"> without scrolling through the whole file.
# "C:/Apache/cgi-bin" should be changed to whatever your ScriptAliased
# CGI directory exists, if you have that configured.
<Directory "C:/Apache/cgi-bin">
12. Modify the Directory tag for the band_fan folder, including the cgi-bin directory.
<Directory "C:/band_fan/cgi-bin">
13. Save and close the configuration file.
14. If Apache is running, close the command-line window in which you ran httpd.exe. Otherwise, the configuration file changes won’t affect the web service.
CGI Scripting and Testing
15. Open a text editor of your choice and type the following
Perl script:
#/perl/bin/perl
use strict;
use warnings;
use CGI;
my $cgi = CGI->new();
print
$cgi->header('text/html'),
$cgi->start_html('Fanclub Signup'),
$cgi->h1('You are now signed up.'),
$cgi->p('Thank you for signing up,' ,
$cgi->strong($cgi->param('name')), '.'),
$cgi->p('The following comment has been submitted:'),
$cgi->blockquote($cgi->param('comments')),
$cgi->end_html;
16. Create a new folder named cgi_bin in the band_fan folder and save the script with the filename signup.pl.
17. Open the fanclub.html file in text or HTML editor and modify the opening form tag as follows:
<form method='post' action='cgi-bin/signup.pl'>
18. Start the Apache web service. Launch the Windows command line and type the following at the commandline prompt:
C:\Apache\bin\httpd.exe
19. Type the URL http://localhost:8080 in your browser. You should see the homepage index.html for the band fan club. Click on the links for the other two pages and verify they work.
20. Test the fanclub.html page by typing in values for the HTML form controls and then clicking the Join button.
21. You should get a resulting page that displays as follows:PROJECT SUBMISSION
Learn More
GUIDELINES
To submit your project, you must provide the signup.pl file and modified fanclub.html and httpd.conf files. You should copy the fanclub.html file from the band_fan folder and the signup.pl file from the cgi-bin folder in the band_fan folder. The httpd.conf file should be copied (do not move) from the default location C:\Apache\conf. Move all files to your desktop or another common folder and then select them together by holding down the CTRL key while clicking them. To combine them into a single file for submission, you should right-click on one of the selected files and choose the Send to > Compressed (zipped) folder option in the context menu.
The resulting file should be named apache.zip. Submit this file for grading. -
MIS 562 Week 5 Homework Query Optimization
$20.00MIS 562 Week 5 Homework Query Optimization
Using the student schema from week 2, provide answers to the following questions.
Question
SQL statement or Answer
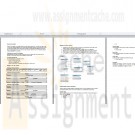
1. Generate statistics for the student, enrollment, grade, and zipcode tables (15 pts)2. Write a query that performs a join, a subquery, a correlated subquery using the student, enrollment, grade, and zipcode tables. Execute each query to show that it produces the same results. (15 pts)
3. Produce an autotrace output and explain plan for each query. (10 pts)
4. Analyze the results and state which performs best and why. Write an analysis of what operations are being performed for each query. Determine which query is the most efficient and explain why (10 pts)
Learn More -
CIS407 Lab 7 Week 7 Error Notification via E-Mail
$12.00This course has expired to download the latest version of CIS407A Labs click here
iLab 7 of 7: Error Notification via E-Mail
iLAB OVERVIEW
Scenario/Summary
In this lab, we will incorporate error handling into the login process so that a notice of each invalid login is automatically e-mailed to the technical support staff.Deliverables
When you try to log in, if your user name is not Mickey, Minnie, or another user you added (that is, if the user name is not found in tblUserLogin), then an e-mail should be sent to the addressrecipient@recipientdomain.com. If the user attempts to bypass the login page by typing a page name in the URL, your web application should redirect the user back to the login page. Once you have verified that it works, save your project, zip up all files, and submit in the Dropbox.
NOTE: E-mails may be blocked due to firewalls, antivirus software, or even Internet service providers that turned off SMTP because of some known security issues. If the code works (does not produce an error when submitting), you will get full credit for this project even if no e-mail message is actually transmitted. Consult with your instructor before submitting if an error occurs or if no e-mail is generated, to be sure.iLAB STEPS
STEP 1: Business Layer Functionality
1. Open Microsoft Visual Studio.NET 2008.
2. Click the ASP.NET website named PayrollSystem to open it.
3. Create a new class called clsBusiness Layer.
4. Add the following code in the clsBusinessLayer class:
// **** Add the following at the top of the class file,
// Add your comments here
using System.Net.Mail;
//**** Add the following code inside the body of public class clsBusinessLayer ****
public static bool SendEmail(string Sender, string Recipient, string bcc, string cc,
string Subject, string Body)
{
try {
// Add your comments here
MailMessage MyMailMessage = new MailMessage();
// Add your comments here
MyMailMessage.From = new MailAddress(Sender);
// Add your comments here
MyMailMessage.To.Add(new MailAddress(Recipient));
// Add your comments here
if (bcc != null && bcc != string.Empty) {
// Add your comments here
MyMailMessage.Bcc.Add(new MailAddress(bcc));
}
// Add your comments here
if (cc != null && cc != string.Empty) {
// Add your comments here
MyMailMessage.CC.Add(new MailAddress(cc));
}
// Add your comments here
MyMailMessage.Subject = Subject;
// Add your comments here
MyMailMessage.Body = Body;
// Add your comments here
MyMailMessage.IsBodyHtml = true;
// Add your comments here
MyMailMessage.Priority = MailPriority.Normal;
// Add your comments here
SmtpClient MySmtpClient = new SmtpClient();
// Add your comments here
MySmtpClient.Port = 25;
MySmtpClient.Host = "127.0.0.1";
// Add your comments here
MySmtpClient.Send(MyMailMessage);
// Add your comments here
return true;
} catch (Exception ex) {
// Add your comments here
return false;
}
}STEP 2: Integration
5. Open the frmLogin web form code behind file and add the following code to the body of the if (dsUserLogin.tblUserLogin.Count < 1) statement, just above the return statement:
// Add your comments here
// Add your comments here
if (clsBusinessLayer.SendEmail("youremail@yourdomain.com",
"receiver@receiverdomain.com", "", "", "Login Incorrect",
"The login failed for UserName: " + Login1.UserName +
" Password: " + Login1.Password))
{
Login1.FailureText = Login1.FailureText +
" Your incorrect login information was sent to receiver@receiverdomain.com";
}6. NOTE: Change the youremail@yourdomain.com and receiver@receiverdomain.com to your e-mail and someone else's e-mail for testing.
7. Optional: Perform this step only if you are doing this lab using Visual Studio 2008 installed on your own computer, your computer has Internet Information Services (IIS) installed, and you have administrative rights to IIS. If you are doing this lab using the iLab (Citrix) server, or if you do not have access to IIS, skip to step 8.
Open IIS (Start > Control Panel > Administrative Tools > Internet Information Services), navigate to the Default SMTP Virtual Server, right-click on it, and left-click on Properties.8. Click here for text description of this image.
9. Click the Access tab, then the Relay button, then Add, and add the IP 127.0.0.1. Click OK, OK, and APPLY when finished.10. Click here for text description of this image.
11. We have a security hole in our web application. If you start the web application by going to the login page, you can bypass the login page by simply typing the name of a form in the URL (try it). There is some limited protection because of the check we are doing for user role, but it still allows a user to get to pages we don't want them to get to unless the role is set properly. Add a security check in the Page_Load of each sensitive page (Manage Users, Add New Employee, View User Activity, Edit Employees), check for the Session role item with a value of "A," and, if the user is accessing these pages without the proper permissions, redirect back to the frmLogin.aspx page.
12. This still leaves the possibility of a person bypassing the login page. We will fix that by using forms authentication. Add the following to the web.config file. (There should already be an authentication section – replace it with this.)
<authentication mode="Forms">
<forms loginUrl="frmLogin.aspx" />
</authentication>
<authorization >
<deny users="?" />
</authorization>
13. This will redirect users to the login page if they have not yet gone through it for login. This process will use a cookie – when the user successfully logs in in a cookie is set that allows the user to go to other pages. If that cookie is not set then the user is redirected to the login page if they try to go to any other page. Add the cookie code by adding this code in the frmLogin.aspx C# code after each place that you have e.Authenticated = true:
FormsAuthentication.RedirectFromLoginPage(Login1.UserName, false);
14. Hints: Make sure you reestablish your database connection if you copied the files from a previous lab. Also, make sure to update the web.config file with the database connection string.
Update any DataSource controls you added with the new payroll database location.
When you manually try to go to a second page by skipping the login page, a cookie is set specifying the name of the page you were attempting to go to. Once you login successfully, ASP.Net will automatically attempt to navigate back to that page. You can reset the cookie so that the next page is frmMain, as expected, by typing that page in the URL for the browser before logging in.Submit Final Lab (includes all previous lab assignments)
STEP 3: Test and Submit
12. Run your project. When you try to log in, enter a user name that is not Mickey or Minnie (i.e., a user name that is not found in tblUserLogin). An e-mail should be sent to therecipient@recipientdomain.com e-mail address.Test that frmMain reconfigures properly based on user role. Make sure the user cannot bypass the login page.
Once you have verified that everything works, save your website, zip up all files, and submit in the Dropbox.
NOTE: E-mails may be blocked due to firewalls, antivirus software, or even Internet service providers that turned SMTP off because of some known security issues. If the code works (does not produce an error when submitting), you will get full credit for this project even if no e-mail message is actually transmitted. Consult with your instructor before submitting if an error occurs or if no e-mail is generated. It is expected that no e-mail will be sent if you are using the DeVry iLab (Citrix) server for this lab or if you were not able to configure IIS in step 7.
NOTE: Make sure you include comments in the code provided where specified (where the " // Add your comments here" is mentioned), including code you wrote, or else a 5 point deduction per item (form, class, function) will be made.
Learn More -
CSC 275 Flower Pack Java Assignment 1
$12.00CSC 275 Flower Pack Java Assignment 1
As I was on a hike the other day I came across a small child in the woods. He told me his life story, with special mention of his disabled sister that loves flowers, and asked me for a favor.
He wanted a way to organize the flowers that he picks for her each day and perform a few basic tasks with them, along with a few restrictions. It is our goal to help him out!
• He can only carry 25 flowers as adding any more causes many of them to become crushed.
• He needs to be able to search for a specific type of flower in his pack incase his sister has a special request.
• He needs to be able to sort flowers by their names alphabetically in ascending order (A-Z)
• He needs to know how many of each flower he has in his pack.Now, I have started a simple program which will serve as guidance for you, please help me finish it. (Please don’t modify the code that I give you, just add your code where required)
Learn More
import java.util.Scanner;
public class Assignment01Driver {
public static void main(String[] args){
new Assignment01Driver ();
}
// This will act as our program switchboard
public Assignment01Driver (){
Scanner input = new Scanner(System.in);
String[] flowerPack = new String[25];
System.out.println("Welcome to my flower pack interface.");
System.out.println("Please select a number from the options below");
System.out.println("");
while(true){
// Give the user a list of their options
System.out.println("1: Add an item to the pack.");
System.out.println("2: Remove an item from the pack.");
System.out.println("3: Sort the contents of the pack.");
System.out.println("4: Search for a flower.");
System.out.println("5: Display the flowers in the pack.");
System.out.println("0: Exit the flower pack interfact.");
// Get the user input
int userChoice = input.nextInt();
switch(userChoice){
case 1:
addFlower(flowerPack);
break;
case 2:
removeFlower(flowerPack);
break;
case 3:
sortFlowers(flowerPack);
break;
case 4:
searchFlowers(flowerPack);
break;
case 5:
displayFlowers(flowerPack);
break;
case 0:
System.out.println("Thank you for using the flower pack interface. See you again soon!");
System.exit(0);
}
}
}
private void addFlower(String flowerPack[]) {
// TODO: Add a flower that is specified by the user
}
private void removeFlower(String flowerPack[]) {
// TODO: Remove a flower that is specified by the user
}
private void sortFlowers(String flowerPack[]) {
// TODO: Sort the flowers in the pack (No need to display them here) - Use Selection or Insertion sorts
// NOTE: Special care is needed when dealing with strings! research the compareTo() method with strings
}
private void searchFlowers(String flowerPack[]) {
// TODO: Search for a user specified flower
}
private void displayFlowers(String flowerPack[]) {
// TODO: Display only the unique flowers along with a count of any duplicates
/*
* For example it should say
* Roses - 7
* Daffodils - 3
* Violets - 5
*/
}
} -
MySql DBA Project 2
$20.00MySql DBA Project 2
Sometimes a search isn't thorough. For example, when looking for information on guitars, a user may search for the term "guitars" and potentially miss documents containing the word "Fender" (a type of guitar).
MySQL's solution to this problem is the WITH QUERY EXPANSION option. The syntax for this solution is as follows:
SELECT Title, AlbumDescription FROM Albums
WHERE MATCH (AlbumDescription)
AGAINST ('guitars' WITH QUERY EXPANSION);When you use WITH QUERY EXPANSION, MySQL actually searches your full text index twice. The first time it searches with the word guitars. It then takes the most relevant results from the first search, and searches again. Take a look:
mysql> SELECT Title, AlbumDescription FROM Albums
-> WHERE MATCH (AlbumDescription)
-> AGAINST ('guitars');
+---------------------+------------------------------------------+
| Title | AlbumDescription |
+---------------------+------------------------------------------+
| Blood on the Tracks | Recorded using Martin and Fender guitars |
+---------------------+------------------------------------------+
1 row in set (0.00 sec)mysql> SELECT Title, AlbumDescription FROM Albums
-> WHERE MATCH (AlbumDescription)
-> AGAINST ('guitars' WITH QUERY EXPANSION);
+----------------------+------------------------------------------+
| Title | AlbumDescription |
+----------------------+------------------------------------------+
| Blood on the Tracks | Recorded using Martin and Fender guitars |
| Highway 61 Revisited | First using the fender! |
+----------------------+------------------------------------------+
2 rows in set (0.00 sec)In the second query, the first row was matched by guitars, and the word fender was used to find the second row.
Demonstrate WITH QUERY EXPANSION by writing four new subqueries against your Albums table. In your first two queries, do not use WITH QUERY EXPANSION. In the remaining two queries DO use WITH QUERY EXPANSION.
Combine the results of the four subqueries with a UNION. Add a column to the result set called QueryExpansion that indicates which row used query expansion. Also, add a column called Query to the result to indicate which words were included in your search.
Save your query as dba1lesson11project2.sql and then hand in the project.
Learn More -
CS371 Database Design Executive Summary
$25.00CS371 Database Design Executive Summary
Write a proposal for the new database design to include:
An executive summary for the database projectDevelop main project details
Explain the issues that exist with maintaining the data in its current form.
Explain the process of migrating the data in its current form to a well formed data model by highlighting the following in detail:
Identify required attributes that need to be tracked
Identify functional dependencies
Show the redesign in 1NF, 2NF, and 3NF (similar to figures 7.29, 7.31, 7.33)Explain the project benefits of the data in its new form.
Create the E-R diagram of your relational tables using MySQL Workbench and include in proposal.
Propose some additional data items, which you believe may be beneficial to the University if tracked in your database (i.e. Descriptions, more info about the instructors and students, departments, etc). Describe the steps required to implement these additions.
Identify project risks
In addition to the proposal, in a separate file submit:
Learn More
Provide the SQL statement required to create at least one of your tables.
Provide the SQL statement required to delete at least one of your tables.
Provide the SQL statement required to create a view which includes Course #, Course Name, Time, and Days only.
Identify at least one index, which you believe would improve performance. Explain your choice.
If you add a course description attribute to your course table, there may be some performance impacts imposed by the addition of this "text" field.

You have no items in your shopping cart.
