Search results for 'CIS355A FINAL PROJECT GUI APPLICATION'
-
CIS115 Course Project Guess The Number
Regular Price: $15.00
Special Price $12.00
CIS115 Course Project Guess The Number
You will create a program that will ask the user to guess a number between 1 and 10. The pseudocode is below. Be sure to import random at the beginning of your code and use a comment block explaining what your program does
#Guess the number week 4
#Name:
#Date:
#Random number, loop while true
#ask user for number.
#if number is too high or too low, tell user, if they guessed it break out of loopDisplay "Welcome to my Guess the number program!"
random mynumber
while True
Display "Guess a number between 1 and 10"
Get guess
if (guess<mynumber)
Display "Too low"
else if (guess>mynumber)
Display "Too high"
else if (guess==mynumber)
Display "You guessed it!"When you run your program the result should be something like this:
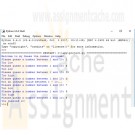
Welcome to my Guess the number program!Please guess a number between 1 and 10: 5
Too high
Please guess a number between 1 and 10: 4
Too high
Please guess a number between 1 and 10: 3
Too high
Please guess a number between 1 and 10: 2
You guessed it!Be sure to submit your assignment
Learn More -
CIS407 Lab 7 of 7: Error Notification Via E-Mail
Regular Price: $12.00
Special Price $10.00
CIS407 Lab 7 of 7: Error Notification Via E-Mail
Scenario/Summary
In this lab, we will incorporate error handling into the login process so that a notice of each invalid login is automatically e-mailed to the technical support staff.STEP 1: Business Layer Functionality
1. Open Microsoft Visual Studio.NET.
2. Click the ASP.NET website named PayrollSystem to open it.
3. Create a new class called clsBusinessLayer.
4. Add the following code in the clsBusinessLayer class:
// **** Add the following at the top of the class file,
// Add your comments here
using System.Net.Mail;
//**** Add the following code inside the body of public class clsBusinessLayer ****
public static bool SendEmail(string Sender, string Recipient, string bcc, string cc,
string Subject, string Body)
{
try {
// Add your comments here
MailMessage MyMailMessage = new MailMessage();
// Add your comments here
MyMailMessage.From = new MailAddress(Sender);
// Add your comments here
MyMailMessage.To.Add(new MailAddress(Recipient));
// Add your comments here
if (bcc != null && bcc != string.Empty) {
// Add your comments here
MyMailMessage.Bcc.Add(new MailAddress(bcc));
}
// Add your comments here
if (cc != null && cc != string.Empty) {
// Add your comments here
MyMailMessage.CC.Add(new MailAddress(cc));
}
// Add your comments here
MyMailMessage.Subject = Subject;
// Add your comments here
MyMailMessage.Body = Body;
// Add your comments here
MyMailMessage.IsBodyHtml = true;
// Add your comments here
MyMailMessage.Priority = MailPriority.Normal;
// Add your comments here
SmtpClient MySmtpClient = new SmtpClient("localhost");
//SMTP Port = 25;
//Generic IP host = "127.0.0.1";
// Add your comments here
MySmtpClient.Send(MyMailMessage);
// Add your comments here
return true;
} catch (Exception ex) {
// Add your comments here
return false;
}
}STEP 2: Integration
5. Open the frmLogin Web form code behind the file and add the following code to the body of the if (dsUserLogin.tblUserLogin.Count < 1) statement, just above the return statement:
// Add your comments here
// Add your comments here
if (clsBusinessLayer.SendEmail("youremail@yourdomain.com",
"receiver@receiverdomain.com", "", "", "Login Incorrect",
"The login failed for UserName: " + Login1.UserName +
" Password: " + Login1.Password))
{
Login1.FailureText = Login1.FailureText +
" Your incorrect login information was sent to receiver@receiverdomain.com";
}
NOTE: Change the youremail@yourdomain.com (Links to an external site.)Links to an external site. and receiver@receiverdomain.com (Links to an external site.)Links to an external site. to your e-mail and someone else's e-mail for testing.6. Optional: Perform this step only if you are doing this lab using Visual Studio installed on your own computer and you have administrative rights on your computer. If you are doing this lab using the Lab (Citrix) server, or if you do not have access to IIS, skip to Step 8.
7. In previous versions of Windows, the SMTP server was built into IIS. Now we will need to get a separate one. On the Microsoft Codeplex site is an SMTP server called smtp4dev, specifically designed for development environments. Pages 652–653 in the text discuss how to download and use smtp4dev. The site is http://smtp4dev.codeplex.com. Click on Downloads. Another example is Papercut, downloadable at:http://papercut.codeplex.com/ You can use either smtp server.
Test the e-mail by logging in as someone other than Mickey or Minnie. You should receive an email to the SMTP client.
8. We have a security hole in our Web application. If you start the Web application by going to the login page, you can bypass the login page by simply typing the name of a form in the URL (try it). There is some limited protection because of the check that we are doing for the user role, but it still allows a user to get to pages that we don't want them to get to unless the role is set properly. Add a security check in the Page_Load of each sensitive page (Manage Users, Add New Employee, View User Activity, Edit Employees), check for the Session role item with a value of A, and, if the user is accessing these pages without the proper permissions, redirect back to the frmLogin.aspx page. For example:
if (Session["SecurityLevel"] != "A")
{
Response.Redirect("frmLogin.aspx");
}9. This still leaves the possibility of a person bypassing the login page. We will fix that by using forms authentication. Add the following to the web.configfile before the </system.web> tag.
<authentication mode="Forms">
<forms loginUrl="frmLogin.aspx" />
</authentication>
<authorization >
<deny users="?" />
</authorization>10. This will redirect users to the login page if they have not yet gone through it for login. This process will use a cookie – when the user successfully logs in, a cookie is set that allows the user to go to other pages. If that cookie is not set, then the user is redirected to the login page if they try to go to any other page. Add the cookie code by adding this code in the frmLogin.aspx C# code after each place that you have e.Authenticated = true:
FormsAuthentication.RedirectFromLoginPage(Login1.UserName, false);
If you receive an error when you enter this in the code, right click on the line and choose Resolve->Using System.Web.Security11. Hints:
- Make sure you reestablish your database connection if you copied the files from a previous lab. Also, make sure to update the web.config file with the database connection string.
- Update any DataSource controls that you added with the new payroll database location.
- When you manually try to go to a second page by skipping the login page, a cookie is set specifying the name of the page you were attempting to visit. Once you log in successfully, ASP.Net will automatically attempt to navigate back to that page. You can reset the cookie so that the next page is frmMain, as expected, by typing that page in the URL for the browser before logging in.
Submit Final Lab (includes all previous lab assignments).STEP 3: Test And Submit
12. Run your project. When you try to log in, enter a username that is not Mickey or Minnie (i.e., a username that is not found in tblUserLogin). An e-mail should be sent to the recipient@recipientdomain.com (Links to an external site.)Links to an external site. e-mail address.
13. Test that frmMain reconfigures properly based on user role. Make sure that the user cannot bypass the login page.
Learn More
Once you have verified that everything works, save your website, zip up all files, and submit them.
NOTE: E-mails may be blocked due to firewalls, antivirus software, or even Internet service providers that turned SMTP off because of some known security issues. If the code works (does not produce an error when submitting), you will get full credit for this project even if no e-mail message is actually transmitted. Consult with your instructor before submitting if an error occurs or if no e-mail is generated. It is expected that no e-mail will be sent if you are using the DeVry Lab (Citrix) server for this lab or if you were not able to download and install smtp4dev.
NOTE: Make sure that you include comments in the code provided where specified (where the " // Add your comments here" is mentioned), including code you wrote, or else a 5-point deduction per item (form, class, function) will be made. -
CIS407 Lab 6 of 7: login and security levels
Regular Price: $12.00
Special Price $10.00
CIS407 Lab 6 of 7: login and security levels
STEP 1: Login Form
1. In order to do this lab, we need to assign a primary key to the tblUserLogin table. This will allow us to modify the user login table from our Manage Users form that we will create later. Go to Windows Explorer and open the PayrollSystem_DB.accdb. Set the UserID as the Primary key and save the table. Close the database.
2. Open Microsoft Visual Studio.NET.
3. Click the ASP.NET website named PayrollSystem to open it.
4. Create a new Web form named frmLogin.
5. Add the ACIT logo to the top of the frmLogin page. Do not hyperlink the logo.
6. Under the login controls, you will see Login. Drop the Login control onto the form. Set the properties of the login control as follows:
Property Value
DestinationPageUrl frmMain.aspx
TitleText Please enter your UserName and Password in order to log in to the system.
7. Highlight everything in the form, then click Format, Justify, Center. Save your work.8. Go to the Solution Explorer, right-click on frmLogin, and left-click on Set As Start Page.
Then run the website to check if the Web form appears correctly.
If you receive an error, add the following code to the web.config file right above the </configuration> line:
<appSettings>
<add key="ValidationSettings:UnobtrusiveValidationMode" value="None" />
</appSettings>STEP 2: Login Check
9. Create a new DataSet called dsUser. Use the table tblUserLogin as the database table for this dataset. Do this in the same way that you added datasets in the previous labs.
10. Open the clsDataLayer and add the following function:
// This function verifies a user in the tblUser table
public static dsUser VerifyUser(string Database, string UserName, string UserPassword)
{
// Add your comments here
dsUser DS;
OleDbConnection sqlConn;
OleDbDataAdapter sqlDA;
// Add your comments here
sqlConn = new OleDbConnection("PROVIDER=Microsoft.ACE.OLEDB.12.0;" +
"Data Source=" + Database);
// Add your comments here
sqlDA = new OleDbDataAdapter("Select SecurityLevel from tblUserLogin " +
"where UserName like '" + UserName + "' " +
"and UserPassword like '" + UserPassword + "'", sqlConn);
// Add your comments here
DS = new dsUser();
// Add your comments here
sqlDA.Fill(DS.tblUserLogin);
// Add your comments here
return DS;
}11. Double-click on the login control that you added. Add the following code to the login control Authenticate event handler:
// Add your comments here
dsUser dsUserLogin;
// Add your comments here
string SecurityLevel;
// Add your comments here
dsUserLogin = clsDataLayer.VerifyUser(Server.MapPath("PayrollSystem_DB.accdb"),
Login1.UserName, Login1.Password);
// Add your comments here
if (dsUserLogin.tblUserLogin.Count < 1)
{
e.Authenticated = false;
return;
}
// Add your comments here
SecurityLevel = dsUserLogin.tblUserLogin[0].SecurityLevel.ToString();
// Add your comments here
switch (SecurityLevel)
{
case "A":
// Add your comments here
e.Authenticated = true;
Session["SecurityLevel"] = "A";
break;
case "U":
// Add your comments here
e.Authenticated = true;
Session["SecurityLevel"] = "U";
break;
default:
e.Authenticated = false;
break;
}STEP 3: User Authentication, Test and Submit
12. Open the frmPersonnel form and add the following code to its Page_Load() function:
// Add your comments here
if (Session["SecurityLevel"] == "A") {
btnSubmit.Visible = true;
//Add your comments here
} else {
btnSubmit.Visible = false;
}13. Set the start page as frmLogin.aspx. Run the website. Try to log in with both User Name = Mickey and Password = Mouse and User Name = Minnie and Password = Mouse. Any other user ID and password should not allow you to log in.
14. When the user logs in, we want to restrict what they can see and do based on their user role. The role is stored in the database table tblUserLogin. Mickey Mouse has all privileges, whereas Minnie Mouse has read only privileges. We want to control the visibility of the links on the frmMain page.
15. Initially, we did not set the ID of any of the Link Button or Image Button controls that we used on frmMain. In order to make our code more maintainable, we will change the IDs as follows:
Option Link Button ID Image Button ID
Annual Salary Calculator linkbtnCalculator imgbtnCalculator
Add New Employee linkbtnNewEmployee imgbtnNewEmployee
View User Activity linkbtnViewUserActivity imgbtnViewUserActivity
View Personnel linkbtnViewPersonnel imgbtnViewPersonnel
Search Personnel linkbtnSearch imgbtnSearch
Edit Employees linkbtnEditEmployees imgbtnEditEmployees16. Modify the main form so that the following options are turned off for nonadmin users:
- Add New Employee
- View User Activity
- Edit Employees17. You now have a Web application that honors the role of the logged-in user. We don't have a way of managing the user roles and users in the system.
18. Add a new form called frmManageUsers that will allow the user to add new users. The user will also need to be able to view all users and modify or delete any of the users in the database. Add a main form option called Manage Users that is only accessible to admin users. Add the link and image buttons as we have done in the past. Add the ACIT logo that is hyperlinked as you did in previous assignments.
- For the security level of the user, use a dropdown list control to allow the user to select from A or U.
- Name the controls with names that make sense.
- Add code as appropriate to the code behind and clsDataLayer. Note: You will need to create a SaveUser function that is very similar to the SavePersonnel function. Use the following as a guide:
public static bool SaveUser(string Database, string UserName, string Password, string SecurityLevel)
When creating the SaveUser function, be sure to insert the data into the tblUserLogin table with columns: userName, UserPassword, and SecurityLevel.19. Hints:
- Make sure you reestablish your database connection if you copied the files from a previous lab.
- Update any DataSource controls that you added with the new Payroll database location.
- You can turn a control on or off by setting its Visible property.
- You can add a data entry form for new users and a grid displaying all users all on the same form.
- To force a gridView to refresh, call its DataBind method in the btnAddUser_click event handler. For example, use the following code in the btnAddUser_click (be sure to include an Else condition as well if the user was not added successfully):
if (clsDataLayer.SaveUser(Server.MapPath("PayrollSystem_DB.accdb"), txtUserName.Text, txtPassword.Text,ddlSecurityLevel.SelectedValue))
{
lblError.Text = "The user was successfully added!";
grdUsers.DataBind();
}20. Test your application to make sure that you are logging in with a valid user ID. Try to log in with both Minnie and Mickey and make sure that the UI adjusts by the role properly. Make sure that you can utilize the Manage Users functionality to Add/Modify/Delete and view user information. Once you have verified that everything works, save your project, zip up all files, and submit it.
Learn More
NOTE: Make sure you include comments in the code provided where specified (where the " // Your comments here" is mentioned); also, any code you write needs to be properly commented, or else a 5-point deduction per item (form, class, function) will be made. -
DAT 210 Week 1 Create an algorithm using pseudocode
Regular Price: $10.00
Special Price $8.00
DAT 210 Week 1 Create an algorithm using pseudocode
You work in the IT group of a department store and the latest analytics shows there is a bug that allows customers to go over their credit limit. The company's president has asked you to develop a new algorithm to solve this problem.
Create your algorithm using pseudocode that determines if a department store customer has exceeded their credit limit. Be sure you gather the following inputs from the user:
Account number
Balance of the account
Total cost of all the products the customer is looking to purchase
Allowed credit limitAfter you gather the inputs, make sure your algorithm calculates if the user can purchase the products and provides a message to the user indicating if the purchase is approved or declined.
Document your answers in a Microsoft® Word document.
Review "Understanding Object-Oriented Programming" with Jungwoo Ryoo from Lynda.com® for additional guidance.
Submit your document.
Learn More -

Microsoft Visual Basic 2012 Shelly Cashman Chapter 6 Case Problem 8 Galaxy Hotel
Regular Price: $20.00
Special Price $15.00
Microsoft Visual Basic 2012 Shelly Cashman Chapter 6 Case Problem 8 Galaxy Hotel
Create a requirements document and a Use Case Definition document, and design a Windows application based on the case project shown in Figure 6-135:
The Galaxy Hotel ask you to write a Windows application that computes the occupancy rate of the hotel. Occupancy rate is a percentage that is equal to the number of rooms sold divided by the total number of room available. The hotel has seven floors. The user should use an InputBox function to respond to two questions about each floor. How many rooms are occupied on that floor? How many rooms on floor are vacant? Display which floor you are asking about in each question. Display how many rooms are occupied and vacant on each floor in a ListBox object. After the user has entered all the information, display the following results: the total number of rooms at hotel, the number of occupied rooms, the number of vacant rooms. Also display the occupancy rate as a percentage, such as 61%. Nonnumeric values should not be accepted. Do not accept negative numbers. Publish the application after testing it.
Learn More -
Microsoft Visual Basic 2012 Shelly Cashman Chapter 6 Case Problem 5 Distance Traveled Calculator
Regular Price: $20.00
Special Price $15.00
Microsoft Visual Basic 2012 Shelly Cashman Chapter 6 Case Problem 5 Distance Traveled Calculator
Design a Windows application and write the code that will execute according to the program requirements shown in Figure 6-132. Before writing the code, create an event planning document for each event in the program. Create a Use Case Definition document for the application.
REQUIREMENTS DOCUMENT
Date submitted: December 5, 2014
Application title: Vacation Distance Calculator Windows ApplicationPurpose: This application computes the number of miles traveled given the speed limit and the number of days traveled while driving cross country.
Program Procedures: In a Windows application, enter the speed limit and the number of days you plan to travel across the country. You will enter the number of hours you would like to drive for each of the days, based on places you plan to visit as you drive and other factors. For example, the first day you plan to drive only 4 hours because you are driving after work. The application displays the distance that you are able to travel for the entire trip based on the speed limit and the hours driven.
Algorithms, Processing, Conditions:
1. The application opens displaying a title. The user enters the speed limit and the and number of days you plan to drive.
2. The user clicks the Distance button to request the number of hours you plan to drive each day. The result of the total number of miles you plan to drive over the entire trip will be displayed.
3. A File menu contains a Clear and an Exit option. The Clear menu item clears the result and the entered number of miles per hour and time traveled. The Exit menu item closes the application.Notes and Restrictions:
1. Nonnumeric values should not be accepted.
2. The number of hours for one day of travel should not exceed 20 hours.Comments:
Learn More
1. The application allows decimal entries. -
CSIS 209 Programming Assignment 4
Regular Price: $10.00
Special Price $8.00
CSIS 209 Programming Assignment 4
Adapted from: Deitel & Deitel (2017). Visual C# 2015 How to Program (6th ed.). Pearson Education, Inc.
Write a recursive method called Power(base, exponent) that, when called, returns base exponent.
For example, Power ( 3, 4 ) = 3 * 3 * 3 * 3.
Assume that exponent is an integer greater than or equal to 1. The recursion step should use the relationship:
base exponent = base * base exponent - 1
The terminating condition occurs when exponent is equal to 1 because
base1 = base
Incorporate this method into an application that enables the user to enter the base and exponent.Requirements:
In the Main() method, declare three arrays of long data types: baseNumbers, exponents, and results. Each array should be created to hold exactly 5 members.Using a FOR loop, populate the baseNumbers array with random integers between 1 and 50 and populate the exponents array with random integers between 1 and 10. Use a random number generator to create these random numbers.
Using another FOR loop, call the Power method, passing it a member of the baseNumbers array and a member of the exponents array for each iteration of the loop. Store the returned values in the results array.
The Power method should use the algorithm described above and MUST be recursive, taking two longs as arguments and returning a long data type.
Create another method called PrintArrays that takes as arguments the three arrays you created above and returns void. The method should print a header as "Base", "Exponent", and "Result" with each word separated with a single tab character. Using a FOR loop, iterate over each array using the GetUpperBound method to determine the condition for which the loop terminates. For each iteration of the loop, print out the base, exponent, and result from each array under the appropriate column headings. (Hint: You may need to use one or more tabs to separate the data values to make them line up with the headers above.)
The Main() method should call the PrintArrays method, passing in the three arrays as arguments.
Learn More -

CSIS 209 Programming Assignment 3
Regular Price: $10.00
Special Price $8.00
CSIS 209 Programming Assignment 3
Adapted from: Deitel & Deitel (2017). Visual C# 2015 How to Program (6th ed.).Pearson Education, Inc.
Write an application to simulate the rolling of two dice. The app should use an object of class Random one to the first die and again to roll the second die. The sum of the two values should then be calculated. Each die can show an integer from 1 to 6, so the sum of the values will vary from 2 to 12, with 7 being the most frequest sum and 2 and 12 the least frequest sums.
Your application should roll the dice 36,000 times. Use a one-dimensional array to tally the number of times each possible sum appears. Display the results in tabular format. Determine whether or the totals are reasonable (e.g. there are six ways to roll a 7, so approximately one-sixth of the rolls should be 7).
Requirements:
In the Main() method, you will declare an integer array to hold the tally of the rolls. Use the Random class to generate a random number between 1 and 6 for each of the die rolls.Using a FOR loop, iterate 36,000 times to make the two die rolls, sum the results, then increase the count of the correct element in the array to record the result. (HINT: The array being used here WILL NOT be 36,000 elements long. It will only have a length of 10)
Using another FOR loop, print the results of roll counts contained in the array to the screen in two columns with headers. The first column will hold all the possible rolls of the two dice, with the count of how many times that roll combination was achieved in the second column.
When using the loop to print the results array, use the GetUpperBounds() method to determine how many times to loop. DO NOT assume that you will always get an array of length 10. Make the code smart enough to figure out how many times to loop no matter what the length of the array.
Learn More -
CSIS 209 Programming Assignment 1
Regular Price: $8.00
Special Price $5.00
CSIS 209 Programming Assignment 1 Instructions
Adapted from: Deitel & Deitel (2017). Visual C# 2015 How to Program (6th ed.).Pearson Education, Inc.
Write an application that asks the user to enter two integers and displays "The two numbers you entered are: ", followed by the two numbers on the screen.
Next , determine the sum, difference (result of first number minus the second number), product, and quotient (result of first number divided by the second number), and modulus (remainder of the first number divided by the second number) and print these values to the screen.
Finally, determine the larger of the two integers, and print to the screen "The larger of the two numbers is: ", followed by the larger integer. If the two numbers are equal, print "The two numbers are equal."
Use the example below to format your output.
Learn More -
CSIS 209 Programming Assignment 2 Salesperson Total Sales Application
Regular Price: $15.00
Special Price $12.00
CSIS 209 Programming Assignment 2 Salesperson Total Sales Application
Adapted from: Deitel & Deitel (2017). Visual C# 2015 How to Program (6th ed.). Pearson Education, Inc.
A large company pays its salespeople on a commission basis. The salespeople receive $200 per week plus 9% of their gross sales for that week. For example, a salesperson who sells $5,000 worth of merchandise in a week receives $200 plus 9% of $5,000, or a total of $650. You’ve been supplied with a list of the items sold by each salesperson. The values of these items are as follows:
Item Value
1 239.99
2 129.75
3 99.95
4 350.89Develop a C# application that inputs one salesperson's items sold for the last week, then calculates and displays that salesperson's total sales. There's no limit to the number of items that can be sold by a salesperson. You do not have to implement this with classes and objects.
Technical Requirements:
Prompt the user to enter the salesperson's name, and store this name in a variable.
Prompt the user to enter an item number and a quantity sold of that item. Store these two entries in two separate variables called "intItem" and "intQuantity".
Using a DO-WHILE control structure, loop until the user enters -1 for the item number.
Calculate the amount of sales for an item and store the result in a variable called dblItemSales.
After the user enters an item number and a quantity, print to the screen: the salesperson's name "has sold " [intQuantity] "of item # [intItem].
Accumulate the total sales in a variable called dblTotalSales by using a SWITCH statement to select the correct value to be multiplied by the quantity sold and adding this result to a running total, which is stored in the variable dblTotalSales.
If the user enters a number other than 1, 2, 3, or 4, display the message "Invalid Entry" and re-prompt the user to enter an Item Number. Make sure you do not perform any calculations or prompt the user to enter a quantity if the item number is incorrect.
After accumulating the total sales for an employee (that is, after the user has entered a -1 to quit), print to the screen Salesperson [Salesperson’s name] sold a total of [total sales].See below for examples of the required output.
Learn More

You have no items in your shopping cart.
