Search results for 'ITS 320'
-

ITSD322 Unit 5 Java ExceptionHandler program
Regular Price: $20.00
Special Price $15.00
ITSD322 Unit 5 Java ExceptionHandler program
Program Description:
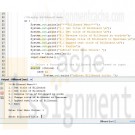
For this project, you will write a Java program that demonstrates exception handling. Your program will accept from the user ten numbers and place them in an array. The numbers in the array will be added together and the result displayed to the user. The program will compare the values for the first two elements in the array (only) and determine which number is larger and report that information on screen. Then divide the larger number by the smaller number and report the result of that calculation. The program must use exception handling to avoid division by zero errors or out of range errors, then present a friendly error message to the user. The program must then repeat (loop), prompting the user for new data entry. When the user enters 9999, the program must terminate on the next loop cycle, and this must be indicated in the program text (“Enter 9999 to exit.”)
Project Steps:
Create a new project named "ExceptionHandler." (Custom classes are not needed.)
Learn More
Write code to accept numbers entered by the user.
Use error handling to ensure that only numbers are accepted.
Write code to add all values in the array together and display the result to the user.
Write code to compare the first two values in the array and report the results
Write code to divide the larger number by the smaller number from the above comparison
Use error handling to ensure that the program doesn’t crash if it attempts to divide a number by zero.
Prompt the user for another set of ten numbers.
If the user entered 9999 during data entry in the last loop cycle, terminate the program.
Use exception handling to manage out of range exceptions (only numbers are entered)
Use exception handling to manage division by zero exceptions (as noted)
Use exception handling to manage by default any errors that don’t fall into the above categories.
Using Catch blocks, display the cause of any exceptions to the user.
Output instructions to the screen so that the user will know how to operate the program and what to expect.
Use code comments to annotate your code, indicating what each line of code does as well as how it works.
Make sure the program runs correctly before submission. (Your instructor is here to help!)
Create an activity diagram that illustrates how your program works. Your diagram must include all the data items in your program.
Formal UML is not required but may be used if preferred. (You may use any software for this, but it must be submitted in Microsoft Word.)
ZIP your project folder and submit that and your Word document (containing the activity diagram) to the portal for grading. -

PRG/420 Week 1 Java 1.31 LAB: Phone number breakdown
Regular Price: $8.00
Special Price $3.00
PRG/420 Week 1 Java 1.31 LAB: Phone number breakdown
Given a long integer representing a 10-digit phone number, output the area code, prefix, and line number using the format (800) 555-1212.
Ex: If the input is:
8005551212
the output is:
(800) 555-1212Hint: Use % to get the desired rightmost digits. Ex: The rightmost 2 digits of 572 is gotten by 572 % 100, which is 72.
Learn More
Hint: Use / to shift right by the desired amount. Ex: Shifting 572 right by 2 digits is done by 572 / 100, which yields 5. (Recall integer division discards the fraction).
For simplicity, assume any part starts with a non-zero digit. So 0119998888 is not allowed. -
ITSD322 Unit 4 Java Billboard Sign console program
Regular Price: $20.00
Special Price $15.00
ITSD322 Unit 4 Java Billboard Sign console program
One of the most useful features of any programming language is recursion and control structures, decisions and loops. Recursion and loop structures allow programs to repeat actions without duplicating code.
This console application focuses on your understanding of object oriented programming, control structures, and arrays.
Create an application that manipulates a billboard sign. Use the following guidelines:
Main Program:
The main program must create an object of Billboard class (see below for details).
The main program must include a menu to allow a user to select a function of the Billboard object.
The menu must repeat (using a loop) until the user exits the program.
The application must exit upon user request.Billboard Class:
The program must include a Billboard class (separate from the main program class) that is able to store and display the text for the completed Billboard advertisement.
The Billboard class must include variables for data input.
The Billboard class must allow the user to define a custom message.
The Billboard class must include 3-4 predefined messages that can be set as the message in the billboard.
Add one method of your choice that can be used to manipulate the message in some way, such as reversing the text or capitalizing the letters.Completion Tasks:
Learn More
Use comments in your code to demonstrate your understanding of each statement.
Make sure the program runs correctly before submission. (Your instructor is here to help!)
ZIP your project folder and submit the file to the portal for grading. (There is no Word document for this assignment.) -

PRG/420 Week 1 Java 1.29 LAB: Expression for calories burned during workout
Regular Price: $5.00
Special Price $3.00
PRG/420 Week 1 Java 1.29 LAB: Expression for calories burned during workout
The following equations estimate the calories burned when exercising (source):
Women: Calories = ( (Age * 0.074) - (Weight * 0.05741) + (Heart Rate * 0.4472) - 20.4022 ) * Time / 4.184
Men: Calories = ( (Ago * 0.2017) - (Weight * 0.09036) + (Heart Rate * 0.6309) - 55.0969 ) * Time / 4.184Write a program using inputs age (years), weight (pounds), heart rate (beats per minute), and time (minutes), respectively.
Output calories burned for women and men.
Output each floating-point value with two digits after the decimal point, which can be achieved as follows:
System.out.printf("%.2f", yourValue))Ex: If the input is:
Learn More
49 155 148 60
the output is:
Women: 580.94 calories
Men: 891.47 calories -

CIS407 Lab 6 of 7: login and security levels
Regular Price: $12.00
Special Price $10.00
CIS407 Lab 6 of 7: login and security levels
STEP 1: Login Form
1. In order to do this lab, we need to assign a primary key to the tblUserLogin table. This will allow us to modify the user login table from our Manage Users form that we will create later. Go to Windows Explorer and open the PayrollSystem_DB.accdb. Set the UserID as the Primary key and save the table. Close the database.
2. Open Microsoft Visual Studio.NET.
3. Click the ASP.NET website named PayrollSystem to open it.
4. Create a new Web form named frmLogin.
5. Add the ACIT logo to the top of the frmLogin page. Do not hyperlink the logo.
6. Under the login controls, you will see Login. Drop the Login control onto the form. Set the properties of the login control as follows:
Property Value
DestinationPageUrl frmMain.aspx
TitleText Please enter your UserName and Password in order to log in to the system.
7. Highlight everything in the form, then click Format, Justify, Center. Save your work.8. Go to the Solution Explorer, right-click on frmLogin, and left-click on Set As Start Page.
Then run the website to check if the Web form appears correctly.
If you receive an error, add the following code to the web.config file right above the </configuration> line:
<appSettings>
<add key="ValidationSettings:UnobtrusiveValidationMode" value="None" />
</appSettings>STEP 2: Login Check
9. Create a new DataSet called dsUser. Use the table tblUserLogin as the database table for this dataset. Do this in the same way that you added datasets in the previous labs.
10. Open the clsDataLayer and add the following function:
// This function verifies a user in the tblUser table
public static dsUser VerifyUser(string Database, string UserName, string UserPassword)
{
// Add your comments here
dsUser DS;
OleDbConnection sqlConn;
OleDbDataAdapter sqlDA;
// Add your comments here
sqlConn = new OleDbConnection("PROVIDER=Microsoft.ACE.OLEDB.12.0;" +
"Data Source=" + Database);
// Add your comments here
sqlDA = new OleDbDataAdapter("Select SecurityLevel from tblUserLogin " +
"where UserName like '" + UserName + "' " +
"and UserPassword like '" + UserPassword + "'", sqlConn);
// Add your comments here
DS = new dsUser();
// Add your comments here
sqlDA.Fill(DS.tblUserLogin);
// Add your comments here
return DS;
}11. Double-click on the login control that you added. Add the following code to the login control Authenticate event handler:
// Add your comments here
dsUser dsUserLogin;
// Add your comments here
string SecurityLevel;
// Add your comments here
dsUserLogin = clsDataLayer.VerifyUser(Server.MapPath("PayrollSystem_DB.accdb"),
Login1.UserName, Login1.Password);
// Add your comments here
if (dsUserLogin.tblUserLogin.Count < 1)
{
e.Authenticated = false;
return;
}
// Add your comments here
SecurityLevel = dsUserLogin.tblUserLogin[0].SecurityLevel.ToString();
// Add your comments here
switch (SecurityLevel)
{
case "A":
// Add your comments here
e.Authenticated = true;
Session["SecurityLevel"] = "A";
break;
case "U":
// Add your comments here
e.Authenticated = true;
Session["SecurityLevel"] = "U";
break;
default:
e.Authenticated = false;
break;
}STEP 3: User Authentication, Test and Submit
12. Open the frmPersonnel form and add the following code to its Page_Load() function:
// Add your comments here
if (Session["SecurityLevel"] == "A") {
btnSubmit.Visible = true;
//Add your comments here
} else {
btnSubmit.Visible = false;
}13. Set the start page as frmLogin.aspx. Run the website. Try to log in with both User Name = Mickey and Password = Mouse and User Name = Minnie and Password = Mouse. Any other user ID and password should not allow you to log in.
14. When the user logs in, we want to restrict what they can see and do based on their user role. The role is stored in the database table tblUserLogin. Mickey Mouse has all privileges, whereas Minnie Mouse has read only privileges. We want to control the visibility of the links on the frmMain page.
15. Initially, we did not set the ID of any of the Link Button or Image Button controls that we used on frmMain. In order to make our code more maintainable, we will change the IDs as follows:
Option Link Button ID Image Button ID
Annual Salary Calculator linkbtnCalculator imgbtnCalculator
Add New Employee linkbtnNewEmployee imgbtnNewEmployee
View User Activity linkbtnViewUserActivity imgbtnViewUserActivity
View Personnel linkbtnViewPersonnel imgbtnViewPersonnel
Search Personnel linkbtnSearch imgbtnSearch
Edit Employees linkbtnEditEmployees imgbtnEditEmployees16. Modify the main form so that the following options are turned off for nonadmin users:
- Add New Employee
- View User Activity
- Edit Employees17. You now have a Web application that honors the role of the logged-in user. We don't have a way of managing the user roles and users in the system.
18. Add a new form called frmManageUsers that will allow the user to add new users. The user will also need to be able to view all users and modify or delete any of the users in the database. Add a main form option called Manage Users that is only accessible to admin users. Add the link and image buttons as we have done in the past. Add the ACIT logo that is hyperlinked as you did in previous assignments.
- For the security level of the user, use a dropdown list control to allow the user to select from A or U.
- Name the controls with names that make sense.
- Add code as appropriate to the code behind and clsDataLayer. Note: You will need to create a SaveUser function that is very similar to the SavePersonnel function. Use the following as a guide:
public static bool SaveUser(string Database, string UserName, string Password, string SecurityLevel)
When creating the SaveUser function, be sure to insert the data into the tblUserLogin table with columns: userName, UserPassword, and SecurityLevel.19. Hints:
- Make sure you reestablish your database connection if you copied the files from a previous lab.
- Update any DataSource controls that you added with the new Payroll database location.
- You can turn a control on or off by setting its Visible property.
- You can add a data entry form for new users and a grid displaying all users all on the same form.
- To force a gridView to refresh, call its DataBind method in the btnAddUser_click event handler. For example, use the following code in the btnAddUser_click (be sure to include an Else condition as well if the user was not added successfully):
if (clsDataLayer.SaveUser(Server.MapPath("PayrollSystem_DB.accdb"), txtUserName.Text, txtPassword.Text,ddlSecurityLevel.SelectedValue))
{
lblError.Text = "The user was successfully added!";
grdUsers.DataBind();
}20. Test your application to make sure that you are logging in with a valid user ID. Try to log in with both Minnie and Mickey and make sure that the UI adjusts by the role properly. Make sure that you can utilize the Manage Users functionality to Add/Modify/Delete and view user information. Once you have verified that everything works, save your project, zip up all files, and submit it.
Learn More
NOTE: Make sure you include comments in the code provided where specified (where the " // Your comments here" is mentioned); also, any code you write needs to be properly commented, or else a 5-point deduction per item (form, class, function) will be made. -
PRG/211 Week 3 Lab 7.4 Loops: Countdown until matching digits
Regular Price: $8.00
Special Price $3.00
PRG/211 Week 3 Lab 7.4 Loops: Countdown until matching digits
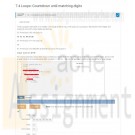
Write a program that takes in an integer in the range 20-98 as input. The output is a countdown starting from the integer, and stopping when both output digits are identical.
Ex: If the input is 93, the output is:
93 92 91 90 89 88Ex: If the input is 77, the output is:
77Ex: If the input is not between 20 and 98 (inclusive), the output is:
Input must be 20-98For coding simplicity, follow each output number by a space, even the last one. Use a while loop. Compare the digits; do not write a large if-else for all possible same-digit numbers (11, 22, 33, ..., 88), as that approach would be cumbersome for large ranges.
Learn More -
PRG/211 Week 3 Lab 7.1 Loops: Convert to binary
Regular Price: $8.00
Special Price $3.00
PRG/211 Week 3 Lab 7.1 Loops: Convert to binary
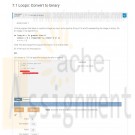
Write a program that takes in a positive integer as input, and outputs a string of 1's and 0's representing the integer in binary. For an integer x, the algorithm is:
As long as x is greater than 0
Output x % 2 (remainder is either 0 or 1)
x = x / 2
Note: The above algorithm outputs the 0's and 1's in reverse order.Ex: If the input is 6, the output is:
Learn More
011
(6 in binary is 110; the algorithm outputs the bits in reverse). -
PRG/211 Week 1 Lab 3.4: Caffeine levels
Regular Price: $8.00
Special Price $3.00
PRG/211 Week 1 Lab 3.4.1: Caffeine levels
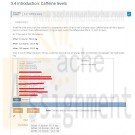
A half-life is the amount of time it takes for a substance or entity to fall to half its original value. Caffeine has a half-life of about 6 hours in humans. Given caffeine amount (in mg) as input, output the caffeine level after 6, 12, and 18 hours.
Ex: If the input is 100, the output is:
After 6 hours: 50.0 mg
Learn More
After 12 hours: 25.0 mg
After 18 hours: 12.5 mg
Note: A cup of coffee has about 100 mg. A soda has about 40 mg. An "energy" drink (a misnomer) has between 100 mg and 200 mg. -

Murachs MySQL 3rd Edition Chapter 11 Exercise 2 and 4
Regular Price: $10.00
Special Price $8.00
Murach's MySQL 3rd Edition Chapter 11 Exercise 2 and 4
2. Write a script that contains the CREATE TABLE statements needed to implement the following design in the EX schema:
These tables provide for members of an association, and each member can be registered in one or more groups within the association.
The member_id and committee_id columns are the primary keys of the Members and Committees tables, and these columns are foreign keys in the Members_Committees table.
Include any contraints or default values that you may think are necessary.
Include statements to drop these tables if the already exist.
Learn More
4. Write an ALTER TABLE statement that adds two new columns to the Members table created in exercise 2.
Add one column for annual dues that provides for three digits to the left of the decimal point and two to the right. This column should have a defualt value 52.50.
Add on column for the payment date. -

CSIS 209 Programming Assignment 2 Salesperson Total Sales Application
Regular Price: $15.00
Special Price $12.00
CSIS 209 Programming Assignment 2 Salesperson Total Sales Application
Adapted from: Deitel & Deitel (2017). Visual C# 2015 How to Program (6th ed.). Pearson Education, Inc.
A large company pays its salespeople on a commission basis. The salespeople receive $200 per week plus 9% of their gross sales for that week. For example, a salesperson who sells $5,000 worth of merchandise in a week receives $200 plus 9% of $5,000, or a total of $650. You’ve been supplied with a list of the items sold by each salesperson. The values of these items are as follows:
Item Value
1 239.99
2 129.75
3 99.95
4 350.89Develop a C# application that inputs one salesperson's items sold for the last week, then calculates and displays that salesperson's total sales. There's no limit to the number of items that can be sold by a salesperson. You do not have to implement this with classes and objects.
Technical Requirements:
Prompt the user to enter the salesperson's name, and store this name in a variable.
Prompt the user to enter an item number and a quantity sold of that item. Store these two entries in two separate variables called "intItem" and "intQuantity".
Using a DO-WHILE control structure, loop until the user enters -1 for the item number.
Calculate the amount of sales for an item and store the result in a variable called dblItemSales.
After the user enters an item number and a quantity, print to the screen: the salesperson's name "has sold " [intQuantity] "of item # [intItem].
Accumulate the total sales in a variable called dblTotalSales by using a SWITCH statement to select the correct value to be multiplied by the quantity sold and adding this result to a running total, which is stored in the variable dblTotalSales.
If the user enters a number other than 1, 2, 3, or 4, display the message "Invalid Entry" and re-prompt the user to enter an Item Number. Make sure you do not perform any calculations or prompt the user to enter a quantity if the item number is incorrect.
After accumulating the total sales for an employee (that is, after the user has entered a -1 to quit), print to the screen Salesperson [Salesperson’s name] sold a total of [total sales].See below for examples of the required output.
Learn More

You have no items in your shopping cart.
