Search results for 'CIS-130 Relational Database Management - M4E 2013'
-

CTS2437 Final Exam SQL Server Administration
$15.00CTS2437 – Final Exam Provide the SQL statements required to accomplish the following tasks. #1 (10 points) Create a database named FINAL_EXAM that you will then use for all remaining problems. #2 (20 points) Create the tables and appropriate constraints based on the following ER diagram. Use appropriate data types. Note that the size column should only accept S, M, or L. In addition the price column should have values greater than zero. All columns in both tables are required. Catgeory Product C #3 (5 points) Insert 3 rows in the Category table. The db is for a small shoe store, so use appropriate data for the description ( “Men”, “Women”, “Children”) #4 (5 points) Insert 3 Product records for each category in the product table. Use whatever data you see as appropriate. #5 (5 points) Use one statement to increase the price of all products in the Men category by 25%. #6 (5 points) Use one statement to delete all products for the Children category. #7 (10 points) Create and execute a view named EXAM_VIEW that shows all columns from both tables. Use an inner join. #8 (10 points) Create a database trigger named EXAM_TRIGGER that prevents a user from deleting a Product record on Tuesdays. Display an appropriate error message. Make sure to show that the trigger is working properly. #9 (10 points) Create a stored procedure named SP_EXAM that will be used to insert records into the Product table. Make sure to show that the procedure is working properly. #10 (5 points) Remove the EXAM_VIEW object from the database. #11 (5 points) Remove the SP_EXAM stored procedure from the database. #12 (5 points) Remove the EXAM_TRIGER database trigger from the database. #13 (5 points) Remove the FINAL_EXAM database. Learn More -
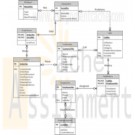
CTS2437 South Community College ERD and SQL script
$15.00South Community College (SCC) is structured like a typical community college. They have 3 semesters and a multitude of courses. Each course may have any number of sections in a given semester. For example, CTS2437 (SQL Server) may have one or more sections being taught in any given semester. SCC has 3 semesters (fall, spring, summer) which they refer to as A, B, and C. They refer to semesters by the year and the semester code. For example, fall 2011 would be referred to as 2011A. They need to keep track of students, courses, schedules, instructors, and grades earned in each course taken. They need a database to maintain these information. The student information would include the student name, address, phone#, and email. Students may have taken or are taking any number of courses. The grade earned for each course must also be maintained. The course information would include the course title and number of credits. Keep in mind that a given course may have many sections in any particular semester. SCC needs to maintain the instructor for each section in addition to the students and the grade they earned. The instructor information would include the instructor name, phone#, office#, and email address. South needs to maintain all courses that the instructor has taught or is currently teaching. Some of the requirements that SCC has requested in the database system include: • Student cannot register for the same section more than once. • A roaster of students can be produced for any given section. • GPA (Grade Point Average) can be generated for a student for any given semester, year, or entire school career. • GPA is calculated by adding up all of the grades earned (A=4, B=3, C=2, D=1, F=0) and dividing by the number of credits associated with the courses taken. • A transcript can be produced for a given student showing all courses taken and grades earned. Learn More -
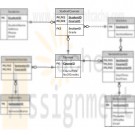
CIS 355 PCI Warranty Call Center Case ER Diagram
$15.00CIS 355 Term Project Part I For your term project, you are expected to design and implement a relational database to meet the requirements described in the PCI Warranty Call Center Case. Deliverables Part I - Project Design Document This document should have the following components: 1. A conceptual ER model/diagram of PCI’s data requirements. The diagram should include all relevant entities, attributes and relationships. For each entity, specify the identifier (primary key). Specify relationship names and cardinality constraints. Indicate which attributes are required, composite, multi- valued, and/or derived (Note: by default, an attribute is assumed to be optional, simple, single-valued and not derived). Indicate which entities are associative. Follow consistent naming conventions for entities and attributes. Use modeling/diagramming software to create the ER Diagram. 2. A list of the normalized relations (the logical model) and their attributes. For each relation, primary and foreign keys should be clearly indicated. Note: Use the format that we will be discussing in class for presenting your logical model. 3. A list of assumptions (if any) made about the information requirements presented in the case. Note: the assumptions should be reasonable and should not contradict the facts of the case. 4. A data dictionary that defines the metadata for the logical model. The data dictionary should include: the definition of each relation and attribute; the primary and foreign keys in each relation; attribute data types and lengths; and whether attributes are optional or required. Organize the data dictionary alphabetically by relation name. Assessment Part I deliverables will be evaluated based on the completeness and correctness/accuracy of the conceptual and logical data models, and of the supporting documentation (i.e., data dictionary, assumptions (if any)). If any of the deliverables are hand-drawn/written, your submission will not be graded. Submit the deliverables as one or more files. Include your name and title of the project on every page of the documents you submit. Learn More -

MIS582 iLab 2 Data Modeling Using Visio
$15.00MIS582 iLab 2: Data Modeling Using Visio
Learn More
iLAB OVERVIEW
Scenario and Summary
In this assignment, you will learn to create a physical database model in Visio from business requirements. To complete this assignment, you will need to be able to run Visio 2010, either through Citrix or installed on your workstation or laptop.
Deliverables
Name your Visio file using Lab2_, your first initial, and your last name (e.g., Lab2_JSmith.vsd). Create and save your database model in your Visio file.
iLAB STEPS
STEP 1:
Read the following business requirements closely to determine the entities and relationships needed to fulfill the requirements. The nouns in the paragraph will tell you the entities that will be needed. The verbs in the paragraph will help you determine the relationships between the entities.
Muscles Health Club Database Requirements:
The Muscles Health Club needs a database to keep track of its members, their personal trainers, and the fitness classes they are taking. Employees can act as personal trainers for members. However, only certified employees can act as personal trainers. A member can work with only one personal trainer at a time. Members can take multiple fitness classes. Fitness classes are taught by employees who can teach multiple classes. Fitness classes are taught in one of the classrooms at one of Muscles Health Club’s several locations. Each fitness classroom is designed for a different type of class (e.g., spinning, aerobics, water aerobics, weight training, etc.). It is necessary to track what fitness classes are being held in each of the different Muscles Health Club locations.
STEP 2:
• Run Visio 2010 either via Citrix or on your workstation.
• Click on the Software and Database Template group in the main window.
• Double-click on the Database Model Diagram Template to open a new file.
• Save the file with a name containing Lab2_, your first initial, and your last name as the file name (e.g., Lab2_JSmith.accdb). You will need to click the computer icon in the Save As window to see the different drives. Be sure to save the file to a local drive so it will be on your workstation.
STEP 3:
Add an entity for each entity you identified in the requirements.
• Drag the entity icon onto the drawing area in Visio.
• In the Database Properties window, add a physical name to identify it.
STEP 4:
For each entity, create a list of attributes you think would be useful to describe the entity.
• Select an entity in the drawing area of Visio.
• In the Database Properties window, select the Columns category.
• Use the table to add your attributes to the selected entities.
• Select one of the attributes to be the primary key (PK).
STEP 5:
Set the diagram to use crow’s feet notation.
• On the Database tab, in the Manage group, click Display Options.
• In the Database Document Option dialog, select the Relationship tab.
• Select the Crow’s Feet check box, and then click OK.
STEP 6:
Draw relationships between your entities.
• Drag the relationship icon onto a blank part of the drawing area.
• Connect the two ends to each of the two entities in the relationship. The parent entity must have a PK defined. The entity will be outlined in bold red lines when it connects to one end of the relationship.
STEP 7:
Set the cardinality of your relationships.
• Select a relationship line in the drawing area that is connecting two entities.
• In the Database Properties window, select the miscellaneous category.
• Select the cardinality for the selected relationship.
STEP 8:
When you are done, save the file on your local hard drive and upload it to the Course Project Drop box. Your file should have the following filename format: Lab2_FirstInitialLastName.vsd.
Submit your assignment to the Drop box located on the silver tab at the top of this page. -

MIS582 iLab 3 Database Construction Using Access
$15.00MIS582 iLab 3: Database Construction Using Access
iLAB OVERVIEW
Scenario and Summary
In this assignment, you will learn to create an Access database from a given ERD. To complete this assignment, you will need to be able to run Access 2010, either through Citrix or installed on your workstation or laptop.
Deliverables
Name your Access database file using Lab3_, your first initial, and your last name (e.g., Lab3_JSmith.accdb). Create and save your Access database file. When you are done, submit your database to the Course Project Dropbox.
iLAB STEPS
STEP 1:
Review the ERD below to understand the entities, attributes, primary keys, and relationships that you will create in your Access database.STEP 2:
• Run Access 2010, either via Citrix or from Visio 2010 installed on your workstation.
• Select the blank database icon in the main window.
• Save the file with a name containing Lab3_, your first initial, and your last name (e.g., Lab3_JSmith.accdb). In Citrix, you will need to click the computer icon in the Save As window to see the different drives. Be sure to save the file to a local drive so it will be on your workstation.
See the tutorials above for instructions on how to perform the following steps in Access 2010.STEP 3:
Learn More
Add tables to the Access database.
• Add a table for each entity listed in the provided ERD diagram.
• Add a column for each attribute listed in the provided ERD diagram.
• Select a primary key for each table as indicated in the provided ERD diagram.
STEP 4:
For every column in every table, update the data type as needed to enforce the domain constraints of the data.
• Dates should have a date data type.
• Surrogate keys should be autonumbered.
• Numeric data should have a numeric data type.
• Character data should have a character data type.
STEP 5:
Draw relationships between your entities.
• Selection Relationships under Database Tools. Move all your tables into the Relationship window by dragging them in or by using the Show Tables pop-up window.
• Second item
o Add the relationship between the tables in your database.
o Enable referential integrity on the relationship.
o Enable cascade updates on the relationship.
STEP 6:
Add at least two rows of data to each table in your database. Use any values you like for each of the columns. Remember that you must add data to parent tables before adding data to child tables, because referential integrity is enabled.
STEP 7:
Set the following column constraints in your database.
• Student first and last name cannot be a null value.
• Course credit hours must be between one and four.
• Course name must be unique and cannot be a null value.
• Instructor first and last name cannot be a null value.
• Grade must be one of these values: A, B, C, D, F, I, W, or E. W signifies withdrawn and E signifies enrolled.
STEP 8:
When you are done, save the file on your local hard drive and upload it to the Course Project Dropbox. Your file should have the following filename format: Lab3_FirstInitialLastName.accdb.
For instructions on how to copy files between the Citrix server and your local machine, watch the iLab tutorial, Copying Files from Citrix, located in the iLab menu tab under Course Home.
Note!
Submit your assignment to the Dropbox located on the silver tab at the top of this page. -

MIS582 iLab 4 Forms and Reports
$15.00MIS582 iLab 4 Forms and Reports
Learn More
i L A B O V E R V I E W
Scenario and Summary
In this assignment, you will learn to create and save forms and reports in a provided Access database. To complete this assignment, you will need to be able to run Access 2010.
Deliverables
Name your Access database file using Lab4_, your first initial, and your last name (e.g., Lab4_JSmith.accdb). Create and save your Access database file. When you are done, submit your database to the Course Project Dropbox.
i L A B S T E P S
STEP 1
• Download the Lab4_FormsReports.accdb database from Doc Sharing.
• Rename the Lab4_FormsReports.accdb database with a name containing Lab4_, your first initial, and your last name as the file name (e.g., Lab4_JSmith.accdb).
STEP 2:
• Run Access 2010, either via Citrix or from Visio 2010 installed on your workstation.
• Open the database you renamed in Step 1.
STEP 3:
Reports
Create a report for each of the following requirements. Reports may be created using the wizard or an SQL query. Reports should follow the formatting guidelines given in the next step. Reports should be named as indicated below (e.g., Report1, Report2, etc.).
1. Report1: Show Instructor information (Instructor_ID, First_Name, Last_Name) grouped by Approved Course_No.
2. Report2: Show student information (Student_ID, First_Name, Last_Name, Status, Zip) grouped by Major.
3. Report3: Show student information (Student_ID, First_Name, Last_Name, Major) grouped by Zip code. Zip codes should be in increasing order.
4. Report4: Show student information (First_Name, Last_Name) grouped by Course Number and Course Name. Course Number should be in in increasing order.
5. Report5: Show student information (Student_ID, First_Name, Last_Name, Address, Zip) grouped by Status. Students should be in alphabetical order by Last_Name and;then First_Name.
STEP 4:
Report Format
• Reports should display two or more child rows for each parent row. For example, Report1 should display each Course_No with instructors who are approved to teach the course grouped under it. In this case, the parent row would be the Approved Course_No with Instructor listed as child rows underneath each parent row
• There should be at least two child rows of data for each parent row. Add data to the tables in order to have reports show at least two child rows per parent.
STEP 5:
Form1: Create a form based on an SQL query.
• Create and run an SQL query that displays Student Information (Student_ID, First_Name, Last_Name, Address, Zip).
• Save the query in the database named Form1Query.
• Create a form based on Form1Query. While Form1Query is selected, go to the Create menu and select Form to build the basic form.
• Select the form and switch between the views (Forms, Layout, and Design) to change the properties or the form’s appearance as desired.
• Save the form in the database named Form1Query.
STEP 6:
Form2: Create a form using the Form Wizard.
• Invoke the Form Wizard as shown in the tutorials above.
• Using the Form Wizard, create a form showing instructor information (Instructor_ID, First_Name, Last_Name, Office_No).
• Switch between the views (Forms, Layout, and Design) to change the properties or the form’s appearance as desired.
• Save the form in the database named Form2Wizard.
STEP 7:
Form3: Create a form using a master detail relationship. A master detail relationship is simply a 1:N relationship between two tables. Use subforms to format the form in a split data entry form as shown in Figure 1-9. You may use SQL queries or the wizard or both to create your form and subform.
• Create a master form showing student information (Student_ID, First_Name, Last_Name, Address, Zip, Major, Status).
• Create a detail Subform showing Student_ID, Class_ID, and Student_Grade.
• For each student displayed, the student’s classes and grades should be displayed in the detail form.
• Switch between the views (Forms, Layout, and Design) to change the properties or the form’s appearance.
• Save the form in the database named Form3MaterDetail.
STEP 8:
When you are done, save the file on your local hard drive and upload it to the Course Project Dropbox. Your file should have the following filename format: Lab4_FirstInitialLastName.accdb. -

Hot Water (HW) Spas Crows Foot ERD
$15.00Create a complete ERD in Crow’s Foot notation that can be implemented in the relational model using the following description of operations. Hot Water (HW) is a small start-up company that sells spas. HW does not carry any stock. A few spas are set up in a simple warehouse so customers can see some of the models available, but any products sold must be ordered at the time of the sale. • HW can get spas from several different manufacturers. • Each manufacturer produces one or more different brands of spas. • Each and every brand is produced by only one manufacturer. • Every brand has one or more models. • Every model is produced as part of a brand. For example, Iguana Bay Spas is a manufacturer that produces Big Blue Iguana spas, a premium-level brand, and Lazy Lizard spas, an entry-level brand. The Big Blue Iguana brand offers several models, including the BBI-6, an 81-jet spa with two 6-hp motors, and the BBI-10, a 102-jet spa with three 6-hp motors. • Every manufacturer is identified by a manufacturer code. The company name, address, area code, phone number, and account number are kept in the system for every manufacturer. • For each brand, the brand name and brand level (premium, mid-level, or entry-level) are kept in the system. • For each model, the model number, number of jets, number of motors, number of horsepower per motor, suggested retail price, HW retail price, dry weight, water capacity, and seating capacity must be kept in the system. In addition, for this problem, use Excel to make a “Components of the ERM” table similar to table 4.4 on page 134. Learn More -

Types of Relationships and Sample Databases
$20.00Types of Relationships and Sample Databases
Learn More
Part 2
Come up with an original example of a one to many unary relationship. Create an example model of this relationship using the MySQL Workbench data modeler.
Part 3
Come up with an original example of a ternary relationship. Create an example model of this relationship using the MySQL Workbench data modeler.
Part 4
Using MySQL Workbench – create a data model for on Adult Baseball league which supports all of the following data requirements:
Teams
A team has a unique number associated with it
Team Name
Team City
Each team has more than one player associated with it
Players
Each Player has a unique number
A player may play or have played for more than one team
The number of years and batting average is tracked for each team the player played for.
Coaches
In this league, all coaches are also players.
A Team can have more than one coach.
Bats
A team can have multiple bats
Each bat is identified by a unique serial number.
For each of the three models above, you should export your model as a single page PDF and submit the resulting files. -

Access VBA Tutorial 11 Challenge Case Problem 2 Parkhurst Health Center
$20.00Case Problem 2
Data File needed for this case problem: exercise.accdb (cont. from Tutorial 10)Parkhurst Health & Fitness Center Martha Parkhurst asks you to continue your work on the Exercise database by creating a new form and enhancing its accuracy and appearance. To help Martha with her request, complete the following steps:
1. Open the Exercise database located in theAccess3\Case2 folder provided with your Data Files.
2. Use the Form tool to create a form named frmMemberinfo using the tblMember table as the source table. Create a procedure for the frmMemberInfo form to convert City field values to proper case—capitalize the first letter of each word, and convert all other letters to lowercase. Test the procedure.
3. Create a procedure to verify Phone field valuesin the frmMemberInfo form by doing the following:
a. For a State field value of VA, the first three digits of the Phone field value must equal 703 or 804. If the Phone field value isinvalid, display an appropriate message, cancel the event, undo the change, and move the focus to the Phone field.
b. No special action is required for other Phone field values.
c. Test the procedure, and then save your form changes.4. Create a procedure for the frmMemberInfo form to do the following:
a. Display the word current to the right of the MemberID text box in bold, magenta text only when the MembershipStatus field value is Active. Otherwise, display the
word review in bold, blue text. (Hint: Remove all controlsfrom the control layout before resizing the MemberID text box and adding the label for the message. Use the Caption property in your VBA code, and make sure you enclose Caption property settings in quotation marks.)
b. Test the modified form, and then save your form changes.5. Make a backup copy of the database, compact and repair the Exercise database, and then close the database.
Learn More -

GetWell Inc MS Access Database
$15.00GetWell, Inc. is a leading pharmaceutical organization. The organization wants to store all its customer and order details in an MS Access database. You need to perform the following tasks:
Create a database called GetWell.
Create two tables, Customer and OrderDetails, with the following information:
Customer
FieldName Type Size
CustomerID Text 5
CustomerName Text 25
CustomerAge Text 3
CustomerAddress Text 30
CustomerID will be the primary key in the Customer table.
OrderDetails
FieldName Type Size
OrderNumber Text 5
CustomerID Text 5
OrderDate Date/Time
OrderValue Number
Discount Number
OrderNumber will be the primary key in the OrderDetails table.Enter following records in the Customer table:
Learn More
CustomerID CustomerName CustomerAge CustomerAddress
C0001 Debbie Howe 28 123, Florida
C0002 Ed Young 33 New York, 234
C0003 Tom Wilkins 47 A-234 New Jersey
C0004 XXXXX XXXXXe 76XXXXXSuite
C0005 Ken Burton 52XXXXXNorth
C0006 XXXXX XXXXX 65 53, N. Dakota
C0007 XXXXX XXXXX 29 655, Wisconsin
C0008 John Barrett 55 2234, Georgia
Enter the following records in the Order table:
OrderNumber CustomerID OrderDate OrderValue Discount
O1207 C0003 10/1/2004 10500 10
O2222 C0008 4/30/2005 26790 15
O2657 C0001 11/23/2004 50000 15
O3412 C0003 2/3/2004 222 0
O4532 C0004 3/27/2005 12320 10
O4578 C0006 6/8/2004 1110 5
O4778 C0001 7/8/2004 3378 5
O5732 C0007 4/15/2005 98700 15
Write SQL statements for the database you have created to do each of the following:
Display details of all the customers whose age is greater than 45 years.
Display the names and addresses of all the customers who have placed orders with a value more than $10,000.
Display the names of customers along with the values of the orders they placed after March 01, 2005.
Create an INSTEAD OF trigger to display the message "You cannot update Order Value", if a user tries to update the OrderValue field in the Order table.
Perform all the above activities using MS Access.

You have no items in your shopping cart.
