Search results for 'university'
-

CIS515 Assignment 2 Database Systems and Database Models
$20.00CIS515 Assignment 2: Database Systems and Database Models
The Strayer Oracle Server may be used to test and compile the SQL Queries developed for this assignment. Your instructor will provide you with login credentials to a Strayer University maintained Oracle server.
Imagine that you have been hired as a consultant to assist in streamlining the data processing of an international based organization that sells high-end electronics. The organization has various departments such as payroll, human resources, finance, marketing, sales, and operations. The sales department is the only department where employees are paid a commission in addition to their yearly salary and benefits. All other departments compensate their employees with a yearly salary and benefits only. Commission is paid by multiplying the employees commission rate by the total amount of product units sold. You have access to the following data sets:
Employee (EmpNumber, EmpFirstName, EmpLastName, CommissionRate, YrlySalary, DepartmentID, JobID)
Invoice (InvNumber, InvDate, EmpNumber, InvAmount)
InvoiceLine (InvLineNumber, InvNumber, ProductNumber, Quantity)
Product (ProductNumber, ProductDescription, ProductCost)
Department (DepartmentID, DepartmentDescription)
Job (JobID, JobDescription)Write a two to three (2-3) page paper in which you:
Design a query that will allow the finance department to determine the commissions paid to specific employees of the sales department for the month of December. Note: You will need to generate the tables described above (Employee, Invoice, InvoiceLine, Product, Department, and Job) in order to compare and validate your code. Validated query code must be part of your paper.
Learn More
Compare the code of the query you designed in Question one (1) to one that would show how much total compensation is paid to each employee for the same month.
Determine and explain the factors necessary to ensure referential integrity.
Create an object-oriented model to show how the tables are interrelated through the use of graphical tools such as Microsoft Visio, or an open source alternative such as Dia. Make sure that you are able to show the relationship types such as 1:M, 1:1, or M:1. Additionally, remember to include the determined factors from the previous assignment requirement. Note: The graphically depicted solution is not included in the required page length.
Identify which data components are the entities and attributes, and the relationship between each using an object representation diagram through the use of graphical tools such as Microsoft Visio, or an open source alternative such as Dia. Note: The graphically depicted solution is not included in the required page length.
Describe how Big Data could be used to assist in the productivity and forecasting of the organizations products and resources. -

GU CS371 Database Design Week 7 Assignment Chapter 8 Final Project
$20.00GU CS371 Database Design Week 7 Assignment Chapter 8 Final Project
Fundamentals of Database Management Systems 2nd Edition
Questions and Task:
Question 1
In your own words discuss the benefits of normalization.Question 2
Do you think we should normalize our designs to higher levels than 3NF? Why or why not?Question 3
There are 14 physical database design techniques discussed in chapter 8. The goal of a quality physical design is to improve performance while disrupting the logical design as little as possible. Pick a technique, which you believe to be the most beneficial in accomplishing the above goal, and explain your reasoning.Question 4
Discuss the concept of an index and explain how they improve performance. Assignment "Final Project Overview" You just took a job with a University and have been asked to track some information about the courses they offer. The previous employee was using a spreadsheet to track this information. The University is expanding from three classes to three hundred classes. Enrollment is expected to increase from around 20 students to 5,000. Your supervisors are not very tech savvy and they simply ask you to continue maintaining the spreadsheet. Review the spreadsheet labeled final_project.xlsx.Explain the issues that exist with maintaining the data in its current form.
Learn More
Explain the process of migrating the data in its current form to a well formed data model by highlighting the following in detail:
Identify required attributes that need to be tracked
Identify functional dependencies Show the redesign in 1NF, 2NF, and 3NF (similar to figures 7.29, 7.31, 7.33)
Explain the benefits of the data in its new form.
Create the E-R diagram of your relational tables using MySQL Workbench.
Provide the SQL statement required to create at least one of your tables.
Provide the SQL statement required to delete at least one of your tables.
Provide the SQL statement required to create a view which includes Course #, Course Name, Time, and Days only.
Identify at least one index, which you believe would improve performance.
Explain your choice.
Propose some additional data items, which you believe may be beneficial to the University if tracked in your database (i.e. Descriptions, more info about the instructors and students, departments, etc).
Describe the steps required to implement these additions.
If you add a course description attribute to your course table, there may be some performance impacts imposed by the addition of this text field.
Discuss a physical design technique to improve the performance of the new course description field. -

ITS 320 Java Program 2 Custom BankAccount Class with a Modified Constructor
$15.00ITS 320 Java Program 2 Custom BankAccount Class with a Modified Constructor
1) Enter the code for the two classes "BankAccount.java" and "Program2.java" shown below. The Program2 class is a driver for the BankAccount class. Note that this version of the BankAccount class accepts a monthly interest rate in decimal format which must be calculated by the user.
/**
* BankAccount class
* This class simulates a bank account.
*
* (Taken from "Starting Out with Java - Early Objects
* (Third Edition) by Tony Gaddis, 2008 by Pearson Educ.)
*
*/
public class BankAccount
{
private double balance; // Account balance
private double interestRate; // Interest rate
private double interest; // Interest earned/**
* The constructor initializes the balance
* and interestRate fields with the values
* passed to startBalance and intRate. The
* interest field is assigned to 0.0.
*/
public BankAccount(double startBalance,
double intRate)
{
balance = startBalance;
interestRate = intRate;
interest = 0.0;
}/**
* The deposit method adds the parameter
* amount to the balance field.
*/
public void deposit(double amount)
{
balance += amount;
}
/**
* The withdraw method subtracts the
* parameter amount from the balance
* field.
*/
public void withdraw(double amount)
{
balance -= amount;
}/**
* The addInterest method adds the interest
* for the month to the balance field.
*/
public void addInterest()
{
interest = balance * interestRate;
balance += interest;
}/**
* The getBalance method returns the
* value in the balance field.
*/
public double getBalance()
{
return balance;
}/**
* The getInterest method returns the
* value in the interest field.
*/
public double getInterest()
{
return interest;
}
}/**
*
* Colorado State University – ITS-320 – Basic Programming
*
* This program demonstrates the BankAccount class.
*
* (Taken from "Starting Out with Java - Early Objects
* (Third Edition) by Tony Gaddis, 2008 by Pearson Educ.)
*
* Programmed by: Reggie Haseltine, instructor
*
* Date: June 19, 2010
*
*/
import java.util.Scanner; // Needed for the Scanner class
import java.text.DecimalFormat; // Needed for 2 decimal place amounts
public class Program2 {
public static void main(String[] args)
{
BankAccount account; // To reference a BankAccount object
double balance, // The account's starting balance
interestRate, // The annual interest rate
pay, // The user's pay
cashNeeded; // The amount of cash to withdraw
// Create a Scanner object for keyboard input.
Scanner keyboard = new Scanner(System.in);// Create an object for dollars and cents
DecimalFormat formatter = new DecimalFormat ("#0.00");
// Get the starting balance.
System.out.print("What is your account's " + "starting balance? ");
balance = keyboard.nextDouble();// Get the monthly interest rate.
System.out.print("What is your monthly interest rate? ");
interestRate = keyboard.nextDouble();
// Create a BankAccount object.
account = new BankAccount(balance, interestRate);
// Get the amount of pay for the month.
System.out.print("How much were you paid this month? ");
pay = keyboard.nextDouble();
// Deposit the user's pay into the account.
System.out.println("We will deposit your pay " + "into your account.");
account.deposit(pay);
System.out.println("Your current balance is $" + formatter.format( account.getBalance() ));
// Withdraw some cash from the account.
System.out.print("How much would you like " + "to withdraw? ");
cashNeeded = keyboard.nextDouble();
account.withdraw(cashNeeded);
// Add the monthly interest to the account.
account.addInterest();
// Display the interest earned and the balance.
System.out.println("This month you have earned $" + formatter.format( account.getInterest() ) + " in interest.");
System.out.println("Now your balance is $" + formatter.format( account.getBalance() ) );
}
}Compile the two test files (BankAccount.java first and then Program2.java second). Execute Program2 with the following inputs:
starting balance - $500 (don't enter the dollar sign)
monthly interest rate - 0.00125 (this is a 1.5% annual rate)
monthly pay - $1000 (don't enter the dollar sign)
withdrawal amount - $900 (don't enter the dollar sign)
Verify that you earn $0.75 in interest and have an ending balance at the end of the month of $600.75.
Then modify the BankAccount class's constructor method to create a BankAccount object which stores a monthly interest when the user inputs an annual interest rate of the format "nnn.nn" (i.e. 1.5). Note that the BankAccount constructor stored a monthly interest rate for the BankAccount object's instance field originally, but the user had to convert the annual rate to a monthly rate (i.e. 1.5 to 0.00125). Then modify the Program2 driver class to prompt the user for an annual interest rate. Recompile both classes and execute the modified Program2 driver class again, this time with following inputs:
starting balance - $500 (don't enter the dollar sign)
annual interest rate - 1.5
monthly pay - $1000 (don't enter the dollar sign)
withdrawal amount - $900 (don't enter the dollar sign)
Verify that you still earn $0.75 in interest and still have an ending balance at the end of the month of $600.75 as you did with the original code.Submit only the modified source code files, final user inputs, and final output. Do not submit the original source code, inputs, and output.
Be sure that you include the course, the program number, your name, and the date in your program header. Also include this information at the top of your Microsoft Word file. Include additional comments as necessary and maintain consistent indentation for good programming style as shown and discussed in our text.
2) You may use the Windows Command Prompt command line interface or any Java IDE you choose to compile and execute your program.
3) You are to submit the following deliverables to the Dropbox:
a) A single Microsoft Word file containing a screen snapshot of your Java source code for both Program2.java and BankAccount.java (just the beginnings of the source code is OK) as it appears in your IDE (e.g. jGRASP, Net Beans, JDeveloper, etc.) or editor (e.g. a DOS "more" of the .java file's first screen).
b) A listing of your entire modified version of the Java source code for Program2.java and BankAccount.java in the same Microsoft Word file as item a), and following item a).
You can simply copy and paste the text from your IDE into Word. Be sure to maintain proper code alignment by using Courier font for this item. Do not submit the original source code files! c) A screen snapshot showing all of your program’s inputs and output in the same Microsoft Word file, and following item b) above.4) Your instructor may compile and run your program to verify that it compiles and executes properly.
Learn More
5) You will be evaluated on (in order of importance):
a) Inclusion of all deliverables in Step #3 in a single Word file.
b) Correct execution of your program. This includes getting the correct results with the modified class files!
c) Adequate commenting of your code.
d) Good programming style (as shown and discussed in the textbook's examples).
e) Neatness in packaging and labeling of your deliverables.
6) You must put all your screen snapshots and source code to a single Microsoft Word file. -

IM300 Week 5 Learning Team Analyze the Execution Plan Letter
$20.00IM300 Week 5 Learning Team Analyze the Execution Plan Letter
A member of your team questions the necessity of an execution plan for the new database system. You reply in a letter.
Resources: University of Phoenix Material: Execution Plan Instructions
Analyze the execution plan created by the database using the query and instructions found in the Execution Plan Instructions document.Write a draft of your business letter to a database administrator including the following:
Learn More
An explanation of why it is important for them to understand execution plans.
How execution plans can be used to improve the performance of the database.
Format your letter consistent with APA guidelines.
The execution plan is attached which I ran against the oracle DB HR and the attached pictures are the result. -

Student Database Oracle DDL and Queries
$40.00Student Database Oracle DDL and Queries
Create the following tables.
STUDENT
Student Number (PK)
Student Last Name
Student Major
Department ID (FK)
Student GPA
Student Hours
Student Class
Advisor ID (FK)ADVISOR
Advisor ID (PK)
Advisor Last Name
Advisor Office
Advisor Building
Advisor PhoneDEPARTMENT
Department ID (PK)
Department Code
Department Name
Department Phone*NOTE* You will have to decide on how to handle the Department and Advisor ID foreign keys in terms of a numbering system as well as appropriate field widths and types for the fields.
The business rules which govern this database are: A student may have one advisor while an advisor may advise multiple students. A student belongs to only one department but each department can have many students.
Populate the table with data from Table P6.4 (p. 217).
There is an error in the book! Change Ortiz’s student number to be 200888. In addition, add these three students to your database.
STU_NUM 123984 995133 367181
STU_LNAME Freeman Wilder Green
STU_MAJOR CIT CIT BIS
DEPT_CODE CS CS IS
DEPT_NAME Computer Science Computer Science Business Informatics
DEPT_PHONE 5234 3951 3951
COLLEGE_NAME Informatics Informatics Informatics
ADVISOR_LNAME Strand Zhang Goh
ADVISOR_BLDG Griffin Griffin Griffin
ADVISOR_OFFICE 5132 3451 5612
ADVISOR_PHONE 1603 3512 7922
STU_GPA 2.5 3.9 2.3
STU_HOURS 97 58 63
STU_CLASS Senior Junior JuniorPart 1
Provide all DDL-related code. This includes table definition and creation, fk/pk creation, and populating the tables with data. Please include the output from Oracle that shows that everything was created correctly.Part 2
Learn More
Queries – For each query provide 1) What the output, specifically, should be based upon eyeballing the data 2) the SQL code used to generate the query, and 3) the output from Oracle. Please include any relevant fields you think the user of the query would need to interpret the output.
1. Advisors need the capability to generate a query that returns *all* student information based upon a student number. This will help them in the advisement process. Create a query that returns all information for student Freeman from each table.
2. Each year, college administrators need to know how many students are in each major. Create a query that counts the number of students in each major while displaying the major name.
3. Kroger has approached NKU with an internship opportunity! The business department chair needs to generate a mailing list to inform great students about a job opportunity. Create a query that shows all the student numbers, last names, majors, department names, and advisor’s last name for students in Business Admin. Students should have a minimum GPA of 2.5 or greater to be on this mailing list. List in ascending order of GPA.
4. To get an idea of the adequacy of admission standards, NKU needs to have an idea of the breakdown of students. By each college, show the number of students in each classification (freshmen, sophomore, junior, senior).
5. Due to a fire, Griffin Hall has burnt down. Write a SQL statement that updates all faculty who had offices in Griffin Hall to now be housed in the University Center.
6. New funding may be able to pay for an advising center. The dean would like to get an idea of how many students each faculty member currently advises. Create a query that shows the names and majors of students for each advisor along with the advisor’s name.
7. (Extra credit) Create a query that counts the number of students who are eligible for the Dean’s list (GPA >= 3.5) in each department. -

New Perspectives on HTML and XHTML Tutorial 3 Case Problem 3
$12.00New Perspectives on HTML and XHTML Tutorial 3 Case Problem 3
Data Files needed for this Case Problem: banner.jpg, king1.gif – king6.gif, kingtxt.htm, and centertxt.css
Center for Diversity Stewart Tompkins is the project coordinator for the Midwest University Center for Diversity. He is currently working on a Web site titled The Voices of Civil Rights, containing Web pages with extended quotes from civil rights leaders of the past and present. He has asked you to help develop a design for the pages in the series.He has given you the text for one of the pages, which is about Dr. Martin Luther King, Jr.
Complete the following:
1. In your text editor, open the kingtxt.htm and centertxt.css files from the tutorial.03\case3 folder included with your Data Files. Enter your name and the
date in the comment section of each file. Save the files as king.htm and center.css in the same folder. Take some time to study the content and layout of the king.htm file as it appears in your text editor and Web browser.
2. Return to the king.htm file in your text editor. Directly below the opening <body> tag, insert a div element with the id banner. Within the div element, insert an inline image for the banner.jpg graphic file. Give the inline image the id, bannerImage, and specify the alternate text “The Voices of Civil Rights Series.”
3. Enclose the rest of the page content, starting with the h1 heading at the top of the page through the address at the bottom of the file, in a div element with the id, pageContent.
4. Save your changes to the file.
5. In your text editor, go to the center.css file. Create a style for the body element that sets the font color to black, the background color to the value (204, 204, 153), and the margin to 0 em.This tutorial includes complete steps from 1-20
Learn More -

CIS407 Lab 1 Week 1 Annual Salary Calculator ASP.NET Web Application
$10.00This course has expired to download the latest version of CIS407A Labs click here
CIS 407 iLab 1 of 7: "Annual Salary Calculator" ASP.NET Web Application
iLAB OVERVIEW
Scenario/Summary
In this iLab, you will create an Annual Salary Calculator ASP.NET web application using Visual Studio.NET 2008.
For the iLabs, you will use the Microsoft Visual Studio 2008 software application. You have two options for using this application:
• You may use a copy of Visual Studio 2008 that is installed on your local PC. If you do not already have this software, there is a link in the Syllabus (in the Textbook and Required Materials section) that you can follow to obtain a copy at low or no cost through the DeVry Student Software Fulfillment Center.
or
• You may run Visual Studio 2008 over the Web from the DeVry iLab (Citrix) server. Instructions for using the iLab (Citrix) server are on the iLab page under Course Home.
Throughout this course, you will be creating a web application for a fictitious company called CoolBiz Productions, Inc. To get familiar with the development environment, follow the Lab Steps to create a simpleAnnual Salary Calculator ASP.NET web application. You will be adding to this application each week.
Instructions for Week 1 iLab: "Hello World, and more" ASP.NET Web Application
Click on the link above to view the tutorial.
Please watch this tutorial before beginning the iLab.
The tutorial has audio.Overview of Fictitious Company
CoolBiz Productions, Inc.
We are a mid-size indie (independent) film studio that is in need of a payroll system. We have outgrown our current system, a simple spreadsheet, to the extent that it takes three people over one week to pay everyone on a timely basis.
Overview of Our Company
We have over 2,000 full-time and part-time employees. We produce comedy, fiction, and science fiction films with budgets of $250K–$20 million. We have produced over 50 films since we first began 20 years ago.
We are very profitable and have strong links to many of the industry's most powerful people.
Current Payroll System
Our current system consists of mostly manual processing using an MS Excel spreadsheet to control who gets paid.
The system consists of the three payroll staff members reviewing each of the full-time staff members' wages, calculating how many hours they worked based on their hourly rate, and paying them by issuing a check.
The check needs to be entered in another worksheet for each of the people who were paid so that we can tell when it went out, how much it was for, and if it was cashed or not. If a [Date_Cashed] is entered, we deduct that amount from our working payroll capital account to track how much money we have for payroll.
This process is then repeated for all part-time staff and independent contractors.
Our Needs
We need a more automated way to pay our staff. We need to use the same logical flow as a basis, yet improve on it by having a way to
1. easily calculate the projected annual salary based on rate and number of hours;
2. search, enter, update, and delete staff and independent employee information in one place;
3. search, enter, update, and delete payroll automation information for the employee to set up recurring payments or one-time payments;
4. produce reports to show the following: (a) summary of who got paid per week, (b) summary of all payments per week, (c) details of any employee to-date (allow entry of a specific employee ID);
5. allow transactions to be rolled back in case we pay someone too much;
6. make use of transaction processing in case the system unexpectedly shuts down;
7. ensure the system is secure (logins required);
8. allow only authorized payroll personnel to control all aspects of the system;
9. allow only authorized payroll personnel to view transactions and user activity;
10. allow only authorized payroll personnel to e-mail reports to users using the e-mail on file; and
11. incorporate error handling into all processes in the system and e-mail any errors to the technical support people.Deliverables
All files are located in the subdirectory of the website. The website should function as follows: You should have a page that, when run, displays a page showing the text "Hello, World." You should also have a second page that is the annual salary calculator that properly calculates the annual salary, given an hourly rate and the number of hours projected to be worked in a year. Once you have verified both pages work, save your website, zip up all files, and submit in the Dropbox.iLAB STEPS
STEPS 1 through 3: Create Website and Home Page (10 points)
In this ilab, we will learn how to create a simple ASP.NET web application using Microsoft Visual Studio.NET 2008. The application will display the text "Hello, World" on the home page.
1. Open Microsoft Visual Studio 2008.
2. Create a new ASP.NET website called "PayrollSystem." To do this, select "File, New Website."
When the "New Website" dialog opens, select "ASP.NET Website" as the Template, select "File System" as the Location, and select "Visual C#" as the Language. Click Browse and navigate to the folder where you want to save your website. Add "PayrollSystem" at the end of the file path. Click OK if you are prompted to create a new folder. Click OK in the New Website dialog to finish creating the website.
3. Edit the Default.aspx file (the home page for your site) to add the message "Hello, World." To do this, if necessary, click the Design button below the editing window to switch to Design view, then click in the editing window and type "Hello, World" (without the quotes).
Click the Save button on the toolbar to save the changes to Default.aspx.
STEPS 4 through 5: Start Debugging (10 points); NOTE: Citrix users have different steps!
4. To ensure that everything is working properly, click the Start Debugging button on the toolbar, or press the F5 key on the keyboard, or pull down the Debug menu and select "Start Debugging."
5. If the "Debugging Not Enabled" dialog box appears, select the option to add or modify the Web.config file to enable debugging and click OK. You should only have to do this the first time you debug the site.
NOTE: To execute the application, you have these options:
A. If you are using Citrix, press CTRL + F5 to Start Without Debugging. You will not be deducted points for this part.
B. If you are using a standalone version, press F5 to Start with Debugging, or you can press CTRL + F5 to Start Without DebuggingSTEP 6 through 7 : Display the "Hello, World" web page (10 points)
Learn More
6. The Internet Explorer web browser will open and display your Default.aspx page containing the "Hello, World" message.
7. Click here for text description of this image.
8. Stop debugging and return to the design mode by closing the browser.
9. Add a new form to your web application called frmSalaryCalculator.aspx. Make sure "Place Code in separate file" is checked when you add the form. To add a new form, click (single-click, not double-click) on the project node in the solution explorer.
With the project node highlighted, right-click on the project node and select "Add New Item" from the popup menu. The following dialog will be displayed:
Select the name of the form you will add frmSalaryCalculator.aspx. Make sure "Place code in separate file" is checked and "Select master page" is unchecked.
10. You will create a web-based salary calculator on this new page. To do this, open the aspx page in Design view and, from the Toolbox, add three labels, two text box controls, and a button control. You can add controls by dragging the control from the Toolbox – Standard section onto your form. Your form should look like this:
11. Change the text displayed in each label so that the first label displays "Annual Hours"; the second label should display "Rate" and the third label should display "$". (Hint: To change the text displayed, change the Text property of each control.)
12. Change the button text to display "Calculate Salary." (Hint: To change the text displayed as the button label, change the Text property of the button.) Your form should now look like this:
13. Set the ID property of the top text box to txtAnnualHours. Set the ID property of the second textbox to txtRate. Set the ID of the bottom label (the one we set the text property to "$") to lblSalary. (Note: We set these IDs as we will be accessing the control values from the C# code. You can set the button ID and the other two labels' ID properties as well, but we won't be accessing them from our code.)
14. In Design view, add a C# event handler for the button-click event by double-clicking on the Calculate Salary button. This will place you in the page code behind file the editor. (Remember that ASP.Net pages have a file containing the HTML markup with an extension of .aspx and a C# 'code behind' file with an extension of .aspx.cs.) This is the code that should be displayed: (If you changed the ID of the button, it will be a different method name.)
This code will be called each time the user presses the button. It is important to remember that code in the code behind page executes on the server – not on the user's browser. This means that when the button is pressed, the page is submitted back to the web server and is processed by the ASP.Net application server on the web server. It is this code (between the { and } in this method) that will execute on the server. Once it is done executing the page will be sent back to the browser. Any changes we make to the page or controls on the page will be shown to the user in the updated page.
15. In this method, add code that will get the text in the txtAnnualHours text box, convert it to a Double, and store it in a double variable. Add code that will get the text from the txtRate text box, convert it to a Double, and store it in another variable. Create a third variable of type Double and set its value to the annual hours variable value multiplied by the rate double variable value. Take this resulting value and convert it to a string (text), and update the lblSalary Text property with this new string.
Hints: A control's property can be accessed by simply using the control ID followed by a . followed by the name of the property. For example, the value stored in the Text property of the txtAnnualHours control can be accessed by using this: txtAnnualHours.Text. Text properties on controls are of type string.
To convert a string to a Double you can use the Convert class. If we had a string variable called str1 and a double variable called myNumber, the C# code to convert this would be as follows:
When converting from one type to another, we are assuming that the value stored in the type being converted is compatible with the type we are converting to. In the example above, if the value stored in str1 was not type compatible with a Double (for example "tiger") an error would be raised.
To set the value of a control on a web form, you can access the control and set the property directly. If I had a label control called lblCar and I wanted to update the text that was displayed in the label, I could do something like this:
Note that following code would be incorrect and cause an error:
lblCar is a Label – it isn't a string so we can't assign a string directly to it, but we can assign a string directly to the Text property of the label.
All of the base types in C# (double, int etc) have a ToString() method you can call. If you had a double variable that you wanted to convert to a string and set that string to my label's text, you would do the following:
This would take whatever value was stored in the myNumber Double and convert it to a string.
To add a $ to output you can use string concatenation in C# like this:
16. Set your new form as the start page by clicking once on the form name in the Solution Explorer and then right-clicking on the form name and selecting "Set as Start Page." You can now test your application and make sure it works correctly as you did with the Hello World form above. You can switch back and forth between which form runs when you run your application by setting the different forms as the start page.
Once you have verified that your project works, save your project, zip all files, and submit in the Dropbox.
NOTE: Please download and review the Doc Sharing files Web Lab and Citrix.zip, which contain information on how to FTP to the DeVry University website and how to use Citrix for the assignments. -
CIS 273 Lab Assignment 2 Three Web Pages with Hyperlinks
$12.00CIS 273 Lab Assignment 2 Three Web Pages with Hyperlinks
Learn More
Follow the directions below to complete Lab Assignment 2:
1. Create three (3) Web pages: index.htm, tips.htm, and glossary.htm. Open and close all tags appropriately using the correct tags.
2. Display your name in the title bar of the browser, declare the DOCTYPE for HTML5, and create a comment listing the lab number, the author, and the date.
3. Create links on each page that link to the other two (2) pages.
4. Create navigation links on each page that link to the other two (2) pages.
5. On the home page, create an image linked to http://strayer.edu.
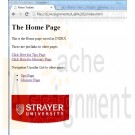
6. Create alternate text for the image link that says "Strayer University."
7. On the glossary.htm page, create a definition list of at least five (5) terms and their definitions.
8. In the definition list, create bold tags for the terms only (not the definition).
9. Display the special characters "<" and ">" somewhere in the term definitions.
10. On the glossary.htm page, create at least two (2) links to areas on the same page. -

CIS 273 Week 8 Assignment Single Page Website
$15.00CIS 273 Week 8 Assignment Single Page Website
Deliverables: One (1) Web page and one (1) Cascading Style Sheet (.css), including the image file.
Imagine that you have just started your own freelancing business. You have been hired to create a Web page for a company of your choice that announces the item of the week, month, or year. (e.g., Car of the Year, Pet of the Month, Sandwich of the Week, etc.)
1. Create a Cascading Style Sheet (.css) that applies a minimum of background color and font.
2. Create one (1) Web page and a heading tag that overrides the Cascading Style Sheet (.css) font settings and makes the font of the heading different from the rest of the page.
3. The page must also include:
a. An image depicting the item of the week, month, or year.
b. At least three (3) hyperlinks to Websites of associated interest to the item and a brief description of what they are about.
Example: Click here to visit Strayer University
This link will take you to the University’s main page where you can find further information.
4. At the bottom of the page, create a link that would allow the user to email you with questions using the mailto: tag and your email address.
Note: When the email opens the subject line should automatically say, "More Information Please".
5. Create a footer displaying the Copyright symbol (using the character entity reference), the year, and your name.
Example: © 2012 Mary Smith
6. Include a piece of JavaScript in the page.The specific course learning outcomes associated with this assignment are:
Learn More
Describe the structure of the World Wide Web as interconnected hypertext documents.
Create and validate HTML documents.
Create presentations using Cascading Style Sheets and DHTML.
Summarize Web standards in terms of specifications, guidelines, software, and tools.
Write clearly and concisely about Web design and development using proper writing mechanics and technical style conventions. -
CS371 Database Design Executive Summary
$25.00CS371 Database Design Executive Summary
Write a proposal for the new database design to include:
An executive summary for the database projectDevelop main project details
Explain the issues that exist with maintaining the data in its current form.
Explain the process of migrating the data in its current form to a well formed data model by highlighting the following in detail:
Identify required attributes that need to be tracked
Identify functional dependencies
Show the redesign in 1NF, 2NF, and 3NF (similar to figures 7.29, 7.31, 7.33)Explain the project benefits of the data in its new form.
Create the E-R diagram of your relational tables using MySQL Workbench and include in proposal.
Propose some additional data items, which you believe may be beneficial to the University if tracked in your database (i.e. Descriptions, more info about the instructors and students, departments, etc). Describe the steps required to implement these additions.
Identify project risks
In addition to the proposal, in a separate file submit:
Learn More
Provide the SQL statement required to create at least one of your tables.
Provide the SQL statement required to delete at least one of your tables.
Provide the SQL statement required to create a view which includes Course #, Course Name, Time, and Days only.
Identify at least one index, which you believe would improve performance. Explain your choice.
If you add a course description attribute to your course table, there may be some performance impacts imposed by the addition of this "text" field.

You have no items in your shopping cart.
