Search results for '''
-

DBM 449 LAB 1 Oracle Joins
$20.00GENERAL OVERVIEW
Scenario/Summary
My colleague, Ann Henry, operates a regional training center for a commercial software organization. She created a database to track client progress so she can analyze effectiveness of the certification program. CLIENT, COURSE, and COURSE_ACTIVITY are three of the tables in her database. The CLIENT table contains client name, company, client number, pre-test score, certification program and email address. The COURSE_ACTIVITY table contains client number, course code, grade, and instructor notes. The COURSE table contains the course code, course name, instructor, course date, and location. Although she and her instructors enter much of the data themselves, some of the data are extracted from the corporate database and loaded into her tables.
Loading the initial data was easy. For grade entry at the end of each course, a former employee created a data entry form for the instructors. Updating most client information and generating statistics on client progress is not easy because Ann does not know much SQL. For now, she exports the three tables into three spreadsheets. To look up a grade in the COURSE_ACTIVITY spreadsheet, she first has to look up client number in the CLIENT spreadsheet. While this is doable, it is certainly not practical. For statistics, she sorts the data in the COURSE_ACTIVITY spreadsheet using multiple methods to get the numbers she needs.
Every month, Ann's database tables need to be refreshed to reflect changes in the corporate database. Ann describes this unpleasant task. She manually compares the contents of newly extracted data from corporate to the data in her spreadsheets, copies in the new values, and then replaces the database contents with the new values.
Ann needs our help. Let’s analyze her situation and determine what advanced SQL she could use to make her tasks easier.
L A B O V E R V I E WScenario/Summary
The purpose of this lab is to explore join operators to determine which, if any, are appropriate for solving Ann's business problems, as described in this week's lecture.
Since Ann prefers to work from Excel spreadsheets, she wants her CLIENT and COURSE_ACTIVITY tables exported into one spreadsheet rather than two, as she is currently using. We need to determine which, if any, of the join operators will provide the data she wants for the single spreadsheet. (Note: we will not perform the export, just determine how to retrieve the necessary data.) Using the spreadsheet, she will be able to determine:
- Which course(s) a specific client has taken
- What grade(s) a specific client has earned in a specific course
- Which clients did not take any courses
- Which courses were not taken by any client
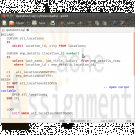
Here are results from DESCRIBE commands that show structure (columns and their data types) of tables CLIENT and COURSE_ACTIVITY. You may refer to it while constructing your queries.
SQL*Plus: Release 10.2.0.1.0 — Production on Thu Jun 14 22:38:52 2007
Copyright (c) 1982, 2005, Oracle. All rights reserved.
Connected to:
Oracle Database 10g Enterprise Edition Release 10.2.0.1.0 — 64bit Production
With the Partitioning, OLAP and Data Mining Options
SQL> desc course_activity
SQL>For this lab you will be creating several documents. First, write your queries in Notepad to create a script file that will contain all of the queries asked for in lab steps 4 through 13. You can (and should) test each query as you write it to make sure that it works and is returning the correct data. Once you have all of your queries written then create a SPOOL session and run your entire script file. Be sure that you execute a SET ECHO ON session command before running the file so that both the query and the output will be captured in the SPOOL file. IMPORTANT: If you are using Windows Vista you will need to create a directory on your C: drive to SPOOL your file into. Vista will not allow you to write a file directly to the C: drive. This will give you two files for the lab. The third file will the be the Lab1 Report document found in Doc Sharing. You will need to put your responses to the questions asked in the various lab steps.
Now let's begin.
L A B S T E P S
STEP 1: Start Oracle SQL*Plus via CitrixLog into the Citrix iLab environment. Open your Oracle folder, select SQL Plus and log in to your database instance. Use "sys" as User Name, and "oracle" as the Password. Enter the Host String as "DB9999.world as sysdba" where 9999 is the database number you have been assigned.
STEP 2: Initialize tables
Download the pupbld.sql and Lab1_init.sql files associated with the links to your C: drive or to the F: drive in your Citrix environment. You will need to open each of the files and edit the connection string to reflect your instance name. The pupbld.sql file has two connections strings; one at the top of the script and another at the bottom. Be sure to change both of these to reflect your instance name.
Once you have done this then run the pupbld.sql script first (DO NOT copy and paste it) in your SQL*Plus session. The script will create the product_user_profile synonym in the SYSTEM account which will be used each time you log in as a normal user.
Next run the lab1_init.sql script in your session. The script will create a new user (DBM449_USER) that will be used in various labs in this course. You can find the password for this new user by looking at the CREATE USER statement in the script file. Disregard the DROP TABLE error messages. They occur because the script is designed to work regardless of whether you have already created the tables or not. This way, you may run it if you ever decide to resent the contents of your tables to the original values. When you run the script for the first time, the error messages appear as you attempt to drop tables that do not exist.
Once the script has finished you will be logged into the new user and ready to start your lab.
STEP 3: Verify your tables
You want to verify that everything completed successfully. To do this execute a SELECT * FROM TAB statement to make sure all 5 tables were created and then you can execute a SELECT COUNT(*) FROM statement using each of the table names. You should find the following numbers of records for each table.
- CLIENT table - 5 rows
- COURSE table - 5 rows
- COURSE_ACTIVITY table - 6 rows
- CORP_EXTRACT1 table - 3 rows
- CORP_EXTRACT2 table - 0 rows
NOTE: In the following steps when writing your queries be sure to list the tables in the FROM clause in the same order they are listed in the instructions. Reversing the order of the tables in the FROM clause will produce an incorrect results set
STEP 4: Using the FULL OUTER JOIN operator
Join the CLIENT and COURSE_ACTIVITY tables using a FULL OUTER JOIN.
- Write and execute the SQL statement that produces the client number and name, course code and grade that the client got in this course.
Will the FULL OUTER JOIN be helpful to Ann? Place your response in the lab report document for this step.
STEP 5: Using the RIGHT OUTER JOIN operator
Join the CLIENT and COURSE_ACTIVITY tables using a RIGHT OUTER JOIN.
- Write and execute the SQL statement that produces the client number and name, course code and grade that the client got in this course.
Will the RIGHT OUTER JOIN be helpful to Ann? Place your response in the lab report document for this step.
STEP 6: Using the LEFT OUTER JOIN operator
Join the CLIENT and COURSE_ACTIVITY tables using a LEFT OUTER JOIN.
- Write and execute the SQL statement that produces the client number and name, course code and grade that the client got in this course.
Will the LEFT OUTER JOIN be helpful to Ann? Place your response in the lab report document for this step.
STEP 7: Using the NATURAL JOIN operator
Join the CLIENT and COURSE_ACTIVITY tables using a NATURAL JOIN.
- Write and execute the SQL statement that produces the client number and name, course code and grade that the client got in this course.
- Will the NATURAL JOIN be helpful to Ann? Place your response in the lab report document for this step.
STEP 8: Using the INNER JOIN operator
Join the CLIENT and COURSE_ACTIVITY tables using a INNER JOIN.
Write and execute the SQL statement that produces the client number and name, course code and grade that the client got in this course.Will the INNER JOIN be helpful to Ann? Place your response in the lab report document for this step.
Write a conclusion based on the five steps above, which join - if any - should Ann use to populate the spreadsheet that can answer her questions.
STEP 9: Using the UNION operator
Examine the clients and courses in Ann’s tables and the CORP_EXTRACT1 table using the UNION operator.
- Write and execute the SQL statement that examines client numbers in CLIENT and CORP_EXTRACT1.
- Write and execute the SQL statement that examines client numbers in COURSE_ACTIVITY and CORP_EXTRACT1.
- Write and execute the SQL statement that examines course names in COURSE and CORP_EXTRACT1.
Which of these statements, if any, will be helpful to Ann? Place your response in the lab report document for this step.
STEP 10: Using the UNION ALL operator
Examine the clients and courses in Ann’s tables and the CORP_EXTRACT1 table using the UNION ALL operator.
- Write and execute the SQL statement that examines client numbers in CLIENT and CORP_EXTRACT1.
- Write and execute the SQL statement that examines client numbers in COURSE_ACTIVITY and CORP_EXTRACT1.
- Write and execute the SQL statement that examines course names in COURSE and CORP_EXTRACT1.
Which of these statements, if any, will be helpful to Ann? Place your response in the lab report document for this step.
STEP 11: Using the INTERSECT operator
Examine the clients and courses in Ann’s tables and the CORP_EXTRACT1 table using the INTERSECT operator.
- Write and execute the SQL statement that examines client numbers in CLIENT and CORP_EXTRACT1.
- Write and execute the SQL statement that examines client numbers in COURSE_ACTIVITY and CORP_EXTRACT1.
- Write and execute the SQL statement that examines course names in COURSE and CORP_EXTRACT1.
Which of these statements, if any, will be helpful to Ann? Place your response in the lab report document for this step.
STEP 12: Using the MINUS operator
Examine the clients and courses in Ann’s tables and the CORP_EXTRACT1 table using the MINUS operator.
- Write and execute the SQL statement that examines client numbers in CLIENT and CORP_EXTRACT1.
- Write and execute the SQL statement that examines client numbers in COURSE_ACTIVITY and CORP_EXTRACT1.
- Write and execute the SQL statement that examines course names in COURSE and CORP_EXTRACT1.
Which of these statements, if any, will be helpful to Ann? Place your response in the lab report document for this step.
STEP 13: Using subqueries
Examine the clients and courses in Ann’s tables and the CORP_EXTRACT1 table using a subquery with NOT IN operator.
- Write and execute the SQL statement that examines client numbers in CLIENT and CORP_EXTRACT1.
- Write and execute the SQL statement that examines client numbers in COURSE_ACTIVITY and CORP_EXTRACT1.
- Write and execute the SQL statement that examines course names in COURSE and CORP_EXTRACT1.
Which of these statements, if any, will be helpful to Ann? Place your response in the lab report document for this step.
Deliverables
What is DueSubmit your spooled lab file with the queries and results sets along with the completed Lab 1 Report to the Dropbox. Your report should contain copies of each query and result set outlined in the lab along with the requested explanation of whether or not it satisfied the business requirement outlined for that particular section of the lab.
Learn More -

DBM 449 Lab 3 Distributed Database
$20.00L A B O V E R V I E W
Scenario/Summary
To the end user working with databases distributed through out a company's network is not different than working with multiple tables within a single database. The fact that the different databases exist in other locations should be totally transparent to the user. For this lab we are going to take on the roll of a database administrator in a company that has three regional offices in the country. You work in the central regional office, but there is also a West Coast Region located in Seattle and an East Coast Region located in Miami. Your roll is to gather report information from the other two regions.For this lab you are going to work with three different databases. You already have your own database instance. You will also be working with the a database named SEATTLE representing the West Coast Region and a database named MIAMI representing the East Coast Region. Login information for these two additional database instances is as follows:
SEATTLE: Userid - seattle_user
Password - seattle
Host String - seattleMIAMI: Userid - miami_user
Password - miami
Host String - miamiTo record your work for this lab use the LAB3_Report.doc found in Doc Sharing. As in your previous labs you will need to copy/paste your SQL statements and results from SQL*Plus into this document. This will be the main document you submit to the Drop Box for Week 3.
L A B S T E P S
STEP 1: Setting up Your Environment- Be sure you are connected to the DBM449_USER schema that was created in lab 1.
- To begin this lab you will need to download the LAB3_DEPTS.SQL script file associated with the link and run the script in your DBM449_USER schema of your database instance. This script contains a single table and that you will be using to help pull data from each of the other two database instances. Notice that the DEPTNO column in this table is the PRIMARY KEY column and can be used to reference or link to the DEPTNO column in the other two database employee tables.
- Now you need to create a couple of private database links that will allow you to connect to your other two regional databases. To accomplish this use the connection information listed above in the Lab Overview section. Name your links using your database instance name together with the region name as the name for the link. Separate the two with an underscore (example - DB1000_SEATTLE).
- After creating both of your database links, query the USER_DB_LINKS view in the data dictionary to retrieve information about your database links. The output from your query should look similar to what you see below. You will need to set your linesize to 132 and format the DB_LINK and HOST columns to be only 25 bytes wide to get the same format that you see.
DB_LINK USERNAME HOST CREATED
------------------------- ------------------------------ ------------------------- ---------
DB1000_MIAMI MIAMI_USER miami 09-DEC-08STEP 2: Testing your Database Links
Each of your remote databases has an employee data table. The tables are named SEATTLE_EMP and MIAMI_EMP respective to the database they are in. Using the appropriate database link, query each of the two tables to retrieve the employee number, name, job function, and salary. (HINT: you can issue a DESC command on each of the distributed tables to find out the actual column names just like you would for a table in your own instance.STEP 3: Connecting Data in the Seattle Database
Write a query that will retrieve all employees from the Seattle region who are salespeople working in the marketing department. Show the employee number, name, job function, salary, and department name (HINT: The department name is in the DEPT table) in the result set.STEP 4: Connecting Data in the Miami Database
Write a query that will retrieve all employees from the Miami region who work in the accounting department. Show the employee number, name, job function, salary, and department name (HINT: The department name is in the DEPT table) in the results set.STEP 5: Connecting Data in all Three Databases
Now we need to increase our report. Write a query that will retrieve employees from both the Seattle and Miami regions who work in sales. Show the employee number, employee name, job function, salary and location name in the result set (HINT: The location name is in the DEPT table).STEP 6: Improving Data Retrieval from all Three Databases
Writing queries like the ones above can be fairly cumbersome. It would be much better to be able to pull this type of data as though it was coming from a single table, and in fact this can be done by creating a view.- Using the query written above as a guide, write and execute the SQL statement that will create a view that will show all employees in both the Seattle and Miami regions (you can use your own naming convention for the view name). Show all the employee number, name, job, salary, commission, department number and location name for each employee (HINT: The location name is in the DEPT table).
- Now write a query that will retrieve all the data from the view just created.
Deliverables
Learn More
Submit your completed Lab 3 Report to the Dropbox. Your report should contain copies of each query and result set outlined in the lab along with the requested explanation of whether or not it satisfied the business requirement outlined for that particular section of the lab. -

DBM 449 Lab 5 Audit and Profile Management
$20.00In your lab for this week you are going to work with three different areas and processes within the Oracle Database that can be used to control data security. Each of these three processes has its own distinctive application to providing levels of security. In each case the individual processes deal with either limiting a users access to the database, limiting access to processes within the database, or keeping track of what the user is doing while in the database.
For the lab you will be using the SCOTT user which is already created in your instance. In Step 4 you will also be asked to shutdown you instance, make some edits to the init.ora file for your instance and then restart the instance. If you are not comfortable with this process which was first introduced to you in DBM438 the refer to the iLab Manual found in week 1 for guidance.
To record your work for this lab use the LAB5_Report.doc found in Doc Sharing. As in your previous labs you will need to copy/paste your SQL statements and results from SQL*Plus into this document. This will be the main document you submit to the Dropbox for Week 5.
LAB STEPS
STEP 1: Define a New Profile
Oracle provides the ability to set expirations, limit the reuse, and define the complexity of passwords. In addition, accounts can be locked if the password is entered incorrectly too many times. In this section of the lab we are going to create a custom profile that will then be applied to the SCOTT user.
- To begin, log into your instance as the SYS user.
- Write SQL script that will create a new profile named DBM449_SCOTT_PROFILE that will do the following:
- Limit the number of failed login attempts to 3 in a row.
- Limit the overall connection time to 10 hours (we will give him a little leeway incase he has to work overtime).
- Allow a session to be idle no more than 1 hour.
- Change the password every 60 days.
- Allow the user 3 days to change the password after it expires.
- Not allow a previous password be reused before there have been three password changes.
- Execute your pfile script and verify that the profile has been created by running a query against the DBA_PROFILES view in the data dictionary. Limit your output to ONLY the DBM449_SCOTT_PROFILE parameters.
Be sure to copy/paste your script and results sets output to the appropriate section in the Lab5_report document.
STEP 2: Testing the New Profile
Now that we have a new profile for the SCOTT user we need to verify that it works properly. For obvious reasons there are going to be parts of the profile that we cannot test within the confines of this lab due to time constraints, but we can test to verify that the SCOTT user is being controlled by the profile.
- The first thing we need to do is assign the profile to the SCOTT user. While still logged into your instance as the SYS user write and execute the SQL command that will assign the new SBM449_SCOTT_PROFILE profile to the SCOTT user.
- Now log into SCOTT (password is TIGER). Remember that you must supply the database instance name when logging in from the SQL> prompt just as you do when using the login window, i.e. CONN SCOTT/TIGER@DB####.WORLD.
- There are several things that we can test related to the logging in and changing a password so here we go.
- You should now be successfully connect to the SCOTT user. Write the connect command again on this time use an incorrect password. NOTE: you should get a warning message stating that you are no longer connected to Oracle. That is fine, just keep trying to log in.
- Repeat the above process until you get the ORA-28000: the account is locked error which will indicate that the profile is working here.
- At this point we need to get the account unlocked so you will need to login to your instance as the SYS user and unlock the SCOTT account BUT DO NOT LOG BACK INTO THE SCOTT USER YET.
- Now we can test the password reuse parameter. To do this we must EXPIRE the current password. Write and execute the SQL command to expire the password for the SCOTT user.
- Now log back into the SCOTT user. You should receive a message stating that the password has expired (ORA-28001: the password has expired) and then prompting you to change the password.
- Try to reuse the TIGER password. You should receive the following - ORA-28007: the password cannot be reused.
- Now log into the SCOTT user again and this time change the password to LION to complete this step of the lab.
Be sure to copy/paste your script and results sets output to the appropriate section in the Lab5_report document.
STEP 3: Using the PRODUCT_USER_PROFILE table
As the owner of a schema a user has certain inherited privileges that would allow the user to pass access to his/her own objects on to other users. Often times this can open up data to scrutiny by individuals who probably do not need to have access to it. These types of decisions should always be made by the DBA in charge of the database. One mechanism the DBA has to keeping users from using these inherited privileges is by excluding those commands using the PRODUCT_USER_PROFILE (PUP) table. In this section of the lab we are going to do this to the SCOTT user by setting up the scenario that will prohibit him from giving the user GEORGE (created in lab 2) access to the EMP table.
- For this section and remainder of the lab you must have the PRODUCT_USER_PROFILE successfully loaded and accessible in your instance. The creation of this profile was one of the first things done back in Lab 1 when you ran the PUPBLD.SQL script. If you are getting an error message stating "Error accessing PRODUCT_USER_PROFILE" when you log in as the DBM449_USER or the SCOTT user then this profile is not successfully installed. Work with your instructor to figure out why your script from Lab 1 did not work correctly. Until this is resolved you will not be able to complete the remainder of the lab.
- If you have the PRODUCT_USER_PROFILE successfully working then log in to your database instance as the SYS user.
- Now we need to limit SCOTT from being able to use the GRANT command.
- Insert the proper values into the PRODUCT_USER_PROFILE table that will keep the SCOTT user from using the GRANT command. Remember that some of the values in your insert statement must be in upper case and some will need to be in mixed case. Once you have done this then query the table to verify the insert (REMEMBER: you cannot query the table as the SYS user, only as the SYSTEM user).
- Now we need to test our above settings and make sure they are working.
- Connect to the SCOTT user (remember that you changed the password to LION).
- Write and execute the statement that would GRANT the user GEORGE the ability to write a select statement and see the data in the EMP table owned by SCOTT. You should receive the following message - SP2-0544: Command "grant" disabled in Product User Profile.
- This verifies that you have now disabled the ability of the SCOTT user to allow another user to access any of the data in his schema.
Be sure to copy/paste your script and results sets output to the appropriate section in the Lab5_report document.
STEP 4: Setting up the Database to use Auditing
Being able to audit what, when and where people are doing things in the database can be a very enlightening thing for a DBA. It can also be a very important tool in working with Data Security. Oracle provides the ability to do various types of auditing, but it takes some special setting up of the environment for this to work. In this step we are going to make the necessary adjustments to the current Oracle instance so that we can enable auditing and make some tests. If you need to review the processes to be used here then refer to the iLab Manual in week 1.
- First you need to make sure that you are logged into your instance as the SYS user.
- At this point issue a SHUTDOWN IMMEDIATE command to shut down you database instance.
- Once the instance is shut down you need to go into your Citrix Windows Explorer application, find your database instance set of directory folders, drill down to the pfile directory folder and open your init.ora file found in that folder.
- Under the section titled "Security and Auditing" you need to add the parameter AUDIT_TRAIL and set the parameter to DB_EXTENDED. This will allow the SQL_TEXT column of the DBA_AUDIT_OBJECT view to be populated. Save and close the file and then go back to your SQL*Plus session.
- Now using the init.ora file, start your instance back up to an OPEN status. You can do this by issuing a STARTUP PFILE= statement and pointing to your init.ora file.
- Once you have completed this process you are ready to begin setting up the database to audit some activity.
Be sure to copy/paste your script and results sets output to the appropriate section in the Lab5_report document.
STEP 5: Creating an Audit Trail
Oracle permits audit trails to be generated for session login attempts, access to objects, and activity performed on objects. Again using the SCOTT user we are going to set up several scenarios for auditing what SCOTT does while in a session. NOTE: if you need to work through this process several times you can delete the values in the AUD$ base table by issuing the TRUNCATE TABLE AUD$ command while logged in as the SYS user.
- Make sure that you are connected as user SYS.
- Display value of the parameter AUDIT_TRAIL. For the VALUE column you should have a value of DB_EXTENDED.
- Now we can set up auditing to track what goes on in the database.
- Write SQL statements to audit successful and unsuccessful login attempts by SCOTT.
- Write SQL statement to audit any successful INSERT, UPDATE or DELETE performed on table DEPT in scott's schema.
- Now we need to test the audits to verify that they work.
- Log into the SCOTT user (remember that the password is LION) and perform the following:
- write and execute an UPDATE statement that will change the value in the LOC column of the DEPT table to MIAMI where the DEPTNO value is 10. Be sure to issue a COMMIT.
- Write and execute the INSERT statement that will in insert the following values into DEPT - (50, 'LEGAL', 'HOUSTON'). Be sure to issue a COMMIT.
- Write and execute the DELETE statement that will delete the row from the DEPT table that was just inserted in the step above. Again, be sure to issue a COMMIT.
- Try to reconnect to the SCOTT user with an invalid password.
- Now connect back to the SYS user.
Now we need to see if our auditing worked.
- While logged into your instance as the SYS user, query the DBA_AUDIT_OBJECT view of the data dictionary for the user name of the account (Not the OS), the object owner, the object name, the action name and the SQL command (text) from the DBA_AUDIT_OBJECT view in the Data Dictionary.
- Did you notice that the entries for successful logon and unsuccessful logon attempts were not there. Now query the user name, action name and return code values in the DBA_AUDIT_SESSION view. You should find that information here.
Be sure to copy/paste your script and results sets output to the appropriate section in the Lab5_report document.
Deliverables
Submit your completed Lab 5 Report to the Dropbox. Your report should contain copies of each query and result set outlined in the lab along with the requested explanation of whether or not it satisfied the business requirement outlined for that particular section of the lab.
Learn More -

DBM 449 Lab 6 SQL Analytical Extensions and Materialized Views
$20.00For the lab this week we are going to look at how the ROLLUP and CUBE extensions available in SQL can be used to create query result sets that have more than one dimension to them. Both of these extensions are used in conjunction with the GROUP BY clause and allow for a much more broad look at the data.
The first thing you will do for this lab is download the lab6_create.sql file and run the file in your database instance. This file will log into the DBM449_USER and then create and populate a set of tables that will be used for this lab. Instructions for this are outlined in Step 1.
To record your work for this lab use the LAB6_Report.doc found in Doc Sharing. As in your previous labs you will need to copy/paste your SQL statements and results from SQL*Plus into this document. This will be the main document you submit to the Dropbox for Week 6.
LAB STEPS
STEP 1: Setting up Your Instance
For this lab you will be using a different user and set of tables than you have used so far for other labs. To set up your instance you will need to do the following.
- Download the lab6_create.sql file associated with the link to either the C drive on your computer or the F drive in your Citrix account.
- Open up the file and edit the login information at the top for the new user that is being created. You will need to replace the @ORACLE piece with the specifics for your instance name. DO NOT include AS SYSDBA after the name of your instance for this login.
- Now log into your instance as the SYS user. Run the script. The script is too long to copy/paste it into your SQL*Plus session so you should run the script using the @ sign from the SQL> prompt.
- Once the script has finished running then issue a SELECT * FROM TAB; sql statement. The result set will have tables from other labs as well but you want to make sure that you see the following tables listed.
TNAME TABTYPE CLUSTERID
------------------------------ ------- ----------
SUPPLIER TABLE
PRODUCT TABLE
DISTRICT TABLE
CUSTOMER TABLE
TIME TABLE
SALES TABLESTEP 2: Using the ROLLUP Extension
In this section of the lab you are going to create a sales report that will show a supplier code, product code and the total sales for each product based on unit price times a quantity. More importantly the column that shows the total sales will also show a grand total for the supplier as well as a grand total over all (this will be the last row of data shown). To do this you will use the ROLLUP extension as part of the GROUP BY clause in the query. Use aliases for the column names so that the output columns in the result set look like the following.
SUPPLIER CODE PRODUCT TOTAL SALES
------------- ---------- -----------For this report you are going to use the SALES, PRODUCT and SUPPLIER tables. You should be able to write your query using NATURAL JOIN but if you feel more comfortable using a traditional JOIN method that will work just as well. When finished you should have a total of 16 rows in your report and the grand total amount should show 2810.74.
Be sure to copy your SQL code and the result set produced and paste it into the appropriate place in the LAB6_REPORT.
STEP 3: Using the CUBE Extension
In this section of the lab you are going to create a sales report that will show a month code, product code and the total sales for each product based on unit price times a quantity. In this report the column that shows the total sales will also show a subtotal for each month (in this case representing a quarter) . Following the monthly totals for each product and the subtotal by month then the report will list a total for each product sold during the period with a grand total for all sales during the period (this will be the last row of data shown). To do this you will use the CUBE extension as part of the GROUP BY clause in the query. Use aliases for the column names so that the output columns in the result set look like the following.
MONTH PRODUCT TOTAL SALES
---------- ---------- -----------For this report you are going to use the SALES, PRODUCT and TIME tables. You should be able to write your query using NATURAL JOIN but if you feel more comfortable using a traditional JOIN method that will work just as well. When finished you should have a grand total amount of 2810.74 (same total as in the step 2).
Be sure to copy your SQL code and the result set produced and paste it into the appropriate place in the LAB6_REPORT.
STEP 4: Materialized Views and View Logs
Materialized views, sometimes referred to as snapshots are a very important aspect of dealing with data when doing data mining or working with a data warehouse. Unlike regular views, a materialized view does not always automatically react to changes made in the base tables of the view. To help keep track of changes made to the base tables you must create what is call a Materialized View Log on each base table that will be used in the view. In this step of the lab we will do this.
For the Materialized View we are going to create we are going to use the TIME and the SALES tables. Before we can create the view you will need to create a Materialized View Log on each of these two tables that will keep track of the ROWID and Sequence and include new values that have been added to the base table.
Be sure to copy your SQL code and the result set produced and paste it into the appropriate place in the LAB6_REPORT.
STEP 5: Creating and Using the Materialized View
Now that we have our logs created we can progress on to the view itself. For this part of the lab you are going to create a Materialized View, demonstrate that the view works, insert a row of data into one of the base tables and then update the view. Finally, you will show that the new data is in the view. The following steps will help move you through this process.
- First, write the SQL CREATE statement that will create a Materialized View based on the following:
- Name the view SALESBYMONTH.
- Include clauses that will build the view immediately, completely refresh the view, and enable a query rewrite.
- For the columns of the view you want to show the YEAR, MONTH, PRODUCT CODE, a TOTAL SALES UNITS, and a TOTAL SALES.
- You will want to group the columns by year, month and product code respectively.
- Execute your script to create the view and then issue a SELECT * FROM SALESBYMONTH.
The output columns from your view should look similar to the following (use aliases to format the column headings) and you should have 18 rows in the result set.
YEAR MONTH PRODUCT CO UNITS SOLD SALES TOTAL
-------- ---------- ---------- ---------- -----------Now we are going to add some data and update the view. Because we have several derived columns in out view we will have to force the update as Oracle will not automatically update a view with this configuration.
- To begin with, insert the following data into the SALES table - (207, 110016, 'SM-18277',1,8.95).
- Now we are going to use a subprogram within the Oracle built in package DBMS_MVIEW. The REFRESH subprogram within this package will update our view so that we can see the new data.
- Write an SQL EXECUTE statement that will use the REFRESH procedure in the DBMS_MVIEW package (HINT: packagename.subprogram). The REFRESH subprogram accepts two parameters; the name of the materialized view to refresh, and either a 'c', 'f', or '?'. For the purposes of the lab use the 'c'. (you can refer back to pages 654-659 of the DBA Handbook readings for week 3).
- Execute your statement to update the view and then query the view once again.
You should now see that the row for units sold in month 10 for SM-18277 has increased from 3 to 4 and total sales amount has gone from 26.85 to 35.80.
Be sure to copy your SQL code and the result set produced and paste it into the appropriate place in the LAB6_REPORT.
Deliverables
Submit your completed Lab 6 Report to the Dropbox. Your report should contain copies of each query and result set outlined in the lab along with the requested explanation of whether or not it satisfied the business requirement outlined for that particular section of the lab.
Learn More -

DBM/380 Week 3 ERD Art Museum in Access
$12.00Develop an Art Museum ERD for DBM/380 Week 3
List the data specifications (must include a minimum of three entities with attributes)
Has to be on An Art Museum that needs to track the artwork, artists, and locations where the art is displayed or stored within the museum If you Don't have Visio then Do a ERD in Access. Need this last week. Make sure the Database flows.
Use a Microsoft® Visio® diagram to create a detailed ERD using the data specifications noted in the Week Two Individual Assignment. Make any necessary changes provided in your faculty's feedback.
Use a Microsoft® Access® database to create the preliminary database tables, columns with data types, primary keys, and relationships.
Learn More -
Oracle Pl/Sql Records Exception Handling and Cursor
$20.00This is your final examination which consists of five programming questions.
You are to provide me with a .txt file or a .sql file for supplying the code for each question. Put these in a .zip file and submit them.1. Use a cursor to retrieve the location number and the city from the locations table. Pass the location number to another cursor to retrieve from the emp_details_view the last_name, job_title and salary for that employees that work at that location.
a. Use the %ISOPEN attribute
b. Use a simple loop
c. Use an EXIT WHEN and a %NOTFOUND attribute2. Write an exception handler to raise an exception named DUE_FOR_ROTATION
The criteria for raising the exception is if location id is 2700.
If the employee’s location in the em_details_view meets this criteria output 'Due for Rotation'.
Insert a listing of all of the EMPLOYEES that meet this criteria into the employee_analysis table.
You will need to create an analysis table as:
CREATE TABLE location_analysis
(employee_id NUMBER(6) not null,
Last_name VARCHAR(25),
First_name VARCHAR2(20),
Location_id NUMBER(4),
City VARCHAR2(30));
Screenshot #1 Creating the Analysis Table3. You will be using the EMPLOYEES table in YOUR TABLESPACE. Using a cursor write a block to find the largest salary where the hire date is before ‘ 1-jan-96’ . When you find employees who match this criteria change give them a salary increase of 25%.
4. You will be using the JOBS table in YOUR TABLESPACE. Create a record that incorporates the four columns from the JOBS table. Output the values for a single job on four lines of output.
5. Write a PL/SQL block to print information about a given country.
Learn More
a. Declare a PL/SQL record based on the structure of the COUNTRIES table.
b. Use the DEFINE command to provide the country ID. Pass the value to the PL/SQL block through a SQL*Plus substitution variable.
c. Use DBMS_OUTPUT.PUT_LINE to print selected information about the country.
d. Execute and test the PL/SQL block for the countries with the IDs CA, DE, UK, US. -

CS362 Structured Query Language for Data Management Week 2 IP
$20.00CS362 Structured Query Language for Data Management Week 2 IP
Learn More
After creating the database schema, use Insert, Update, and Delete commands to populate the tables with the following information.
1. Insert the following classes' records:
Code Name Description
ACCT306 Accounting 1 This course introduces accounting concepts and explores the accounting environment. It covers the basic structure of accounting, how to maintain accounts, use account balances to prepare financial statements, and complete the accounting cycle. It also introduces the concept of internal control and how to account for assets.
CS362 Structured Query Language for Data Management This course gives complete coverage of SQL, with an emphasis on storage, retrieval, and manipulation of data.
ENG115 English Composition In this course, students focus on developing writing skills through practice and revision. Students will examine expository, critical, and persuasive essay techniques.
FIN322 Investments This course focuses on investments and investment strategies. Various investment vehicles such as stocks, bonds, and commodities are examined. Students will explore the principles of security analysis and valuation.
2. Insert the following advisors' records:
Name Email
Fred Stone fred@college.edu
Bob Gordon bob@college.edu
Jack Simpson jack@college.edu
3. Insert the following students' records:
Name Birthdate Gender StartDate GPA IsActive AdvisorID
Craig Franklin 1970-03-15 Male 2010-05-30 3.10 Yes 3
Harriet Smith 1982-04-15 Female 2010-05-30 3.22 Yes 1
George David 1984-11-05 Male 2010-10-01 0.00 Yes 3
Ben Jefferson 1976-09-25 Male 2009-02-21 1.80 No, the student has gone on temporary leave to pursue other opportunities but plans on returning in 1 year. 3
4. Delete the course named Investments from the system.
5. Change Harriet Smith’s birthdate to April 25, 1982 and her GPA to 3.25.
Copy and paste the work into your Key Assignment document and include screen shots of each step, describe what you did for each step and paste in the actual SQL text used to perform each step. Provide an introduction explaining the important of these commands in relation to your overall Key Assignment. -

CS362 Structured Query Language for Data Management Week 3 IP Select Statements
$20.00CS362 Structured Query Language for Data Management Week 3 IP Select Statements:
Learn More
Provide select statements to satisfy the following data requests:
1. List all active male students assigned to Advisors 1 or 3 (Fred Stone or Jack Simpson). (Where Clause - Filtering 3 different things: Active, Male Students, Adivsors)
2. Provide a list of all students without a biography. (focusing Null Biography)
3. What classes are in the English department? (Where Clause)
4. Create a list of all students and their advisors. Sort by the advisor’s name and then the student’s name. Include the student’s birth date, gender, and GPA. (join's statement combine the two tables students and class tables: Order by clause like birthday, gpa,etc)
5. How many students were born in the 1980s? (Aggregate using count expression)
6. Write a query to show the average GPA by gender. (Aggregate using count expression)
7. Provide a list of all advisors and the number of active students assigned to each. Filter out any advisors with more than 1 student. (Combine lines 4-6)
Copy and paste the work into your Key Assignment document and include screen shots of each step, describe what you did for each step and paste in the actual SQL text used to perform each step. Include an explanation as to how and where these queries or others like them can be used in your final system. Upload your document to the Submitted Tasks. -

CS362 Structured Query Language for Data Management Week 5 IP Functions Stored Procedure and Indexes
$20.00CS362 Structured Query Language for Data Management Week 5 IP Functions Stored Procedure and Indexes
This assignment requires you to take your extended design from Week 4 IP and add proper indexes, a function, and a stored procedure. Your changes will provide functionality used by the teachers for screens such as a grade book. Be sure any code is properly formatted and has appropriate comments.
Part 1: Function
Write a user-defined function (UDF) that calculates a student's GPA for a given time frame. Inputs are StudentId int, ClassStartDateStart datetime, and ClassStartDateEnd datetime. The output should be the student's GPA for all classes that were taken between ClassStartDateStart and ClassStartDateEnd. Also, supply the script to call this new function, passing it parameter values of your choice.
Part 2: Stored Procedure
Write the DDL script to make a stored procedure that returns data needed to display a grade book screen for a professor. The only input for the stored procedure is a ClassId. Outputs need to include student names and grades for all assignments as well as a calculated overall grade for the class for each student. Provide an example calling this new stored procedure, passing it parameter values of your choice. Include a screenshot of the output.
Part 3: Indexes
Provide a list of suggested indexes and the DDL script to create them. Include an explanation of the purpose of indexes and how you made your decision for the fields to include in your list of suggested indexes.Copy and paste the work into your Key Assignment document and include screen shots of each step, describe what you did for each step and paste in the actual SQL text used to perform each step. Upload your document to the Submitted Tasks.
Learn More -

CMIS 320 Project 1 Mom and Pop Johnson video store ERD
$20.00CMIS 320 Project 1 Mom and Pop Johnson video store ERD
This project allows students to demonstrate their skills in the area of designing relational databases to satisfy specific business rules and requirements. The deliverables for this project include an Entity Relationship Diagram and detailed documentation describing the database design and structure.
Project 1 Details:
In this project you will be provided a set of specifications to create an entity-relationship diagram and design accompanying table layout using sound relational modeling concepts and practices. The relationships between the entities and the attributes for the entities will be identified and described. This database will provide the foundation for the follow-on project. The following paragraphs provide the background and summary of the business requirements.
You are a database consultant with Ace Software, Inc. and have been assigned to develop a database for the Mom and Pop Johnson video store in town. Mom and Pop have been keeping their records of videos and DVDs purchased from distributors and rented to customers in stacks of invoices and piles of rental forms for years. They have finally decided to automate their record keeping with a relational database.
You sit down with Mom and Pop to discuss their business, and watch their operation for about a week. You discover quickly that a video and a DVD are both copies of a movie kept in a separate plastic case that is rented out. They have several copies of each movie they rent; therefore there are several videos and DVDs for each movie title. You learn that in their inventory they have several thousand videos and DVDs, which they get wholesale from about a half dozen distributors. The video and DVD prices to them are based on the quantity of their shipment and the past business they have done with each company.
The price of a DVD for a movie might be different than the price of a video for the same movie, even from the same distributor. Each distributor provides different types of movies (e.g., suspense, horror, mystery, comedy, etc.). A single distributor may provide several different types of movies in both video and DVD format. It is possible to obtain the same movie from multiple distributors, and at different wholesale prices.
Each video and DVD has a unique identification number that Mom and Pop assign in their inventory, in addition to the distributor's serial number for the item. Each movie also has a unique identification number Mom and Pop assign in addition to the title, and any movie IDs the distributors use in their electronic catalogs. Distributors provide electronic catalogs to Mom and Pop and the information from these catalogs must be included in the database.
Mom and Pop need to record when a video or DVD is rented, when a video or DVD is returned, and all customer charges such as late and damaged fees, failure to rewind fees, and taxes. They need a report of which videos are returned late because there are standard and late charges. On occasion there are discount prices for certain movies or types of movies. Customers want to rent movies based on actors or actresses, running length, type of movie, rating, year released, the director, and the academy awards won (by the movie, the actors, the actresses and/or the directors). Customers also want to know how many videos they have rented in the last month, year, and so forth. Mom and Pop need to keep only basic information on customers in their database, such as name, address, telephone numbers, etc.
There must be no limit to the number of video and/or DVD copies of a movie that Mom and Pop can have in their inventory. Video/DVD ID numbers, movie ID numbers, and distributor ID numbers for videos, DVDs, and movies are all different. Also, each movie must be able to have an unlimited number of actors, actresses, directors, and academy awards (i.e., Oscars). Other types of awards (e.g., Golden Globe, People's Choice, etc.) are not of interest for this application. The rental of equipment, sale of videos, DVDs, popcorn, etc., is not to be kept in the database.
Using this information, you should:
1. Determine and list your entities. Then describe fully the relationships between entities via pairs of sentences that indicate the two components of the total relationship in both directions between the entities. Relationships may be unary, binary, or ternary with respect to entities. You should not have any many-to-many relationships.
2. Begin the database logical design by identifying the entities, relationships between entities, and entities' attributes as we have done in this course. Use the same entity/relationship diagram (ERD) notation as used in class for entities, attributes, and relationships. Sketch your ERD by hand or a drawing program (e.g., Visio, PPT, SQL Modeler …) on one single 8-1/2" x 11" page (8-1/2" x 14" maximum), labeled "Mom and Pop Johnson Video Store Database E/R Diagram." Your ERD should not have any many-to-many relationships between entities. Make sure that all relationships between entities are one-to-many to facilitate the construction of relational database tables.
3. Complete the logical database design and start the physical database design by creating metadata (i.e. documentation) that describes the table(s) created from each entity and the column(s) created from each attribute in the ERD. Attributes should be self-describing. Particular attention will be given to the proper specification of all primary key (via "PK") and foreign key (via "FK") columns in the table layouts. These should match your ERD exactly. Begin these descriptions on a page labeled "Proposed Database Tables and Columns based on E/R Diagram." All tables must be 3rd Normal Form. Indicate any and all assumptions that were made.
4. Make sure your work is neat and legible.
Submissions:
1. You should submit a well-organized Word document that includes your entity list, ERD, and database design description. This document should also include all assumptions and your lesson learned during your project.
2. Submit in your WebTycho portfolio in the Project 1 area before the due date. Please contact the instructor before the due date if you have any questions or concerns.
Learn More

You have no items in your shopping cart.
