Search results for 'microsoft access Walburg'
-
CIS 365 Movie Database Project PostgreSQL C# Project
$25.00CIS 365 Movie Database Project PostgreSQL C# Project
Project Requirements
The project for this course is designed to reinforce the material we have covered in the course as well as expose you to new technologies you are likely to encounter when working out in industry.To complete your project, you will be required to connect to a database and display/modify its data. You will be using ADO.Net to work with the database.
The database you will be working with is a PostGres database I have distributed to the class. To access the database, you will need to download and install the PostGres software. It can be found here http://wwwmaster.postgresql.org/download/mirrors-ftp?file=%2Fbinary%2Fv8.2.6%2Fwin32%2Fpostgresql-8.2.6-2.zip, or you can download it from the project folder on Blackboard. To view the database schema and table contents directly, you will need to run the pgAdmin III administrator’s tool installed with the PostGres database (Start->All Programs->PostgreSQLx.x->pgAdmin III).
I would recommend browsing the database and familiarizing yourself with the media table and its associated columns/data.
The following are the project requirements:
1) The user interface must be GUI based and written using Windows Presentation Foundation (WPF).
2) The user must be able to do the following: View the database records, Insert new database records, Modify database records and Delete database records.
3) Error trapping must be performed by the application.
4) Combo boxes must be used to provide user input options (i.e. rating, ranking fields) and to avoid input validation.
5) The application must have a menu bar. I would suggest duplicating any actions such as insert/delete which are performed via command buttons within the menu bar.
6) You should use the following controls in your project: ComboBox, TextBox, Label, Command Buttons, at least one image and radio button/check boxes. ListView and GridView controls are encouraged.Valid choices for rating are G, PG, PG-13 and R. Valid choices for ranking are Poor, Fair, Average, Good, Excellent.
You will also find a project evaluation sheet in the project folder on Blackboard. I would suggest using it as a checklist when working on your project.
I have also placed an example project in Blackboard to demonstrate connecting to the database and pulling records from it.
I have left the actual design of the GUI and user-interaction open to your interpretation. I look forward to seeing your projects.
Learn More -
CIS 170 Week 1 iLab 1 of 7 Getting Started Your First C# Programs
$15.00CIS 170 iLab 1 of 7 Getting Started Your First C# Programs
Week 1 Your First Program Data Types and Expressions
Scenario/Summary
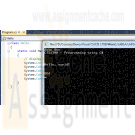
Welcome to Programming with C#. The purpose of this three-part lab is to walk you through the following tutorial to become familiar with the actions of compiling and executing a C# program.iLab Steps
Part A: Getting Started
Step 1: Start the Application
Locate the Visual Studio 2010 icon and double click to open. Under Applications, click on the Microsoft Visual Studio.NET 2010 icon to open the C# software.
Step 2: Create a C# Console Project
Choose File->New Project, and click Console Application. In the project name box, enter LAB1A. Your screen should look like the screen below. If so, press the OK button.
Step 3: Delete All Code in Program.cs
Your screen should now look like what you see below. Now, highlight all of the code that you see [Ctrl + A] and press the Delete key. You will not need this code because you will now be getting experience writing every line of a new program.
Step 4: Type in Program
Now enter the following C# program exactly as you see it. Use the tab where appropriate. (Note: C# is case sensitive.) Instead of John Doe, type your name.
class Hello
{
static void Main()
{
// display output
System.Console.WriteLine("John Doe");
System.Console.WriteLine("CIS170B – Programming using C#");
System.Console.WriteLine("\n\n\nHello, world!\n\n");
System.Console.WriteLine("EOJ");
System.Console.ReadLine();
}
}
Step 5: Save Program
Save your program by clicking File on the menu bar and then clicking Save Program.cs, or by clicking the Savebutton on the toolbar or Ctrl + S.
Step 6: Build Solution
To compile the program, click Debug on the menu bar and then click the Build Solution or Build LabAoption. You should receive no error messages in the Error List window below the program. If you see some error messages, check the code above to make sure you didn't key in something wrong. You can double click on each error message to better navigate to the area where the problem might be. Once you make your corrections to the code, go ahead and build the solution again.
Step 7: Execute the Program
Once you have no compile errors, to execute or run your program, either:
click Debug on the menu bar, and then Start Debugging;
click the right arrow icon on the menu bar; or press the F5 key.
Step 8: Capture the Output
Print a picture of your screen output. (Do a print screen and paste this into your MS Word document.)
Step 9: Print the Source Code
Copy your source code and paste it into your Word document.
End of Part APart B: Calculate Total Tickets
Step 1: Create New Project
Make sure you close your previous program by clicking File >> Close Solution. Now, create a new project and name it LAB1B.
Step 2: Type in Program
Like before, delete the code that is automatically created and enter the following program. Type in your name for Developer and current date for Date Written.
// ---------------------------------------------------------------
// Programming Assignment: LAB1B
// Developer: ______________________
// Date Written: ______________________
// Purpose: Ticket Calculation Program
// ---------------------------------------------------------------
using System;
class FirstOutputWithUsing
{
static void Main()
{
// create variables and load values
int childTkts, adultTkts, totalTkts;
childTkts = 3;
adultTkts = 2;
// process (calculation)
totalTkts = childTkts + adultTkts;
// display output
Console.WriteLine(totalTkts);
// pause
Console.Write("\nPress Enter to continue...");
Console.ReadLine();
}
}
Step 3: Save Program
Save your program by clicking File on the menu bar and then clicking Save Program.cs, or by clicking the Savebutton on the toolbar or Ctrl + S.
Step 4: Build Solution
To compile the program, click Build on the menu bar and then click the Build Solution or Build LabB option. You should receive no error messages. If you see some error messages, check the code above to make sure you didn't key in something wrong. Once you make your corrections to the code, go ahead and click Build >> Build Solution again.
Step 5: Execute the Program
Once you have no syntax errors, to execute or run your program, click Debug on the menu bar and then clickStart Debugging.
Step 6: Comment the Program
Go back to the editor and insert meaningful comments that show that you understand what each line of code does.
Step 7: Capture the Output
1. Run the program again.
2. Capture a screen print of your output. (Do a PRINT SCREEN and paste into your MS Word document.)
3. Copy your commented code and paste it into your document
End of Part BPart C: Payroll Program
Step 1: Create a New Project
1. Make sure you close your previous program by clicking File >> Close Solution.
2. Create a new project and name it LAB1C.
3. This time, do not delete the code that gets automatically created. Instead, insert your code right between the curly braces, as illustrated below.
static void Main(string [] Args)
{
// your code goes here!
}
Include a comment box like what you coded in Part B at the very top of your program.
Step 1a: Write Your Own Program
Write a program that calculates and displays the take-home pay for a commissioned sales employee after deductions are taken. The employee receives 7% of his or her total sales as his or her gross pay. His or her federal tax rate is 18%. He or she contributes 10% to his or her retirement program and 6% to Social Security. Use the Processing Logic provided in Step 2 below as a guide. The program's output should look something like this:
Enter weekly sales: 28,000
Total sales: $28,000.00
Gross pay (7%): $1,960.00
Federal tax paid: $352.80
Social security paid: $117.60
Retirement contribution: $196.00
Total deductions: $666.40
Take home pay: $1,293.60
Press any key to continue.Step 2: Processing Logic
Basic Logic and Flowchart
Input: Prompt the user for the weekly sales.
Process: Perform the calculations. The employee receives 7% of his or her total sales as his or her gross pay. His or her federal tax rate is 18%. He or she contributes 10% to his or her retirement program and 6% to Social Security.
Output: Display the results.
Pseudocode:
1. Declare variables
2. Accept Input – weeklySales
3. Calculate Gross Pay = Weekly Sales * .07
4. Calculate Federal Tax = Gross Pay * .18
5. Calculate Social Security = Gross Pay * .06
6. Calculate Retirement = Gross Pay * .10
7. Calculate Total Deductions = Federal Tax + Social Security + Retirement
8. Calculate Total Take Home Pay = Gross Pay – Total Deductions
9. Display the following on separate lines and format variables with $ and decimal
1. Total Sales Amount: value of weekly sales
2. Gross Pay (.07): value of gross pay
3. Federal Tax paid (.18): value of federal tax
4. Social Security paid (.06): value of social security
5. Retirement contribution (.10): value of retirement
6. Total Deductions: value of total deductions
7. Take Home Pay: value of take home payStep 3: Save Program
Save your program by clicking File on the menu bar and then clicking Save Program.cs, or by clicking the Savebutton on the toolbar or Ctrl + S.Step 4: Build Solution
To compile the program, click Debug on the menu bar and then click the Build Solution or Build LabCoption. You should receive no error messages. If you see some error messages, check the code above to make sure you didn't key in something wrong. Double-click on an error to navigate to its location in the code. Once you make your corrections to the code, go ahead and click Debug >> Build Solution again.Step 5: Execute the Program
Once you have no syntax errors, to execute or run your program, click Debug on the menu bar and then clickStart Debugging, or press the right arrow icon or the F5 key.Step 6: Capture the Output
1. Capture a screen print of your output. (Do a PRINT SCREEN and paste into your MS Word document.)
2. Copy your commented code and paste it into the Word document.
End of Part C
END OF LABAfter you have completed your lab, complete the following for each part of the lab (if there are multiple parts).
Learn More
1. Capture a screen print of your output. (Do a PRINT SCREEN and paste into an MS Word document.)
2. Copy your code and paste it into the same MS Word document that contains the screen print of your output.
3. Save the Word document as CIS170B_Lab01_B_LastName_FirstInitial.docx.
4. Upload all three projects folder and save the compressed file as CIS170B_Lab01_B_LastName_FirstInitial.Zip.
5. Submit both the compressed project file and the Word document to the weekly Dropbox for this lab.
Zipping and Submitting Your Project Files
When you submit your project files, you will want to send the entire project folder that is created by MS Visual Studio when you create the project, along with your MS Word file. Use your favorite compression tool to zip the full contents of both projects, zip the single zip file, and submit the zip file to your Dropbox. -
Clearly Visual Basic 2010 Chapter 10 Exercise 8 WKRK Solution
$15.00Clearly Visual Basic 2010 Chapter 10 Exercise 8 WKRK Solution
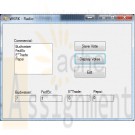
Each year, WKRK-Radio polls its audience to determine the best Super Bowl commercial. Th e choices are as follows: Budweiser, FedEx, E*Trade, and Pepsi. The station manager wants an application that allows him to enter a caller’s choice. The choice should be saved in a sequential access file. The application also should display the number of votes for each commercial. Create a Visual Basic Windows application. Use the following names for the solution, project, and form file, respectively: WKRK Solution, WKRK Project, and Main Form.vb. Create the interface shown in Figure 10-45, and then code the application. Save the solution and then start and test the application. Close the Code Editor window and then close the solution.
Learn More -
Clearly Visual Basic 2010 Chapter 10 Exercise 9 Carlton Solution
$15.00Clearly Visual Basic 2010 Chapter 10 Exercise 9 Carlton Solution
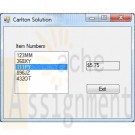
Carlton Industries stores the item numbers and prices of the items it sells in a sequential access file named ItemInfo.txt. The company's sales manager wants an application that displays the price corresponding to the item selected in a list box.
a. Create a Visual Basic Windows application. Use the following names for the solution, project, and form file, respectively: Carlton Solution, Carlton Project, and Main Form.vb. Create the interface shown in Figure 10-46.
b. Use Windows to copy the ItemInfo.txt file from the VB2010\Chap 10 folder to the project's bin\Debug folder. Open the Code Editor window and then open the ItemInfo.txt file contained in the project's bin\Debug folder. Each line contains an item's number followed by a comma and the price. Close the ItemInfo.txt window.
c. Define a structure named item. The structure should contain two member variables: a String variable to store the item number and a Decimal variable to store the price.
d. Declare a class-level array that contains five Item structure variables.
e. Code the form's Load event procedure so that it reads the item numbers and prices from the ItemInfo.txt file. The procedure should store the item numbers and prices in the class-level array. It also should add the item numbers to the list box.
f. When the user selects an item in the list box, the item?s price should appear in the lblPrice control. Code the appropriate procedure.
g. Save the solution and then start and test the application. Close the Code Editor window and then close the solution.
Learn More -
Pizza Parlour Visual Basic Program
$20.00Pizza Parlour Visual Basic Program
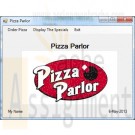
I need to create an order form for ordering pizzas. the first screen should be splash screen that displays the name of the Pizza Parlour, a picture and my name and date I created the project.
It should then go to a main form that has the same picture and a menu at the top. The menu should show Order Pizza as the first menu item, Display the Specials as the second menu item and Exit as the third menu item across the top. When the user clicks the first option, a form will be displayed for them to order the pizza they want, for the second one, a form should be displayed to display the specials for the day. When they click on Exit, the program ends with a nice little message telling them, “Goodbye”.
When the user selects the menu option to Order Pizza, the main form should close and the new form should be displayed. On this form I need the following components.
- A textbox to allow them to enter the number of pizzas they want
- Three radio buttons to allow the user to select the size of the pizza where the first one is small for 6.00, the second one is medium for 8.00 and the third one is large for 10.00.
- Three radio buttons for the type of crust they want. , ex. Thin, Thick and
- Display a message that the first topping comes with the price of size of the pizza but every topping after that is 1.00 extra.
- Display a minimum of 8 check boxes for different toppings.
- I need a button that displays a message like, Make my order!
- When the button is pressed, you will add the choices starting with the price, then the size and then the crust type and all of the toppings they chose into an array.
- You are to then close this form and open another form to display the selections.In this form (called from step 3 to display the selections, I need to put the same menu at the top as is on the first form in step 2..
- I need a combobox of email addresses on the screen where the person will select their email address.
- Also, a button under this stating, Show Order.
- I need to create a data connection to the customer table in the PizzaDelivery Access database. I want to copy the table from the solution explorer right onto the form to create a grid which will display the name of the customer whose email address has been selected. The grid should not be displayed until after the button has been pressed.
- After the customer data has been displayed, I need to fill a listbox with the contents of the array created in the last form to show the user what they ordered.
- Then it should display the total amount due. This includes the sales tax of .06 and any additional items the user selected for toppings.
- The datagrid, listbox and button and label to display the total should all be hidden until the user has entered the email address.Next is the form to display the specials for the day. On this form as in the last, I need to copy the menu from the form in step 2 to the top.
I need to have a label telling the user to select which, if any, specials they want. They are to click the Calculate Total button displayed at the bottom, to get the number of items selected and how much it would cost.
In here, I need to copy the contents from a sequential file called specials.txt into a list box. The sequential file should contain descriptions and prices. I need at least 6 of each.
Example:
3 large pepperoni pizzas with Coke
15.60 would be displayed in the list box.Once they select the Calculate Total button, they are shown the number of items they selected and the total including tax.
Learn More
For every amount entered in a text box, it must be validated in a subprogram and they must select something from the size and crust type for the pizza order. -
Microsoft Visual Basic 2010 Shelly Cashman Series Chapter 5 Case Problem 7 Technology Conference Registration
$12.00Microsoft Visual Basic 2010 Shelly Cashman Series Chapter 5 Case Problem 7 Technology Conference Registration
Technology Conference Registration
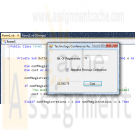
Based on the case project shown in Figure 5-111, create a requirements document and a UseCase Definition document, and then design a Windows application. Before writing the code, create an event planning document for each event in the program.It is important that developers update their skills by attending developers conferences. The Dynamic International Management Consorttium (DIMC) runs and manages the ADSE (Active Developers Skill Enhancement) Conference two times per year. To encourage companies to send multiple employees to the conference, the cost per attendee is determined based on the number of attending developers from a given company. The table below specifies cost per attendee.
Number of Conference
Registration per
Company Cost per Attendee
1 $695
2-4 $545
5-8 $480
8 or more $395DIMS has requested that you develop a Windows application that can determine and display the total cost per company for developers attending the conference. DIMC has a conference policy that states if any member of a company has attended a previous DIMC conference, the company receives a 15% discount from the total cost of its employees who attend. The policy also states that no more than 16 people from a single company can attend the conference. DIMC has asked that you design the program so that the user must enter valid data.
Learn More -
Microsoft Visual Basic 2010 Shelly Cashman Series Chapter 4 Case Problem 6 Convert Currency
$12.00Microsoft Visual Basic 2010 Shelly Cashman Series Chapter 4 Case Problem 6 Convert Currency
Convert Currency
Design a Windows application and write the code that will execute according to the program requirements in Figure 4-109. Before designing the user interface, create a Use Case definition. Before writing the code,create an event planning document for each event in the program.REQUIREMENTS DOCUMENT
Date submitted: November 4, 2014
Application title: Convert Currency
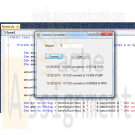
Purpose: The Convert Currency Windows application will display the value of U.S. dollars in euros, English pounds, and Mexican pesos.Program Procedures: From a window on the screen, the user should enter the number of U.S. dollars to be converted. The program will display the equivalent value in euros, British pounds, and Mexican pesos.
Algorithms, Processing, and Conditions:
1. The user must be able to enter the number of U.S. dollars to be converted.
2. After entering the number of U.S. dollars to be converted, the user clicks the Convert Currency button.
3. The program converts the number of U.S. dollars entered into the equivalent number of euros, English pounds, and Mexican pesos. The program displays all three currencies together with the U.S. dollars.
4. To find the conversion rates, the developer must consult the appropriate Web sites.A possible site is www.xe.com.
5. Because the currency rates change dynamically, the user should enter both the date and the time that the conversion rates were applied. The date and time should be displayed in U.S. format.
6. The user should be able to clear the date and time, the number of U.S. dollars entered, and the results of the calculations, and then enter new values.Notes and Restrictions: 1. The user should be able to click an exit button to close the application.
Comments: 1. The designer must determine the design of the user interface, and the words and graphics used in the user interface.
Learn More -

Microsoft Visual Basic 2010 Shelly Cashman Series Chapter 4 Case Problem 3 WEEKLY PAY CALCULATOR
$12.00Microsoft Visual Basic 2010 Shelly Cashman Series Chapter 4 Case Problem 3 WEEKLY PAY CALCULATOR
WEEKLY PAY CALCULATOR
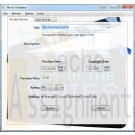
Design a Windows application and write the code that will execute according to the program requirements in Figure 4-104 and the Use Case definition in Figure 4-105. Before writing the code, create an event planning document for each event in the program. The completed program is shown in Figure 4-106.REQUIREMENTS DOCUMENT
Date submitted: May 11, 2014
Application title: Weekly Pay Calculator
Purpose: The Weekly Pay Calculator Windows application computes the weekly pay for an hourly employee.Program Procedures: From a window on the screen, a payroll clerk enters the total minutes an employee worked in a week and the hourly pay rate. The program displays the weekly pay for the employee.
Algorithms, Processing, and Conditions:
1. The payroll clerk must be able to enter the total minutes worked during the week and the hourly pay rate.
2. The company name (Western Distribution) and the picture (Payroll found at scsite.com/vb2010/ch4/images) will be displayed throughout the entire process.
3. After entering the total minutes worked and hourly pay rate, the payroll clerk clicks the weekly pay button.
4. The weekly pay is displayed in currency format together with the number of hours and minutes worked.Notes and Restrictions:
1. The user can clear the total minutes worked, the hourly pay rate, the hours and minutes worked, and the weekly pay by clicking a clear button. He then can enter another employee’s data.
2. An exit button should close the application.
3. In this application, if hours worked is greater than 40, the hourly pay rate still applies.Comments: n/a
USE CASE DEFINITION
Learn More
1. The Windows Application opens.
2. The payroll clerk enters the total minutes worked by an employee and the employee’s hourly pay rate.
3. The payroll clerk clicks the Weekly Pay button.
4. The program displays the hours worked, the minutes worked, and the employee’s weekly pay.
5. The payroll clerk can click the Clear button and then repeat steps 2 through 4.
6. The user terminates the program by clicking the Exit button. -
Microsoft Visual Basic 2010 Shelly Cashman Series Chapter 6 Case Problem 7 Factorial Math
$12.00Microsoft Visual Basic 2010 Shelly Cashman Series Chapter 6 Case Problem 7 Factorial Math
Create a requirements document and a Use Case Definition document, and design a Windows application based on the case project shown in Figure 6-134:
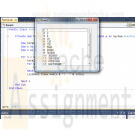
Most calculators have an operation called a “factorial” which is shown on a calculator key as an exclamation point. For example 5! (5 factorial) multiplies 5 * 4 * 3 * 2 * 1 to calculate the result of 120. Using loops to compute the factorial, display the following factorials in a Listbox object:
Learn More
1! 1
2! 2
3! 6
4! 24
5! 120
6! 720
7! 5040
8! 40320
9! -
Microsoft Visual Basic 2010 Shelly Cashman Series Chapter 6 Case Problem 5 Distance Travelled Calculator
$12.00Microsoft Visual Basic 2010 Shelly Cashman Series Chapter 6 Case Problem 5 Distance Travelled Calculator
Design a Windows application and write the code that will execute according to the program requirements shown in Figure 6-132. Before writing the codes, create an event planning document for each event in the program. Create a use Case Definition document for the application.
Requirements Document
Application title: Vacation Distance Calculator Windows Application
Purpose: This application computes the number of miles travelled given the speed limit and the number of days travelled driving cross country.Program Procedure: In a Windows Application, the user enters the speed limit and the number of days you plan to travel cross country. You will enter the number of hours you will like to drive each of the days based on places you plan to visit as you drive and other factors. For example, the first day you plan to drive only 4 hours because you are driving after work. The application displays the distance that you are able to travel for the entire trip based on the speed limit and the hours driven.
Algorithms, Processing, and Conditions:
1. The application opens displaying a title. The user enters the speed limit and the number of days you plan to drive.
2. The user clicks the Distance button to request the number of hours you plan to drive each day. The result of the total number of miles you plan to drive over the entire trip will be displayed.
3. A File menu contains a Clear and an Exit option. The Clear item clears the result and the entered number of miles per hour and time traveled. The Exit menu item closes the application.Notes and Restrictions:
1. Non-numeric values should not be accepted.
2. The user of hours for one day of travel should not exceed 20 hours.Comments:
Learn More
1. The application allows decimal entries.

You have no items in your shopping cart.
