Search results for 'microsoft access 2010'
-

Visual C# 2010 How to Program Deitel Chapter 9 Exercise 9.4 Solution
$12.00Visual C# 2010 How to Program Deitel Chapter 9 Exercise 9.4 Solution
9.4 (Duplicate Word Removal) Write a console application that inputs a sentence from the user (assume no punctuation), then determines and displays the non-duplicate words in alphabetical order. Treat uppercase and lowercase letters the same. [Hint: You can use string method Split with no arguments, as in sentence.Split(), to break a sentence into an array of strings containing the individual words. By default, Split uses spaces as delimiters. Use string method ToLower in the select and orderby clauses of your LINQ query to obtain the lowercase version of each word.]
Learn More -
Visual C# 2010 How to Program Deitel Spam Scanner and Generic Linear Search Method Solution
$12.00Visual C# 2010 How to Program Deitel Spam Scanner and Generic Linear Search Method Solution
(Spam Scanner) Spam (or junk e.mail) cost U.S. organization billions of dollars a year in spam-prevention software, equipment, network resources, bandwidth, and lost productivity. Research online some of the most common spam e.mail messages and words, and check your own junk e.mail folder. Create a list of 30 words and phrases commonly found in spam messages. Write an application in which the user enters an e.mail message. Then, scan the message for each of the 30 keywords or phrases. For each occurrence of one of these within the message, add a pint to the message’s “spam score.” Next, rate the likelihood that the message is spam, based on the number of points received.
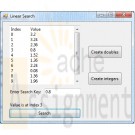
22.7 (Generic Linear Search Method) Write a generic method, Search, that implements the linear-search algorithm. Method Search should compare the search key with each element in the array until the search key is found or until the end of the array is reached. If the search key is found, return its location in the array; otherwise, return -1. Write a test application that inputs and searches an int array and a double array. Provide buttons that the user can click to randomly generate int and double values. Display the generated values in a TextBox, so the user knows what values they can search for [Hint: Use (T : IComparable<T>) in the where clause for method Search so that you can use method CompareTo to compare the search key to the elements in the array.}
Learn More -
Visual C# 2010 How to Program 4E Deitel Chapter 24 Cash Register Microwave and Phone book Applications
$15.00Visual C# 2010 How to Program 4E Deitel Chapter 24 Cash Register Microwave and Phone book Applications
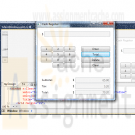
24.9 Create a cash-register application modeled after the one presented in Fig. 24.37. It should alow users to enter a series of prices, then obtain the total. The Delete button should clear the current entry, and the Clear button should reset the application.
24.11 Using WPF, create a GUI that represents a simple microwave, as shown below (you do not have to provide functionality) To create the Start, Clear and numerical Buttons, you’ll need to make use of control templates. To apply a control template automatically for a control type, you can create a style (with a TargetType) that sets the Template property.
Learn More
24.12 WPF allows two-way data bindings. In a normal data binding, if the data source is updated, the binding’s target will update, but not vice versa. In a two-way binding, if the value is changed in either the binding’s source or its target, the other will automatically updated. To create a two-way binding, set the Mode property to TwoWay at the binding declaration. Create a phone book application modeled after the one shown below. When the user selects a contact from the contacts list, its information should display in a Grid of TextBoxes. As the information is modified, the contacts list should display each change. -
Visual C# 2010 Deitel LinkedList without Duplicates Using a Generic List Reversing a LinkedList Printer GUI Solution
$20.00Visual C# 2010 How to Program Deitel Chapter 23 LinkedList without Duplicates Using a Generic List Reversing a LinkedList Printer GUI Solution
23.11 (LinkedList without Duplicates) - Write an application that reads in a series of first names and stores them in a LinkedList. Do not store duplicate names. Allow the user to search for a first name.
23.15 (Using a Generic List) - Write an application that inserts 25 random integers from 0 to 100 in order into an object of class List. The application should calculate the sum of the elements and the floating-point average of the elements.
23.16 (Reversing a LinkedList) - Write an application that creates a LinkedList object of 10 characters, then a second list object containing a copy of the first list, but in reverse order.
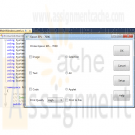
24.7 Create the GUI in Fig. 24.35 (you do not have to provide functionality) using WPF. Do not use a canvas. Do not use explicit sizing or positioning.
Learn More -

Visual C# 2010 How to Program Deitel Chapter 25 Reflection Enlarge Picture
$20.00Visual C# 2010 How to Program Deitel Chapter 25 Exercise 25.6 Reflection Enlarge Picture
Create an application that has the same GUI as shown in the enclosed. The cover images are included in the folder with chapter examples. When the mouse hovers over any of the covers, that cover and its reflection should animate to a larger size.
Learn More -
CIS 365 Movie Database Project PostgreSQL C# Project
$25.00CIS 365 Movie Database Project PostgreSQL C# Project
Project Requirements
The project for this course is designed to reinforce the material we have covered in the course as well as expose you to new technologies you are likely to encounter when working out in industry.To complete your project, you will be required to connect to a database and display/modify its data. You will be using ADO.Net to work with the database.
The database you will be working with is a PostGres database I have distributed to the class. To access the database, you will need to download and install the PostGres software. It can be found here http://wwwmaster.postgresql.org/download/mirrors-ftp?file=%2Fbinary%2Fv8.2.6%2Fwin32%2Fpostgresql-8.2.6-2.zip, or you can download it from the project folder on Blackboard. To view the database schema and table contents directly, you will need to run the pgAdmin III administrator’s tool installed with the PostGres database (Start->All Programs->PostgreSQLx.x->pgAdmin III).
I would recommend browsing the database and familiarizing yourself with the media table and its associated columns/data.
The following are the project requirements:
1) The user interface must be GUI based and written using Windows Presentation Foundation (WPF).
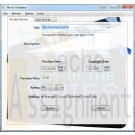
2) The user must be able to do the following: View the database records, Insert new database records, Modify database records and Delete database records.
3) Error trapping must be performed by the application.
4) Combo boxes must be used to provide user input options (i.e. rating, ranking fields) and to avoid input validation.
5) The application must have a menu bar. I would suggest duplicating any actions such as insert/delete which are performed via command buttons within the menu bar.
6) You should use the following controls in your project: ComboBox, TextBox, Label, Command Buttons, at least one image and radio button/check boxes. ListView and GridView controls are encouraged.Valid choices for rating are G, PG, PG-13 and R. Valid choices for ranking are Poor, Fair, Average, Good, Excellent.
You will also find a project evaluation sheet in the project folder on Blackboard. I would suggest using it as a checklist when working on your project.
I have also placed an example project in Blackboard to demonstrate connecting to the database and pulling records from it.
I have left the actual design of the GUI and user-interaction open to your interpretation. I look forward to seeing your projects.
Learn More -
CIS 170 Week 1 iLab 1 of 7 Getting Started Your First C# Programs
$15.00CIS 170 iLab 1 of 7 Getting Started Your First C# Programs
Week 1 Your First Program Data Types and Expressions
Scenario/Summary
Welcome to Programming with C#. The purpose of this three-part lab is to walk you through the following tutorial to become familiar with the actions of compiling and executing a C# program.iLab Steps
Part A: Getting Started
Step 1: Start the Application
Locate the Visual Studio 2010 icon and double click to open. Under Applications, click on the Microsoft Visual Studio.NET 2010 icon to open the C# software.
Step 2: Create a C# Console Project
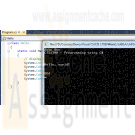
Choose File->New Project, and click Console Application. In the project name box, enter LAB1A. Your screen should look like the screen below. If so, press the OK button.
Step 3: Delete All Code in Program.cs
Your screen should now look like what you see below. Now, highlight all of the code that you see [Ctrl + A] and press the Delete key. You will not need this code because you will now be getting experience writing every line of a new program.
Step 4: Type in Program
Now enter the following C# program exactly as you see it. Use the tab where appropriate. (Note: C# is case sensitive.) Instead of John Doe, type your name.
class Hello
{
static void Main()
{
// display output
System.Console.WriteLine("John Doe");
System.Console.WriteLine("CIS170B – Programming using C#");
System.Console.WriteLine("\n\n\nHello, world!\n\n");
System.Console.WriteLine("EOJ");
System.Console.ReadLine();
}
}
Step 5: Save Program
Save your program by clicking File on the menu bar and then clicking Save Program.cs, or by clicking the Savebutton on the toolbar or Ctrl + S.
Step 6: Build Solution
To compile the program, click Debug on the menu bar and then click the Build Solution or Build LabAoption. You should receive no error messages in the Error List window below the program. If you see some error messages, check the code above to make sure you didn't key in something wrong. You can double click on each error message to better navigate to the area where the problem might be. Once you make your corrections to the code, go ahead and build the solution again.
Step 7: Execute the Program
Once you have no compile errors, to execute or run your program, either:
click Debug on the menu bar, and then Start Debugging;
click the right arrow icon on the menu bar; or press the F5 key.
Step 8: Capture the Output
Print a picture of your screen output. (Do a print screen and paste this into your MS Word document.)
Step 9: Print the Source Code
Copy your source code and paste it into your Word document.
End of Part APart B: Calculate Total Tickets
Step 1: Create New Project
Make sure you close your previous program by clicking File >> Close Solution. Now, create a new project and name it LAB1B.
Step 2: Type in Program
Like before, delete the code that is automatically created and enter the following program. Type in your name for Developer and current date for Date Written.
// ---------------------------------------------------------------
// Programming Assignment: LAB1B
// Developer: ______________________
// Date Written: ______________________
// Purpose: Ticket Calculation Program
// ---------------------------------------------------------------
using System;
class FirstOutputWithUsing
{
static void Main()
{
// create variables and load values
int childTkts, adultTkts, totalTkts;
childTkts = 3;
adultTkts = 2;
// process (calculation)
totalTkts = childTkts + adultTkts;
// display output
Console.WriteLine(totalTkts);
// pause
Console.Write("\nPress Enter to continue...");
Console.ReadLine();
}
}
Step 3: Save Program
Save your program by clicking File on the menu bar and then clicking Save Program.cs, or by clicking the Savebutton on the toolbar or Ctrl + S.
Step 4: Build Solution
To compile the program, click Build on the menu bar and then click the Build Solution or Build LabB option. You should receive no error messages. If you see some error messages, check the code above to make sure you didn't key in something wrong. Once you make your corrections to the code, go ahead and click Build >> Build Solution again.
Step 5: Execute the Program
Once you have no syntax errors, to execute or run your program, click Debug on the menu bar and then clickStart Debugging.
Step 6: Comment the Program
Go back to the editor and insert meaningful comments that show that you understand what each line of code does.
Step 7: Capture the Output
1. Run the program again.
2. Capture a screen print of your output. (Do a PRINT SCREEN and paste into your MS Word document.)
3. Copy your commented code and paste it into your document
End of Part BPart C: Payroll Program
Step 1: Create a New Project
1. Make sure you close your previous program by clicking File >> Close Solution.
2. Create a new project and name it LAB1C.
3. This time, do not delete the code that gets automatically created. Instead, insert your code right between the curly braces, as illustrated below.
static void Main(string [] Args)
{
// your code goes here!
}
Include a comment box like what you coded in Part B at the very top of your program.
Step 1a: Write Your Own Program
Write a program that calculates and displays the take-home pay for a commissioned sales employee after deductions are taken. The employee receives 7% of his or her total sales as his or her gross pay. His or her federal tax rate is 18%. He or she contributes 10% to his or her retirement program and 6% to Social Security. Use the Processing Logic provided in Step 2 below as a guide. The program's output should look something like this:
Enter weekly sales: 28,000
Total sales: $28,000.00
Gross pay (7%): $1,960.00
Federal tax paid: $352.80
Social security paid: $117.60
Retirement contribution: $196.00
Total deductions: $666.40
Take home pay: $1,293.60
Press any key to continue.Step 2: Processing Logic
Basic Logic and Flowchart
Input: Prompt the user for the weekly sales.
Process: Perform the calculations. The employee receives 7% of his or her total sales as his or her gross pay. His or her federal tax rate is 18%. He or she contributes 10% to his or her retirement program and 6% to Social Security.
Output: Display the results.
Pseudocode:
1. Declare variables
2. Accept Input – weeklySales
3. Calculate Gross Pay = Weekly Sales * .07
4. Calculate Federal Tax = Gross Pay * .18
5. Calculate Social Security = Gross Pay * .06
6. Calculate Retirement = Gross Pay * .10
7. Calculate Total Deductions = Federal Tax + Social Security + Retirement
8. Calculate Total Take Home Pay = Gross Pay – Total Deductions
9. Display the following on separate lines and format variables with $ and decimal
1. Total Sales Amount: value of weekly sales
2. Gross Pay (.07): value of gross pay
3. Federal Tax paid (.18): value of federal tax
4. Social Security paid (.06): value of social security
5. Retirement contribution (.10): value of retirement
6. Total Deductions: value of total deductions
7. Take Home Pay: value of take home payStep 3: Save Program
Save your program by clicking File on the menu bar and then clicking Save Program.cs, or by clicking the Savebutton on the toolbar or Ctrl + S.Step 4: Build Solution
To compile the program, click Debug on the menu bar and then click the Build Solution or Build LabCoption. You should receive no error messages. If you see some error messages, check the code above to make sure you didn't key in something wrong. Double-click on an error to navigate to its location in the code. Once you make your corrections to the code, go ahead and click Debug >> Build Solution again.Step 5: Execute the Program
Once you have no syntax errors, to execute or run your program, click Debug on the menu bar and then clickStart Debugging, or press the right arrow icon or the F5 key.Step 6: Capture the Output
1. Capture a screen print of your output. (Do a PRINT SCREEN and paste into your MS Word document.)
2. Copy your commented code and paste it into the Word document.
End of Part C
END OF LABAfter you have completed your lab, complete the following for each part of the lab (if there are multiple parts).
Learn More
1. Capture a screen print of your output. (Do a PRINT SCREEN and paste into an MS Word document.)
2. Copy your code and paste it into the same MS Word document that contains the screen print of your output.
3. Save the Word document as CIS170B_Lab01_B_LastName_FirstInitial.docx.
4. Upload all three projects folder and save the compressed file as CIS170B_Lab01_B_LastName_FirstInitial.Zip.
5. Submit both the compressed project file and the Word document to the weekly Dropbox for this lab.
Zipping and Submitting Your Project Files
When you submit your project files, you will want to send the entire project folder that is created by MS Visual Studio when you create the project, along with your MS Word file. Use your favorite compression tool to zip the full contents of both projects, zip the single zip file, and submit the zip file to your Dropbox. -
Clearly Visual Basic 2010 Chapter 7 Cable Direct Application
$15.00Clearly Visual Basic 2010 Chapter 7 Cable Direct Application
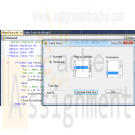
Create a Visual Basic Windows application. Use the following names for the solution, project, and form file, respectively: Cable Direct Solution, Cable Direct Project, and Main Form.vb. Save the application in the VB2010\Chap07 folder. Create the interface shown in Figure 7-39. The list boxes are named lstPremium and lstConnections. Display numbers from 0 through 20 in the lstPremium control. Display numbers from 0 through 100 in the lstConnections control. The Calculate Total Due button’s Click event procedure should calculate and display a customer’s cable bill. The cable rates are shown in Figure 7-40. Business customers must have at least one connection. Use two functions: one to calculate and return the total due for business customers, and the other to calculate and return the total due for residential customers. The form’s FormClosing event procedure should verify that the user wants to close the application. Code the application. Save the solution and then start and test the application. Close the Code Editor window and then close the solution.
Learn More -
Clearly Visual Basic 2010 Chapter 10 Exercise 8 WKRK Solution
$15.00Clearly Visual Basic 2010 Chapter 10 Exercise 8 WKRK Solution
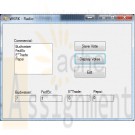
Each year, WKRK-Radio polls its audience to determine the best Super Bowl commercial. Th e choices are as follows: Budweiser, FedEx, E*Trade, and Pepsi. The station manager wants an application that allows him to enter a caller’s choice. The choice should be saved in a sequential access file. The application also should display the number of votes for each commercial. Create a Visual Basic Windows application. Use the following names for the solution, project, and form file, respectively: WKRK Solution, WKRK Project, and Main Form.vb. Create the interface shown in Figure 10-45, and then code the application. Save the solution and then start and test the application. Close the Code Editor window and then close the solution.
Learn More -
Clearly Visual Basic 2010 Chapter 10 Exercise 9 Carlton Solution
$15.00Clearly Visual Basic 2010 Chapter 10 Exercise 9 Carlton Solution
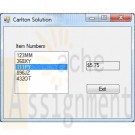
Carlton Industries stores the item numbers and prices of the items it sells in a sequential access file named ItemInfo.txt. The company's sales manager wants an application that displays the price corresponding to the item selected in a list box.
a. Create a Visual Basic Windows application. Use the following names for the solution, project, and form file, respectively: Carlton Solution, Carlton Project, and Main Form.vb. Create the interface shown in Figure 10-46.
b. Use Windows to copy the ItemInfo.txt file from the VB2010\Chap 10 folder to the project's bin\Debug folder. Open the Code Editor window and then open the ItemInfo.txt file contained in the project's bin\Debug folder. Each line contains an item's number followed by a comma and the price. Close the ItemInfo.txt window.
c. Define a structure named item. The structure should contain two member variables: a String variable to store the item number and a Decimal variable to store the price.
d. Declare a class-level array that contains five Item structure variables.
e. Code the form's Load event procedure so that it reads the item numbers and prices from the ItemInfo.txt file. The procedure should store the item numbers and prices in the class-level array. It also should add the item numbers to the list box.
f. When the user selects an item in the list box, the item?s price should appear in the lblPrice control. Code the appropriate procedure.
g. Save the solution and then start and test the application. Close the Code Editor window and then close the solution.
Learn More


