Search results for 'shipping company database'
10 Item(s)
Grid List
-

New Perspectives on HTML and XHTML Tutorial 5 Case Problem 3
$12.00New Perspectives on HTML and XHTML Tutorial 5 Case Problem 3
Data Files needed for this Case Problem: blank.gif, bottom.jpg, bottomleft.jpg, bottomright.jpg, dhometxt.htm, dlogo.jpg, domepaper.css, dometxt.css, dtabletxt.css, left.jpg, leftbox.jpg, right.jpg, rightbox.jpg, tableback.jpg, top.jpg, topleft.jpg, and topright.jpg
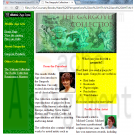
dHome, Inc. Olivia Moore is the director of advertising for dHome, one of the nation’s newest manufacturers of geodesic dome houses. She’s hired you to work on the company’s Web site. Olivia has provided you with all of the text you need for the Web page, and your job is to design the page’s layout. You’ll start by designing a draft of the company’s home page. Olivia wants the page to include information about dHome’s pricing structure for various dome models. The page should also contain links to other pages on the Web site. A preview of the design you’ll create for Olivia is shown in Figure 5-78.
Complete the following:
1. Use your text editor to open dhometxt.htm, dometxt.css, and dtabletxt.css from the tutorial.05\case3 folder included with your Data Files. Enter your name and the date in the comment section of each file. Save the files as dhome.htm, dome.css, and dtable.css, respectively, in the same folder.
2. Go to the dhome.htm file in your text editor. Create links to the dome.css and dtable.css style sheets.
3. Scroll down to the pageContent div element, and above the paragraphs within that element, insert a table with the class name domeSpecs. Add the table summary, “A table describing six dome models sold by dHome, Inc.” and add the caption, “Building Models”.
4. Create a column group containing three col elements with class names of firstColumn, middleColumns, and lastColumn. The middleColumns element should span
two columns in the table.This tutorial includes complete steps from 1-22.
Learn More -
New Perspectives on HTML and XHTML Tutorial 9 Case Problem 2 Solution
$12.00New Perspectives on HTML and XHTML Tutorial 9 Case Problem 2 Solution
Data Files needed for this Case Problem: cassini.jpg, dtd_list.txt, gargtxt.htm, gbar.jpg, glogo.jpg, maa.jpg, and oneil.jpg
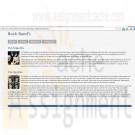
Middle Age Arts Nicole Swanson is the head of the Web site team at Middle Age Arts, a company that creates and sells replicas of historical European works of art for home and garden use. She has recently started a project to update the old HTML code in the site’s many pages. She’s asked you to update the page describing the company’s collection of decorative gargoyles. She wants the page to comply with XHTML 1.0 strict standards. Figure 9-30 shows a preview of the completed Web page.
Complete the following:
Learn More
1. Use your text editor to open gargtxt.htm from the tutorial.09\case2 folder included with your Data Files. Enter your name and the date in the comment section and save the file as gargoyle.htm in the same file.
2. Insert an XML prolog at the top of the file. Use the standard attribute defaults for an XHTML file.
3. After the XML prolog, insert a DOCTYPE declaration for the XHTML 1.0 strict DTD.
4. Set the default namespace of the document to the XHTML namespace.
5. Test the file on the validator. Fix the errors as follows:
• Convert the attributes for the body element into styles in an embedded style sheet.
(Hint: The link, alink, and vlink attributes are used to set the colors of hyperlinks, active links, and visited links in the Web page.)
• Use proper syntax for any empty elements.
• Set the color and text alignment of an h4 element using an inline style.
• Ensure that all two-sided tags are properly closed.
• Use the float style to align all inline images.
• Use an inline style to set a table cell’s width and background color.
• Remove all deprecated elements and attributes.
6. Save your final version of the file once it passes the validation test for XHTML 1.0 strict, and then test it in your browser to ensure that it looks like Figure 9-30.
7. Submit your completed files to your instructor. -

CIS 273 Week 8 Assignment Single Page Website
$15.00CIS 273 Week 8 Assignment Single Page Website
Deliverables: One (1) Web page and one (1) Cascading Style Sheet (.css), including the image file.
Imagine that you have just started your own freelancing business. You have been hired to create a Web page for a company of your choice that announces the item of the week, month, or year. (e.g., Car of the Year, Pet of the Month, Sandwich of the Week, etc.)
1. Create a Cascading Style Sheet (.css) that applies a minimum of background color and font.
2. Create one (1) Web page and a heading tag that overrides the Cascading Style Sheet (.css) font settings and makes the font of the heading different from the rest of the page.
3. The page must also include:
a. An image depicting the item of the week, month, or year.
b. At least three (3) hyperlinks to Websites of associated interest to the item and a brief description of what they are about.
Example: Click here to visit Strayer University
This link will take you to the University’s main page where you can find further information.
4. At the bottom of the page, create a link that would allow the user to email you with questions using the mailto: tag and your email address.
Note: When the email opens the subject line should automatically say, "More Information Please".
5. Create a footer displaying the Copyright symbol (using the character entity reference), the year, and your name.
Example: © 2012 Mary Smith
6. Include a piece of JavaScript in the page.The specific course learning outcomes associated with this assignment are:
Learn More
Describe the structure of the World Wide Web as interconnected hypertext documents.
Create and validate HTML documents.
Create presentations using Cascading Style Sheets and DHTML.
Summarize Web standards in terms of specifications, guidelines, software, and tools.
Write clearly and concisely about Web design and development using proper writing mechanics and technical style conventions. -
CTI 110 Web Programming and Database Foundations HTML and CSS Website Project
Regular Price: $40.00
Special Price $30.00
CTI 110 Web Programming and Database Foundations HTML and CSS Website Project
Project Guidelines
The following are the minimum guidelines for the HTML and CSS Website Project. As such, simply meeting the guidelines does not guarantee you a grade of 100 on the project.You may choose your own topic for your website. Pick a topic that you are already familiar with or that you wish to learn about. You may create a fictional topic, but this actually tends to increase the amount of work necessary to complete the project. Remember, this project is designed to be a website project, not a research project - keep it simple.Your site must contain a minimum of four(4)HTML pages and one(1)cascading style sheet.
All pages in your site should be based off of a template. All styling, formatting, and placement of elements should be controlled by CSS. Complete the template first then make copies and fill in the blanks. Refer to your textbooks and the assignments that you have already completed for ideas. It is ok to reuse your code, just not someone else's.
Follow the design tips found in your textbook and in any supplemental materials in Moodle.
The homepage of your site should explain the concept of your site and/or provide some type of introduction.
All pages in your site must be linked together through a common navigational structure. Your navigation elements must have some type of hover effect similar to those used in your textbook.
Your site must include atleast one image. Your image should be optimized to reduce file size.
Your site must include relevant data displayed in a table.
Your site must include atleast one link to an external site as well as a mailto link. The external link should open in a new window/tab.
To facilitate uploading your files to Moodle, all files in your site should be saved in a single .zip file.
Be creative. This is one of the few opportunities in the class where you can "do your own thing."
Keep a backup copy of your files.
If you have questions, ask!
When you are finished with your project, upload the .zip file containing all of the files in your project using the appropriate link in Moodle. You should have a single file to upload, and the file cannot be larger than 20 MB.
Learn More -
New Perspectives on HTML and CSS Edition 6 Tutorial 4 Case Problem 2 Creating Page Layouts with CSS
Regular Price: $20.00
Special Price $15.00
New Perspectives on HTML and CSS Edition 6 Tutorial 4 Case Problem 2 Creating Page Layouts with CSS
Learn More
Data Files needed for this Case Problem: modernizr-1.5.js, notice.png, pizzatxt.c, rblogo.png, redhalltxt.htm, redbar.png, slice.png, toppings.png
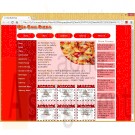
Red Ball Pizza Alice Nichols is the owner of Red Ball Pizza, a well-established pizzeria in Ormond Beach, Florida. She's asked for your help in creating a design for the company's Website. After discussing the issue with Alice, you settle on a fixed width layout. Alice has created a sample home page for you to work on. She already created all of the content and the graphics. She needs your help with the design. Figure 4-79 shows a preview of the page you'll create for her.
Complete the following:
1. In your text editor, open the pizzatxt.css and redballtxt.htm files from the tutorial.04\case2 folder. Enter your name and the date in the comment section of each file. Save the files as pizza.css and rcdhall.htm, respectively.
2. Return to the redball.htm file in your text editor. Take some time to review the content and structure of the document, and then link the file to the pizza.css style sheet. Close the file, saving your changes.
3. Go to the pizza.css file in your text editor. Create a style rule to display the header, section, aside, tooter, and nav elements as blocks.
4. Set the default padding and margin size to 0 pixels.
5. Create a style for the body element to: a) set the background color to red; and b) set the font family to Verdana, Geneva, or sans-serif.
6. The entire content of the page has been enclosed in a div container element with the id container. Create a style rule for this container to: a) set the width to 1000 pixels; b) center the container in the browser window by selling the top/bottom margins to 0 pixels and the left/right margins to auto; c) display a 1-pixel solid black border on the left and right edges; and d) set the background color to white and display the redbar.png image file as the background image, placing the image file in the top-left corner of the container and tiling it in the vertical direction only.
7. Change the background color of the header element to white and set its height to 100 pixels.
8. Create a style rule for the horizontal navigation list to: a) set the height to 70 pixels and the width to 100%; and b) set the background color to white.
9. For eath list item within the horizontal navigation list, create a style rule to: a) set the background color to white; b) set the font size to 16 pixels, the height and the line height to 50 pixels, and the width to 180 pixels; c) display the item as a block and float it on the left; d) set the left and right margins to 5 pixels; and e) horizontally center the contents.
10. For each hypertext link within a list item in the horizontal navigation list, create a style rule to: a) display the link as a block; b) set the background color to red and the text color to white; c) create elongated corners with a horizontal radius of 10 pixels and a vertical radius of 25 pixels (use progressive enhancement to support browser extensions); and d) remove the text underlining. If a user hovers a mouse pointer over these links, change the background color to the value (255, 101, 101) and the text color to black.
11. Create a style rule for the vertical navigation list to: a) float it on the left only when the left margin is clear; and b) set the width to 200 pixels.
12. For list items within the vertical navigation list, create a style rule to: a) remove the list item marker; b) indent the text 20 pixels; and c) set the top and bottom margins to 20 pixels.
13. For hypertext links within the vertical navigation list, set the text color to white and remove the text underlining. When a user hovers the mouse pointer over these links, change the text color to black.
14. The main content of the Web page is contained in a section element with the id main. Create a style rule for this element to: a) change the background color to the value (255, 211, 211); b) float the element on the left; and c) set the width to 600 pixels.
15. For paragraphs that are direct children of the main section, set the font size to 20 pixels and the margin to 15 pixels.
16. For inline images within the main section, create a style rule to: a) float the image on the right; b) set the margin to 15 pixels; c) set the width to 350 pixels; and d) set the radius of the bottom-left corner to 350 pixels (use progressive enhancement to support the Mozilla and WebKit browser extensions).
17. Alice has included six coupons in the home page that have been nested within div elements belonging to the coupon class. For each coupon div element: a) add a 5-pixel dashed black border; b) float the coupons on the left; c) set the width to 170 pixels and the height to 150 pixels; and d) set the top and bottom margins to 20 pixels, and the left and right margins to 10 pixels.
18. To the style rule for the coupons, add style properties to create the following two background images: a) place the slice.png image in the center of the coupon without tiling; and b) place the notice.png image in the bottom-right corner of the coupon without tiling. Set the background color of the coupon to white.
19. For h1 headings within the coupons, add a style rule to: a) set the text color to white on a background with the color value (192, 0, 0); b) set the font size to 16 pixels and the kerning to 2 pixels; c) center the text; d) set the height to 25 pixels; and e) display the text in small caps.
20. For paragraphs within the coupons, create a style rule to: a) set the font size to 14 pixels; b) center the text; and c) set the margin to 5 pixels.
21. Alice has placed interesting tidbits about pizza in an aside element. Float the aside element on the left with a width of 200 pixels.
22. For h1 headings within the aside element, create a style rule to: a) set the text color to the value(l92, 0,0); b) set the font size to 20 pixels and the kerning to 2 pixels; c) set the font weight to normal; and d) center the text of the headings.
23. For list items within the aside element, create a style rule to: a) set the background color to the value (255, 135, 1 35); b) add round corners with a 5-pixel radius; c) set the text color to black; d) remove the list style maker; and e) set the margin to 10 pixels and the padding to 5 pixels.
24. Display the footer element when the left margin is clear, and set the size of the left margin to 200 pixels.
25. For the address element within the footer element, create a style rule to: a) add a l-pixel solid red border to the top of the element; b) change the text color to red; c) set the font size to 10 pixels, set the font style to normal, and center the address text; and d) set the top margin to 25 pixels and the bottom padding to 20 pixels.
26. Add style comments throughout your style sheet to document your work and then save your changes.
27. Open the redhall.htm file in your Web browser and verify that the design and layout resemble that shown in Figure 4-79.
28. Submit your completed files to your instructor, in either printed or electronic form, as requested. -
Penn foster Graded Project 41885100 WEB PAGES LISTS AND TABLES
Regular Price: $20.00
Special Price $15.00
Penn foster Graded Project 41885100 WEB PAGES LISTS AND TABLES
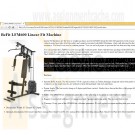
Body Systems is one of the leading manufacturers of home gyms. The company recently hired you to assist in developing their web site. Your first task is to create a Web page for the LSM400, a popular weight machine sold by the company.
Learn More
You'll download three files from your My Courses page:
1. smith.txt, describing the features of the LSM400
2. image file, logo.jpg, displaying the company logo
3. smith.jpg, an image of the LSM400
You can supplement these files with any other resources available to you. You're responsible for the page's content and appearance.
To complete this task:
1. Create an XHTML file named smith.htm.
2. In the head element, include an appropriate page title, along with a comment describing the purpose of the page, your name, and the date.
3. Include at least one example of each of the following in the document:
a. Heading
b. Paragraph
c. Ordered or unordered list
d. Character formatting element
e. Inline image
f. Horizontal line
g. Special character
h. Block-level element that is not a heading, paragraph, list, or horizontal line
4. Demonstrate your understanding of inline styles by including at least two different examples of an inline style.
5. Use proper XHTML syntax at all times. Close all two sided tags. Properly nest all tags. Use lowercase element and attribute names. Enclose attribute values in quotes. Include alternate text for non-graphical browsers with inline images.
6. Write your code so that it will be easy to read and understand. (You may download two image files from the Internet and use those, citing where you downloaded the files, and create a list of 3 to 5 features at your discretion.)
7. Save your XHTML file, and then view the resulting Web page in a browser.
8. Submit your completed project. -
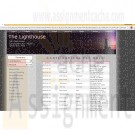
New Perspectives on HTML, CSS, and Dynamic HTML 5th edition Tutorial 12 Case 1 The Lighthouse
Regular Price: $15.00
Special Price $12.00
New Perspectives on HTML, CSS, and Dynamic HTML 5th edition Tutorial 12 Case 1 The Lighthouse
The Lighthouse is a charitable organization located in central Kentucky that matches donors with needy groups. The fundraising coordinator for The Lighthouse is Aaron Kitchen. On an administration Web page available only to Lighthouse staff, Aaron wants to display a list of information on recent donations, including the name and address of the donor, the amount donated, and the date of the donation. A list of donations from the last month has been downloaded from an external database and stored in a collection of arrays named firstName, lastName, street, city, state, zip, amount, and date. Aaron needs your help with displaying the data from those arrays in a Web table. He also wants a summary table that displays the total number of contributors and the total contribution amount. Figure 12-36 shows a preview of the Web page you’ll create.
Complete the following:
Learn More
1. Using your text editor, open clisttxt.htm and tablestxt.js from the tutorial.12\case1 folder. Enter your name and the date in the head section, and then save the files as clist.htm and tables.js, respectively.
2. Go to the clist.htm file in your text editor. The firstName, lastName, street, city, state, zip, amount, and date arrays have been created and populated for you in the april.js file. In the head section of the document, insert a script element that points to this file.
3. Aaron already has created a style sheet for the tables that will display the list of contributors and the summary of their contributions. Add a link to the tables.css style sheet in the Web page.
4. Save your changes to the file, and then go to the tables.js file in your text editor.
5. Add a function named showTable() that will be used to display the table containing the contributor list. The function has no parameters. Add the following commands to the function:
a. Write the following code to the document to create the header row for the table of contributions:
<table id='contributors'>
<thead>
<tr>
<th>Date</th><th>Amount</th>
<th>First Name</th><th>Last Name</th>
<th>Address</th>
</tr>
</thead>
b. Write the <tbody> tag to the document.
c. Next, you’ll create a table row for each person listed in the lastName array. Create a for loop that loops through each entry in the lastName array. Each time through the loop, write the HTML code
<tr>
<td>date</td>
<td class='amt'>amount</td>
<td>firstName</td>
<td>lastName</td>
<td>street <br />
city, state zip
</td>
</tr>
to the document, where date, amount, firstName, lastName, street, city, state, and zip are the items from the date, amount, firstName, lastName, street, city, and zip arrays, respectively, corresponding to the value from the counter variable in the for loop.
d. After the for loop, write the </tbody> tag to close off the table body.
e. Write the </table> tag to close off the Web table.
6. Create a function named showSummary() that will be used to calculate and display the total number of contributors and the total amount of contributions. The function has no parameters. Add the following commands to the function:
a. Declare the total variable, setting its initial value to 0.
b. Loop through each of the entries in the amount array, adding each item's value to the total variable.
c. Write the HTML code
<table id='sumTable'>
<tr>
<th id='sumTitle' colspan='2'>Summary</th>
</tr>
<tr>
<th>Contributors</th>
<td>contributors</td>
</tr>
<tr>
<th>Amount</th>
<td>$total</td>
</tr>
</table>
to the document, where contributors is the length of the lastName array and total is the value of the total variable.
7. Document your code using descriptive comments. Close the file, saving your changes, and then return to the clist.htm file in your text editor.
8. Add a script element to link to the tables.js file you created.
9. Scroll down to the figure box for the contribution totals. Within the figure box, insert a script element that runs the showSummary() function.
10. Scroll down to the figure box for the contributors data list. Within the figure box, insert a script element that runs the showTable() function.
11. Save your changes to the file, and then open clist.htm in your Web browser. Verify that the summary and contributor list tables appear as shown in Figure 12-36.
12. Submit your completed files to your instructor, in either printed or electronic form, as requested. -

New Perspectives on HTML, CSS, and Dynamic HTML 5th edition Tutorial 13 Case 1 Twin Life Magazine
Regular Price: $15.00
Special Price $12.00
New Perspectives on HTML, CSS, and Dynamic HTML 5th edition Tutorial 13 Case 1 Twin Life Magazine
Twin Life Magazine Elise Howard is the editor of Twin Life, a magazine for parents of twins, triplets, and other multiple births. The magazine is upgrading its Web site and Elise has approached you to help with the website design. She would like to give readers the ability to increase or decrease the font size of the articles the magazine publishes to make the text easier to read, or to allow readers to view an entire article on the same screen. Although readers can use their Web browsers to zoom in and zoom out of the Web pages, Elise wants an app that will affect only the article text and accompanying photo, while leaving the rest of page features - the magazine logo and list of links - unaffected.
To create this effect, her sample page has two buttons: one to increase the font size and other to decrease it. All text and page objects that are to be resized have been set using the relative em unit, while the other page text and objects that are to remain fixed in size have been set in pixels. Thus to change the size of all of the resizable objects, your code simply needs to change the default size of the document page body; all of the resizable objects will change proportionally based on the default font size. Figure 13-39 shows a preview of the article and resizing buttons that you'll work on for Twin Life.Complete the following:
Learn More
1. Using your text editor, open twinstxt.htm, tlmtxt.css, and fonttxt.js from the tutorial.13\case1 folder. Enter your name and the date in the head section, and then save the files as twins.htm, tlm.css, and fontsizer.js, respectively.
2. Go to the twins.htm file in your text editor and add a script element linking to the fontsizer.js file.
3. Scroll down the file and locate the fontbuttons div element, which contains two image buttons. Place both image buttons in the fontsizer class. Set the values associated with those buttons to -0.1 for the fontdown.png image and 0.1 for fontup.png.
4. Save your changes to the file, and then go to the tlm.css file in your text editor.
5. At the bottom of the file, insert a style rule to set the width of the inline image within the figure box in the article element to 12em.
6. Add another rule to set the font size of paragraph text within the article element to 1em.
7. Save your changes to the file, and then go to the fontsizer.js file in your text editor.
8. Add a command to run the startup() function when the page is initially loaded by the browser.
9. Create the startup() function. The purpose of this function is to apply onclick event handlers to the two font resize buttons. Create the fontButtons variable containing all of the page elements that belong to the fontsizer class. Loop through that collection and add an event handler to each item in the collection to run the resizeText() function when clicked.
10. Create the resizeText() function. The purpose of this function is to change the default font size of the document body based on the value of the font button being clicked. When that value is changed, all object sizes based on em units automatically will be resized. Add the following commands to the function:
a. Using the parseFloat() function, store the numeric value of the button being clicked in the fontChange variable.
b. Next, you must determine whether an inline style has been used to set the default document body font size. First, test whether the font size of the document body is equal to an empty text string. If it is, set the font size to 1.0em. (Hint: Use the reference document.body to reference the document body.)
c. Use the parseFloat() function to store the numeric value of the document body font size in the currentFontSize variable.
d. Change the document body font size to the text string current font size + font change + "em" where current font size is the value of the currentFontSize variable and font change is the value of the fontChange variable.
11. Document your code with appropriate comments throughout.
12. Save your changes to the file, and then load twins.htm in your Web browser. Verify that when you click the buttons to increase or decrease the font size, the paragraph text and the size of the author’s photo change in response, but no other part of the Web page changes in size.
13. Submit your completed files to your instructor, in either printed or electronic form, as requested. -

ITCO381 Unit 1 IP assignment
Regular Price: $20.00
Special Price $15.00
ITCO381 Unit 1 IP assignment
In an era where Web sites are highly dynamic, interactive, and database dependent, a static Web page consisting of only HTML may seem archaic. However, Web developers must begin somewhere and a good understanding of the language of the Web (HTML) is the right place to start. You have decided to develop a static Web page that contains valid HTML as the newsletter for an organization that interests you.
Create a static Web page that includes the basic structure of a valid HTML (not XHTML) document. Make sure to include the language attribute of the html element and the character set attribute of the metadata element. You may want to save this basic document as the starting structure for development of all static Web pages.
Continue to structure the newsletter using the HTML semantic elements
header
section
footer
Within the structure of the newsletter add other HTML elements including at least one:
heading
paragraph
image that implements accessibility guidelines
navigation that includes a
list of at least
four links that
navigate to actual Web pages and
implement accessibility guidelines
Use of any inline elements should follow current standards
No style should be applied
Validate the finished web page.
Zip (compress) the into a .zip file.
Please submit your assignment.Grading
Learn More
You will be graded on the content, structure, and validity of your final HTML page. -
CIS363A Week 3 iLab 3 Create a Web Page Using CSS
Regular Price: $20.00
Special Price $15.00
CIS363A Week 3 iLab 3 Create a Web Page Using CSS
A local recruiter wants you to make a Web page for his information technology staffing company. He wants a Web page that has informed recent graduates about careers as Web programmers and Web designers. Create a Web page that will give information about each of the positions mentioned. The page content should be as followed:
Descriptions about each of the positions
Skills and/or education required for these positions
Salaries, benefits associated with these positions
Professional organizations of which people who hold these positions are typical membersThis page must have at least five graphical elements. You must implement the following CSS features:
Box Model
Floating Elements
Borders
Remember that the recruiter wants this page to be well organized, informative, and attractive. Use colors and great graphics to make this Web page interesting so that he can attract more business.Software Citation Requirements
This course uses open-source software which must be cited when used for any student work. Citation requirements are on the Open Source Applications page.
Please review the installation instruction files to complete your assignmentDeliverables
Submit your assignment to the Dropbox, located at the top of this page. For instructions on how to use the Dropbox, read these step-by-step instructions. (See the Syllabus section "Due Dates for Assignments & Exams" for due dates.)
Submit a Week 3 Lab folder, including
The HTML Web page
Associated CSS files
Images and multimedia (if any)Category Points
Use of Box Model, bordering, and floating elements 15
Completed Web page based on project specifications 15
Correct External CSS file that attaches to each page 10
Total 40Required Software
Software Name 1
Access the software at https://lab.devry.edu.
Steps: 1, 2, and 3
Software Name 2
Access the software at https://devrydesktop.rkon.com.
Steps: 4 and 5Lab Steps
STEP 1: Gather Web Content
Create written Web content about each of the positions.
Gather all images that you will use.STEP 2: Create Your Web Page
Create an informal page layout for the Web page.
Create the Web page based on criteria mentioned.STEP 3: Submit Your Assignment
Learn More
Upon completion of this step, upload your site to the Web server and attach a copy of the zipped folder to the Dropbox.
Submit your assignment to the Dropbox, located at the top of this page. For instructions on how to use the Dropbox, read these step-by-step instructions.
10 Item(s)
Grid List

You have no items in your shopping cart.
