Search results for 'omer'
7 Item(s)
Grid List
-
New Perspectives on HTML and XHTML Tutorial 6 Case Problem 1 Solution
$12.00New Perspectives on HTML and XHTML Tutorial 6 Case Problem 1 Solution
Data Files needed for this Case Problem: parch.jpg, pcg.css, pcglogo.jpg, sformtxt.css, and subtxt.htm
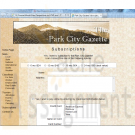
The Park City Gazette Kevin Webber, the editor of the Park City Gazette of Estes Park, Colorado, has asked for your help in developing a subscription page for the newspaper’s Web site. The page includes a form where customers can enter the length of the subscription they want to purchase, their mailing address, and their credit card information. Kevin has already created much of the layout and text of the Web page. Your job is to add the fields and control elements for the subscription form. A preview of the Web page you’ll create for Kevin is shown in Figure 6-60.The form contains several labels and control elements placed side-by-side in two columns. To create this two-column layout, you’ll float the labels and control elements on the left margin. You’ll identify the labels that are floated by putting them into the float-Label class. The floated control elements will belong to the floatCtrl class.
Complete the following:
Learn More
1. Use your text editor to open the sformtxt.css and subtxt.htm files from the tutorial.06\case1 folder included with your Data Files. Enter your name and the date in the comment section of each file. Save the files as sform.css and subscription.htm, respectively, in the same folder.
2. Go to the subscription.htm file in your text editor and insert a link to the sform.css style sheet.
3. Scroll down the file and insert a form element with the id subForm, directly below the paragraph in the rightColumn div container.
4. At the top of the form, Kevin wants an option list showing the four different payment plans. Insert a field set with the id subPlans. Within the field set do the following:
• Insert four option buttons belonging to the subplan field.
• Give the option buttons the ids plan1 through plan4 and the values 1 through 4.
• After each option button, insert a label element associated with the preceding option button. The text of the four labels is "6 mo./$24", "12 mo./$45", "18
mo./$64", and "24 mo./$80 (best value)".
5. After the subPlans field set, insert a label containing the text "Name". Associate the label with the cName field and put it in the class floatLabel.
6. After the label, insert an input box for the cName field. Place the input box in the floatCtrl field and set the size of the input box to 50 characters.
7. Insert another label containing the text "Address" associated with the address field and belonging to the floatLabel class. After the label, insert a text area box for the address field. Set the size of the box to six rows by 50 columns and place the text area box in the floatCtrl field.
8. Insert a label with the id agreeLabel associated with the agree field. Place the label in the floatLabel class. Within the label element, insert a check box for the agree field. After the check box, but within the label element, insert the text "Yes, I wish to pay online by entering my credit card information below."
9. Insert a field set with the id payment. At the top of the field set, insert a label belonging to the floatLabel class, containing the text "Credit Card" and associated with the cardType field.
10. Insert a selection list for the cardType field. Do the following for the selection list:
• Place the selection list in the floatCtrl class.
• Set the selection list to display four items.
• Add the following options to the selection list: American Express, Discover, MasterCard, and Visa.
• Set the values of the four options to: Amex, Disc, MC, and Visa.
11. Below the selection list, insert two labels. The first label should contain the text "Name on Card" and should be associated with the cardName field. The second label should contain the text “Card Number” and should be associated with the cardNumber field. Put both labels in the floatLabel class.
12. Directly after each label, insert an input box. The first input box should be for the cardName field; the second input box is for the cardNumber field. For both input boxes, set the width to 30 characters and place the input box into the floatCtrl class.
13. Insert a label belonging to the floatLabel class and containing the text "Expiration Date". After the label, insert two selection lists for the expMonth and expYear field. Do the following for the selection lists:
• Place both selection lists in the floatCtrl class.
• Add 12 options to the expMonth selection list containing the text "01" through "12". The values of the options should range from 1 to 12.
• Add five options to the expYear selection list containing the text "2011" through "2015". Set the values of each option to match the option text.
14. Insert a field set with the id buttons. Within the field set, insert a submit and reset button. Give the submit button the value Subscribe. Give the reset button the value Cancel.
15. Use the CGI script at http://www.theparkcitygazette.com/subscribe with the post method.
16. Save your changes to the file.
17. Go to the sform.css file in your text editor and add the following styles to the style sheet:
• Set the background color of the subPlans field set to white. Set the padding to 5 pixels and the bottom margin to 20 pixels. Center the contents of the field set.
• For label elements within the subPlans fieldset element, set the right margin to 15 pixels.
• Display objects belonging to the floatLabel class as block-level elements, floated on the left margin but only when the left margin is clear. (Hint: Use the clear style.) Set the width to 150 pixels and the bottom margin to 10 pixels. Right-align the label text.
• Display objects belonging to the floatCtrl class as block-level elements, floated on the left margin. Set the left margin to 20 pixels and the bottom margin to 10 pixels.
• Set the width of the agreeLabel label to 600 pixels with top/bottom margins of 20 pixels and left/right margins of 0 pixels. Center the label text.
• Display the payment field set only when the left margin is clear. Set the background color to white. Set the width of the field set to 400 pixels with a left margin of 100 pixels and 5 pixels of padding.
• Center the contents of the buttons field set with top/bottom margins of 10 pixels and left/right margins of 0 pixels. Set the border style to none.
18. Save your changes to the sform.css file and open subscription.htm in your Web browser. Verify that the layout and content of the Web form resemble that shown in Figure 6-60.
19. Submit your completed files to your instructor. -
Penn foster Graded Project 40206200 HTML Coding
$30.00Penn foster Graded Project 40206200 HTML Coding
OVERVIEW
After completing the exercises and the examination for your HTML Coding study guide, you're now ready to complete the graded project. For the graded project, you'll use HTML and JavaScript to create a new Web page by using many of the new Web designing skills you've learned. You'll then upload the project to the student Web hosting site.INSTRUCTIONS
For the graded project, you'll create a Web page from scratch using many of the HTML commands you've learned. Follow each step and add each of the presentation elements as instructed.
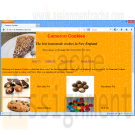
Laura Cameron, owner of Cameron Cookies in Portland, Maine, asks you to create a Web page for her. She wants her customers to be able to view her contact information, a listing of some types of cookies she sells, and an e-mail link to contact her at the store. She also wants you to link this page to a Web form where customers can order cookies. Follow the instructions below to create these Web pages for Laura.
1. Open a text editor, such as Windows Notepad.
2. Type the following lines of code into your document as shown below (Figure 1):
<HTML>
<HEAD>
<TITLE> Cameron Cookies </TITLE>
</HEAD>
<BODY>
</BODY>
</HTML>
3. Add a welcome message to your Web page by typing Heading 1 tags under the <BODY> tag as follows:
<H1> Cameron Cookies </H1>
4. Save the file as "index.htm."
5. Open a Web browser to view how your Web page looks. From the File menu, click Open and locate where you saved the file index.htm before clicking OK. Your Web page should look like Figure 2.
6. Change the color and positioning of your heading by
- Aligning the heading in the center
- Changing the font color to red
- Changing the font face to Arial. If Arial isn't available, then use Helvetica. If Helvetica isn't available, then use Sans Serif.
7. Save your changes and return to your Web browser. Press F5 to refresh the page to view your changes on your Web page (Figure 3).
8. Underneath the heading, add the following text: "The best homemade cookies in New England." Be sure to format this text as
- Heading 2
- Italicized (if Heading 2 isn’t already italicized)
- Centered
9. Save your changes and return to your Web browser. Press F5 to refresh the page to view your changes in your Web page (Figure 4).
10. Underneath this heading, add the following address information as paragraph text: 99 Sycamore St. Portland, ME 04101 (207) 555-1212 Be sure to center the text.
11. Add the following text underneath the address. Welcome to Cameron Cookies, which has been voted "the best homemade cookies in New England" in a recent poll. At Cameron Cookies, you're sure to find a cookie you’ll love. Here's a sampling of our many varieties:
Chocolate Nut
Macadamia Nut
Oatmeal Raisin
M & M's
White Chocolate
Chocolate Pecan
Chocolate Hazelnut
Cookies are a great gift idea that everybody loves. Just give us a call or send us an e-mail 24 hours in advance and we'll create a lovely gift bag or basket filled with an assortment of fresh, homemade cookies. Thanks for visiting our Web site and be sure to come visit us in person here in Portland, Maine. To place an order, click here.
12. Take your own photos or search through the Web to find photos of cookies to illustrate your Web pages. Create a table to display photos of each type of cookie to the left of the cookie name as in Figure 6. (Make sure your images don't have copyright restrictions. One source of free clip art is http://dgl.microsoft.com/.) Right-click the image and save it to the same folder where your Web page is located. Insert the photos in your HTML document to the left of each cookie name. Note: You may have to create a table for your images to appear correctly.
13. Find an image to use as your background of your Web page. Change your background to include this background image.
14. Save your changes in your text file and refresh your Web page in your browser.
15. Go back to the text you just entered in your HTML document and find the words "click here." Create a link from the words "click here" to a new Web page that
you haven't created yet called "orderform.htm," which you’ll save to the same folder as Cameron Cookies.
16. Save your changes in your text file and refresh your Web page in your browser. The words "click here" should now appear as a hyperlink, similar to Figure 5. (Don't click on the hyperlink; it's not yet fully functional.)
17. Save your file and check your e-mail link. Your Web page should look similar to Figure 6.Adding Links
Now you’re going to add more links to your home page for Cameron Cookies.
1. If you closed your HTML document for index.htm, reopen it now.
2. Under the address line for Cameron Cookies, insert a table with the following elements:
- Table width = 500
- One row
- Four columns
- No border
- Table row data is centered
3. Within each table cell, type the following text:
- About Us
- Contact Us
- Place an Order
- Sample Recipe
4. You're going to add a link for the text you just added.
Follow the directions below for the destination of each link:
- Link "About Us" to the page "about.htm." You haven't created this page yet, so the link won't be active until you create the About Us page. However, create the link to this page now.
- Link "Contact Us" to the e-mail address cookiemaster@cameroncookies.com.
- Link "Place an Order" to the page "orderform.htm."
You haven't created this page yet, so it won't be active until you create the Order Form page.
- Link "Sample Recipe" to the page "recipe.htm." You haven't created this page yet so it won’t be active until you create the recipe page.
5. Save your changes and check your Web file in a browser.
Your Web page should look similar to Figure 7. You're now finished with the index.htm page.Creating Your Other Pages
1. Copy your index.htm page and save it as "about.htm." You’re going to use some elements of the main page in all your other pages, so you don’t have to retype them.
2. Scroll down your HTML code to find the text "Welcome to Cameron Cookies." Now delete all the text from "Welcome" to the end of the page.
3. Make a copy of your about.htm file and save it as "recipe.htm."
4. Make another copy and save it as "orderform.htm."
5. Open the Web page for each new page created in your browser. Your Web pages should have your image, headers, address, and links; however, the remaining text should be gone.Modifying the About Us Page
1. Type the following text and format it to look like the text in Figure 8.
Cameron Cookies was created by Bill and Laura Cameron in 1995. The Camerons began selling homemade cookies around their neighborhood using a family recipe passed down by Bill’s grandmother, Stella Cameron. Their cookies were so popular that Bill and Laura had to expand their business, and in 1996 they moved to their current location in Portland, Maine. Cameron Cookies continues to sell off the shelves. Visitors to Maine drive out of their way to sample these wonderful, rich cookies that they’ve heard so much about. We hope to see you soon! Bill and Laura
2. Change your link "About Us" to "Home."
3. Change the destination of the link "Home" to index.htm.
4. Save your changes to your file and open the Web page for about.htm in your browser. Your page should look similar to Figure 8.
5. Test that the link for “Home” functions correctly. You'll be creating the recipe page next.Modifying the Recipe Page
1. Type Chocolate Chip Cookies in a Heading 2 format.
2. Type Ingredients in a Heading 3 format.
3. Type the following list of ingredients in an unordered list:
1/2 cup butter, softened
1 cup light brown sugar
3 tablespoons sugar
1 large egg
2 teaspoons vanilla extract
1-3/4 cups flour
12 HTML Coding
1/2 teaspoon baking powder
1/2 teaspoon baking soda
1/2 teaspoon salt
1-1/2 cups chocolate chips
4. Type Directions in a Heading 3 format.
5. Type the following in an ordered list format:
1. Preheat oven to 300 degrees. Cream butter with sugars.
2. Beat in egg and vanilla extract.
3. Mix dry ingredients in bowl. Add slowly to butter mixture. Stir in chocolate chips.
4. Drop cookie dough using a spoon onto a greased cookie sheet. Bake for 20 minutes or until browned.
Type the following:
Yield: 2 dozen cookies
7. Save your Web page and view it in a browser. It should appear similar to Figure 9.Modifying the Web Order Form
1. Add the form tags to your HTML document.
After your links, create a table for your order form with the following elements:
- Width = 65%
- Border = 0
- Cellpadding = 2
2. Within this table, you're going to create nested tables for your order form. The first table will contain personal information, the second will contain order information, and the third will contain payment information.
3. Create your first nested table and add form content and data to your table as shown in Figure 10.
4. Create your second nested table and add form content and data to your table as shown in Figure 11A and Figure 11B.
5. Add the words, "$5.95 for 1–5 boxes, $10 for five or more boxes to the second column.
6. Create your third nested table and add form content and data to your table as shown in Figure 12.
7. Save your file and refresh the Web page in your browser.
8. Check that all links on all pages are functional.Working with Dynamic Content and JavaScript
Learn More
This third part of your graded project involves working with dynamic content. You’re going to create transient status bar messages and a pop-up window. Turn to page 741 of your textbook and follow the directions for Case Problem 1. -
CIS 273 Lab Assignment 6 Working with Tables
Regular Price: $15.00
Special Price $12.00
CIS 273 Lab Assignment 6 Working with Tables
Deliverable: One (1) Web page and one (1) Cascading Style Sheet (.css).
Follow the directions below to complete Lab Assignment 6:
Learn More
1. Create a Web page and a Cascading Style Sheet (.css) that adds color to the page.
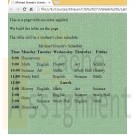
2. Re-create the Web page and the table as shown.
3. Create a caption for a student’s name.
4. Create a 1px table border.
5. Create weekday headings.
6. Create time headings.
7. Create multiple column coverage as shown for:
a. "Homeroom".
b. "Dismissed".
8. Create multiple column coverage and a centered bold tag for "Lunch" as shown.
9. Create multiple row coverage for “Gym” on Monday from 2:00 and 3:00 as shown. -

New Perspectives on HTML and CSS Edition 6 Tutorial 6 Case Problem 2 Creating a Web Form
Regular Price: $20.00
Special Price $15.00
New Perspectives on HTML and CSS Edition 6 Tutorial 6 Case Problem 2 Creating a Web Form
Learn More
Data Files needed for this Case Problem: diners.png, discover.png, formsubmit.js, go.png, master.png, modernizr-1.5.js, paytxt.css, regex.txt, sb.css, sbback.png, sblogo.png, spicetxt.htm, state.txt, stop.png, visa.png
The Spice Bowl Rita Sato is the manager of the Web development team for The Spice Bowl, a new online grocery store specializing in gourmet spices. She's asked you to work on the Web forms for the site. The first form you'll create is a payment form in which customers enter their billing address and credit card data. She wants you to include validation tests for customers postal codes, phone numbers, e-mail addresses, and credit card numbers. A preview of the form you'll create is shown in Figure 6-79.
Complete the following:
1. In your text editor, open the spicetxt.htm and paytxt.css files from the tutorial.06\case2 folder included with your Data Files. Enter your name and the date in the comment section of each file. Save the files as spice.htm and payment.css respectively.
2. Go to the spice.htm file in your text editor and review the contents and structure of the document. Link the file to the payment.css style sheet.
3. Scroll down to the h1 heading Payment Form, and below it insert a form element with the action http://www.thespicebowlcorp.com/cgi-bin/payment using the post method.
4. Within the form, create three field sets with the ids billing, creditcard, and info, and with the legend text Billing Information (required), Credit Card (required), and Additional Information, respectively.
5. Within the billing field set, create input boxes for the customer's first name, last name, street address, second line of the street address, and city with the field names fNane, lNane, street, street2, and city, respectively. Add field labels for these input boxes as shown in Figure 6-79.
6. Create a selection list for the state field containing two-letter abbreviations of the state names. You can find a list of state abbreviations in the state.txt file. Add the label text State.
7. Create an input box for the zip field along with the label text ZIP/Postal Code. The pattern of the field value should match the regular expression for postal codes. You can use the regular expression patterns listed in the regex.txt data file.
8. Create an input box for the country field along with the label text Country. Make the default value of the field equal to the text string United States.
9. Create an input box for the phone field along with the label text Phone. The pattern of the field value should match the regular expression for phone numbers.
10. All of the fields within the billing field set should be marked as required fields with the exception of the street2 field.
11. Within the creditcard field set, create a field set belonging to the class optionGroup. Within this field set, create four label elements. Within each label, create an option button belonging to the card field followed by an inline image belonging to one of four credit card companies. The field values associated with the four option buttons are diners, discover, master, and visa, and the inline images are diners.png, discover.png, master.png, and visa.png, respectively.
12. Directly below the optionGroup field set, create an input box for the ccardnumber field along with the label text Credit Card Number. The text of the field value should match the regular expression for credit card numbers found in the regex.txt file.
13. Add a label containing the text Expiration Date followed by a selection list for the ccardmonthfield field that contains the first entry --Month-- followed by the text for each individual month in chronological order from January (01) through December (12). Also add a selection list for the ccardyear field with the first entry --Year-- followed by year values for 2014 through 2018.
14. Add a label containing the text CSC followed by an input box for the csc field. The csc field should be limited to three characters, follow the regular expression pattern \d{3 }$ and display the placeholder text nnn.
15. Make all of the fields within the creditCard field set required fields.
16. Within the info field set, create a label containing the text Contact Email followed by an input box for the email field that uses the email data type.
17. Add a label containing the text Special Notes followed by a text area box for the notes field.
18. At the bottom or the form, directly above the closing </form> tag, insert a submit button with the button text Submit Order.
19. Save your changes to the file, and then go to the payment.css file and add styles rules for the different form elements as described in the following steps.
20. Display all field sets without borders and with a 5-pixel margin. Display all field set legends with a background color of (239, 198, 145) and a text color of black. Set the top and bottom margins to 10 pixels and indent the legend text 20 pixels. Set the width of the legend to 1O0% of the width of the field set. Finally, add rounded borders to the legend, 1 0 pixels in radius.
21. Display all labels as blocks, floated on the left margin once the left margin is clear. Set the font size to 0.8em and align the label text to the right. Set the top and bottom margins to 2 pixels, and set the left and right margins to 5 pixels. Set the width of the labels to 25%.
22. Display all input elements as blocks, floated on the left with a font size of 0.9cm and a width of 60%. Set the top and bottom margins to 2 pixels, and set the left and right margins to O pixels.
23. Display all select elements as blocks floated on the left with a font size of 0.9 em and a margin of 2 pixels.
24. Display all textarea elements as blocks floated on the left with a font size of 0.9 em, a height of 75 pixels, and a width of 60%.
25. Set the left margin of the field set belonging to the optionGroup class to 25%. For label elements nested within the optionGroup field set: a) display the labels inline; b) do not float the labels; and c) set the label width to 100 pixels.
26. Display option buttons inline with no floating. Set the margin of the option buttons to 0 pixels and the width to 20 pixels.
27. Set the width of the input box for the csc field to 50 pixels.
28. For the submit button, add the following styles: a) set the background color to the value (239, 198, 145); b) do not float the input box; c) set the dimensions of the button to 150 pixels wide by 30 pixels high; d) set the top and bottom margins to 10 pixels. and set the left and right margins to auto; and e) add a rounded border with a 15-pixel radius.
29. When input, select, and textarea elements receive the focus, change the background color to the value (255, 218, 165).
30. When an input element receives the focus and is invalid, change the background color to the value (255, 245, 215) and display the stop.png background image file in the bottom-right corner of the input box with no tiling.
31. When an input element receives the focus and is valid, change the background color to the value (215, 255, 215) and display the go.png image in the bottom-right corner of the input box with no tiling.
32. Save your changes to the style sheet.
33. Open the spice.htm file in your Web browser. Verify that you cannot submit the form without all required fields filled out, and without phone number, e-mail address, and CSC values entered in the proper format.
34. Verify the validation checks for the credit card number by confirming that the form rejects the following credit card numbers (which are not valid card numbers):
• 31012345678901
• 6012123456789019
• 5912345678901235
• 8123456789012349
35. Further verify the validation checks for the credit card number by confirming that the form accepts the following credit card numbers which are valid card numbers:
• 30312345678901
• 6011123456789019
• 5112345678901235
• 4123456789012349
36. Submit your completed files to your instructor, in either printed or electronic form, as requested. -

New Perspectives on HTML, CSS, and Dynamic HTML 5th edition Tutorial 14 Case 1 New Accents Photography
Regular Price: $15.00
Special Price $12.00
New Perspectives on HTML, CSS, and Dynamic HTML 5th edition Tutorial 14 Case 1 New Accents Photography
After you have completed all of the tutorials in Chapter 14, turn to page 1001 in your textbook and do Case Problem 1, New Accents Photography. Make sure all files are uploaded to cPanel and submit your URL for the accents.htm file when you are finished.
Use JavaScript to create a dynamic style sheet switcher.
Data files needed for this Case Problem: accentstxt.htm, base.css, elegant.css, elegant.png, elegant_back.png, elegant_small.png, innovative.css, innovative.png, innovative_back.png, innovative_small.png, joyous.css, joyous.png, joyous_back.png, joyous_small.png, modernizr-1.5.js, nalogo.png, romantic.css, romantic.png, romantic_back.png, romantic_small.png, styletxt.js, zany.css, zany.png, zany_back.png, zany_small.png
New Accents Photography Christine Drake is the owner and chief photographer at New Accents Photography, a photography studio in Ashland, Oregon, that specializes in wedding photos. Wedding portraiture is a competitive business. and Christine wants to improve the design of her Web site's opening page to help interest couples in viewing her work. Christine is proud of the many and varied styles of portraiture that New Accents Photography offers, and she would like to create an interactive style sheet switcher that loads different style designs based on her photos.
Christine envisions making several style sheets, and she wants to limit the amount of work she'll have to do when updating the HTML code as she adds new sheets to her site. She would like your help with writing a JavaScript app that examines the list of style sheets in the site's home page and creates a figure box of clickable thumbnail images for each sheet design. A preview of the page you'll create for Christine is shown In figure 14-66.Christine already has written the style sheet code and most of the HTML code. Your job will be to write the JavaScript code to enable her customers to switch from one style design to another.
Complete the following:
1. Using your text editor, open accentstxt.htm and styletxt.js from the tutorial.14\case1 folder. Enter your name and the date in the comment section of each file, and then save the files asaccents.htm and stylebox.js, respectively.2. Go to the accents.htm file in your text editor. Currently, Christine has only one persistent style sheet linked to her document. Create a link to the preferred style sheet romantic.css and give it the title romantic.
3. Create links to the following alternate style sheets: elegant.css, joyous.css, innovative.css, and zany.css. Give the style sheets the titles elegant, joyous, innovative, and zany, respectively. Do not disable any of these style sheets at this time.
4. Create a link to the styleBox.js file. Take some time to study the rest of the HTML code and then close the file, saving your changes.
5. Go to the styleBox.js file in your text editor. Below the comments, declare a global variable named allSheets and set it equal to an empty array. The purpose of the allSheets variable will be to store references to each preferred and alternate style sheet in the document.
6. Add a command to run the loadStyles() function when the page is initially loaded.
7. Create the loadStyles() function. The purpose of this function is to load all of the preferred and alternate style sheets into the allSheets variable. Add the following commands to the function:
a. Declare the links variable referencing all link elements in the document.
b. Loop through the contents of the links object collection. For each item, determine whether it represents a preferred or alternate style sheet with a defined title.
c. Disable each alternate style sheet, but leave the preferred style sheet enabled.
d. Use the push() array method to add each preferred or alternate style sheet to the allSheets array.
e. After the completion of the for loop, call the displayThumbs() function.
8. Create the displayThumbs() function. The purpose of this function is to display thumbnail images of each style sheet design from the allSheets array. Add the following commands to the function:
a. Create an element node for the figure element and store it in the figBox variable.
b. Set the id of the figBox element node to the text string thumbnails.
c. Loop through each item in the allSheets array, and do the following for each item:
i) create an element node for the img element and store it in the sheetImg variable;
ii) set the source of the sheetImginline image to the file title_small.png, where title is the title value of the current style sheet in the loop; iii)set the title attribute of the inline image to match the title attribute of the current style sheet;
iv) add an onclick event handler to the inline image to run the showSheet() function when clicked; and
v) append sheetImg to the figBox node.
d. After the for loop has completed, append the figBox node to the document element with the id main.
9. Create the showSheet() function. The purpose of this function is to change the style sheet used in the document. Add the following commands to the function:
a. Declare the variable sTitle, setting it equal to the title attribute of the inline image that called the showSheet() function. (Hint: Use the this keyword to reference the inline image.)
b. Loop through all of the sheets in the allSheets array. Enable the style sheet whose title attribute equals sTitle and disable all of the others.
10. Document your work with descriptive comments throughout your code.11. Save your changes to the file, and then open accents.htm in your Web browser. Verify that five inline images have been added near the bottom of the Web page. Click each thumbnail image and verify that it loads a different style sheet. (Note: If you are using Safari for Windows or Macintosh Version 5.1.2, this style sheet switcher will not work.)
12. Submit your completed files to your instructor, in either printed or electronic form, as requested.
Learn More -
New Perspectives HTML5 and CSS3 7th Edition Tutorial 10 Case 1 Trophy Case Sports
Regular Price: $20.00
Special Price $15.00
New Perspectives HTML5 and CSS3 7th Edition Tutorial 10 Case 1 Trophy Case Sports
Trophy Case Sports Sarah Nordheim manages the website for Trophy Case Sports, a sports memorabilia store located in Beavercreek, Ohio. She has asked you to work on creating a script for a shopping cart page. The script should take information on the items that the customer has purchased and present in it table form, calculating the total cost of the order. A preview of the page you will create is shown in Figure 10-35.
Sarah has already designed the page layout. Your job will be to use JavaScript to enter the order information (this task will later be handled by a script running on website) and to write a script that generates the HTML code for the shopping cart table.
Complete the following:
1. Use your editor to open the tc_cart_txt.html, tc_cart_txt.js and tc_order_txt.js files from the htm10 case 1 folder. Enter your name and the date in the comment section of each file, and save them as tc_cart.html, tc_cart.js and tc_order.js respectively.2. Go to the tc_cart.html file in your editor. Directly above the closing </head> tag, insert script elements to link the page to the tc_order.js and tc_cart.js files in that order. Defer the loading and running of both script files until after the page has loaded.
3. Scroll down the file and directly below the h1 heading titled "Shopping Cart" insert a div element with the ID cart.
4. Save your changes to the file and go to the tc_ordet.js file in your editor.
5. Within the tc_order.js file, you will create arrays containing information on a sample customer order. Create an array named item that will contain the ID numbers of the items purchased by the customer. Add the following four item numbers to the array: 10582, 23015, 41807, and 10041.
6. Create an array named itemDescription containing the following item descriptions:
• 1975 Green Bay Packers Football (signed), Item 10582
• Tom Land, 1955 Football Card (unsigned), Item 23015
• 1916 Army-Navy Game, Framed Photo (signed), Item 41807
• Protective Card Sheets, Rem 100417. Create an array named itemPrice containing the following item prices: 149.93, 89.98, 334.93, and 22.67.
8. Create an array named itemQty containing the following quantities that the customer ordered of each item: 1, 1, 1, and 4.
9. Save your changes to the file, and then open the tc_cart.js file in your editor.
10. In your script, you will calculate a running total of the cost of the order. Declare a variable named orderTotal and set its initial value to 0.
11. Declare a variable named cartHTML that will contain the HTML code for the contents of the shopping cart, which will be displayed as a table. Set its initial value to the text string:
<table>
<tr>
<th>Item</th><th>Description</th><th>Price</th><th>Qty</th><th>Total</th>
</tr>12. Create a for loop that loops through the entries in the item array. Each time through the loop, execute the commands described in Steps a through e.
a. Add the following HTML code to the value of the cartHTML variable
<tr> <td><img src='tc_item.png' alt='item' /> </td>
where item is the current value from the item array.
b. Add the following HTML code to the cartHTML variable to display the description, price, and quantity ordered of the item
<td> description</td> <td>price</td> <td>quantity</td>
where description is the current value from the itemDescription array, price is the current value from the itemPrice array preceded by a $ symbol, and quantity is from the itemQty array.
c. Declare a variable named itemCost equal to the price value multiplied by the quantity value for the current item.
d. Add the following HTML code to the cartHTML variable to display the cost for the item(s) ordered, completing the table row
<td>$cost</td></tr>
where cost is the value of the itemCost variable, preceded by a $ symbol.
e. Add the value of the itemCost variable to the order Total variable to keep a running total of the total cost of the customer order.13. After the tor loop has completed, add the following HTML code to the value of the cartHTML variable, completing the shopping cart table
<tr>
<td colspan= '4'>Subtotal</td>
<td>Total</td>
</tr>
</table>
where total is the value of the orderTotal variable, preceded by a $ symbol.14. Apply the cartHTML value to the inner HTML of the div element with the ID cart.
15. Document your script file with appropriate comments, and then save your work.
16. Open the tc_cart.html file in your browser and verify that the page now shows the shopping cart data for the sample customer order.
Learn More -
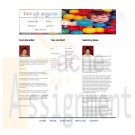
Project 3 Twin Life Magazine
Regular Price: $15.00
Special Price $12.00
Project 3 Twin Life Magazine
For your last project, you will design and build a web site for an online version of a magazine about twins.
1. Plan and design the layout of the web site. You will need to review the files provided and the specifications for the web site before you begin this part.2. You are to create an online version of a magazine created for parents of twins, triplets, and other multiple birth children following the guidelines below.
Learn More
a. There are to be a total of five web pages for the site that you need to hand in plus one style sheet. A front page called twinlife.htm, a news page called news.htm, a monthly features page called features.htm, a page for special articles called articles.htm and a customer survey page called survey.htm. In addition you need to create a style sheet containing all the styles for the site called twinstyles.css.
b. You will need to download the skeleton web pages, some text files and some images to use from the link on the Project 3 Instructions page. The text files contain information that you must use on the pages. Go through all of these files and decide what should go on each page. It is up to you what you put on which page although some of the information clearly goes on certain pages. Feel free to supplement them if you want but if you use additional images be sure to include them when you submit your assignment. The design of the web site is up to you.
c. General instructions for all pages.
1. Add your name, the date and an appropriate description to the head of every page.
2. The logo, twinlife.gif, must appear as an image map with links to the other pages at the top of every page. You will have to determine the coordinates using an image map editor like, http://www.image-maps.com.
3. Regular links to the other pages must appear in the footer of every page.
4. All image files provided must be used.
5. Code on every page must be neat, properly indented and easy to read
6. All content of the text files provided must be used.
d. All formatting should be done in twinstyles.css.
1. All formatting and styles for the web pages must appear in this stylesheet.
2. All style categories must have a descriptive comment before it in the page.
3. Styles must be grouped and organized.
4. All pages must have a common color scheme.
5. Styles must be added for each page to insure that it is attractive and easy to navigate.
e. Requirements for twinlife.htm.
1. Must be the home page for the site.
2. Must be attractive and easy to navigate.
3. Must contain the current date. Use the showDate() function from dates.js JavaScript file to generate the text of the current date (do not write your own date code).
f. Requirements for articles.htm.
1. Must contain articles about twins and child care.
2. Must be attractive and easy to navigate.
3. Must have at least two columns.
g. Requirements for features.htm
1. Must contain the advice column, photo of the month and a recipe of the month.
2. Must have borders around at least two elements.
3. Must be attractive and easy to navigate.
h. Requirements for news.htm
1. Must contain a page of news stories neatly formatted and easy to read.
2. Has a drop shadow around one object on the page.
3. Must be attractive and easy to navigate.
i. Requirements for survey.htm
1. Must contain a web form requesting information from the newsletter subscribers. The required content can be found in survey.txt.
2. Must be attractive and easy to navigate.
3. Must contain, a Submit button and a Reset Button. The form should be submitted using the CGI script at: http://www.twinlifemag.com/cgi/survey.
j. There are numerous files available with information that you must use in your website.
1. twinlife.htm – A homepage.
2. news.htm – A news page.
3. features.htm - A page containing monthly features.
4. articles.htm – A containing special articles about twins.
5. survey.htm - A customer survey page
6. twinstyles.css - A style sheet that must contain all the styles for the site.
7. twinlogo.gif – Image for logo of newsletter.
8. editor.txt - Content for a letter from an editor of the newsletter
9. howard.jpg - Image of the editor of the newsletter.
10. staff.txt - A list of the newsletter staff.
11. twins.jpg - An image of a set of twins.
12. chicago.txt - An article about a twins convention held in Chicago.
13. lasker.jpg – Image of author of convention article.
14. twintips.txt - Content of a Q&A page.
15. lawson.jpg - An image of the author of the Q&A information.
16. talk.txt - Content for an article about twins and talking.
17. kuhlman.jpg - An image of the author of the twins and talking article.
18. roles.txt - Content for an article about twins switching roles.
19. kerkman.jpg - An image of the author of twins switching roles.
20. rates.txt - Content for an article about the frequency of twins.
21. mbirths.txt - Content for an article about multiple births increasing.
22. recipe.txt - Recipe of the month.
23. deliver.txt - Photo of the month – goes with deliver.jpg
24. deliver.jpg - An image of the twins being delivered.
25. survey.txt - Specifics for the survey page.
26. dates.js - Javascript code to handle all date manipulation.
7 Item(s)
Grid List

You have no items in your shopping cart.
