Search results for 'microsoft access Walburg'
9 Item(s)
Grid List
-
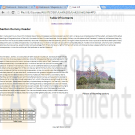
ITCO381 Unit 3 IP assignment
$15.00ITCO381 Unit 3 IP assignment
Continue to build on the skills of providing Web page content and structure with HTML and Web page style and layout using CSS. Design and develop an intermediate-level Web page consisting of valid HTML content that includes semantic elements, images, and tables.
Learn More
• Use Visual Studio to create a New Web Site. Select the ASP.NET Empty Web Site template to create the Web site. Use the File System Web location to create the Web site at the selected location and give the Web site an appropriate name.
• Create a static Web page that includes the basic structure of a valid HTML (not XHTML) document.
o Make sure to include
the language attribute of the html element and
the character set attribute of the metadata element.
o Name the Web page Unit3.htm
• Link to the Unit3.css file used to style and layout the Web page.
• Assign “Unit 3 IP” to the title.
• Structure the Web page using the HTML semantic elements
o header
o section
o footer
• Within the structure of the Web page add other HTML elements including at least:
o one level-one heading for the page in the header
o navigation in the header that includes a
one level-two heading for a table of contents in the header
list of at least three placeholders that
navigate to the paragraphs in the section
implement accessibility guidelines
o one level-one heading for the section
o three paragraphs in the section
beginning of each paragraph is a placeholder
additional text to lengthen the document
o three paragraphs in the section
a return placeholder that navigates back to the table of contents
o one figure element in the section to display
Image that implements accessibility guidelines
Copy the image file to the Web site folder.
Submit the image file along with the document.
figure caption
o figure element in the section to display
figure caption
table with
table header
table body
at least three table rows
at least three table data
table footer that spans three columns
• Use of any inline elements should follow current standards
• No style should be applied
• Validate the HTML in the Web page.
Develop an external CSS to provide style, presentation, and layout to the HTML document.
• Select Website > Add New Item from the menu and select Style Sheet from Add New Item dialog box. Name the style sheet Unit3.css.
• Add style rules to Unit3.css to accomplish the following:
o Ensure that the semantic elements format in older browsers.
o Eliminate the default spacing around all elements.
o In the following order, use the Calibri font, Arial font, or any available sans-serif font for the text.
o Set the font size for the body to 85% of the browser’s default font size.
o Set the width of the window to display the document to 950.
o Center the text in the header.
o Set the font size for the level-one heading in the header to two and one-half times the browser’s default font size.
o Set the font size for the level-two heading in the header and the level-one heading in the section to one and three-quarter times the browser’s default font size.
o Set the text to undecorated and one and one-quarter times the browser’s default font size when the user hovers over or focuses on the links in the table of contents.
o Set the width of figures to 300.
o Display figures on the right with the paragraph text flowing to the left of the figures.
o Set the margin for figures to the equivalent of one capital M on all sides.
o Set the padding for figures to the equivalent of one capital M on all sides.
o Display a one pixel black border to the left of figures.
o Bold the text of figure captions.
o Set the size of the font of figure captions to one and one-quarter times the browser’s default font size.
o Center the text of figure captions.
o Set the padding of all paragraphs to the equivalent of one capital M on the top and bottom and zero on the left and right.
o Clear the float of the figures in the paragraphs that return the user to the table of contents.
o Center the text of the paragraphs that return the user to the table of contents.
o Display the footer in the center of the page.
o Set the padding of table data and table headers to zero on the top and bottom and to the equivalent of one-half a capital M on the left and right;
o Display a one pixel black border around all table data and table headers.
o Center the text in the table footer.
o Bold the text in the table footer.
• Validate the CSS style rules.
• Zip (compress) the Visual Studio Web site folder into a .zip file to submit. -
Penn foster Graded Project 40206200 HTML Coding
$30.00Penn foster Graded Project 40206200 HTML Coding
OVERVIEW
After completing the exercises and the examination for your HTML Coding study guide, you're now ready to complete the graded project. For the graded project, you'll use HTML and JavaScript to create a new Web page by using many of the new Web designing skills you've learned. You'll then upload the project to the student Web hosting site.INSTRUCTIONS
For the graded project, you'll create a Web page from scratch using many of the HTML commands you've learned. Follow each step and add each of the presentation elements as instructed.
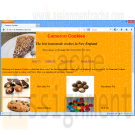
Laura Cameron, owner of Cameron Cookies in Portland, Maine, asks you to create a Web page for her. She wants her customers to be able to view her contact information, a listing of some types of cookies she sells, and an e-mail link to contact her at the store. She also wants you to link this page to a Web form where customers can order cookies. Follow the instructions below to create these Web pages for Laura.
1. Open a text editor, such as Windows Notepad.
2. Type the following lines of code into your document as shown below (Figure 1):
<HTML>
<HEAD>
<TITLE> Cameron Cookies </TITLE>
</HEAD>
<BODY>
</BODY>
</HTML>
3. Add a welcome message to your Web page by typing Heading 1 tags under the <BODY> tag as follows:
<H1> Cameron Cookies </H1>
4. Save the file as "index.htm."
5. Open a Web browser to view how your Web page looks. From the File menu, click Open and locate where you saved the file index.htm before clicking OK. Your Web page should look like Figure 2.
6. Change the color and positioning of your heading by
- Aligning the heading in the center
- Changing the font color to red
- Changing the font face to Arial. If Arial isn't available, then use Helvetica. If Helvetica isn't available, then use Sans Serif.
7. Save your changes and return to your Web browser. Press F5 to refresh the page to view your changes on your Web page (Figure 3).
8. Underneath the heading, add the following text: "The best homemade cookies in New England." Be sure to format this text as
- Heading 2
- Italicized (if Heading 2 isn’t already italicized)
- Centered
9. Save your changes and return to your Web browser. Press F5 to refresh the page to view your changes in your Web page (Figure 4).
10. Underneath this heading, add the following address information as paragraph text: 99 Sycamore St. Portland, ME 04101 (207) 555-1212 Be sure to center the text.
11. Add the following text underneath the address. Welcome to Cameron Cookies, which has been voted "the best homemade cookies in New England" in a recent poll. At Cameron Cookies, you're sure to find a cookie you’ll love. Here's a sampling of our many varieties:
Chocolate Nut
Macadamia Nut
Oatmeal Raisin
M & M's
White Chocolate
Chocolate Pecan
Chocolate Hazelnut
Cookies are a great gift idea that everybody loves. Just give us a call or send us an e-mail 24 hours in advance and we'll create a lovely gift bag or basket filled with an assortment of fresh, homemade cookies. Thanks for visiting our Web site and be sure to come visit us in person here in Portland, Maine. To place an order, click here.
12. Take your own photos or search through the Web to find photos of cookies to illustrate your Web pages. Create a table to display photos of each type of cookie to the left of the cookie name as in Figure 6. (Make sure your images don't have copyright restrictions. One source of free clip art is http://dgl.microsoft.com/.) Right-click the image and save it to the same folder where your Web page is located. Insert the photos in your HTML document to the left of each cookie name. Note: You may have to create a table for your images to appear correctly.
13. Find an image to use as your background of your Web page. Change your background to include this background image.
14. Save your changes in your text file and refresh your Web page in your browser.
15. Go back to the text you just entered in your HTML document and find the words "click here." Create a link from the words "click here" to a new Web page that
you haven't created yet called "orderform.htm," which you’ll save to the same folder as Cameron Cookies.
16. Save your changes in your text file and refresh your Web page in your browser. The words "click here" should now appear as a hyperlink, similar to Figure 5. (Don't click on the hyperlink; it's not yet fully functional.)
17. Save your file and check your e-mail link. Your Web page should look similar to Figure 6.Adding Links
Now you’re going to add more links to your home page for Cameron Cookies.
1. If you closed your HTML document for index.htm, reopen it now.
2. Under the address line for Cameron Cookies, insert a table with the following elements:
- Table width = 500
- One row
- Four columns
- No border
- Table row data is centered
3. Within each table cell, type the following text:
- About Us
- Contact Us
- Place an Order
- Sample Recipe
4. You're going to add a link for the text you just added.
Follow the directions below for the destination of each link:
- Link "About Us" to the page "about.htm." You haven't created this page yet, so the link won't be active until you create the About Us page. However, create the link to this page now.
- Link "Contact Us" to the e-mail address cookiemaster@cameroncookies.com.
- Link "Place an Order" to the page "orderform.htm."
You haven't created this page yet, so it won't be active until you create the Order Form page.
- Link "Sample Recipe" to the page "recipe.htm." You haven't created this page yet so it won’t be active until you create the recipe page.
5. Save your changes and check your Web file in a browser.
Your Web page should look similar to Figure 7. You're now finished with the index.htm page.Creating Your Other Pages
1. Copy your index.htm page and save it as "about.htm." You’re going to use some elements of the main page in all your other pages, so you don’t have to retype them.
2. Scroll down your HTML code to find the text "Welcome to Cameron Cookies." Now delete all the text from "Welcome" to the end of the page.
3. Make a copy of your about.htm file and save it as "recipe.htm."
4. Make another copy and save it as "orderform.htm."
5. Open the Web page for each new page created in your browser. Your Web pages should have your image, headers, address, and links; however, the remaining text should be gone.Modifying the About Us Page
1. Type the following text and format it to look like the text in Figure 8.
Cameron Cookies was created by Bill and Laura Cameron in 1995. The Camerons began selling homemade cookies around their neighborhood using a family recipe passed down by Bill’s grandmother, Stella Cameron. Their cookies were so popular that Bill and Laura had to expand their business, and in 1996 they moved to their current location in Portland, Maine. Cameron Cookies continues to sell off the shelves. Visitors to Maine drive out of their way to sample these wonderful, rich cookies that they’ve heard so much about. We hope to see you soon! Bill and Laura
2. Change your link "About Us" to "Home."
3. Change the destination of the link "Home" to index.htm.
4. Save your changes to your file and open the Web page for about.htm in your browser. Your page should look similar to Figure 8.
5. Test that the link for “Home” functions correctly. You'll be creating the recipe page next.Modifying the Recipe Page
1. Type Chocolate Chip Cookies in a Heading 2 format.
2. Type Ingredients in a Heading 3 format.
3. Type the following list of ingredients in an unordered list:
1/2 cup butter, softened
1 cup light brown sugar
3 tablespoons sugar
1 large egg
2 teaspoons vanilla extract
1-3/4 cups flour
12 HTML Coding
1/2 teaspoon baking powder
1/2 teaspoon baking soda
1/2 teaspoon salt
1-1/2 cups chocolate chips
4. Type Directions in a Heading 3 format.
5. Type the following in an ordered list format:
1. Preheat oven to 300 degrees. Cream butter with sugars.
2. Beat in egg and vanilla extract.
3. Mix dry ingredients in bowl. Add slowly to butter mixture. Stir in chocolate chips.
4. Drop cookie dough using a spoon onto a greased cookie sheet. Bake for 20 minutes or until browned.
Type the following:
Yield: 2 dozen cookies
7. Save your Web page and view it in a browser. It should appear similar to Figure 9.Modifying the Web Order Form
1. Add the form tags to your HTML document.
After your links, create a table for your order form with the following elements:
- Width = 65%
- Border = 0
- Cellpadding = 2
2. Within this table, you're going to create nested tables for your order form. The first table will contain personal information, the second will contain order information, and the third will contain payment information.
3. Create your first nested table and add form content and data to your table as shown in Figure 10.
4. Create your second nested table and add form content and data to your table as shown in Figure 11A and Figure 11B.
5. Add the words, "$5.95 for 1–5 boxes, $10 for five or more boxes to the second column.
6. Create your third nested table and add form content and data to your table as shown in Figure 12.
7. Save your file and refresh the Web page in your browser.
8. Check that all links on all pages are functional.Working with Dynamic Content and JavaScript
Learn More
This third part of your graded project involves working with dynamic content. You’re going to create transient status bar messages and a pop-up window. Turn to page 741 of your textbook and follow the directions for Case Problem 1. -

Penn foster Graded Project 402082 Unix-Based Environments and Apache HTTP Server
$15.00Penn foster Graded Project 402082 Unix-Based Environments and Apache HTTP Server
OVERVIEW
After installing Apache HTTP Server, you’re now ready to configure it for your website! Throughout this and future graded projects, you’ll be creating a fictional website, configuring it in various web server environments and then uploading it to the Penn Foster web server. There’s no better way to apply your knowledge than by completing a common real-world task!PROJECT SCENARIO
You’re now asked to test the fan club website on a local Apache HTTP Server. You should have completed the previous graded assignment and have the following files:
• index.html—Contains the band name, current lineup, and a brief history of the band.
• music.html—Contains their music catalog and upcoming tour dates.
• fanclub.html—Contains a form to sign-up for the band’s fanclub.
If not, go back to the previous graded project and create the required files and folders. In addition to these pages, you’ll add the following Perl script in this graded project:
• signup.pl—This script will accept the form data from fanclub.html and display that data on a welcome page.INSTRUCTIONS
In this graded project, you’ll need to have installed ActivePerl from the previous study unit and installed Apache HTTP Server as directed in the current study unit. In the first section, you’ll configure Apache for your website. In the second section, you’ll add a Perl script, modify the fanclub.html file and then test to see if the website works. To make configuration simpler, you may want to move the band_fan folder with all of its content to the C:\ drive to shorten its path. The location will now be C:\band_fan.CONFIGURATION
1. Determine the location of the band_fan folder. You can do this through the GUI by right-clicking the folder and choosing the Properties option from the context menu (Figure 7). The folder in which it’s located is the value for the Location field. You can either copy-and-paste the location or write it down. Click the OK button to dismiss the dialog.Open the Apache configuration file. This can be accessed from the Start menu. Start > All Programs > Apache HTTP Server 2.2 > Configure Apache Server > Edit the Apache httpd.conf Configuration (Figure 8).
2. A dialog may appear indicating that Windows can’t open the file. If so, select the Select a program from a list of installed programs radio button and click
the OK button. You can choose any text editor you prefer.
3. Find the DocumentRoot directive in the httpd.conf file. You can use the CTRL-F shortcut to search for the word without scrolling through the whole file.
# DocumentRoot: The directory out of which you’ll serve your
# documents. By default, all requests are taken from this directory, but
# symbolic links and aliases may be used to point to other locations.
#
DocumentRoot "C:/Apache/htdocs"
4. Modify the DocumentRoot directive for the band_fan folder. Warning: You’ll need to change every backslash (\) in the path to a forward-slash (/). C:\foster\band_fan should now be C:/foster/band_fan.
DocumentRoot "C:/band_fan"
5. Find the second Directory tag in the httpd.conf file. You can use the CTRL-F shortcut to search for the phrase <Directory "C:/Apache/htdocs"> without scrolling through the whole file.
# This should be changed to whatever you set DocumentRoot to.
#
<Directory "C:/Apache/htdocs">
6. Modify the Directory tag for the band_fan folder. Warning: You’ll need to change every backslash (\) in the path to a forward-slash (/).
<Directory "C:/band_fan">
7. Find the Options directive immediately below the Directory tag.
# The Options directive is both complicated and important. Please see
# http://httpd.apache.org/docs/2.2/mod/core.html#options
# for more information.
Options Indexes FollowSymLinks
8. Modify the Options directive to support CGI scripts by adding the option ExecCGI.
Options Indexes FollowSymLinks ExecCGI
9. Find the ScriptAlias directive in the httpd.conf file. You can use the CTRL-F shortcut to search for the word without scrolling through the whole file.
# ScriptAlias: This controls which directories contain server scripts.
# ScriptAliases are essentially the same as Aliases, except that
# documents in the target directory are treated as applications and
# run by the server when requested rather than as documents sent to the
# client. The same rules about trailing "/" apply to ScriptAlias
# directives as to Alias.
ScriptAlias /cgi-bin/ "C:/Apache/cgi-bin/"
10. Modify the ScriptAlias directive for the band_fan folder, including the cgi-bin directory.
ScriptAlias /cgi-bin/"C:/band_fan/cgi-bin/"
11. Find the next Directory tag in the httpd.conf file. You can use the CTRL-F shortcut to search for the phrase <Directory "C:/Apache/cgi-bin"> without scrolling through the whole file.
# "C:/Apache/cgi-bin" should be changed to whatever your ScriptAliased
# CGI directory exists, if you have that configured.
<Directory "C:/Apache/cgi-bin">
12. Modify the Directory tag for the band_fan folder, including the cgi-bin directory.
<Directory "C:/band_fan/cgi-bin">
13. Save and close the configuration file.
14. If Apache is running, close the command-line window in which you ran httpd.exe. Otherwise, the configuration file changes won’t affect the web service.
CGI Scripting and Testing
15. Open a text editor of your choice and type the following
Perl script:
#/perl/bin/perl
use strict;
use warnings;
use CGI;
my $cgi = CGI->new();
print
$cgi->header('text/html'),
$cgi->start_html('Fanclub Signup'),
$cgi->h1('You are now signed up.'),
$cgi->p('Thank you for signing up,' ,
$cgi->strong($cgi->param('name')), '.'),
$cgi->p('The following comment has been submitted:'),
$cgi->blockquote($cgi->param('comments')),
$cgi->end_html;
16. Create a new folder named cgi_bin in the band_fan folder and save the script with the filename signup.pl.
17. Open the fanclub.html file in text or HTML editor and modify the opening form tag as follows:
<form method='post' action='cgi-bin/signup.pl'>
18. Start the Apache web service. Launch the Windows command line and type the following at the commandline prompt:
C:\Apache\bin\httpd.exe
19. Type the URL http://localhost:8080 in your browser. You should see the homepage index.html for the band fan club. Click on the links for the other two pages and verify they work.
20. Test the fanclub.html page by typing in values for the HTML form controls and then clicking the Join button.
21. You should get a resulting page that displays as follows:PROJECT SUBMISSION
Learn More
GUIDELINES
To submit your project, you must provide the signup.pl file and modified fanclub.html and httpd.conf files. You should copy the fanclub.html file from the band_fan folder and the signup.pl file from the cgi-bin folder in the band_fan folder. The httpd.conf file should be copied (do not move) from the default location C:\Apache\conf. Move all files to your desktop or another common folder and then select them together by holding down the CTRL key while clicking them. To combine them into a single file for submission, you should right-click on one of the selected files and choose the Send to > Compressed (zipped) folder option in the context menu.
The resulting file should be named apache.zip. Submit this file for grading. -

Penn foster Graded Project 402083 Windows Server and Internet Information Services
$15.00Penn foster Graded Project 402083 Windows Server and Internet Information Services
OVERVIEW
After installing IIS, you’re now ready to configure it for your website!
Throughout this and future graded projects, you’ll be creating a fictional website, configuring it in various web server environments and then uploading it to the Penn Foster web server. There’s no better way to apply your knowledge than completing a common real-world task!PROJECT SCENARIO
You’re now asked to test the fan club website on a local installation of IIS. You should have completed the previous graded assignment and have the following files:
• index.html—Contains the band name, current lineup, and a brief history of the band.
• music.html—Contains their music catalog and upcoming tour dates.
• fanclub.html—Contains a form to sign-up for the band’s fan club.
• signup.pl—This script handles the form data from fanclub.html.
If not, go back to the previous graded project and create the required files and folders.INSTRUCTIONS
In this graded project, you’ll need to have installed ActivePerl from the previous study unit and installed IIS as directed in the current study unit.
In the first section, you’ll configure IIS for your website using its administrative console. In the second section, you’ll test to see if the website works. To make configuration simpler, you may want to move the band_fan folder with all of its content to the C:\ drive to shorten its path if you haven’t done so
already.CONFIGURATION
1. Determine the location of the band_fan folder. You can do this through the GUI by right-clicking the folder and choosing the Properties option from the context menu. The folder in which it’s located is the value for the Location field. You can either copy-and-paste the location or write it down. Click the OK button to dismiss the dialog (Figure 7).
2. Open the Internet Information Services (IIS) Manager console. This can be accessed using the command inetmgr. To launch the console, click on the Start Menu, type inetmgr in the Search textbox, and hit the ENTER key.
3. Add a new web application to the default website. In the left pane labeled Connections, expand COMPUTERNAME > Sites, right-click on the Default Web Site node
and choose Add Application in the context menu (Figure 8).
4. In the Add Application dialog, type BandFan in the Alias textbox and the location of the band_fan folder in the Physical path textbox. Click the OK button to
dismiss the dialog (Figure 9)
5. Open IIS handler mappings. With the BandFan node still selected in the left-pane, double-click on Handler Mappings in the center pane.
6. Double-click on the CGI-exe handler mapping in the disabled section of the center pane. In the Edit Module Mapping dialog, set the Request path textbox to *.pl and the Executable (optional) textbox to C:\Perl\bin\perl.exe "%s" %s. The %s switch is a placeholder for the actual Perl script filename (Figure 10).
7. Click the OK button to dismiss the Edit Module Mapping dialog. An information message will appear, asking whether you want to enable the extension. Click
the Yes button to dismiss the message dialog (Figure 11). To complete the CGI configuration, you must restart IIS. To restart IIS, you must be running the command line as an administrator.
8. To launch the Windows command line in administrator mode, click on the Start Menu, type cmd in the Search textbox, right-click cmd.exe, and choose the Run as
administrator option from the context menu (Figure 12)
9. Click Yes to dismiss the User Account Control dialog. FIGURE 10—Setting the Request Path FIGURE 11—Click Yes to allow the ISAPI Extension.
10. To restart IIS, type iisreset and hit the ENTER key.
You should get the following output:
Attempting stop...
Internet services successfully stopped
Attempting start...
Internet services successfully restartedTESTING
1. Type the URL http://localhost/BandFan in your browser. You should see the homepage index.html for the band fan club. Click on the links for the other two
pages and verify that they work. FIGURE 12—Launching the Windows Command Line in Admin Mode
2. Test the fanclub.html page by typing in values for the HTML form controls and then clicking the Join button.
3. You should get a resulting page that displays as follows:PROJECT SUBMISSION
Learn More
GUIDELINES
To submit your project, you must provide the applicationHost.config file. This file contains all of the configuration settings you made in IIS to host the website. The applicationHost.config file should be copied (not moved) from the default location C:\Windows\System32\inetsrv\config. Submit this file for grading. -

New Perspectives on HTML, CSS, and Dynamic HTML 5th edition Tutorial 6 Case 1 Sblogger
Regular Price: $15.00
Special Price $12.00
New Perspectives on HTML, CSS, and Dynamic HTML 5th edition Tutorial 6 Case 1
Sblogger Sports enthusiast Steve Lavent is working on a Web site called Sblogger that will contain articles and commentary on the world of sports. He's asked for your help in designing the page on which users can submit their own comments on the articles that Steve posts to his blog. Your job will be to create a prototype for the commentary form, and to include HTML code and CSS styles to help validate user input. A preview of the Web form you'll create is shown in Figure 6-78.
Complete the following:
Learn More
1. In your text editor, open the sblogtxt.htm and commtxt.css files from the tutorial.06\case1 folder included with your Data Files. Enter your name and the date in the comment section of the file. Save the files as sblogger.htm and comments.css, respectively.
2. Go to the sblogger.htm file in your text editor and review the contents and structure of the document. Link the file to the comments.css style sheet.
3. Scroll down to the h2 heading title Post Your Comments, and directly below this heading insert a form element with the action www.sblogger/cgi-bin/subcomments using the post method.
4. Within the form element, create a field set with the name and id commentFS.
5. Create a label element with the text Username. Within the label element, insert an input box for the username field. Make the field required and add the title Supply your username.
6. Create a label element with the text E-mail. Within the label element, insert an input box for the email field. Set the data type to email and make the field required. Add the title Supply a valid e-mail address.
7. Create a label element with the text Password containing an input box for the password field. Set the data type to password and make the field required. Add the title You must provide your password.
8. Create a label element with the text Comment (500 character limit), placing the parenthetical text on a new line, and within the label element insert a text area box for the commentBox field. Limit the number of characters that can be typed into the text area box to 500 characters.
9. Add a submit button with the text Submit Comment.
10. Save your changes to the file and then go to the comments.css file in your text editor. Create style rules for the styles described in the following steps.
11. Display the field set with a background color of (245, 245, 255). Set the top and bottom margins to 15 pixels and the left and right margins to auto. Add 5 pixels of padding and set the width of the field set to 90%.
12. Display labels as blocks floated on the left once the left margin is clear of elements. Set the font size to 0.9 em and the width to 100%. Set the top and bottom margins to 5 pixels.
13. Display input boxes and text area boxes as blocks floated on the right margin. Set the font size to 0.9 em and the width to 55%. Set the left and right margins to 10 pixels. In addition, set the height of text area boxes to 150 pixels.
14. Display the submit button as a block once both margins are clear. Do not float the submit button. Set the dimensions of the button to 200 pixels wide by 30 pixels high.Set the top and bottom margins to 5 pixels, and the left and right margins to auto.
15. When input boxes and text area boxes receive the focus, change the background color to the value (225, 225, 240).
16. When input boxes receive the focus and are valid, change the background color to (225, 240, 225) and display the background image go.png in the bottom-right corner of the box with no tiling. Resize the background image so that it is contained within the input box.
17. When input boxes receive the focus and are invalid, change the background color to (240, 225, 225) and display the background image stop.png in the bottom-right corner of the box with no tiling. Resize the background image so that it's contained within the input box.
18. Close the style sheet file, saving your changes.
19. Open sblogger.htm in your Web browser and test the form. Verify that you cannot leave the username, email, and password fields blank and still submit the form. Also verify that the form is rejected if an invalid e-mail address is submitted in the email field.
20. If you have access to the Google Chrome browser, test the Web page in that browser and verify that the title text you entered for the input boxes in Steps 5 through 7 is included in the error box supplied by the browser when those input boxes fail the validation test.
21. Submit your completed files to your instructor, in either printed or electronic form, as requested. -
New Perspectives on HTML, CSS, and Dynamic HTML 5th edition Tutorial 10 Case 3 MidWest Student Union
Regular Price: $15.00
Special Price $12.00
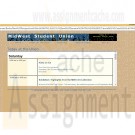
New Perspectives on HTML, CSS, and Dynamic HTML 5th edition Tutorial 10 Case 3 MidWest Student Union
MidWest Student Union Sean Lee manages the Web site for the student union at MidWest University in Salina, Kansas. The student union provides daily activities for the students on campus. As Web site manager, part of Sean's job is to keep the Web site up to date on the latest activities sponsored by the union. At the beginning of each week, she revises a set of seven Web pages detailing the events for each day in the upcoming week.
Sean would like the Web site to display the current day's schedule in an inline frame within the Web page titled Today at the Union. To do this, her Web page must be able to determine the day of the week and then load the appropriate file into the frame. She would also like the Today at the Union page to display the current day and date. Figure 10-39 shows a preview of the page she wants you to create.Sean has created the layout of the page, and she needs you to write the scripts to insert the current date and the calendar of events for the current day. To assist you, she has located two functions:
• The showDate() function returns a text string containing the current date in the format Weekday, Month Day, Year. The function has no parameter values.
• The weekDay() function returns a text string containing the name of the current weekday, from Sunday through Saturday. This function also has no parameter values.
The two functions are stored in an external JavaScript file named functions.js. The daily schedules have been stored in files named sunday.htm through saturday.htm.Complete the following:
Learn More
1. Use your text editor to open the todaytxt.htm file from the tutorial.10\case3 folder included with your Data Files. Enter your name and the date in the comment section of the file and save it as today.htm.
2. In the head section just above the closing </head> tag, insert a script element accessing the functions.js file.
3. Scroll down the file and locate the div element with the id dateBox. Within this element insert a script element. The script should run the following two commands:
a. Write the following HTML code to the Web page:
Today is<br/>
b. Write the text string returned by the showDate() function to the Web document.
4. Scroll down the file and locate the h1 heading with the text Today at the Union. Within the empty paragraph that follows this heading, insert another script element. Within the script element, do the following:
a. Insert the following multiline comment:
Display the daily schedule in an inline frame.
Daily schedules are stored in the files sunday.
htm through saturday.htm.
b. Insert a command to write the HTML code
<iframe src='weekday.htm'></iframe>
to the Web page, where weekday is the text string returned by the weekDay() function.
5. Save your changes to the document.
6. Open today.htm in your Web browser. Verify that it shows the current date and that the daily schedule matches the current weekday.
7. If you have the ability to change your computer's date and time, change the date to different days of the week and reload (not simply refresh) the Web page. Verify that the date and the daily schedule change to match the new date you selected. Debug your code as necessary.
8. Submit your completed files to your instructor. -

ITCO381 Unit 1 IP assignment
Regular Price: $20.00
Special Price $15.00
ITCO381 Unit 1 IP assignment
In an era where Web sites are highly dynamic, interactive, and database dependent, a static Web page consisting of only HTML may seem archaic. However, Web developers must begin somewhere and a good understanding of the language of the Web (HTML) is the right place to start. You have decided to develop a static Web page that contains valid HTML as the newsletter for an organization that interests you.
Create a static Web page that includes the basic structure of a valid HTML (not XHTML) document. Make sure to include the language attribute of the html element and the character set attribute of the metadata element. You may want to save this basic document as the starting structure for development of all static Web pages.
Continue to structure the newsletter using the HTML semantic elements
header
section
footer
Within the structure of the newsletter add other HTML elements including at least one:
heading
paragraph
image that implements accessibility guidelines
navigation that includes a
list of at least
four links that
navigate to actual Web pages and
implement accessibility guidelines
Use of any inline elements should follow current standards
No style should be applied
Validate the finished web page.
Zip (compress) the into a .zip file.
Please submit your assignment.Grading
Learn More
You will be graded on the content, structure, and validity of your final HTML page. -

CIS363A Week 3 iLab 3 Create a Web Page Using CSS
Regular Price: $20.00
Special Price $15.00
CIS363A Week 3 iLab 3 Create a Web Page Using CSS
A local recruiter wants you to make a Web page for his information technology staffing company. He wants a Web page that has informed recent graduates about careers as Web programmers and Web designers. Create a Web page that will give information about each of the positions mentioned. The page content should be as followed:
Descriptions about each of the positions
Skills and/or education required for these positions
Salaries, benefits associated with these positions
Professional organizations of which people who hold these positions are typical membersThis page must have at least five graphical elements. You must implement the following CSS features:
Box Model
Floating Elements
Borders
Remember that the recruiter wants this page to be well organized, informative, and attractive. Use colors and great graphics to make this Web page interesting so that he can attract more business.Software Citation Requirements
This course uses open-source software which must be cited when used for any student work. Citation requirements are on the Open Source Applications page.
Please review the installation instruction files to complete your assignmentDeliverables
Submit your assignment to the Dropbox, located at the top of this page. For instructions on how to use the Dropbox, read these step-by-step instructions. (See the Syllabus section "Due Dates for Assignments & Exams" for due dates.)
Submit a Week 3 Lab folder, including
The HTML Web page
Associated CSS files
Images and multimedia (if any)Category Points
Use of Box Model, bordering, and floating elements 15
Completed Web page based on project specifications 15
Correct External CSS file that attaches to each page 10
Total 40Required Software
Software Name 1
Access the software at https://lab.devry.edu.
Steps: 1, 2, and 3
Software Name 2
Access the software at https://devrydesktop.rkon.com.
Steps: 4 and 5Lab Steps
STEP 1: Gather Web Content
Create written Web content about each of the positions.
Gather all images that you will use.STEP 2: Create Your Web Page
Create an informal page layout for the Web page.
Create the Web page based on criteria mentioned.STEP 3: Submit Your Assignment
Learn More
Upon completion of this step, upload your site to the Web server and attach a copy of the zipped folder to the Dropbox.
Submit your assignment to the Dropbox, located at the top of this page. For instructions on how to use the Dropbox, read these step-by-step instructions. -
New Perspectives on HTML, CSS, and Dynamic HTML 5th edition Tutorial 8 Case 2 Willet Creek Golf Course
Regular Price: $15.00
Special Price $12.00
New Perspectives on HTML, CSS, and Dynamic HTML 5th edition Tutorial 8 Case 2 Willet Creek Golf Course
Willet Creek Golf Course Willet Creek is a popular golf course resort in central Idaho. You’ve been asked to work on the design of the resort’s Web site by Michael Carpenter, the head of promotion for the resort. He would like you to add some CSS3 visual effects for drop shadows and gradients. Figure 8-66 shows a preview of the screen version of the Web page.
Complete the following:
1. In your text editor, open the willettxt.htm and wceffectstxt.css files from the tutorial.08\case2 folder included with your Data Files. Enter your name and the date in the comment section of each file. Save the files as willet.htm and wceffects. css, respectively.2. Go to the wceffects.css file and create a shadow effect for the body element. The effect should contain two box shadows, both with a color value of (31, 61, 31) and an opacity of 0.9. Place the first shadow with a horizontal offset of 20 pixels, a vertical offset of 0 pixels, and a blur of 25 pixels. Do the same for the second shadow, except place the shadow with a horizontal offset of 220 pixels.
3. Set the opacity of the div elements nested within the aside elements to 75%. Use both the CSS3 opacity style and the IE Alpha filter. Add a box shadow that has a color value of (101, 101, 101) with an opacity of 0.7. Set the horizontal and vertical offsets to 5 pixels and the blur to 10 pixels. You do not have to add an IE filter for the box shadow.
4. Save your changes to the file, and then return to the willet.htm file in your text editor. Add a link to the wceffects.css style sheet file, using the style sheet for screen devices that have a minimum width of 501 pixels. Add the same media query for the wclayout.css style sheet file.
5. Use an Internet Explorer conditional comment for versions of IE before version 9 to link to the wclayout.css and wceffects.css style sheet files for screen devices.
6. Save your changes to the document, and then open the willet.htm file in your Web browser. Verify that the appearance and layout of your page resemble those shown in Figure 8-66.
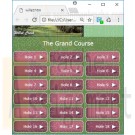
7. Many golfers playing the courses at Willet Creek like to receive information and advice about each hole. Michael would like you to create a mobile version of the Web page so that golfers with mobile devices can view information about the course during their rounds. Figure 8-67 shows a preview of the Web app you’ll create.
8. Open the wcmobiletxt.css file from the tutorial.08/case2 folder in your text editor. Enter your name and the date in the comment section of the file, and then save it as wcmobile.css.
9. Within the style sheet file, add a style rule to hide the navigation list in the header, the inline image in the header, the main section, the aside
element, and the page footer.10. Set the background color to the value (107, 140, 80).
11. For the header element, create a style rule to: a) change the background color to the value (151, 201, 151) with the image file willet.jpg placed in the left-center of the background with no tiling; b) set the size of the background image to contain; c) set the width to 100%; and d) set the height to 50 pixels.
12. The navigation list containing links to each of the 18 holes in the Grand Course has the id holes. Create a style rule to set the width of this navigation list to 100%.
13. For h1 elements within the holes navigation list, create a style rule to: a) set the font size to 25 pixels; b) set the font color to white; c) set the margin to 15 pixels; and d) center the text of the heading.
14. For list items in the holes navigation list, create a style rule to: a) display the items as blocks; b) add the background image file arrow.png to the right-center of the background with no tiling; c) set the width to 60% and the height to 50 pixels; d) add top and bottom margins of 5 pixels, and add left and right margins of auto; e) add a 1-pixel-wide solid white border to each list item and create rounded borders with a radius of 10 pixels; and f) add inset box shadows to the list items with a color value of (51, 51, 51) and an opacity of 50% (the inset shadows should appear in the lowerleft corner of each list item with a horizontal offset of 10 pixels, a vertical offset of 5 pixels, and a blur of 20 pixels).
15. For hypertext links within each list item, add a style rule to: a) display the link as blocks; b) set the width to 100% and the line height to 50 pixels; c) set the font color to white; and d) horizontally center the text of the link.
16. For odd-numbered list items, set the background color to the value (187, 105, 123). (Hint: Use the pseudo-class nth-of-type(odd).) For even-numbered list items, set the background color to the value (150, 80, 100).
17. The preceding styles will be applied by default to the page in portrait orientation. Create an @media rule for the page in landscape orientation.
18. Add the following style rule for list items displayed in landscape orientation: a) set the width to 30%; b) float the list items on the left; and c) set the margins to 5 pixels.
19. Save your changes to the style sheet, and then return to the willet.htm file in your text editor.
20. Within the willet.htm file, insert a viewport meta element.
21. Create a link to the wcmobile.css file to be accessed by only screen devices with maximum widths of 500 pixels.
22. Save your changes to the file, and then open the willet.htm file in your mobile device or with your browser window resized to a width of less than 500 pixels. Verify that for smaller screen widths, the mobile version of the page is displayed. Further verify that the layout of the links to individual holes changes depending on whether the page is in portrait or landscape orientation.
23. Submit your completed files to your instructor.
Learn More
9 Item(s)
Grid List

You have no items in your shopping cart.
