Search results for 'College'
2 Item(s)
Grid List
-
CIS363A Week 3 iLab 3 Create a Web Page Using CSS in Dreamweaver
Regular Price: $12.00
Special Price $10.00
CIS363A Week 3 iLab 3 Create a Web Page Using CSS in Dreamweaver
iLAB OVERVIEW
Scenario and Summary
Create an index.html file and create an external CSS file based on the specifications given in the assignment.
You will need to create an internal and external CSS.
You will also need to attach an external CSS file to the original page.Deliverables
index.html with attached external CSS sheet
style.css fileiLAB STEPS
Lab Preparation
Download the lab3Content.docx document found in Doc Sharing.Part A: Create HTML and CSS Files (3 Points)
Step 1: Create a New HTML File (1 point)
Open Dreamweaver and create a new HTML page.
Enter index.html as the web page name.Step 2: Copy Content From the Word Document (1 point)
Open the lab3Content document found in Doc Sharing.
Paste the content into the index.html page.Step 3: Create a CSS File (1 point)
Create a new CSS page.
Save the file and name it styles.css.
Note: If your styles.css file does not show when needed in the remaining steps, then click on the attach stylesheet icon, select browse, locate the styles.css file, and then click OK. (The styles.css will automatically be linked to the index.html file in the head section of the code.)Part B: Internal CSS (22 Points)
Step 1: Create an Internal CSS (10 points)
Go to the index.html file and create an internal CSS for the following properties. Use the Page Properties option in the Properties Panel.
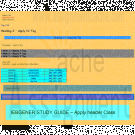
Background color for the body A light tan: #FC6
Font color for all text in the body A dark blue: #039
Font for all text in the body Comic Sans MS
Font size for all the text in the body Body: 14 points
Link color for all links Dark red: #CC0000
Visited link color for all links Dark red: #CC0000
Rollover link color for all links Dark green: #060
Active link color for all links Dark red: #CC0000
No link should be underlined for all links Never underlineStep 2: Apply Internal CSS (12 points)
Your index.html page should reflect the styles from above.
Go back to Page Properties if the page did not update with your internal CSS.Part C: Tag CSS (22 Points)
Step 1: Create Tag CSS (10 Points)
For all of the following tags, create the CSS rule from the descriptions below.
Hint: To create a CSS, you need to click on the New CSS Rule in the CSS panel on the right-hand side. Watch Adobe TV on best practices for creating a style sheet. You will need to enter Style Sheets or CSS in the Adobe TV searchbox (http://help.adobe.com/en_US/dreamweaver/cs/using/WScbb6b82af5544594822510a94ae8d65-7e32a.html).
H2 Text color: #333, bold
H3 Background color: #39f
Border on the bottom with the following rules
Width: thin
Style: solid
Color: #003
Centered text
Margin on all sides: 35 pixels
p Font: Georgia
Text color: #030
Padding of 15 pixels on all sides
li Font family: Arial
Background color: gray
Text color:black, bold
Text size: 18 pointsStep 2: Apply Tag CSS (12 points)
Apply the new tag CSS to the content on the page.Part D: Class CSS (23 Points)
Step 1: Create a Class CSS (10 points)
Create a new CSS rule using a class CSS. You will need to select the option to include the class CSS to the styles.css file.Navtable: This class will be applied to a navigation table. Font family: Times Roman
Background color: #0ff
Text color: bold, centerexample1:This class will be applied to Example 1.
Background color: #699
Text color: #033, bold
Text size: 10 points
Margin on all sides: 25 pixels
Padding on all sides: 25 pixelsexample2:This class will be applied to Example 2.
Background color: #66c
Border on all sides with the following rules
Width: 10px
Style: solid
Color: #06c
Text size: 10 pixels
Text color: #cccheader:This class will be applied to the heading "IEBGENER STUDY GUIDE."
Font family: Arial
Background color: #6ff
Text color: 030
Text size: 36 points
Margin on all sides: 50 pixels
Padding on all sides: 50 pixelsStep 2: Apply the Class CSS (12 points)
Apply the class CSS as done in the class CSS steps above.Step 3: Upload Zipped File (1 point)
Learn More
Your index.html page should have all inline, tags, and class CSS applied.
Create a folder called CIS363A_YourLastName_Lab3.
Put copies of each required deliverable into the new folder.
Right-click on the folder and select Send To -> Compressed (zipped) Folder. You can also use other tools to compress the files into a single zip folder (e.g., 7-zip).
Upload the zip file to the weekly iLab Dropbox in eCollege. -
New Perspectives on HTML, XHTML, and Dynamic HTML Chapter 6 Case Problem 2 Civil War Studies
Regular Price: $15.00
Special Price $12.00
New Perspectives on HTML, XHTML, and Dynamic HTML Chapter 6 Case Problem 2 Civil War Studies
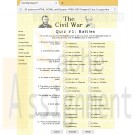
Civil War Studies Adanya Lynne, a professor of military history at Ridgeview State College in Bartlett, Tennessee, has been preparing a series of online quizzes for her students. She has created the basicWeb page design and layout, but has come to you for help in designing the quiz form. She envisions a series of multiple choice questions displayed in a collection of option buttons. Students will be able to click answers on the form and then submit their answers to a CGI script running on theWeb server for their scores. Figure 6-61 shows a preview of the page you’ll create for Professor Lynne.
Complete the following:
Learn More
1. Use your text editor to open the cwquiztxt.htm and qformtxt.css files from the tutorial.06\case2 folder included with your Data Files. Enter your name and the date in the comment section of each file. Save the files as cwquiz.htm and qform.css, respectively.
2. Go to the cwquiz.htm file in your text editor and insert a link to the qform.css style sheet.
3. Scroll down the file to the rightColumn div element. Professor Lynne has inserted the 10 questions for the online quiz. Enclose the questions in a form element with the id quizForm. Call the CGI script at http://www.ridgeviewcollmil.edu/quiz using the post method.
4. Go to the first question and enclose the text of the question in a div element with the class name question.
5. Enclose the set of answers for the first question within a field set.
6. Place a label element around each possible answer for the first question. Put the first answer in the class answerA, the second answer in the class answerB, the third answer in the class answerC, and the fourth answer in the class answerD.
7. Within each of the four labels for the answers to the first question, insert an option button directly before the text of the answer. Assign the ids ans1a, ans1b, ans1c, and ans1d to the four option buttons. Assign the field name question1 to each of the four option buttons. Finally, set the values for the four option buttons to a, b, c, and d.
8. Associate each of the four labels with a different id. Associate the first label with the ans1a field, the second with ans1b, the third with ans1c, and the fourth with ans1d.
9. Repeat Steps 4 through 8 for the remaining nine questions in the quiz, with the following changes:
- Change the ids for the four option buttons to the question number. For example, the ids for the second question are: ans2a, ans2b, ans2c, and ans2d.
- Change the field name of the four option buttons to the number of the question. For example, the field name for the second question is question2, for the third question is question3, and so forth.
10. After the last question, insert a div element with the id buttons. Within the element, insert a submit button with the value Submit, a command button with the value Answers, and a reset button with the value Reset.
11. Save your changes to the file.
12. Go to the qform.css file in your text editor and add the following styles to the style sheet:
- Float all elements of the question class on the left margin. Set their widths to 200 pixels and right-align the text. Set the clear style to left so that the element is only displayed when the left margin is clear.
- Display all field sets as block-level elements floated on the left margin. Set the size of the field sets to 400 pixels wide by 50 pixels high. Add a 20-pixel left margin and a 5-pixel bottom margin. Set the position property to relative. Finally, display the tan.jpg file as the background image for the field sets.
- Use absolute positioning to place all elements of the answerA class at the coordinates (0, 0), place answerB class elements at the coordinates (200, 0), place answerC class elements at (0, 25), and place answerD class elements at (200, 25).
- Center the contents of the div element with the buttons id. Set the width to 600 pixels and the top/bottom padding to 10 pixels. Set the left/right padding to 0 pixels.
- For input elements within the buttons div element, set the width to 100 pixels, set the top/bottom margin to 0 pixels, and set the left/right margin to 10 pixels.
13. Save your changes to the file and open cwquiz.htm in your Web browser. Verify that the layout and design resemble that shown in Figure 6-61.
14. Submit your completed files to your instructor.
2 Item(s)
Grid List

You have no items in your shopping cart.
