Search results for 'Chapter 5: Apply Your Knowledge – Adding Fields, Using Input Mask and Querying Dates(Pages 327 - 328) Use the Babbage CPA'
Maximum words count is 10. In your search query was cut next part: Mask and Querying Dates(Pages 327 - 328) Use the Babbage CPA.
-

DAT/305 Week 3 Challenge Activities 3.4.1: Queues using linked lists
Regular Price: $5.00
Special Price $2.00
DAT/305 Week 3 Challenge Activities 3.4.1: Queues using linked lists
CHALLENGE ACTIVITY 1
Given an empty queue numQueue, what does the list head pointer point to? If the pointer is null, enter null.
What does the list tail pointer point to?
After the following operations:
QueueEnqueue(numqueue, 66)
QueueEnqueue(numQueue, 93)
QueueDequeue(numQueue)What does the list head pointer point to?
What does the list tail pointer point to?
CHALLENGE ACTIVITY 2Given numQueue: 78, 37, 47
What does the list head pointer point to? If the pointer is null enter null.
What does the list tail pointer point to?
After the following operations:
QueueEnqueue(numQueue, 60)
QueueEnqueue(numqueue, 57)
QueueDequeue(numQueue)
QueueDequeue(numQueue)What does the list head pointer point to?
What does the list tail pointer point to?
Learn More -

DAT/305 Week 3 Challenge Activities 3.2.1: Stacks using linked lists
Regular Price: $5.00
Special Price $3.00
DAT/305 Week 3 Challenge Activities 3.2.1: Stacks using linked lists
CHALLENGE ACTIVITY 1
Given an empty stack numStack, what does the list head pointer point to? If the pointer is null, enter null.
After the following operation, which node does the list head pointer point to?
StackPush(numStack, 83)
CHALLENGE ACTIVITY 2Given numStack: 54, 38, 25, 28 (top is 54)
After the following operation: StackPush(numStack, 40)
What node does newNode's next pointer point to? If the pointer is null, enter null.What node does the list's head pointer point to?
CHALLENGE ACTIVITY 3Given numStack: 51 (top is 51)
After the following operation: StackPop(numStack)
What is returned?What node does the list's head pointer point to? If the pointer is null, enter null:
Learn More -

DAT/380 Week 5 LAB 5.7 - Implement supertype and subtype entities (Sakila)
Regular Price: $5.00
Special Price $3.00
DAT/380 Week 5 LAB 5.7 - Implement supertype and subtype entities (Sakila)
Refer to the customer and staff tables of the Sakila database. These tables have many columns in common and represent similar entities. Convert the customer and staff entities into subtypes of a new supertype person:
In the center is the person entity, with primary key person_id and additional attributes first_name, last_name, email, active, and last_update. The person entity contains subtype entities staff and customer. The staff entity has primary key person_id and additional attributes picture, username, and password. The customer entity has primary key person_id and additional attribute create_date. Cardinality does not appear after the primary keys and attributes. On the left is the address entity, connected to the person entity by the belongs_to relationship. Belongs_to has cardinality 1(1) on the address side and M(0) on the person side. On the right is the store entity, connected to the person entity by the works_at relationship. Works_at has cardinality 1(1) on the store side and M(0) on the person side.
The diagram uses Sakila naming conventions. Follow the Sakila conventions for your table and column names:
All lower case
Underscore separator between root and suffix
Foreign keys have the same name as referenced primary keyImplement supertype and subtype entities as person, customer, and staff tables with primary key person_id.
Implement attributes as columns:
All columns are NOT NULL.
The person_id columns have data type SMALLINT UNSIGNED.
The last_update and create_date columns have data type TIMESTAMP.
The picture column has data type BLOB.
All other columns have data type VARCHAR(20).Implement the dependency relationships between subtype and supertype entities as foreign keys:
The person_id columns of customer and staff become foreign keys referring to person.
Specify CASCADE actions for both relationships.Implement the belongs_to and works_at relationships as foreign keys:
belongs_to becomes an address_id foreign key in person referring to address.
works_at becomes a store_id foreign key in staff referring to store.
Specify RESTRICT actions for both relationships.The address and store tables, with primary keys address_id and store_id, are pre-defined in the zyLab environment. Foreign keys must have the same data types as the referenced primary keys:
address_id has data type SMALLINT UNSIGNED.
store_id has data type TINYINT UNSIGNED.If you execute your solution with the Sakila database, you must first drop customer, staff, and all constraints that refer to these tables. Use the following statements with Sakila only, not in the zyLab environment:
Learn More
DROP TABLE customer, staff;
ALTER TABLE payment
DROP CONSTRAINT fk_payment_customer,
DROP CONSTRAINT fk_payment_staff;
ALTER TABLE rental
DROP CONSTRAINT fk_rental_customer,
DROP CONSTRAINT fk_rental_staff;
ALTER TABLE store
DROP CONSTRAINT fk_store_staff; -

DAT/380 Week 5 LAB 5.6 - Implement independent entity (Sakila)
Regular Price: $5.00
Special Price $3.00
DAT/380 Week 5 LAB 5.6 - Implement independent entity (Sakila)
Implement a new independent entity phone in the Sakila database. Attributes and relationships are shown in the following diagram:
The phone entity appears on the right. The phone entity contains four attributes, each followed by cardinality information: phone_id 1-1(1), country_code M-1(1), phone_numer M-1(1), and phone_type M-1(0). Three entities appear on the left: store, staff, and customer, connected to the phone entity by three identical relationships. The three relationships are named 'has' and have cardinality 1(0) on both sides.
The diagram uses Sakila naming conventions. Follow the Sakila conventions for your table and column names:
All lower case
Underscore separator between root and suffix
Foreign keys have the same name as referenced primary keyWrite CREATE TABLE and ALTER TABLE statements that:
1. Implement the entity as a new phone table.
2. Implement the has relationships as foreign keys in the Sakila customer, staff, and store tables.
3. Remove the existing phone column from the Sakila address table.Step 2 requires adding a foreign key constraint to an existing table. Ex:
ALTER TABLE customer
ADD FOREIGN KEY (phone_id) REFERENCES phone(phone_id)
ON DELETE SET NULL
ON UPDATE CASCADE;
Specify data types as follows:
phone_id, phone_number, and country_code have data type INT.
phone_type has date type VARCHAR(12) and contains strings like 'Home', 'Mobile', and 'Other'.Apply these constraints:
Learn More
NOT NULL constraints correspond to cardinalities on the diagram above.
Foreign key actions are SET NULL for delete rules and CASCADE for update rules.
Specify a suitable column as the phone table primary key. -

DAT/380 Week 3 LAB 3.12 - Create LessonSchedule table with FK constraints
Regular Price: $5.00
Special Price $3.00
DAT/380 Week 3 LAB 3.12 - Create LessonSchedule table with FK constraints
Two tables are created:
Horse with columns:
ID - integer, primary key
RegisteredName - variable-length stringStudent with columns:
ID - integer, primary key
FirstName - variable-length string
LastName - variable-length stringCreate the LessonSchedule table with columns:
HorseID - integer with range 0 to 65 thousand, not NULL, partial primary key, foreign key references Horse(ID)
StudentID - integer with range 0 to 65 thousand, foreign key references Student(ID)
LessonDateTime - date/time, not NULL, partial primary keyIf a row is deleted from Horse, the rows with the same horse ID should be deleted from LessonSchedule automatically.
If a row is deleted from Student, the same student IDs should be set to NULL in LessonSchedule automatically.
Note: Table and column names are case sensitive in the auto-grader.
CREATE TABLE Horse (
ID SMALLINT UNSIGNED AUTO_INCREMENT,
RegisteredName VARCHAR(15),
PRIMARY KEY (ID)
);CREATE TABLE Student (
ID SMALLINT UNSIGNED AUTO_INCREMENT,
FirstName VARCHAR(20),
LastName VARCHAR(30),
PRIMARY KEY (ID)
);-- Your SQL statements go here
Learn More -

DAT/380 Week 2 LAB 2.10 - Select employees and managers with inner join
Regular Price: $5.00
Special Price $3.00
DAT/380 Week 2 LAB 2.10 - Select employees and managers with inner join
The Employee table has the following columns:
ID - integer, primary key
FirstName - variable-length string
LastName - variable-length string
ManagerID - integer
Write a SELECT statement to show a list of all employees' first names and their managers' first names. List only employees that have a manager. Order the results by Employee first name. Use aliases to give the result columns distinctly different names, like "Employee" and "Manager".Hint: Join the Employee table to itself using INNER JOIN.
Learn More -

DBM 405A Lab 3 Database Creation and Table Manipulation
Regular Price: $15.00
Special Price $12.00
DBM 405A Lab 3 Database Creation and Table Manipulation
I. OBJECTIVES
1. Understand and become familiar with Table Manipulation.II. PARTS LIST
1. EDUPE Omnymbus Environment (https://devry.edupe.net:8300); and/or
2. MySQL (dev.mysql.com/downloads).III. PROCEDURE
By now you have set up either the Omnymbus environment or the MySQL Server Community environment, or both. You may do the labs in this class on your own computer equipped with MySQL or you may use the MySQL environment hosted by the vendor Omnymbus. You may even use both.Lab Procedure Continued (common to both environments)
Learn More
1. Add a table named "Season" to your Baseball database, which consists of the following fields:
a. Season (Integer)
b. PlayDate (date)
c. HomeTeam (character 5)
d. HomeTeamScore (Integer)
e. AwayTeam (character 5)
f. AwayTeamScore (Integer)
2. Populate the table with 56 unique games where each plays the other 7 twice (once as the home team and once as the away team). Make the season equal to this year. Leave the scores blank and use any date for the PlayDate.
3. Create another table called "PastSeasons" by copying the structure of the table "Season" and copying all the data from "Season" into the new table.
4. Replace the Season field in the table Season with next year for all records.
5. Unload the Season table data to a comma-delimited file.
6. Load the comma-delimited file to PastSeasons table, appending the data to the data that is already there. -

DBM 405A Lab 2 SQL Review
Regular Price: $15.00
Special Price $12.00
DBM 405A Lab 2 SQL Review
I. OBJECTIVES
1. Get access to a MySQL environment.
2. Familiarize yourself with the environment.II. PARTS LIST
3. EDUPE Omnymbus Environment (https://devry.edupe.net:8300); and/or
4. MySQL (dev.mysql.com/downloads).III. PROCEDURE
You may do the labs in this class on your own computer equipped with MySQL or you may use the MySQL environment hosted by the vendor Omnymbus. You may even use both.Using MySQL on your own computer means downloading a version from dev.mysql.com/downloads and installing the database engine on your computer. This can be done easily and there are a number of resources on the web to help you with this process.
You may also use the MySQL environment hosted by Omnymbus by logging in with your credentials to https://devry.edupe.net:8300.
Using the first approach will give you experience writing programs on a desktop computer and accessing a database. Using the second approach will give you experience writing applications that access a database in a cloud environment.
You are encouraged to use both approaches.
In the previous lab (Week 1), you have established a database environment (either MySQL Community Server or the Omnymbus environment). You may continue to use that environment or you my return to Week 1 to set up the alternate environment.
Lab Procedure Continued (common to both environments)
Learn More
1. Use the database named “Baseball” created in last week’s lab.
2. Use the table named “Teams” which consists of the following fields:
a. TeamCode (character 5)
b. TName (character 20)
c. TAddress (character 30)
d. TCity (character 20)
e. TState (character 2)
f. TZip (character 9)
g. Wins (integer)
h. Losses (integer)
3. You should have a table with 8 teams.
4. Use the table named “Players”, which consists of the following fields:
a. FirstName (character 20)
b. LastName (character 30)
c. MidInit (character 1)
d. PAddress (character 30)
e. PCity (character 20)
f. PState (character 2)
g. PZip (character 9)
h. Phone (character 11)
i. Team (character 5)
5. You should have a table with 80 players (10 on each team). Players are identified by the Team field which matches the TeamCode in the Teams table.
6. Demonstrate the use of the WHERE clause by selecting and displaying only the players from one team.
7. Demonstrate the use of the COUNT function by determining how many players are on each team and displaying the results.
8. For each City, find the number of players who list their home in that city.
9. Demonstrate the ORDER BY clause by listing all the players in alphabetical order by last name within Team. -

DBM 405A Lab 1 SQL Review
Regular Price: $15.00
Special Price $12.00
DBM 405A Lab 1 SQL Review
I. OBJECTIVES
a. Get access to a MySQL environment.
b. Familiarize yourself with the environment.II. PARTS LIST
1. EDUPE Omnymbus Environment (https://devry.edupe.net:8300); and/or
2. MySQL (dev.mysql.com/downloads).III. PROCEDURE
You may do the labs in this class on your own computer equipped with MySQL or you may use the MySQL environment hosted by the vendor Omnymbus. You may even use both.Using MySQL on your own computer means downloading a version from dev.mysql.com/downloads and installing the database engine on your computer. This can be done easily and there are a number of resources on the web to help you with this process.
You may also use the MySQL environment hosted by Omnymbus by logging in with your credentials to https://devry.edupe.net:8300.
Using the first approach will give you experience writing programs on a desktop computer and accessing a database. Using the second approach will give you experience writing applications that access a database in a cloud environment.
You are encouraged to use both approaches.
Desktop MySQL Environment
1. Download the MySQL Community Server from the http://dev.mysql.com/downloads/ website.
2. Install MySQL on your computer.
3. Open the MySQL Environment on your computer.Omnymbus Environment
1. Login to the MySQL Omnymbus Environment by following the instruction located in Doc Sharing (document titled “Login MySQL Omnymbus Environment”).Lab Procedure Continued (common to both environments)
1. Create a database named “Baseball”.2. Create a table named “Teams” and add the following fields:
a. TeamCode (character 5)
b. TName (character 20)
c. TAddress (character 30)
d. TCity (character 20)
e. TState (character 2)
f. TZip (character 9)
g. Wins (integer)
h. Losses (integer)3. Populate the table with 8 teams.
4. Create a table named “Players” and add the following fields:
a. FirstName (character 20)
b. LastName (character 30)
c. MidInit (character 1)
d. PAddress (character 30)
e. PCity (character 20)
f. PState (character 2)
g. PZip (character 9)
h. Phone (character 11)
i. Team (character 5)5. Populate the table with 80 players (10 on each team). For the team, use the TeamCode from the first table to identify the Team the player is on.
Learn More
6. Display or list the data from both table to the screen or printer. -

Murachs MySQL 3rd Edition Chapter 11 Exercise 2 and 4
Regular Price: $10.00
Special Price $8.00
Murach's MySQL 3rd Edition Chapter 11 Exercise 2 and 4
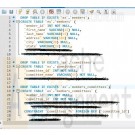
2. Write a script that contains the CREATE TABLE statements needed to implement the following design in the EX schema:
These tables provide for members of an association, and each member can be registered in one or more groups within the association.
The member_id and committee_id columns are the primary keys of the Members and Committees tables, and these columns are foreign keys in the Members_Committees table.
Include any contraints or default values that you may think are necessary.
Include statements to drop these tables if the already exist.
Learn More
4. Write an ALTER TABLE statement that adds two new columns to the Members table created in exercise 2.
Add one column for annual dues that provides for three digits to the left of the decimal point and two to the right. This column should have a defualt value 52.50.
Add on column for the payment date.


