Search results for 'Assignment'
-

DBM 502 Week 1 Individual Assignment Small Database and Paper
$15.00Build a small, simple database for your personal use. Some suggestions might be an address book, tax deduction tracking, or automotive history. You must use a relational database management system (RDBMS). You may use any RDBMS you wish (e.g. Access, SQL Server, Oracle, DB2, MySQL, etc.), although if you’re unfamiliar with any product, then you will probably find Access to be the easiest to use. Your database must have at least 2 related tables. All of your tables should be fully normalized, such that redundant data is removed. You must show how your tables were created (i.e. Design Views or SQL). You must include all applicable integrity constraints (i.e. primary keys, foreign keys, required/NOT NULL, unique, and validation rules/CHECK constraints). Submit for grading a single Word or .pdf file with screen snapshots showing all steps in the creation of your database, the creation of your tables, the population of your tables with at least 3 rows of data each, and at least 3 queries of your data. Do not submit your actual database. Include at the end of your Word or .pdf file a 200- to 350-word write-up to respond to the following: • As you built your database, what challenges did you encounter? What tips do you have for your fellow students? Learn More -
DBM 502 Week 2 Data Architecture ERD
$15.00Individual Assignment: ERD and Table Specifications Resources: Huffman Trucking Virtual Organization Review the information currently housed in Huffman Trucking’s database, in the Entities and Attributes for Fleet Truck Maintenance file on the virtual Organizations site. Create a Microsoft® Visio® Logical ERD, based on the Entities and Attributes for Fleet Truck Maintenance document, and any additional information needed to normalize the database. Ensure that your entities are properly normalized. Properly annotate the entities, primary keys, foreign keys, and relationships in your ERD. All relationships should be one-to-many. Use the crow’s feet notation for your ERD. Every entity should be related to at least one other entity. Create table design metadata specifications in a Microsoft® Excel® spreadsheet based on your ERD. Indicate primary keys, foreign keys, and new attributes as in the entity relationship diagram. For each table in your metadata, indicate the table’s name, the columns in the table, the data types for the columns, the sizes of the columns, the primary keys, the foreign keys, the required/NOT NULL columns, the default values, and the range of legal values for the columns. Learn More -
DBM 502 Week 3 Data Population, Manipulation, and Retrieval
$15.00Individual Assignment Database Creation and Reporting Resources: The entity relationship diagram and normalized table specifications from the Week Two individual assignment, SQL Server® and Reporting Services on the Toolwire® site, and Beginning Microsoft® SQL Server® 2008 Programming Based on your Week #2 IA’s table design metadata, program your own SQL statements using SQL Server’s Management Studio to create, populate, and query a relational database for the Huffman Trucking’s fleet truck maintenance application. (3 points) Use CREATE TABLE statements to create a table for each entity for Huffman Trucking’s fleet truck maintenance database. (2 points) Use INSERT statements to populate the tables with realistic sample data. Include at least 2 rows for each table. (2.5 points; 0.5 point each) Use a separate SELECT statement to create each of the following queries: • A simple query for each table that returns all of the columns and all of the rows for each table. • A query that displays each part that has been purchased by Huffman Trucking Company. For each part, also retrieve its parts catalog information from the parts catalog table and vendor information from the vendor table. • A query that displays all of the rows in the vehicle maintenance table. For each vehicle maintenance row, join the corresponding information from the maintenance descriptions table and vehicles table. • A query that displays each row in the maintenance work order table. For each row in the maintenance work order table, join the corresponding information from the maintenance description table. • A query that counts the number of maintenance work orders for each vehicle in the maintenance work order table. Display the vehicle column and the corresponding count of work orders for each vehicle. (2.5 points) Create a report using the SQL Server Business Intelligence Reporting Services of the parts purchasing history for Huffman Trucking Company. The report should display all parts purchasing history including manufacturer and vendor information, parts catalog information, and associated parts inventory issues, and all parts inventory purchases. Format the report to present to senior management at Huffman Trucking. Place screen snapshots of all of the above SQL statements as they executed in SQL Server Management Studio showing the SQL statements and the results returned, as well as a screen snapshot of your Reporting Services report, showing your actual data, into a single Word or .pdf file Learn More -

DBM 502 Week 4 Data Warehouses BI Presentation
$15.00Individual Assignment BI Presentation Resources: Huffman Trucking in the Virtual Organizations; the entity relationship diagram, tables, and sample database from the Week Two and Week Three individual assignments Prepare a Microsoft PowerPoint Presentation for senior management at Huffman Trucking explaining how integrating the fleet truck maintenance information into the corporate data warehouse will support organizational goals. Explain how business intelligence may improve efficiencies and fleet performance. Provide a detailed example of a data-mining technique or application and how it will provide information useful to management. · Describe a data-mining technique from Table 9-4 of Modern Database Management or a data-mining application from Table 9-5 of Modern Database Management. · Identify a specific use of this data-mining tool with the information from the sample database from the Week Four individual assignment. · Identify the attributes that this data-mining tool will access. · Explain how the information gathered using this data-mining tool will support Huffman Trucking’s organizational goals. Support your arguments with at least four peer-reviewed or industry publications. Present your recommendation in a 6- to 8-slide Microsoft® PowerPoint® presentation. Keep your slides uncluttered with at most 5 bullets and 7 words per bullet. Your must include speaker notes in your presentation. Learn More -

DBM/502 Week 5 Data and Database Administration
$20.00Individual Assignment Database Paper Choose one of the following assignment options to complete: Option 1: Data Governance, Quality, Integration, and Security in your organization Review data management and information security practices where you work or at an organization with which you are familiar. Recommend three specific policy changes to improve data governance, quality, integration, and security. Support each recommendation with evidence from at least two scholarly or trade publications. Option 2: Mountain View Community Hospital Case Study Review the Case sections of Ch. 10 and Ch. 11 in Modern Database Management. Analyze the data governance, quality, integration, and security at Mountain View Community Hospital. Address the strengths and opportunities for improvement in data management and security. Support your arguments with evidence from scholarly or trade publications. For either option chosen, write a 1,050- to 1,400-word paper consistent with APA guidelines. Learn More -

DBM/380 Week 2 Database Design
$15.00Individual Database Environment Paper Write a 750- to 1,050-word paper in which you complete the following: · Choose a database environment from the following: o An appropriate database environment within your workplace (must be approved by your instructor) o An Art Museum that needs to track the artwork, artists, and locations where the art is displayed or stored within the museum o Smith Consulting (Virtual Organization) – needs a database to track their consulting staff, each staff member’s skill sets, and what projects they are working on · Analyze the database environment. · Describe the problems and constraints. · Describe the objectives of the database environment. · Describe the scope and boundaries. · List the data specifications (must include a minimum of three entities with attributes). Include 3 to 5 references. Format your paper consistent with APA guidelines. · Note. The database environment chosen will be used in the Weeks Three and Four Individual Assignments. Learn More -

DBM 380 Week 3 Entity Relationship Diagram
$15.00Individual ERD Creation Project The following assignment is based on the database environment chosen and discussed in the Week Two Individual Assignment. Use a Microsoft® Visio® diagram to create a detailed ERD using the data specifications noted in the Week Two Individual Assignment. Make any necessary changes provided in your faculty’s feedback. · Use a Microsoft® Access® database to create the preliminary database tables, columns with data types, primary keys, and relationships. Learn More -

DBM 380 Week 4 Normalization of ERD
$15.00Individual Normalization of the ERD The following assignment is based on the database environment chosen and created in the Week Three Individual Assignment. Your database project must meet the following assessment requirements: Design and develop a database using professional principles and standards. · Provide a logical and physical design of the database. · Use relational database software application to develop database. · Provide an entity relationship diagram. · Normalize the database. · Generate and provide test data. Use a Microsoft® Visio® diagram to normalize the ERD to third normal form (3NF). Use the Microsoft® Access® database created in Week Three to create a minimum of 10 rows of test data in each table. Also, create at least one query that joins two tables and returns values from both tables. Note. Only the Microsoft® Visio® diagram must be normalized to the 3NF. The 3NF is not required for a Microsoft® Access®database. Submit the ERD and final database to the appropriate Assignment link. Learn More -
MIS582 iLab 2 Data Modeling Using Visio
$15.00MIS582 iLab 2: Data Modeling Using Visio
Learn More
iLAB OVERVIEW
Scenario and Summary
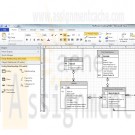
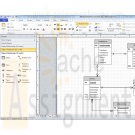
In this assignment, you will learn to create a physical database model in Visio from business requirements. To complete this assignment, you will need to be able to run Visio 2010, either through Citrix or installed on your workstation or laptop.
Deliverables
Name your Visio file using Lab2_, your first initial, and your last name (e.g., Lab2_JSmith.vsd). Create and save your database model in your Visio file.
iLAB STEPS
STEP 1:
Read the following business requirements closely to determine the entities and relationships needed to fulfill the requirements. The nouns in the paragraph will tell you the entities that will be needed. The verbs in the paragraph will help you determine the relationships between the entities.
Muscles Health Club Database Requirements:
The Muscles Health Club needs a database to keep track of its members, their personal trainers, and the fitness classes they are taking. Employees can act as personal trainers for members. However, only certified employees can act as personal trainers. A member can work with only one personal trainer at a time. Members can take multiple fitness classes. Fitness classes are taught by employees who can teach multiple classes. Fitness classes are taught in one of the classrooms at one of Muscles Health Club’s several locations. Each fitness classroom is designed for a different type of class (e.g., spinning, aerobics, water aerobics, weight training, etc.). It is necessary to track what fitness classes are being held in each of the different Muscles Health Club locations.
STEP 2:
• Run Visio 2010 either via Citrix or on your workstation.
• Click on the Software and Database Template group in the main window.
• Double-click on the Database Model Diagram Template to open a new file.
• Save the file with a name containing Lab2_, your first initial, and your last name as the file name (e.g., Lab2_JSmith.accdb). You will need to click the computer icon in the Save As window to see the different drives. Be sure to save the file to a local drive so it will be on your workstation.
STEP 3:
Add an entity for each entity you identified in the requirements.
• Drag the entity icon onto the drawing area in Visio.
• In the Database Properties window, add a physical name to identify it.
STEP 4:
For each entity, create a list of attributes you think would be useful to describe the entity.
• Select an entity in the drawing area of Visio.
• In the Database Properties window, select the Columns category.
• Use the table to add your attributes to the selected entities.
• Select one of the attributes to be the primary key (PK).
STEP 5:
Set the diagram to use crow’s feet notation.
• On the Database tab, in the Manage group, click Display Options.
• In the Database Document Option dialog, select the Relationship tab.
• Select the Crow’s Feet check box, and then click OK.
STEP 6:
Draw relationships between your entities.
• Drag the relationship icon onto a blank part of the drawing area.
• Connect the two ends to each of the two entities in the relationship. The parent entity must have a PK defined. The entity will be outlined in bold red lines when it connects to one end of the relationship.
STEP 7:
Set the cardinality of your relationships.
• Select a relationship line in the drawing area that is connecting two entities.
• In the Database Properties window, select the miscellaneous category.
• Select the cardinality for the selected relationship.
STEP 8:
When you are done, save the file on your local hard drive and upload it to the Course Project Drop box. Your file should have the following filename format: Lab2_FirstInitialLastName.vsd.
Submit your assignment to the Drop box located on the silver tab at the top of this page. -

MIS582 iLab 3 Database Construction Using Access
$15.00MIS582 iLab 3: Database Construction Using Access
iLAB OVERVIEW
Scenario and Summary
In this assignment, you will learn to create an Access database from a given ERD. To complete this assignment, you will need to be able to run Access 2010, either through Citrix or installed on your workstation or laptop.
Deliverables
Name your Access database file using Lab3_, your first initial, and your last name (e.g., Lab3_JSmith.accdb). Create and save your Access database file. When you are done, submit your database to the Course Project Dropbox.
iLAB STEPS
STEP 1:
Review the ERD below to understand the entities, attributes, primary keys, and relationships that you will create in your Access database.STEP 2:
• Run Access 2010, either via Citrix or from Visio 2010 installed on your workstation.
• Select the blank database icon in the main window.
• Save the file with a name containing Lab3_, your first initial, and your last name (e.g., Lab3_JSmith.accdb). In Citrix, you will need to click the computer icon in the Save As window to see the different drives. Be sure to save the file to a local drive so it will be on your workstation.
See the tutorials above for instructions on how to perform the following steps in Access 2010.STEP 3:
Learn More
Add tables to the Access database.
• Add a table for each entity listed in the provided ERD diagram.
• Add a column for each attribute listed in the provided ERD diagram.
• Select a primary key for each table as indicated in the provided ERD diagram.
STEP 4:
For every column in every table, update the data type as needed to enforce the domain constraints of the data.
• Dates should have a date data type.
• Surrogate keys should be autonumbered.
• Numeric data should have a numeric data type.
• Character data should have a character data type.
STEP 5:
Draw relationships between your entities.
• Selection Relationships under Database Tools. Move all your tables into the Relationship window by dragging them in or by using the Show Tables pop-up window.
• Second item
o Add the relationship between the tables in your database.
o Enable referential integrity on the relationship.
o Enable cascade updates on the relationship.
STEP 6:
Add at least two rows of data to each table in your database. Use any values you like for each of the columns. Remember that you must add data to parent tables before adding data to child tables, because referential integrity is enabled.
STEP 7:
Set the following column constraints in your database.
• Student first and last name cannot be a null value.
• Course credit hours must be between one and four.
• Course name must be unique and cannot be a null value.
• Instructor first and last name cannot be a null value.
• Grade must be one of these values: A, B, C, D, F, I, W, or E. W signifies withdrawn and E signifies enrolled.
STEP 8:
When you are done, save the file on your local hard drive and upload it to the Course Project Dropbox. Your file should have the following filename format: Lab3_FirstInitialLastName.accdb.
For instructions on how to copy files between the Citrix server and your local machine, watch the iLab tutorial, Copying Files from Citrix, located in the iLab menu tab under Course Home.
Note!
Submit your assignment to the Dropbox located on the silver tab at the top of this page.
Currently Shopping by:
- Category: Database Remove This Item
Shopping Options
- Category
-
- Oracle (21)
- ERD (20)
- MS Access (19)
- SQL (10)
- SQLServer (18)
- MySQL (12)
- POS410 Sql For Business (4)
- DBM380 Database Concepts (7)
- DBM502 Database Management Assignment Help (5)

You have no items in your shopping cart.
